Within Trustifi’s “Threat Prevention Rules”, you can create different presets for custom scenarios or user groups. This article will describe how to create, manage, and use threat prevention rule presets.
Creating Rule Presets
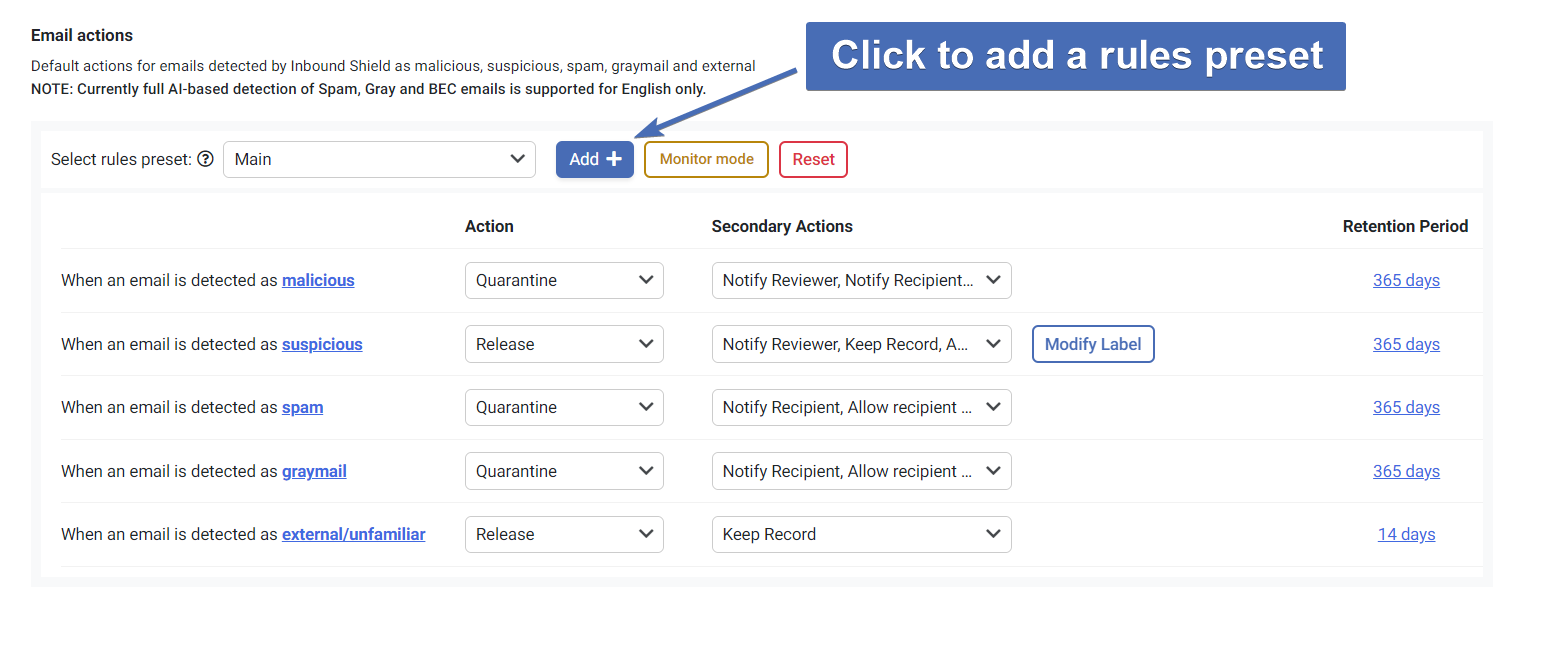
In the “Threat Prevention Rules” tab within the Trustifi admin portal, you will find the “Select rules preset” section just above the list of threat prevention rules.
Here, you can click on the “Add” button to add a new rules preset.
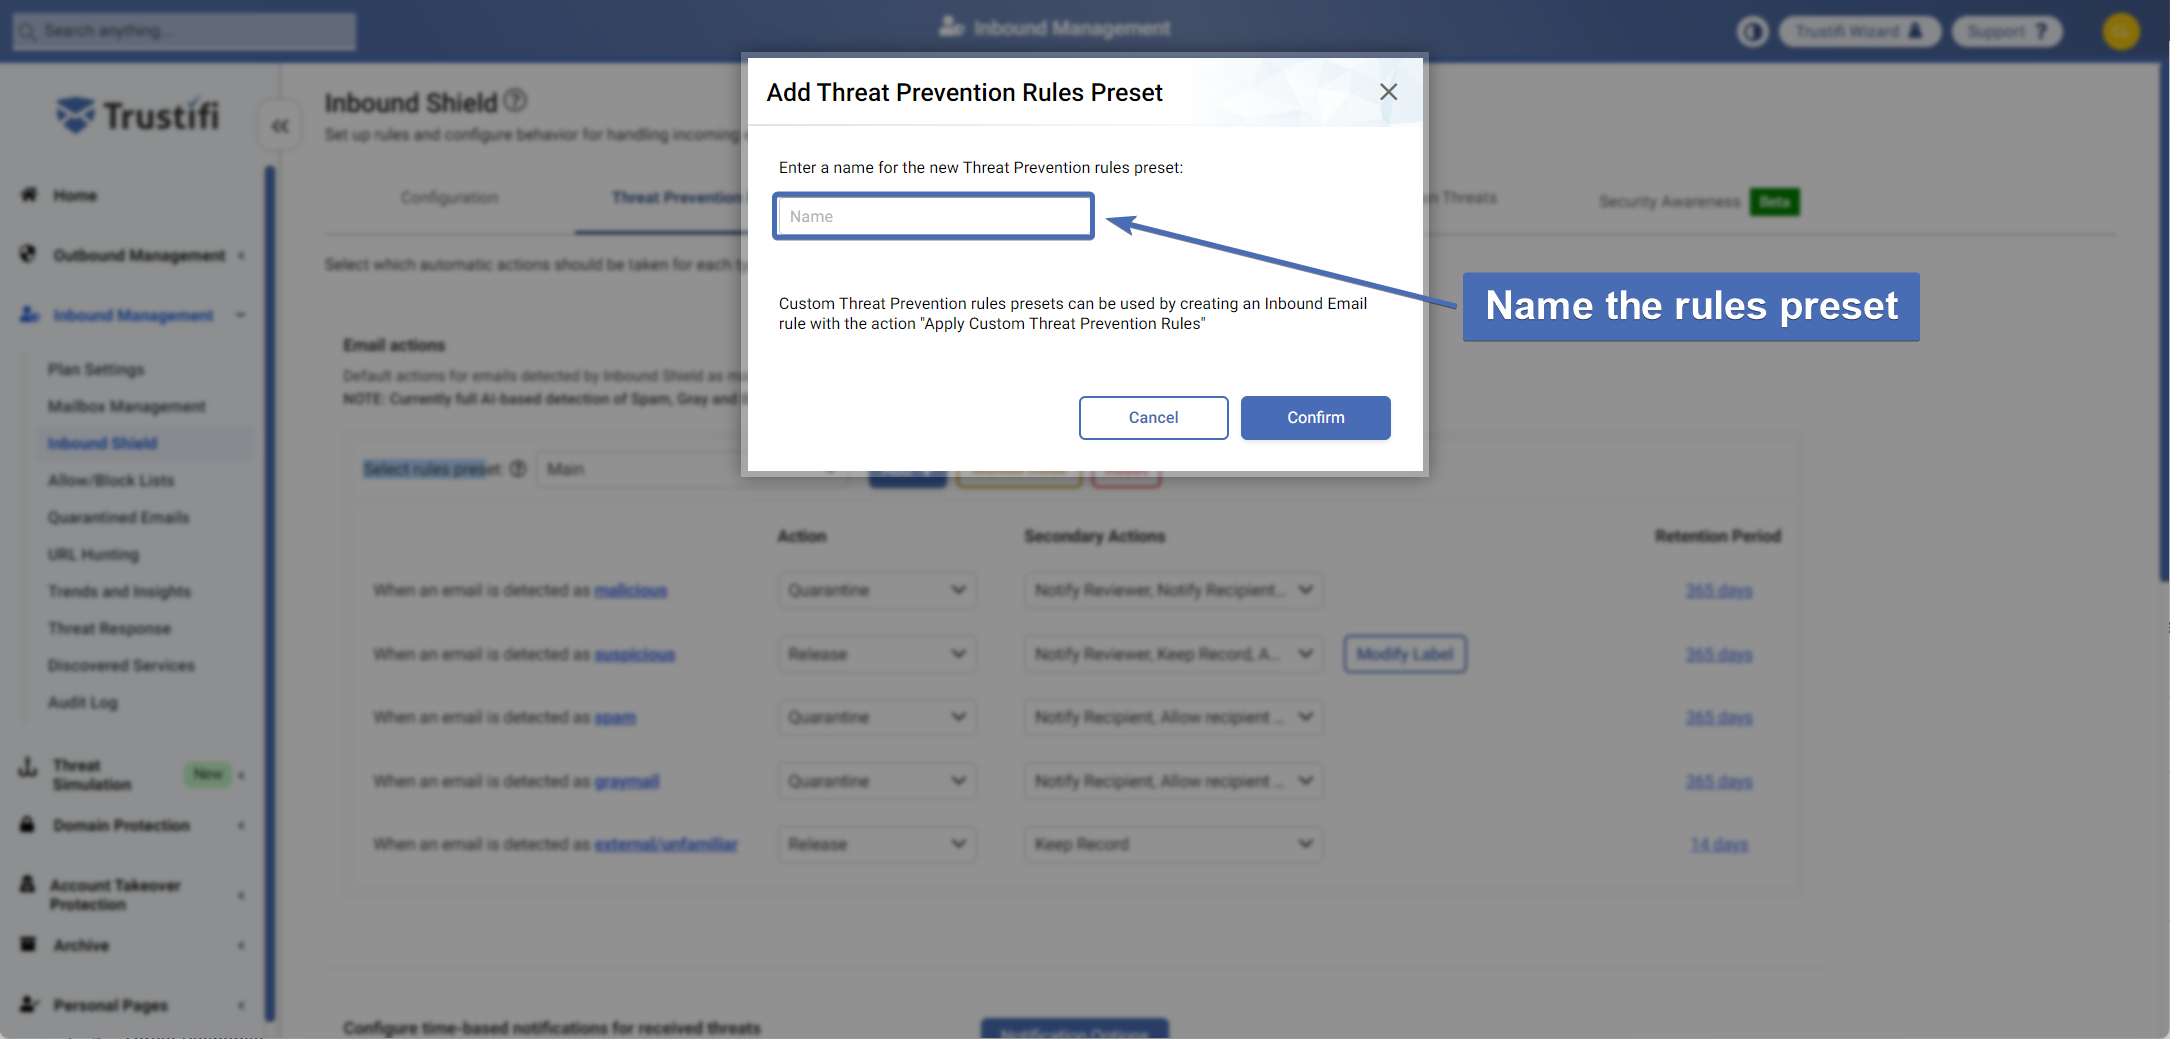
The first step to adding a rules preset is to give the preset a name. Try to add a descriptive name as it will help you identify and understand the preset later on.
After naming the preset, you can edit the threat prevention rules for this preset.
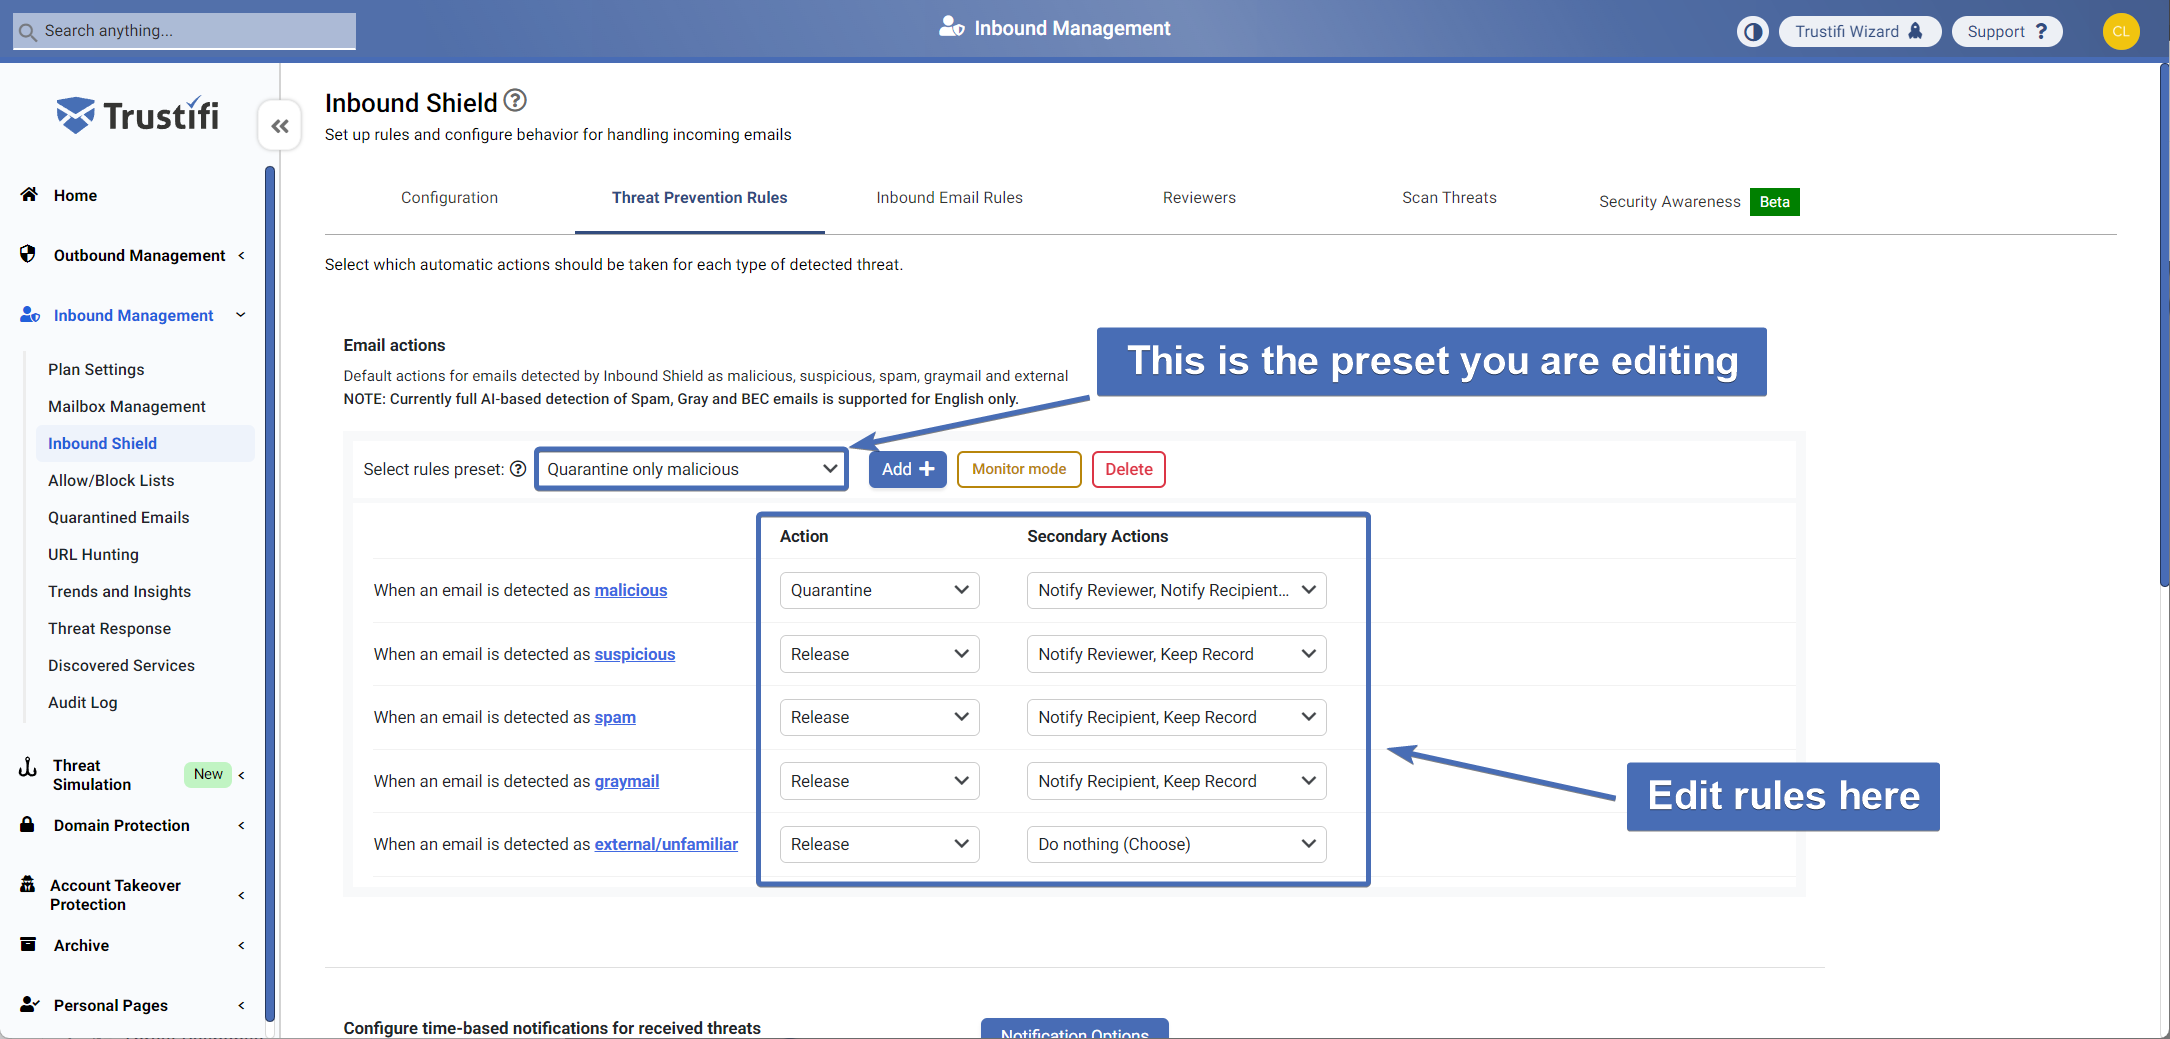
In the “Select rules preset” menu, you will notice you are now using the new custom preset you created. You can click on the drop-down menu to switching between this preset, the main (default) preset, or any other presets you’ve created.
After selecting a preset, just edit the primary action and secondary actions of threat prevention rules to fit your use-case.
In this example we’ve created a preset called “Quarantine malicious only”, and as pictured above we’ve set only the “Malicious” threat type to quarantine while all others are set to release.
Important note:
In the custom rules preset you create, only the primary action and secondary actions for each threat type can be edited. Other settings like retention period, notification settings, and footer configurations are set on the main rules preset by default.
Using Rule Presets
After you’ve created a custom rule preset, you will need to create a policy for when that rule preset should be used. This is done in the Inbound Email Rules tab.
First, create a new rule by clicking on the “Create New Rule” button.
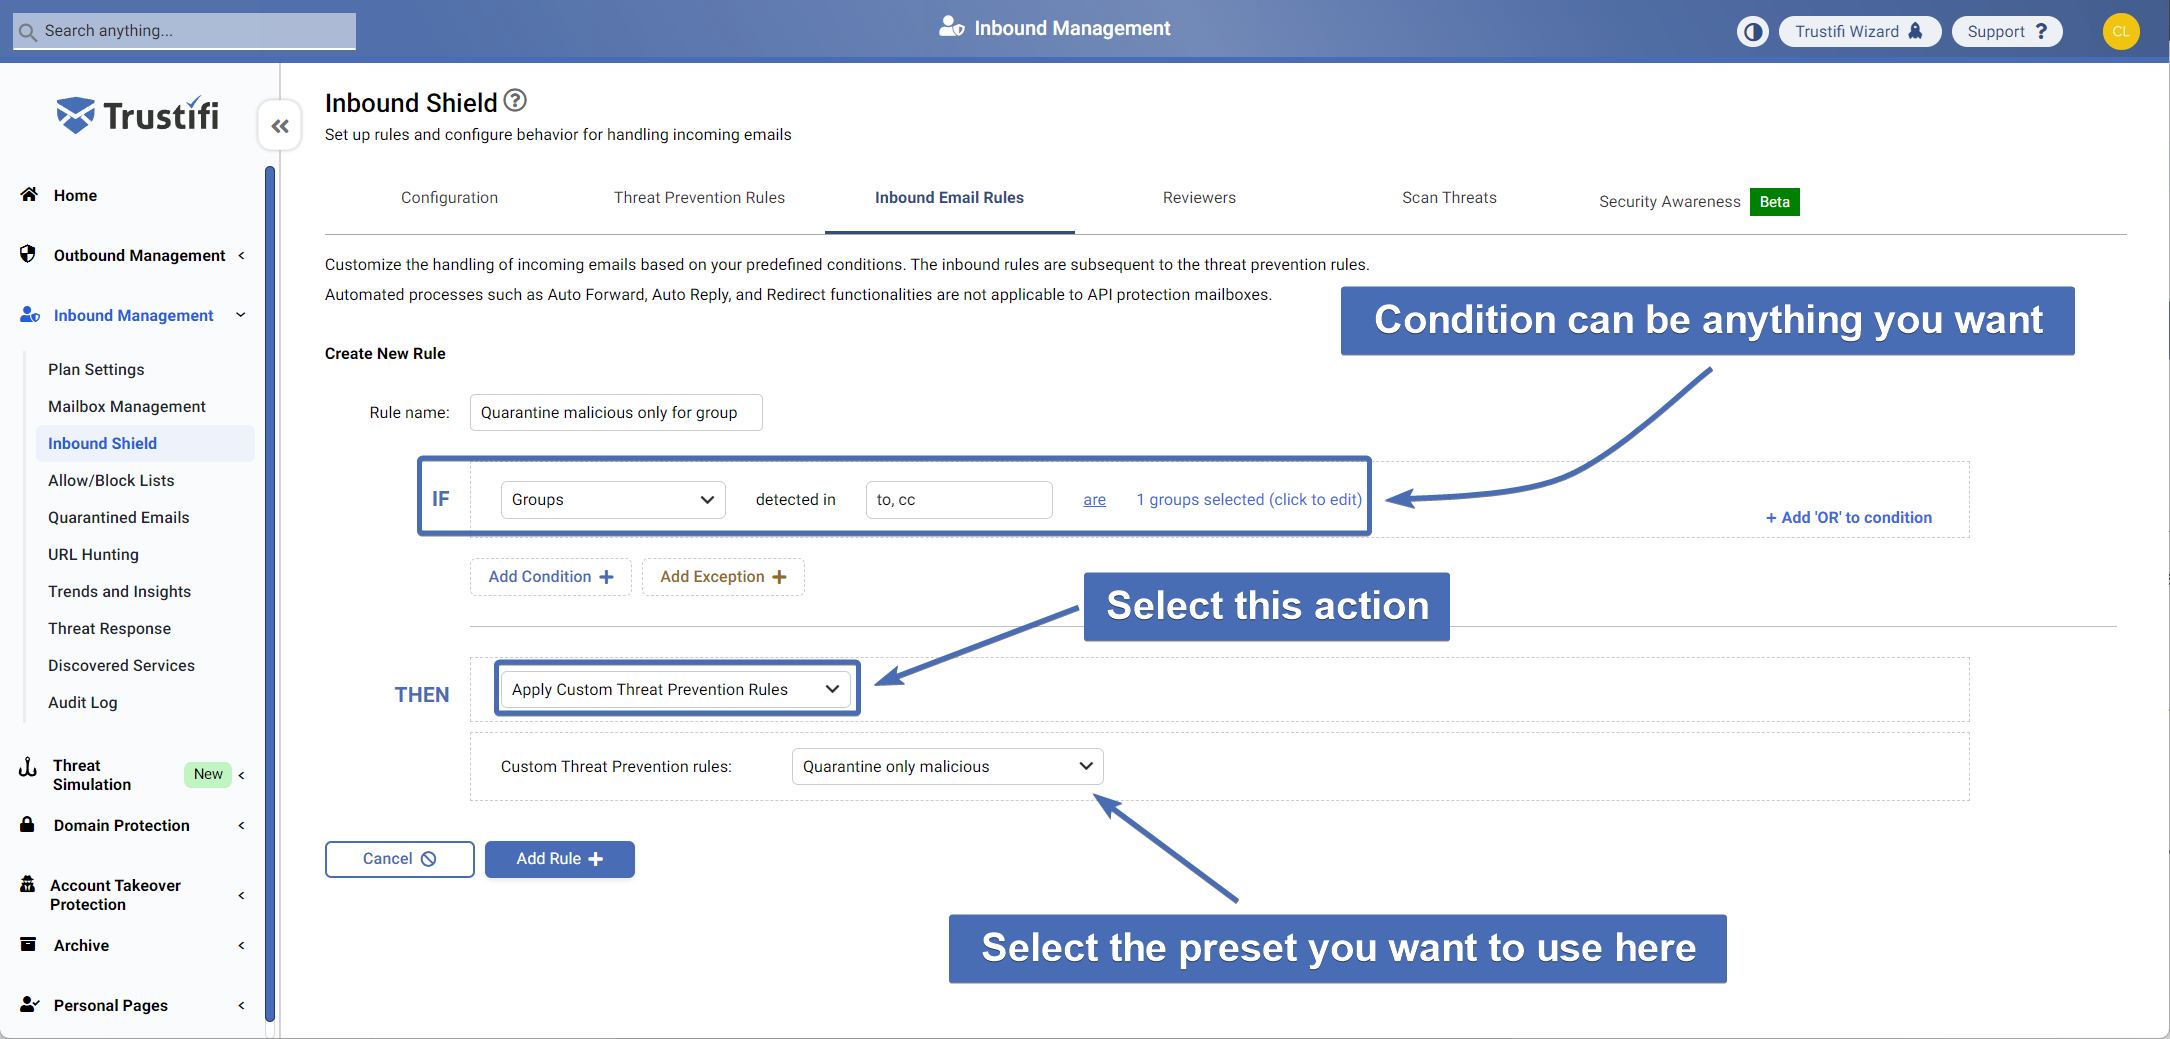
The condition(s) for the rule (“IF”) can be anything you want, in our example pictured below we set the condition to check if the email is sent to a specific group.
For the rule action (“THEN”), select “Apply custom threat prevention rules“ and then select the custom preset you want to use.
Once the rule is created and enabled, the custom rule preset will be used whenever an inbound email matches the condition set up in the rule.
You can create a similar setup for any number of custom presets you like.