Trustifi supports the creation of custom inbound rules that can send unwanted emails to your “Junk” folder, instead of sending the email into the Trustifi quarantine.
Using this type of custom inbound rule is possible for users of the Trustifi Inbound Relay on Office365 by creating an additional mail flow rule in the Exchange Admin Center, which can send emails to Junk based on the Trustifi configuration and detection.
To create this mail flow rule in Exchange, follow the steps detailed in this guide.
Step 1 - Create a New Mail Flow Rule
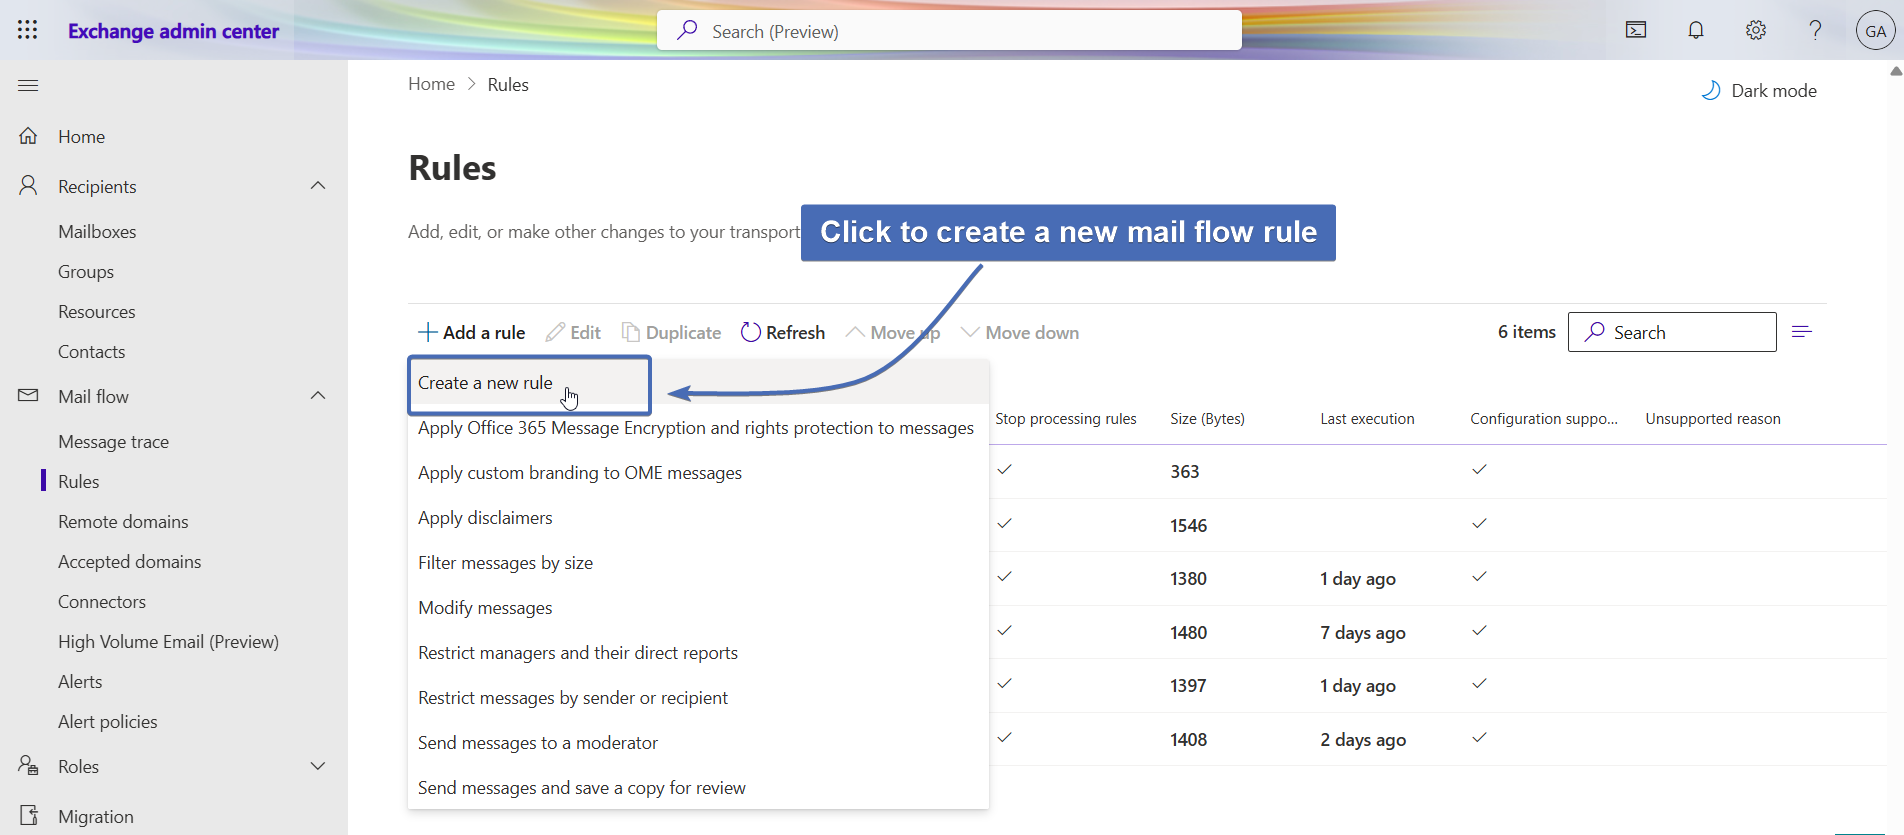
To start, sign into the Exchange Admin Center using your admin credentials and navigate to the Mail Flow Rules page.
Here, click on the “+” sign and then select “Create a New Rule“:
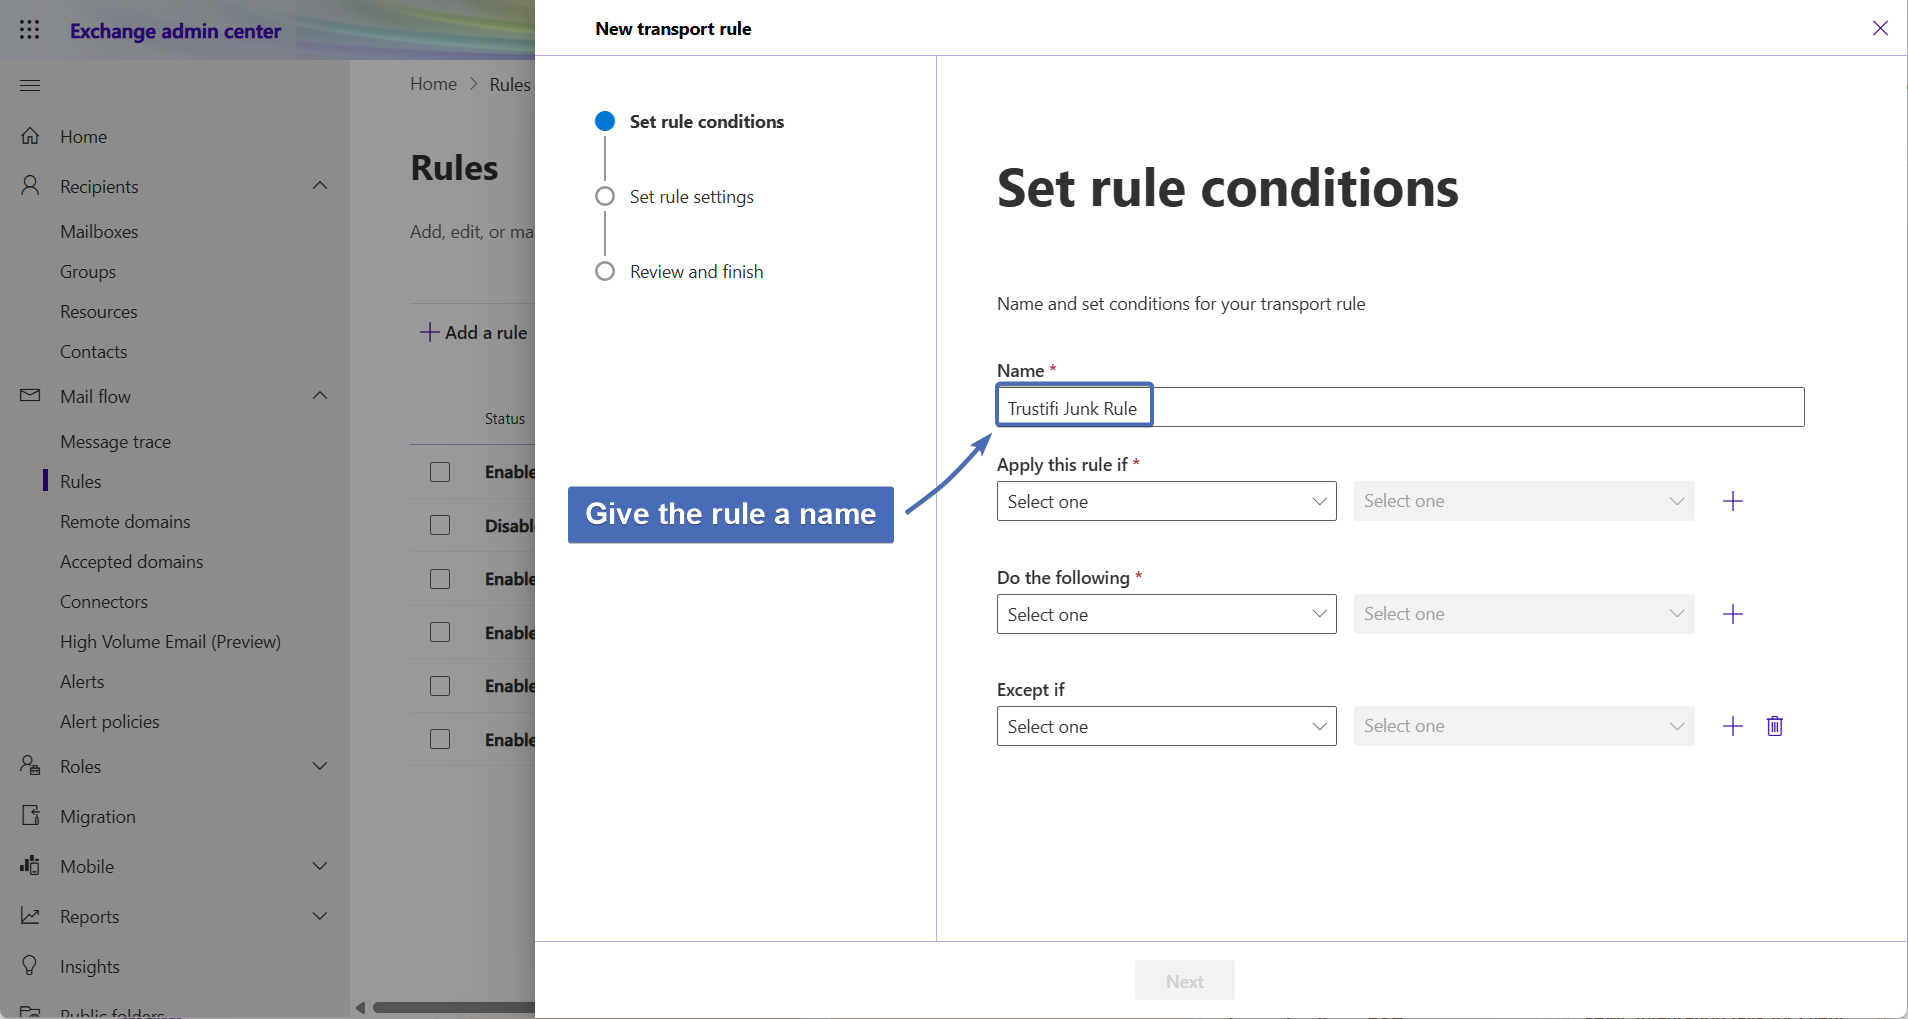
Step 2 - Give the Rule a Name
To start creating the rule, provide it with a descriptive name such as “Trustifi Junk Rule“:
Step 3 - Header Condition
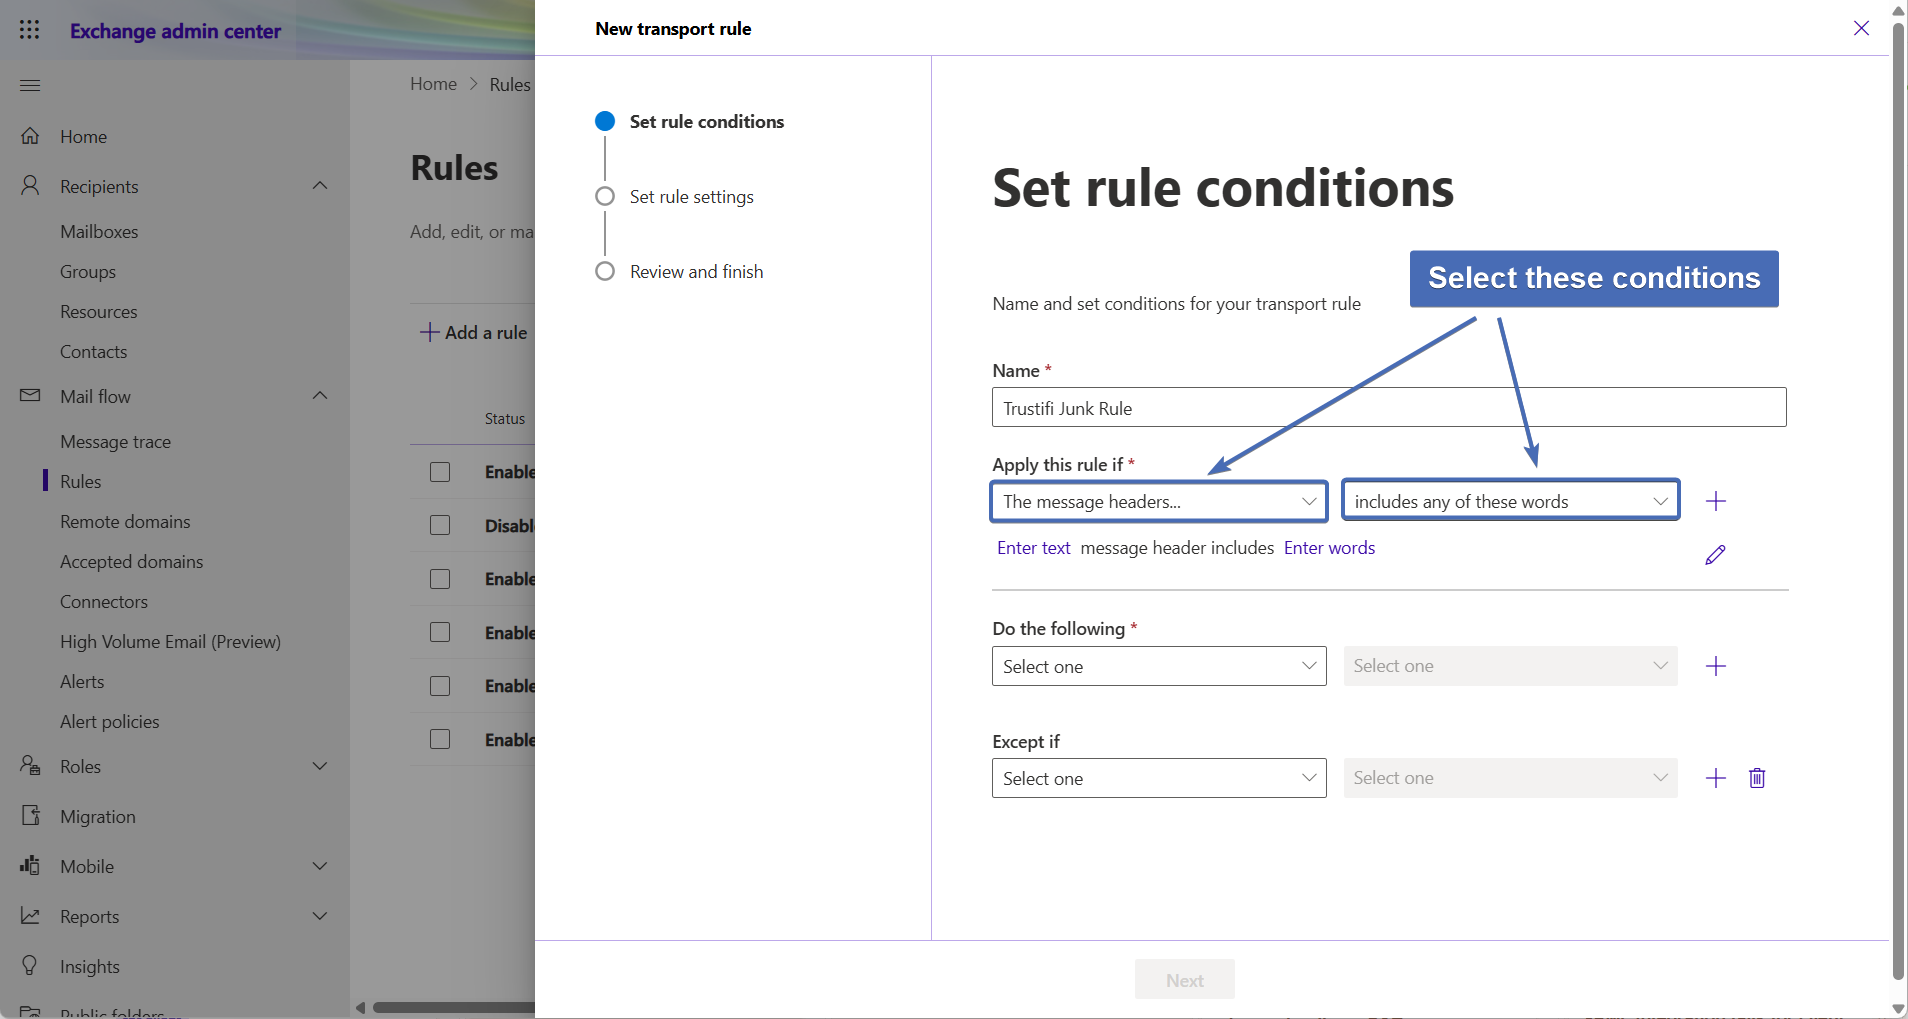
In this step we will add the rule’s header-based condition.
Under “Apply this rule if”, select “The message headers” and then select “includes any of these words” in the 2nd drop-down menu on the right:
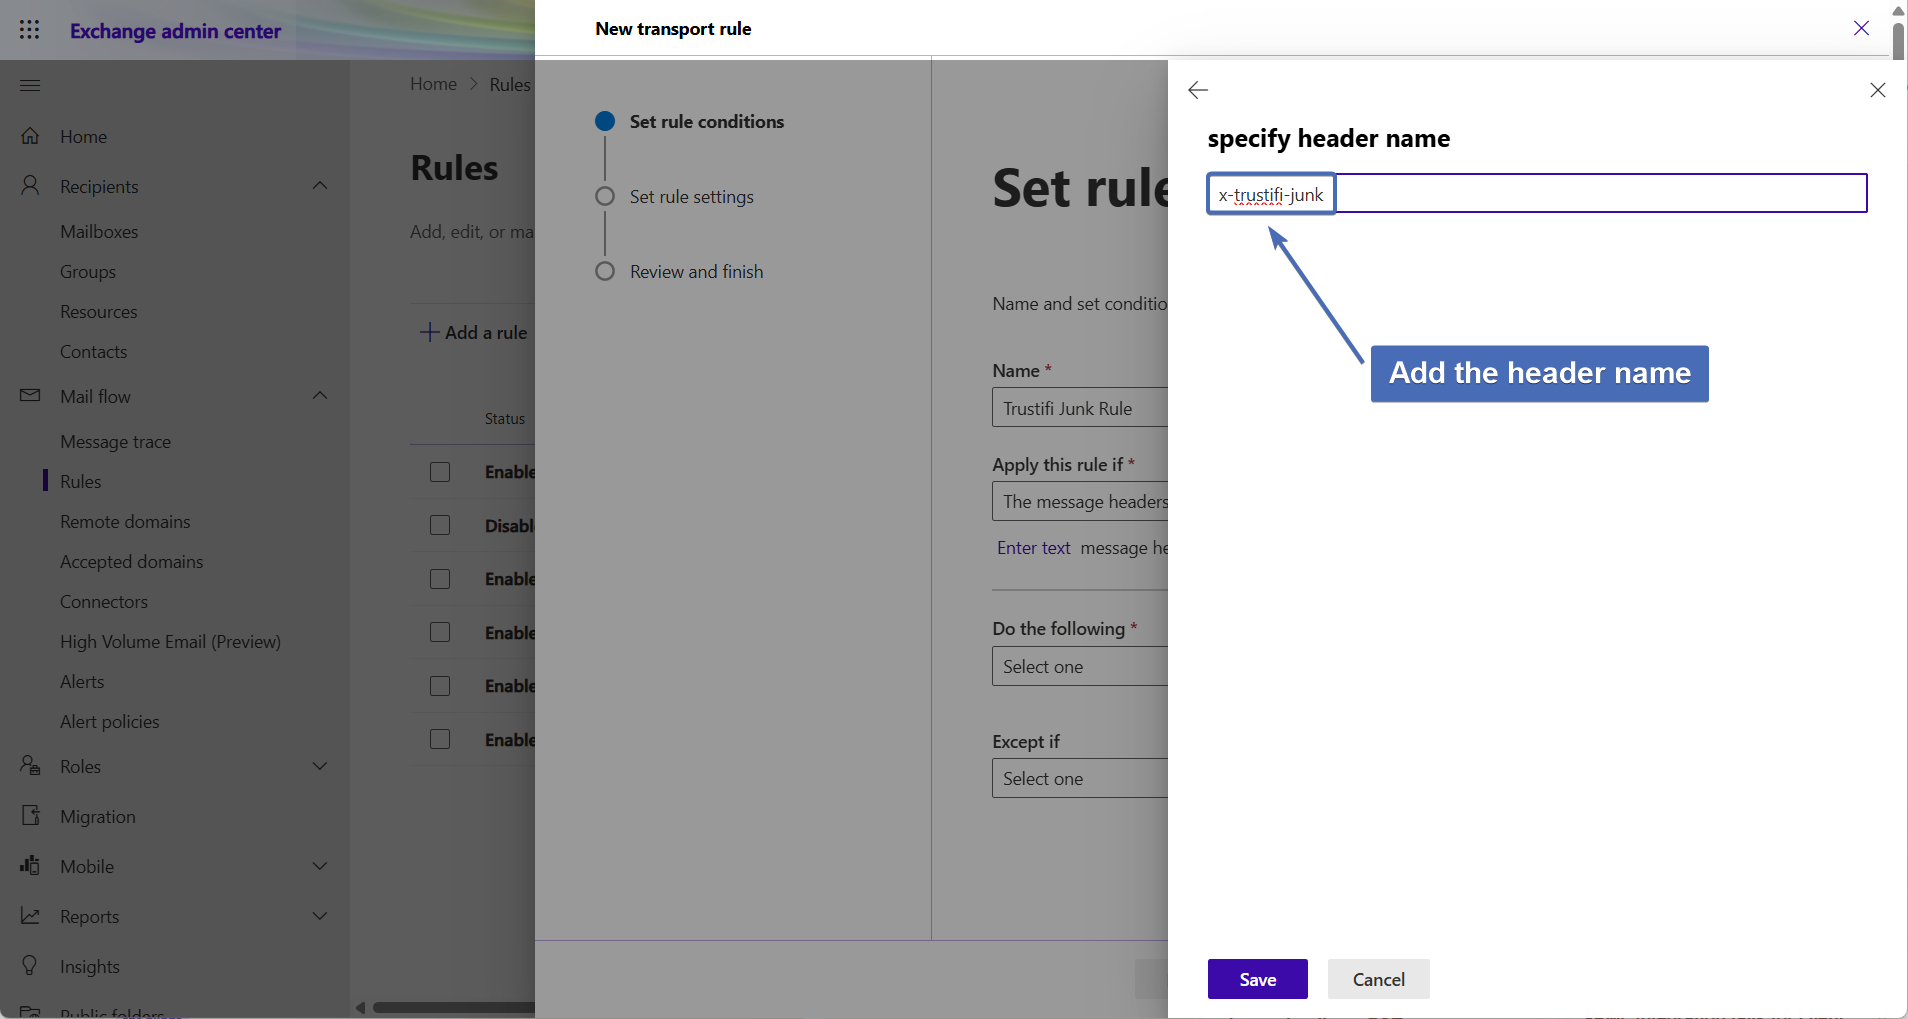
Step 4 - Specifying the Header Name
Click on the first (left) “Enter text” link to provide a header name.
In the input field, enter the following value:
x-trustifi-junkClick on the “Save” button at the bottom to save the header name.
Step 5 - Specifying the Header Value
Click on the second (right) “Enter text” link to provide a header value.
In the input field, enter the following value:
yesClick on the “Save” button at the bottom to save the header value.

Step 6 - Setting the Rule Action
Here we will set which action the rule should take when it is triggered.
Under “Do the following”, select “Modify the message properties” and then select “set the spam confidence level (SCL)” in the 2nd drop-down menu on the right.
You will be prompted to select the specific Spam Confidence Level (SCL) to set. Here, select 7 or above:
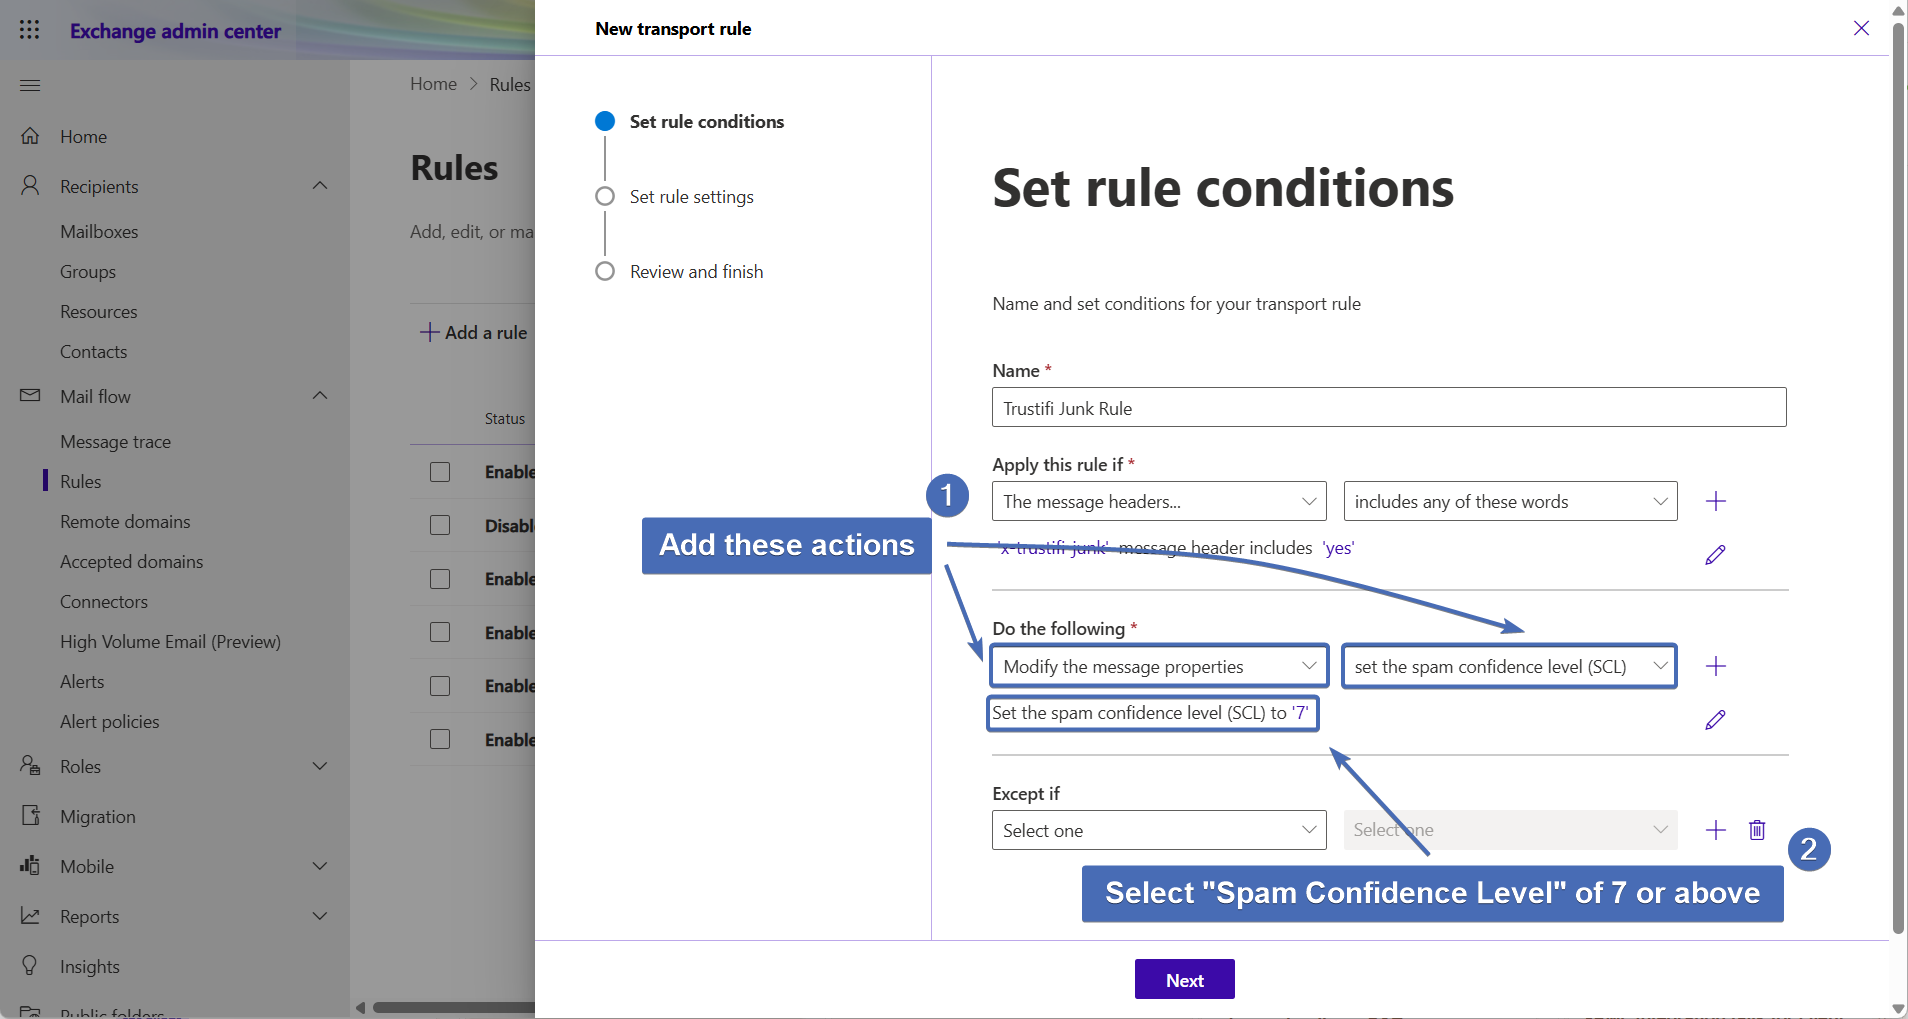
After this action has been set, click on the “Next” button at the bottom to continue.
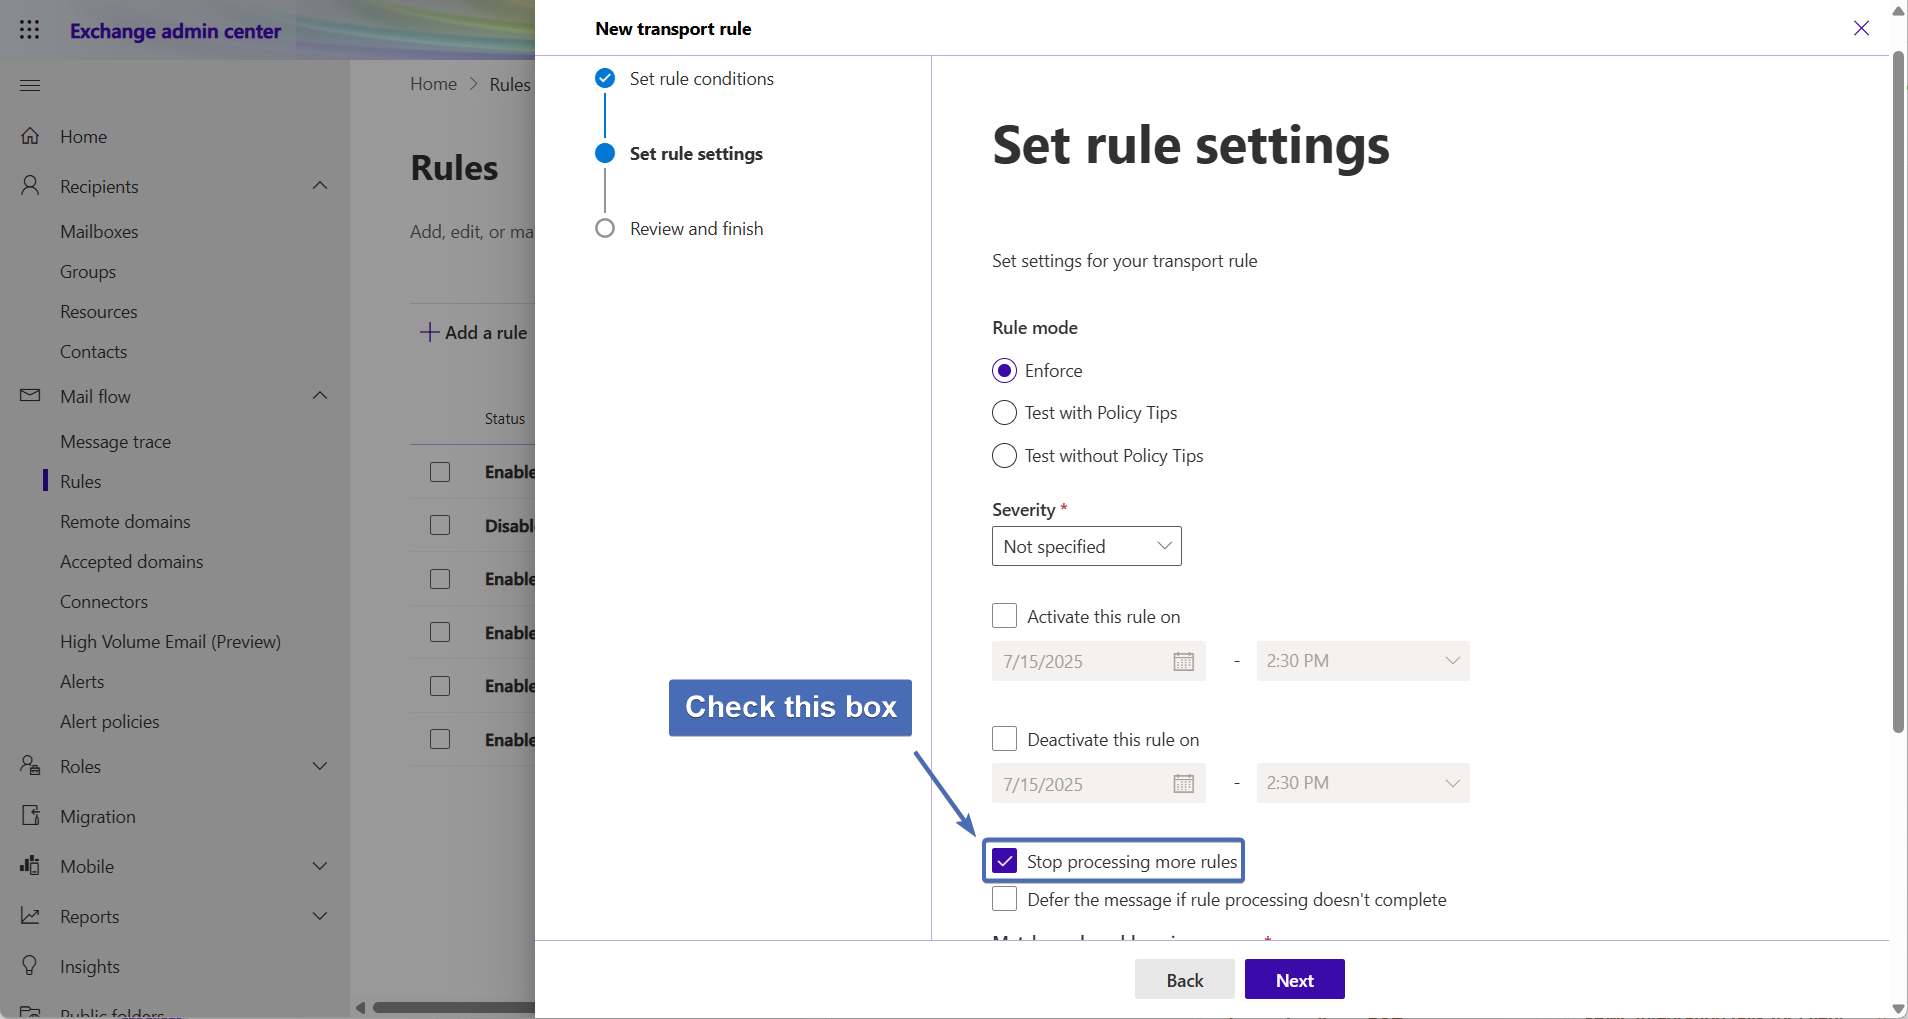
Step 7 - Rule Settings
In the “Rule settings” section, check the box for “Stop processing more rules”.
Then, click on the “Next” button at the bottom to continue.
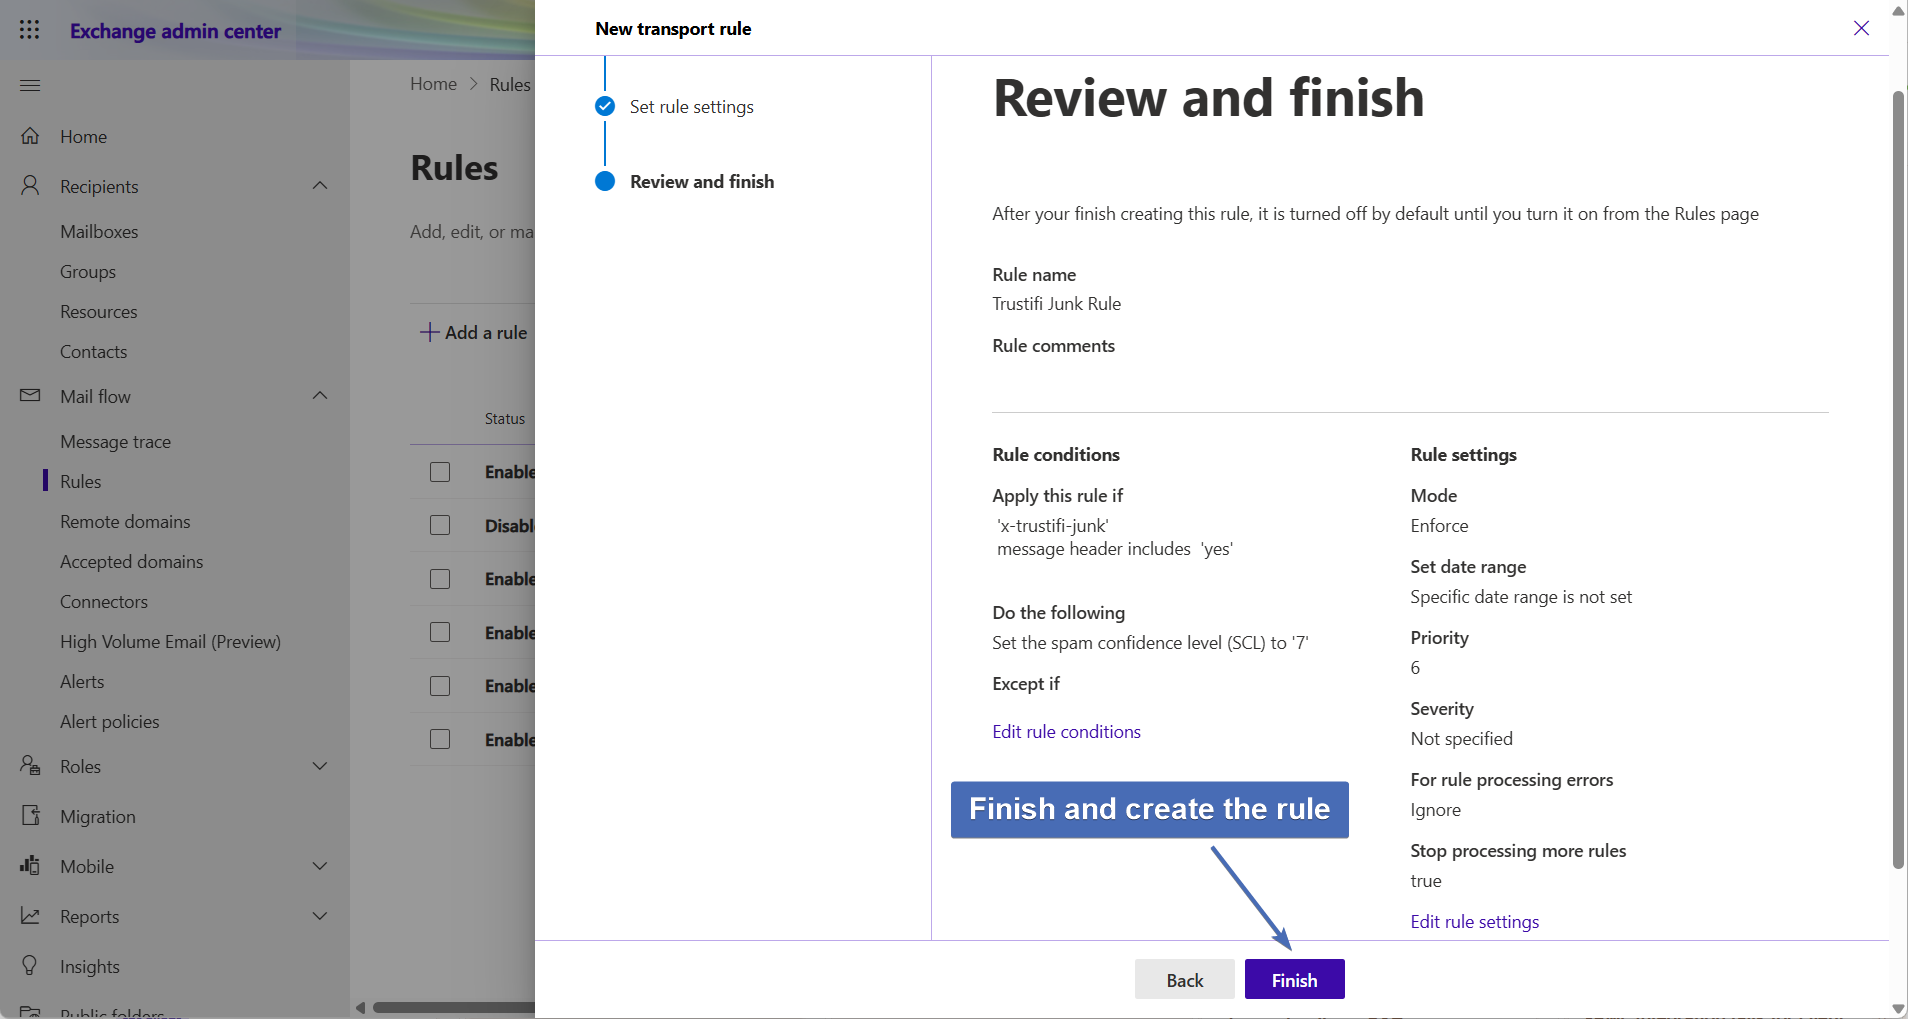
Step 8 - Reviewing and Creating the Rule
At this step you will have the chance to review the rule before creating it.
Make sure the rule conditions and settings are correct and then click on the “Finish” button at the bottom of the page to create the rule.