Trustifi’s “Threat Prevention Rules” are a set of instructions that define how Inbound Shield handles different categories of inbound email threats.
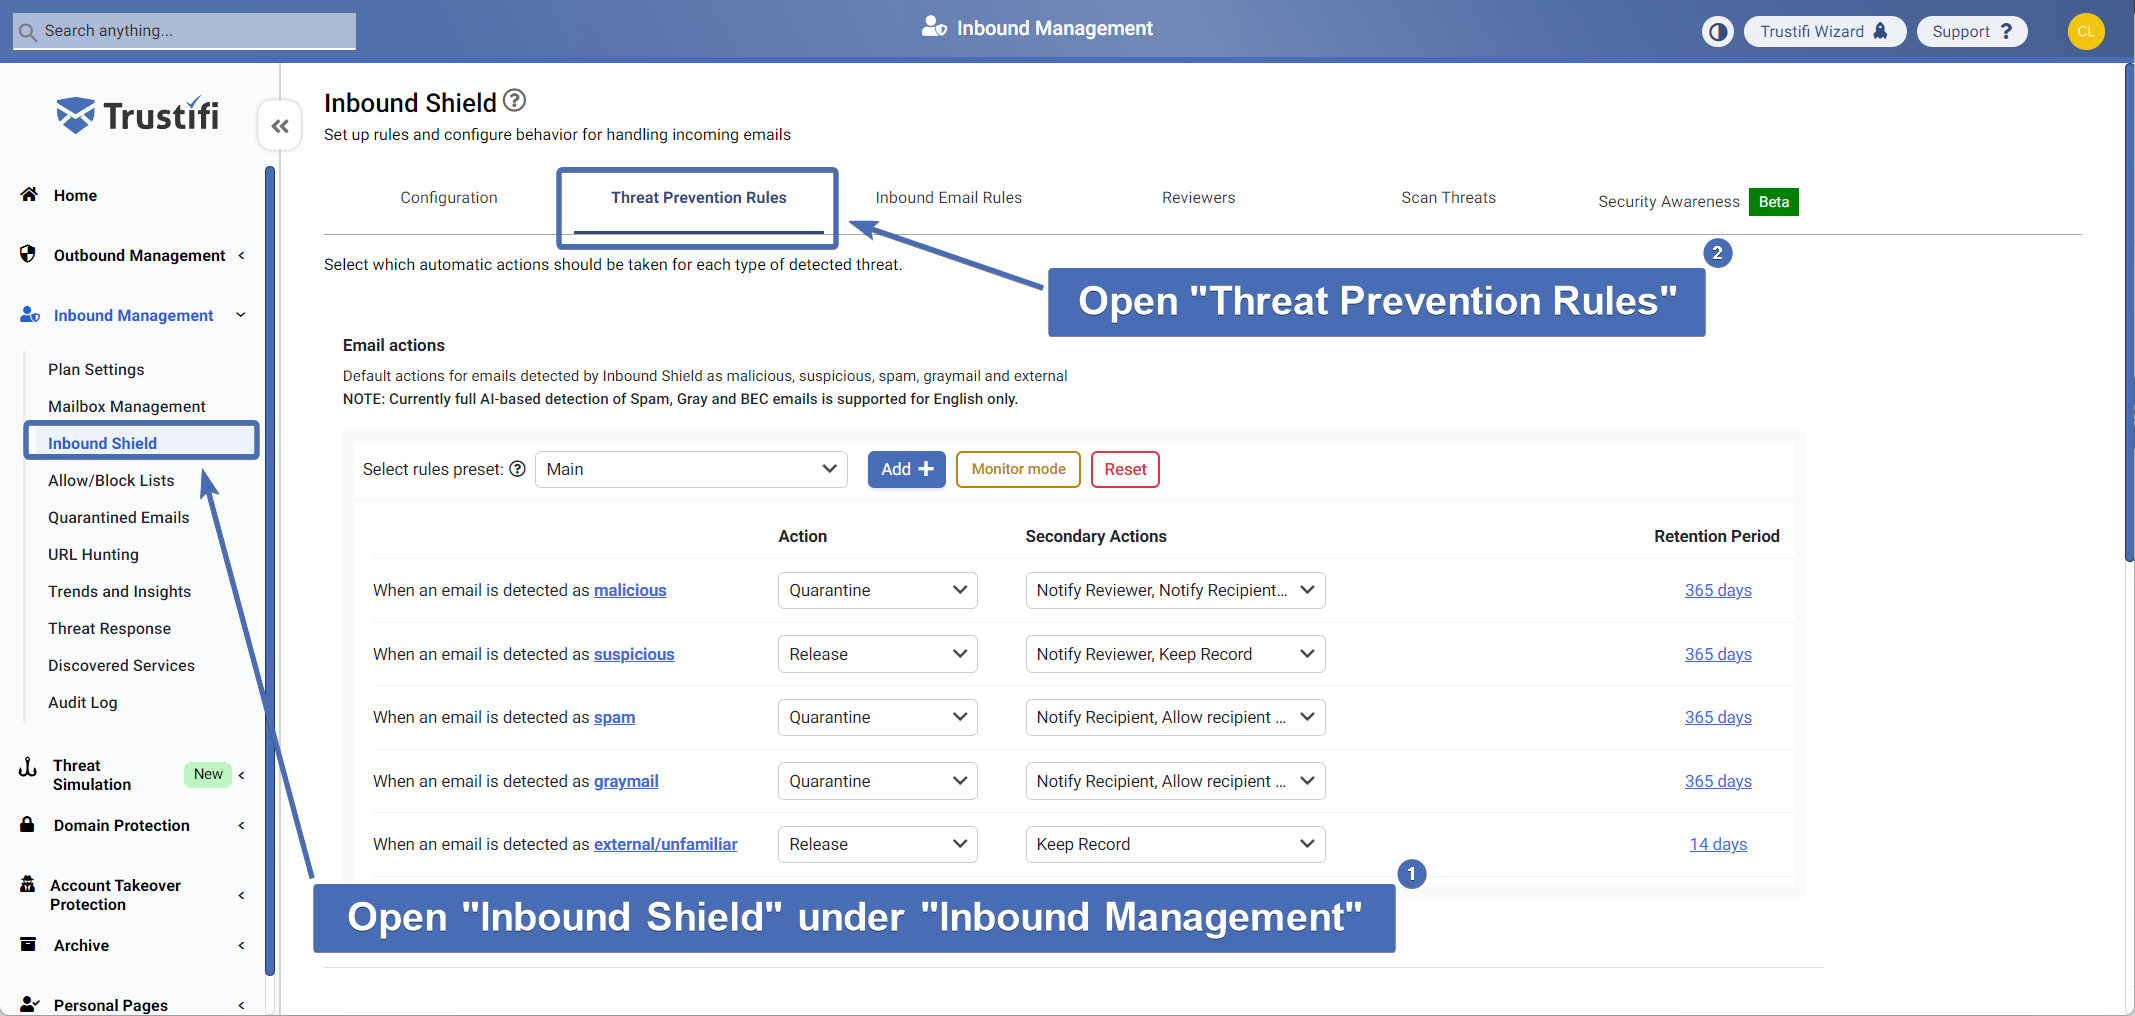
To view and edit these rules, navigate to the Threat Prevention Rules page in the Trustifi web app (Inbound Management > Inbound Shield > Threat Prevention Rules).
Setting up rules
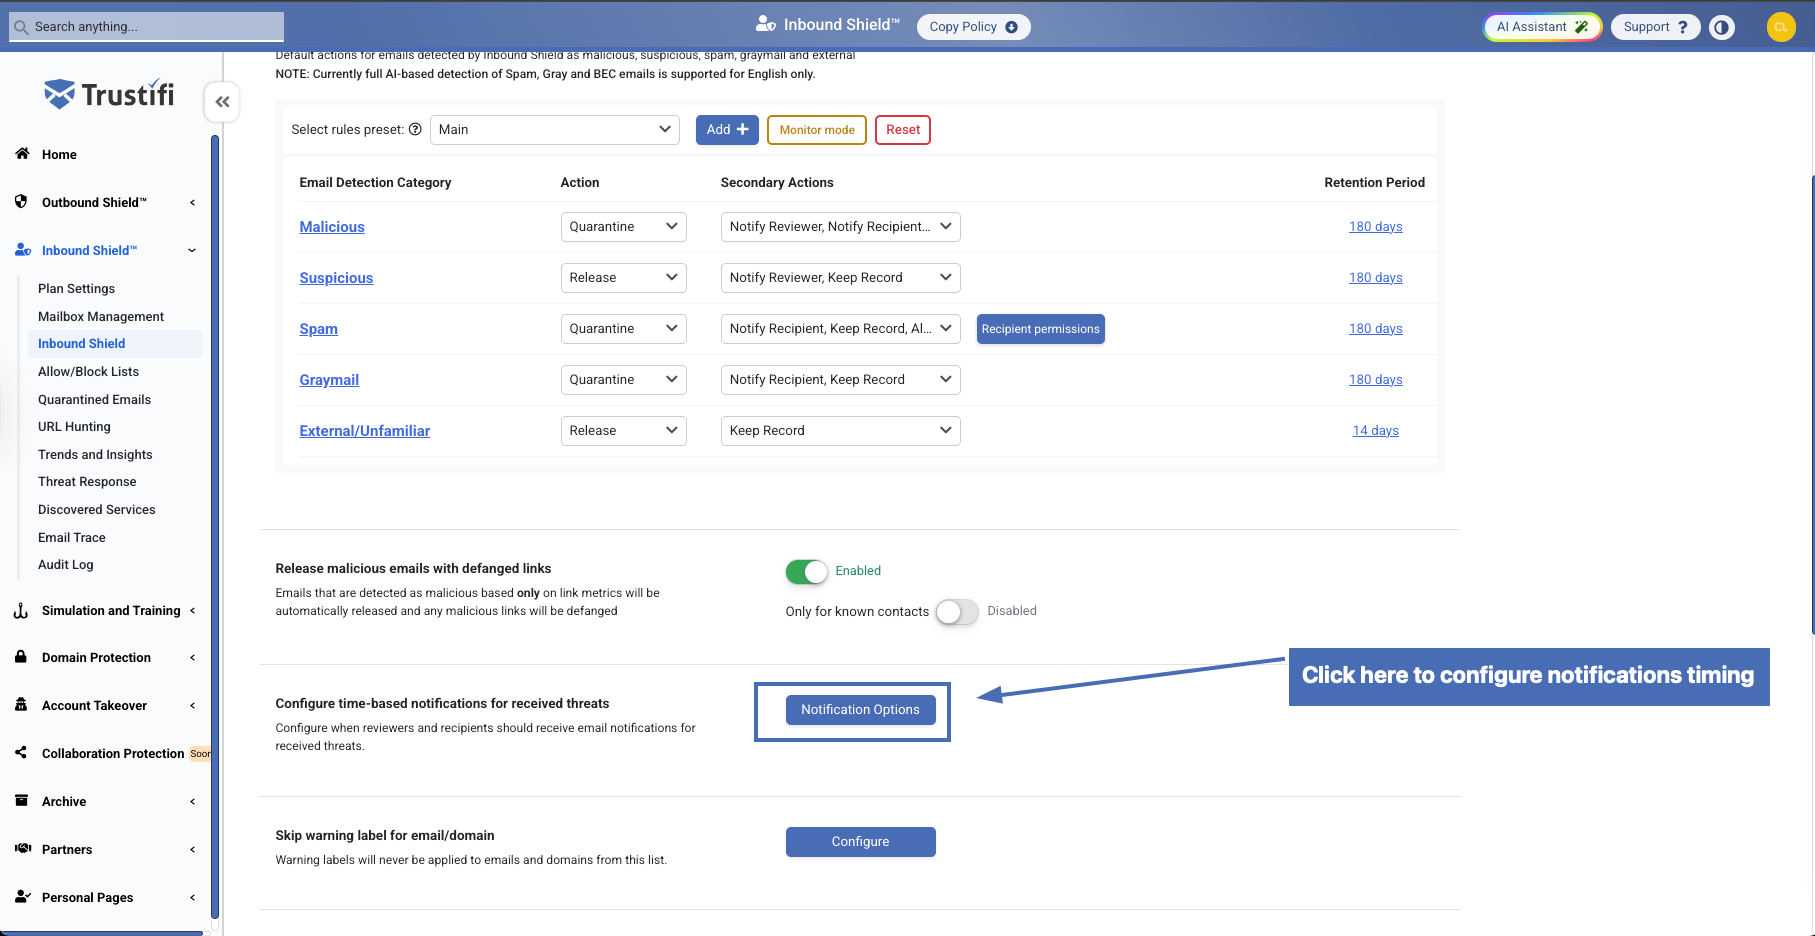
Threat prevention rules allow you to configure the correct response for each of the following categories of emails:
Malicious: Emails that have been sent for malicious purposes and/or contain malicious content that may harm the recipient such as phishing, malware, ransomware, spoofing, viruses, or zero-day attacks.
Suspicious: Suspicious emails could be a result of improper configuration/registration on the sender’s side (bad certificates, DNS issues, etc.). These emails could also possibly contain malicious content, but Inbound Shield was not able to fully confirm the analysis.
Spam: Spam emails are unwanted bulk messages, usually promotional or irrelevant, sent without the recipient’s consent.
Graymail: Marketing emails or newsletters that may be useful for some, but could also be considered spam for others.
External/unfamiliar: Emails that originate outside of your organization or trusted network, but otherwise safe.
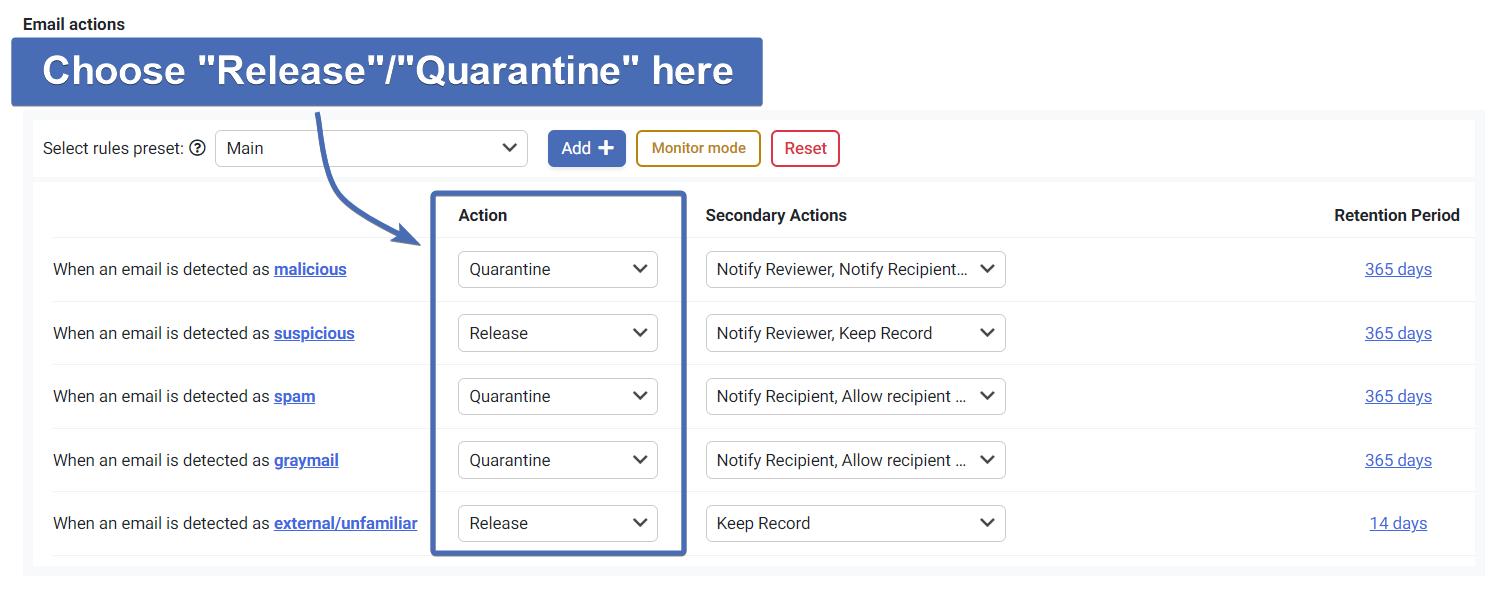
For each type of email, you can decide the primary action by clicking on the first menu under “Action“. You can decide if each type of email should be released or quarantined.
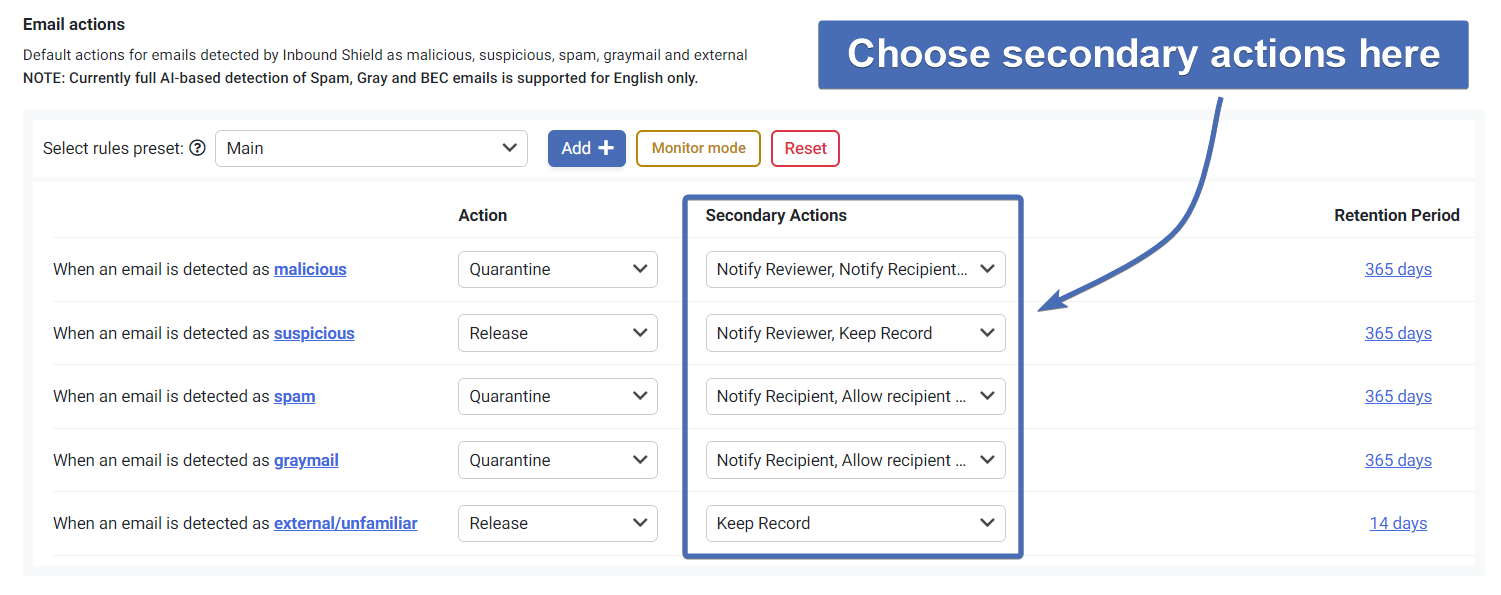
You can also choose additional actions for each type of email by clicking on the menu under “Secondary Actions“. You can choose any of the following:
Notify Recipient: A notification will be sent to the recipient of the email, explaining the detected threat(s) and which actions were taken on the email.
Note: By default, recipients cannot review or release their own quarantined emails.Notify Reviewer: A notification will be sent to all reviewers, showing a detailed report of the detected threats and allowing the reviewer to review the email and take actions on it.
Allow reviewer to view content: Reviewers will be allowed to view the content of quarantined email from this category (assuming the reviewer has general “View content” permissions”).
Allow Recipient Control: When this is selected, recipients will be able to review and release their own quarantined emails of this type.
Add Warning Label: Adds a warning label (banner) to the top of the email. Warning labels can be customized for design and content.
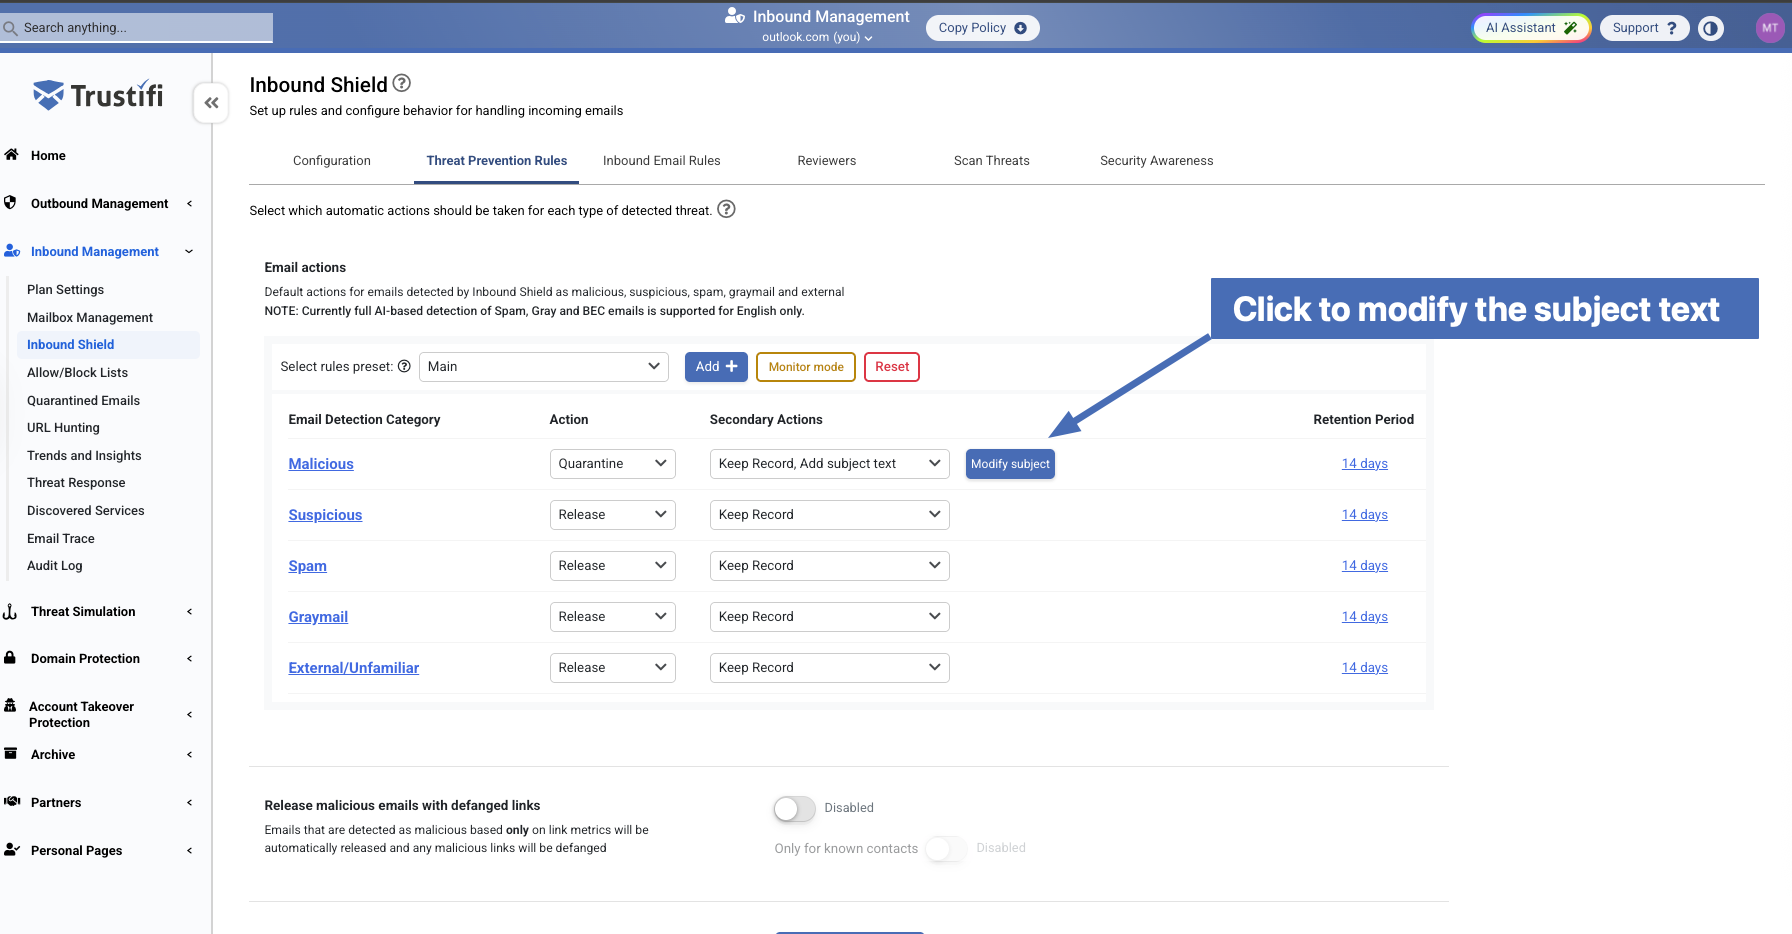
Add Subject Text: Prepends the email subject with text of your choice.
Keep Record: A record of the email’s threat analysis will be added to the “Quarantined Emails” page.
Note: For emails set to be quarantined, the “Keep Record” option cannot be deselected.
Modifying warning labels
If you choose to add a warning label to any email, you can click on “Modify Label” to customize it.
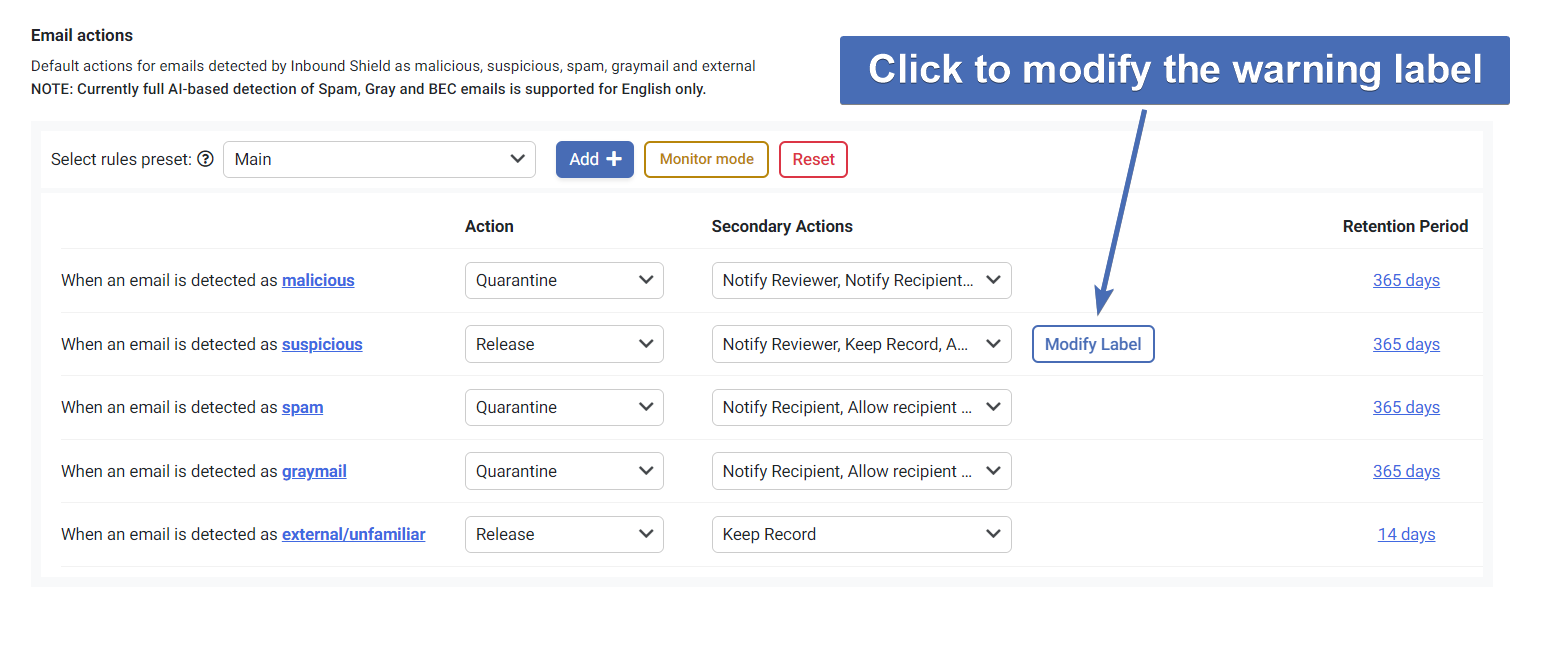
This will open a pop-up with different customization options for the warning label:
Customize the color and hue of the banner
Edit or add your own text
Edit the text font size and attributes
Edit the warning label as HTML
“Allow Reporting“: This will add reporting buttons in the warning label to allow users to report an email as safe or malicious.
Note: this option is only available if you are also connected to Trustifi’s outbound email relay.
You can click on the “Preview” button to see what the warning label will look like. Once you are done, click on “Apply” to save the changes.

Add subject text
If you choose to add subject text to any email, you can click on “Modify subject” to customize it.
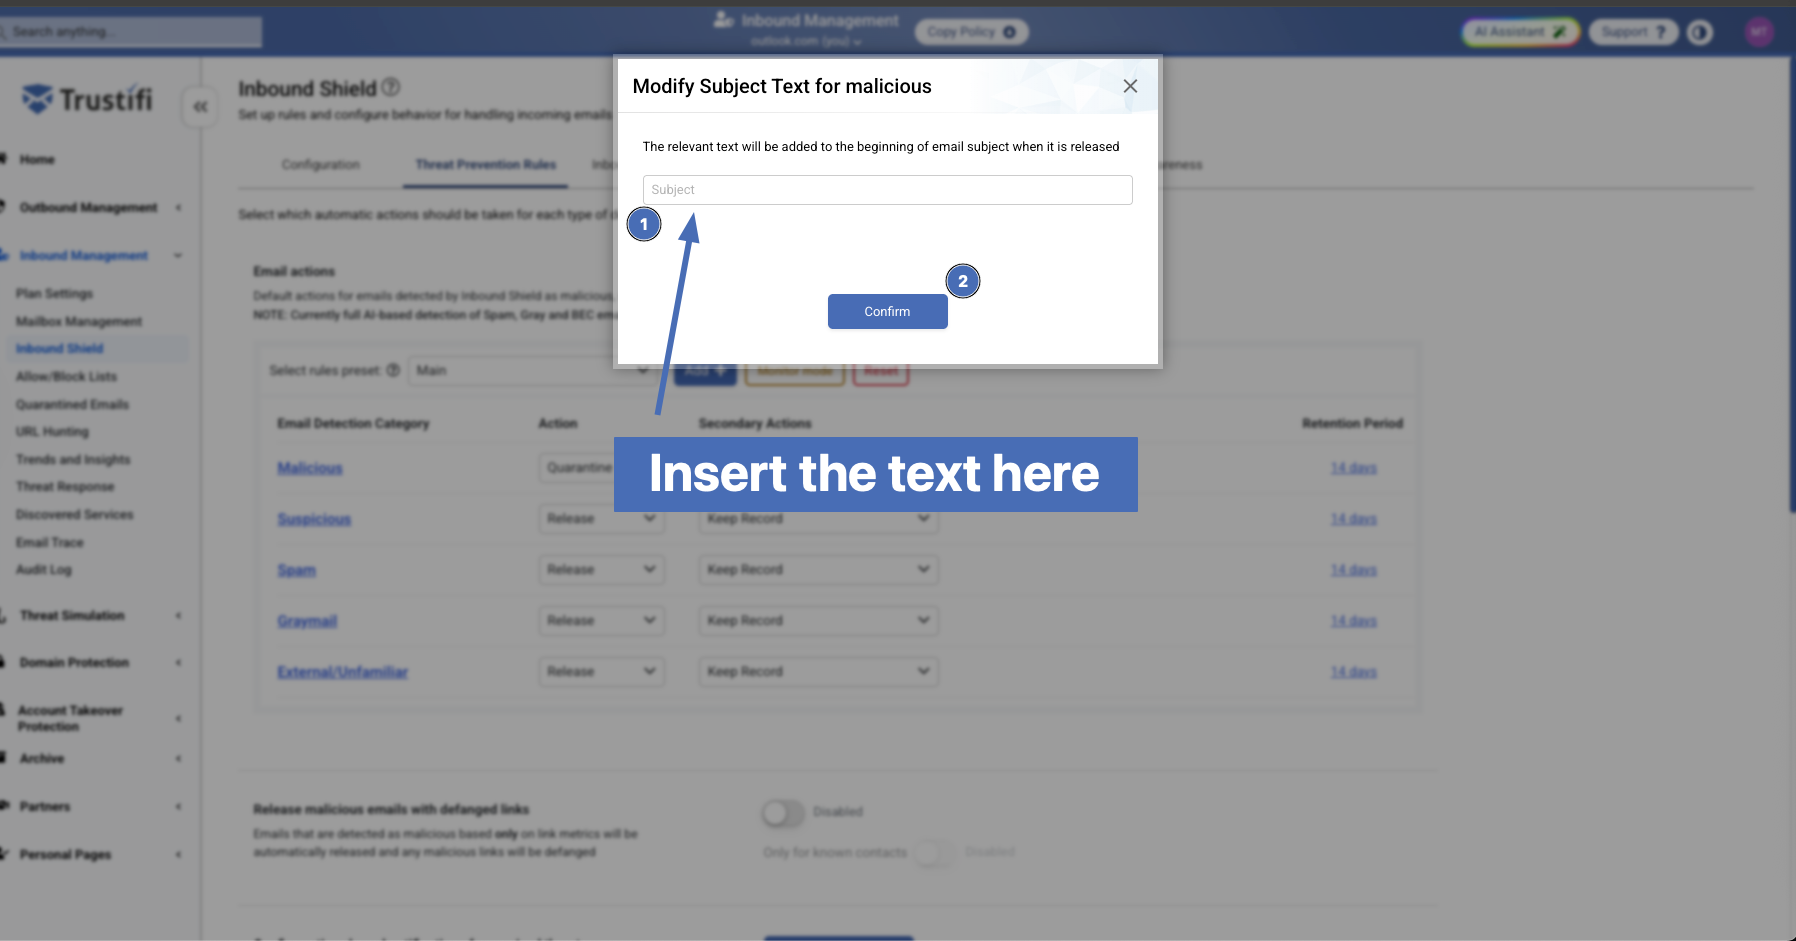
This will open a pop-up with input for adding the text, which will be added to the beginning of the email subject when it is released.
Once you are done, click on “Confirm” to save the changes.
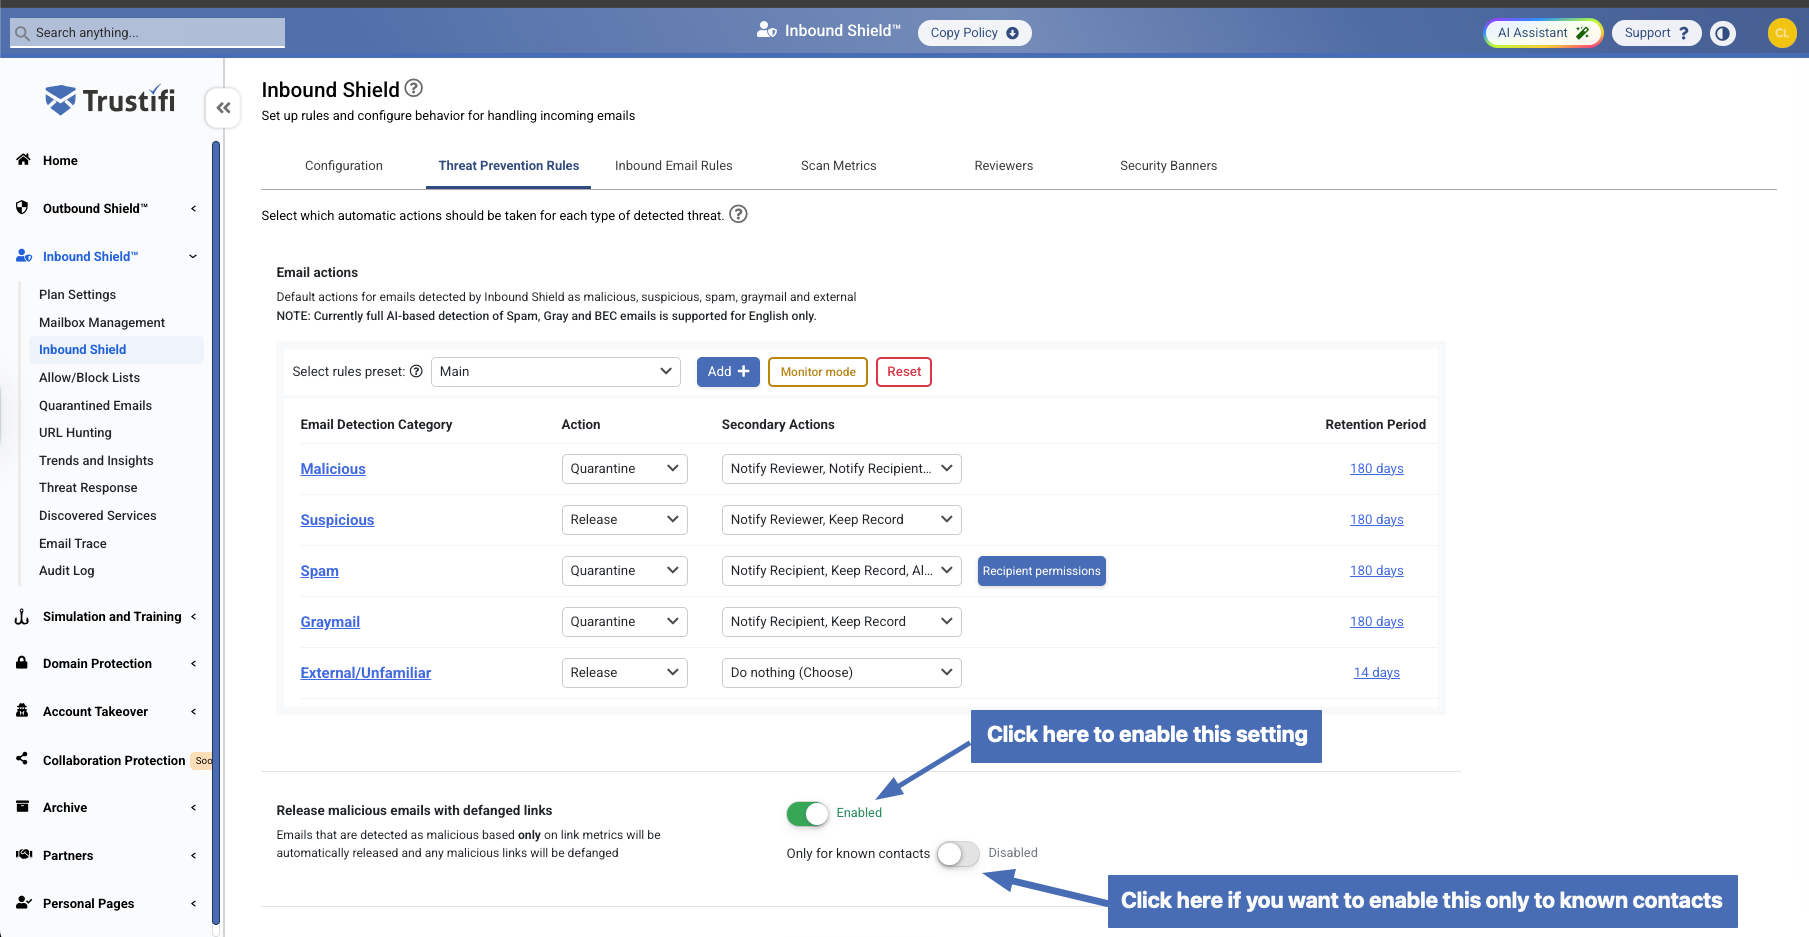
Release malicious emails with defanged links
When this setting is enabled, emails detected as malicious based solely on link metrics will be automatically released, and any malicious links within the email will be defanged.
You can also configure this setting to apply only to known contacts.
Configure time-based notifications for received threats
Configure when reviewers and recipients should receive email notifications for received threats.
A full guide can be found in the ‘Quarantined Email Notifications’ section
Skip warning label for email/domain
If you selected adding warning labels to certain emails, you may choose to exclude adding this label to emails from specific domains or senders.
To do this, click on the “Configure” button in the section “Skip warning label for email/domain“.
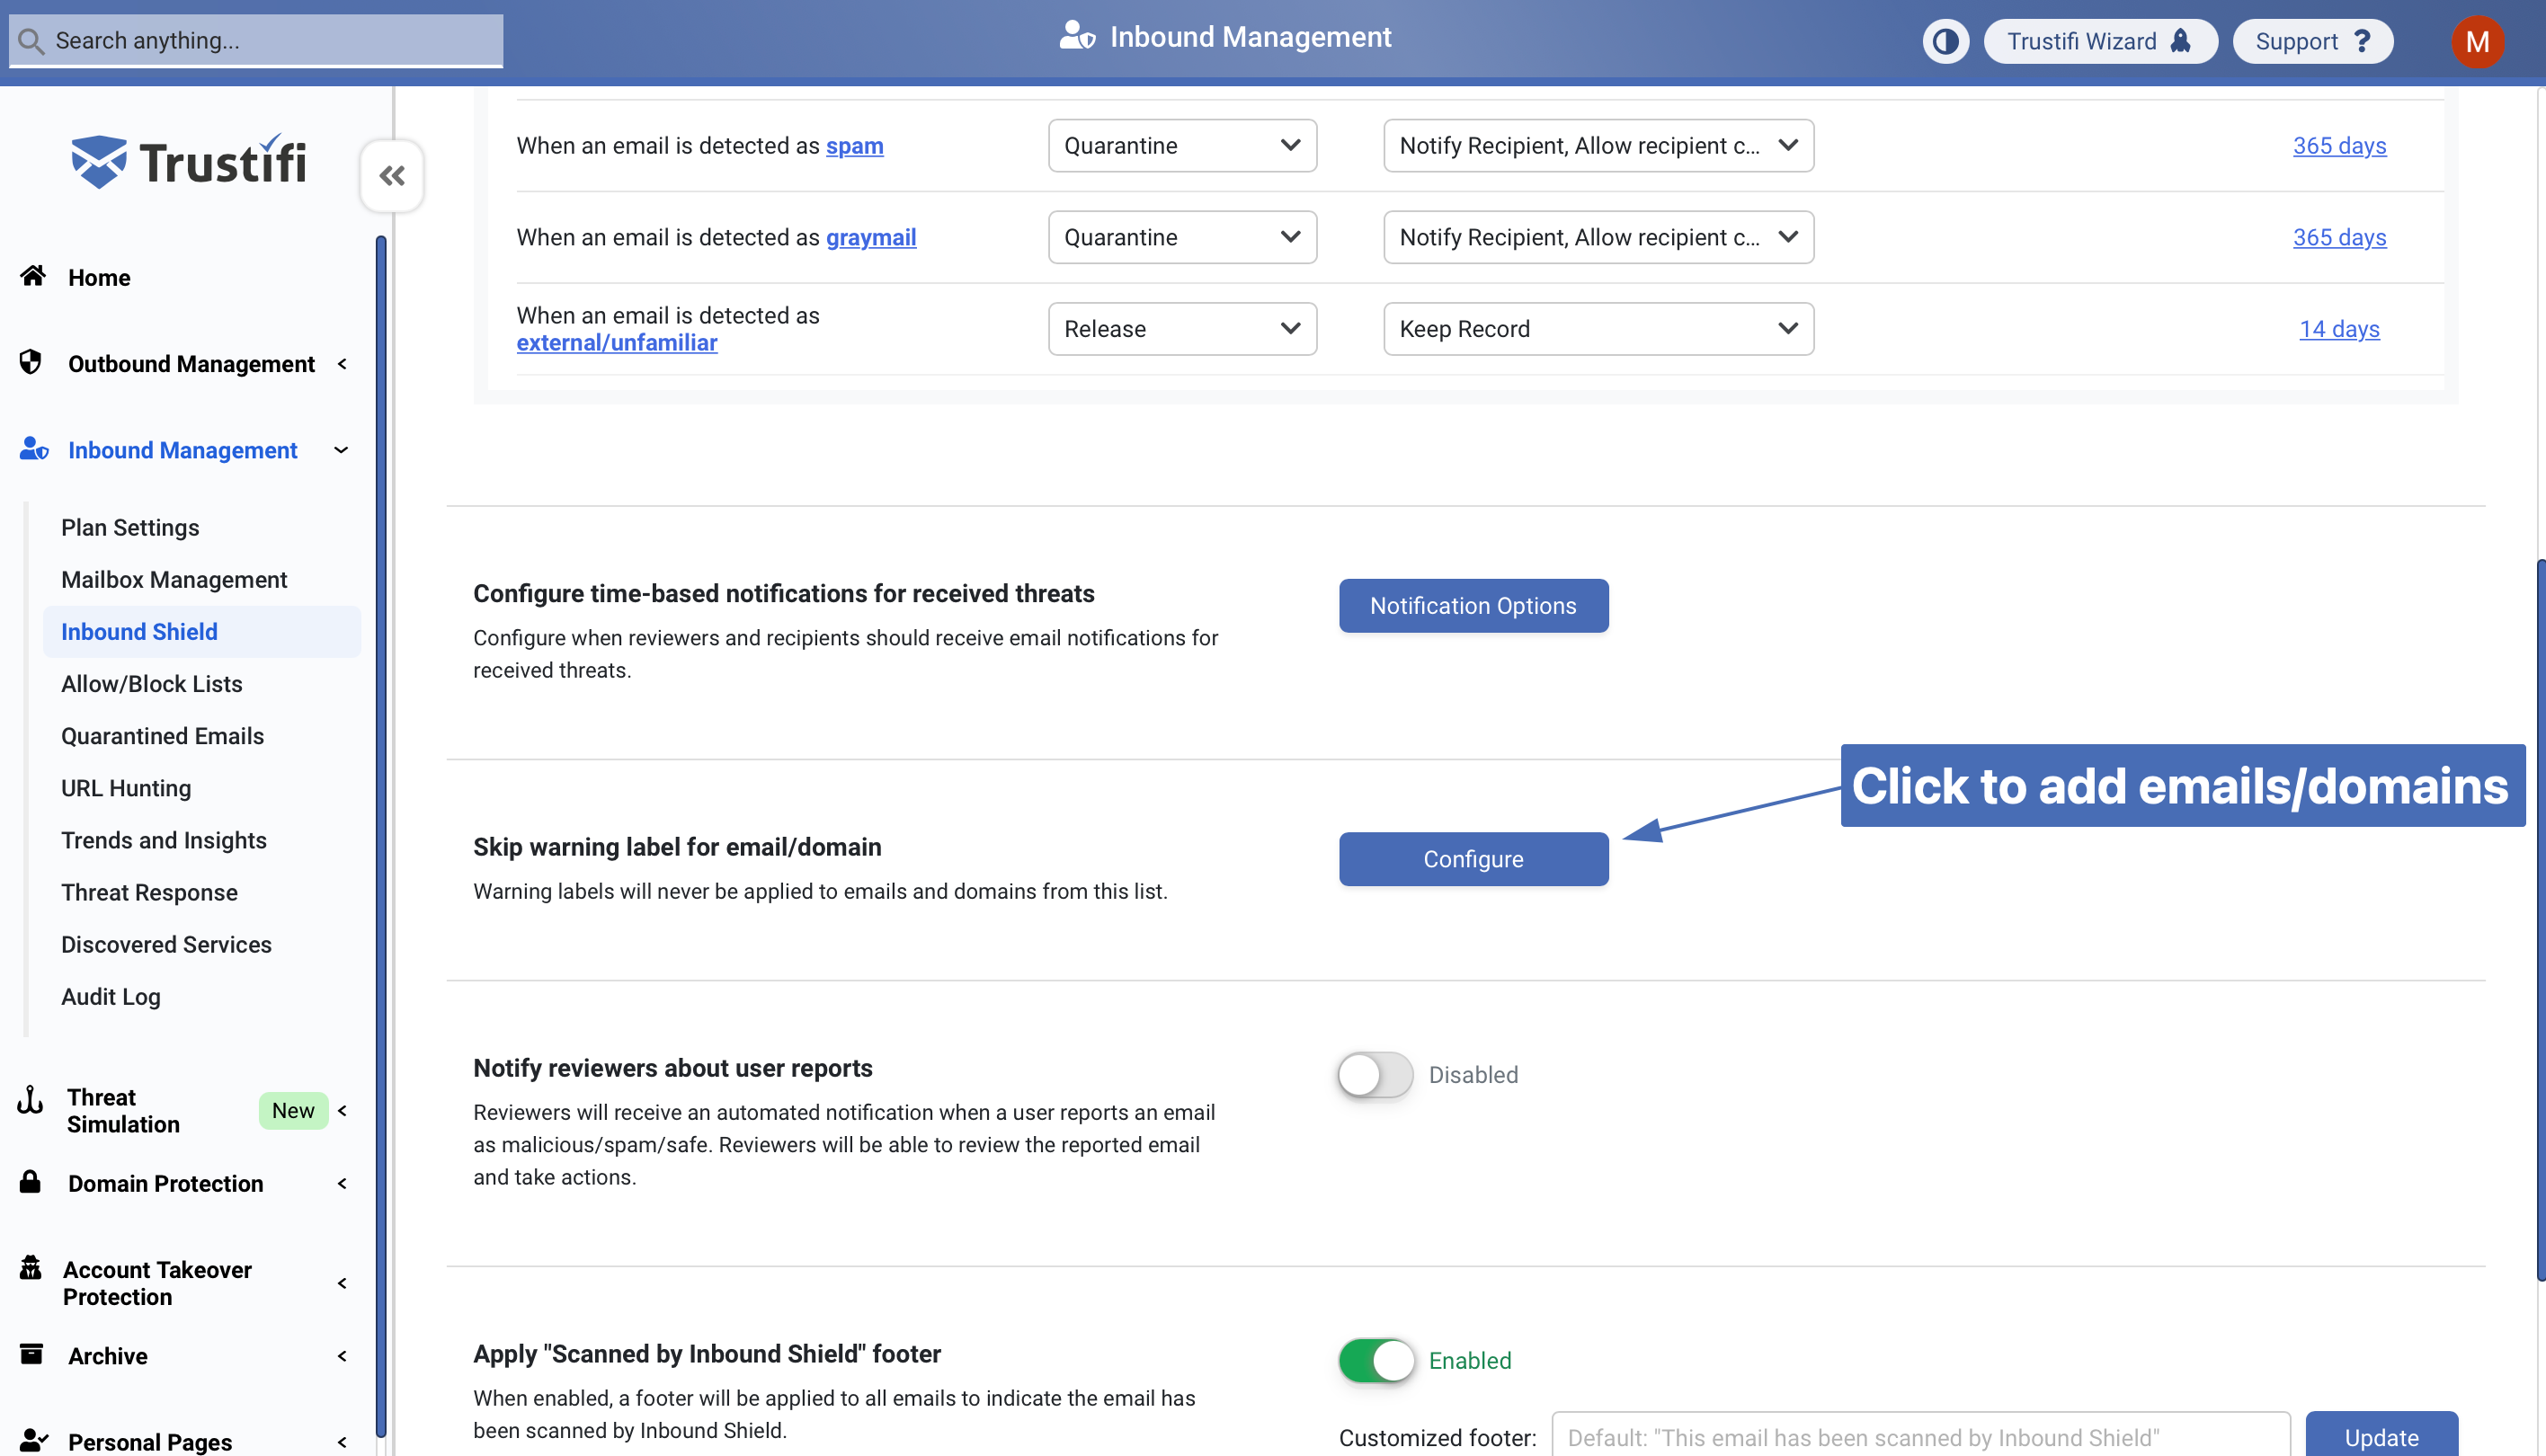
This will open a pop-up where you can add the domains/emails to be excluded.
Notify reviewers about user reports
When this setting is enabled, your inbound reviewers will receive automated notifications whenever any user reports an email as malicious/safe/spam. Reviewers can review the reported email and take actions.
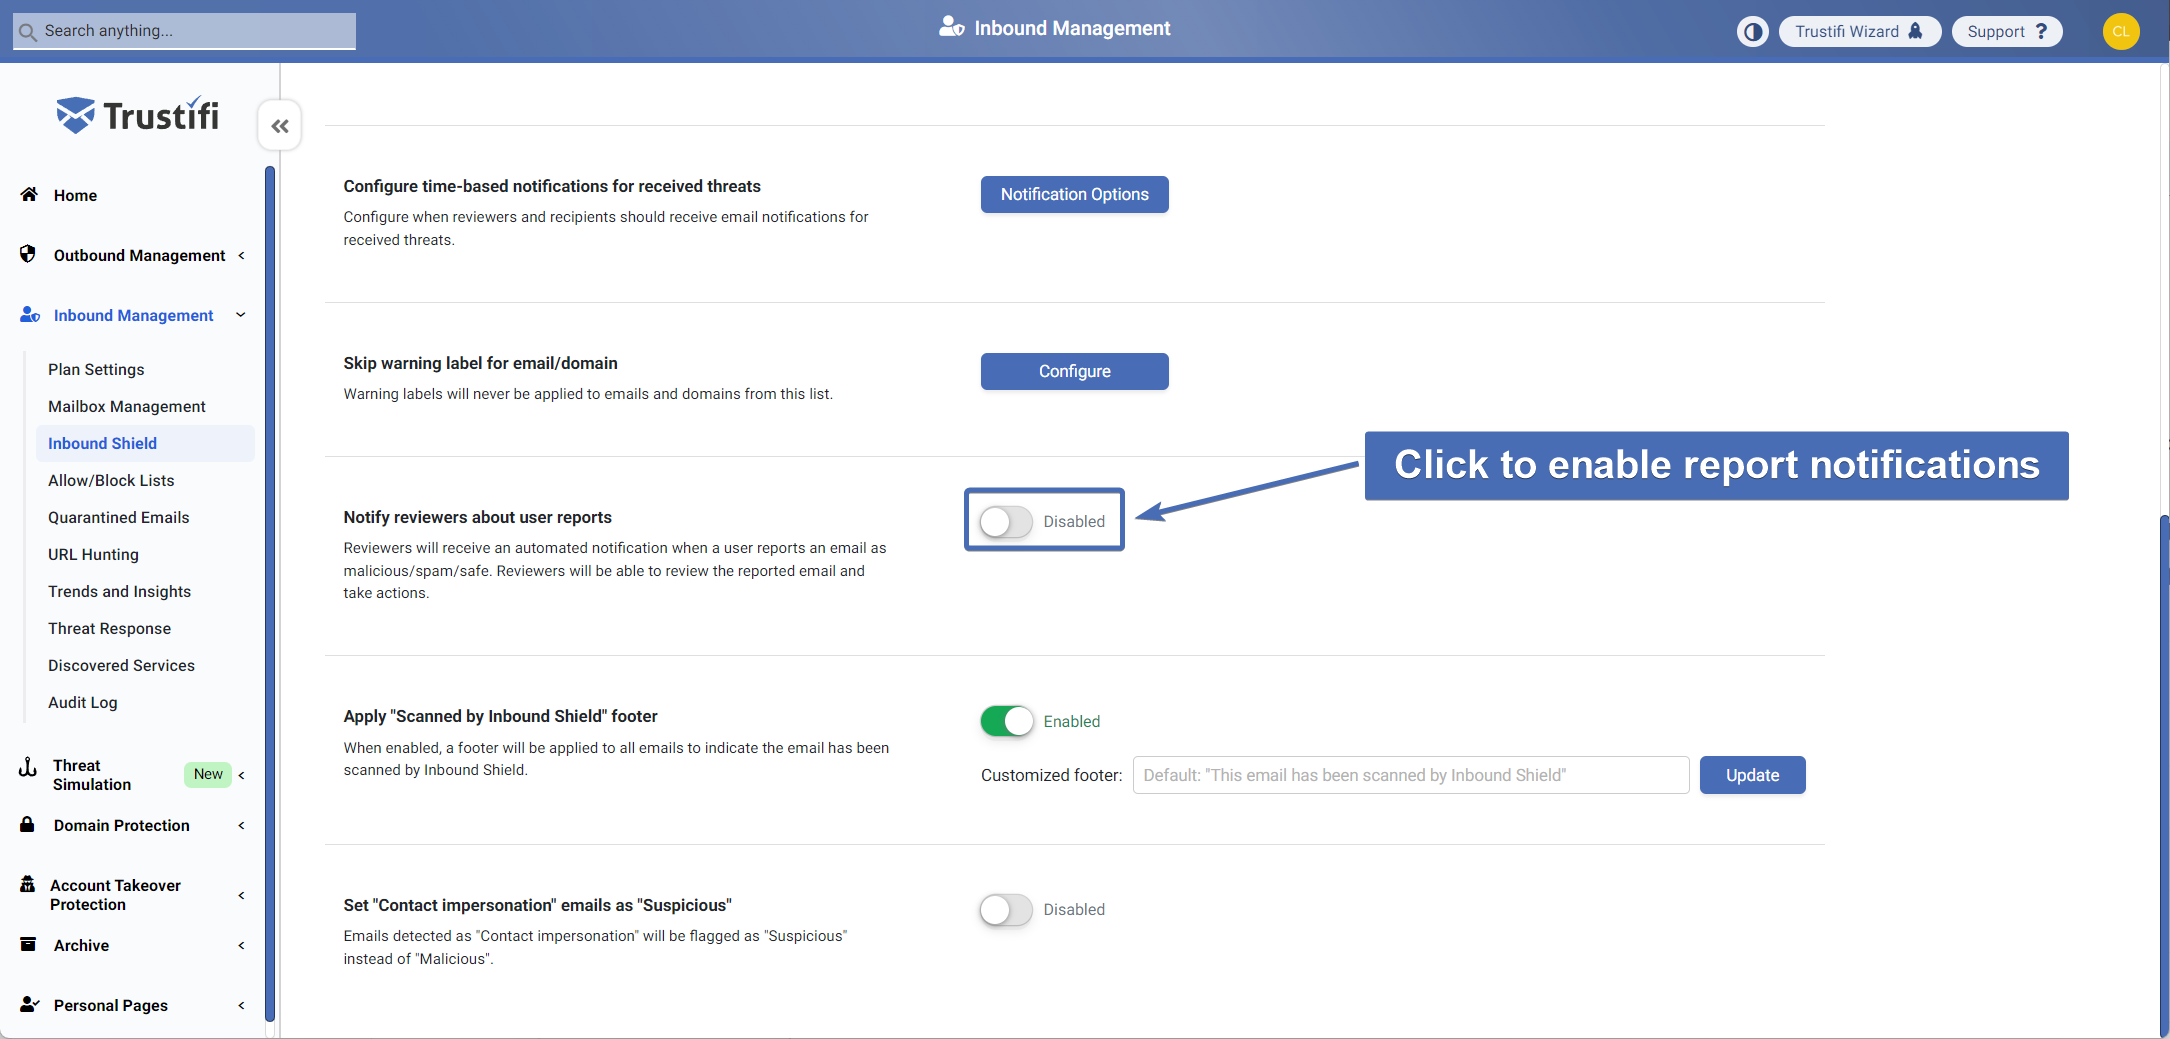
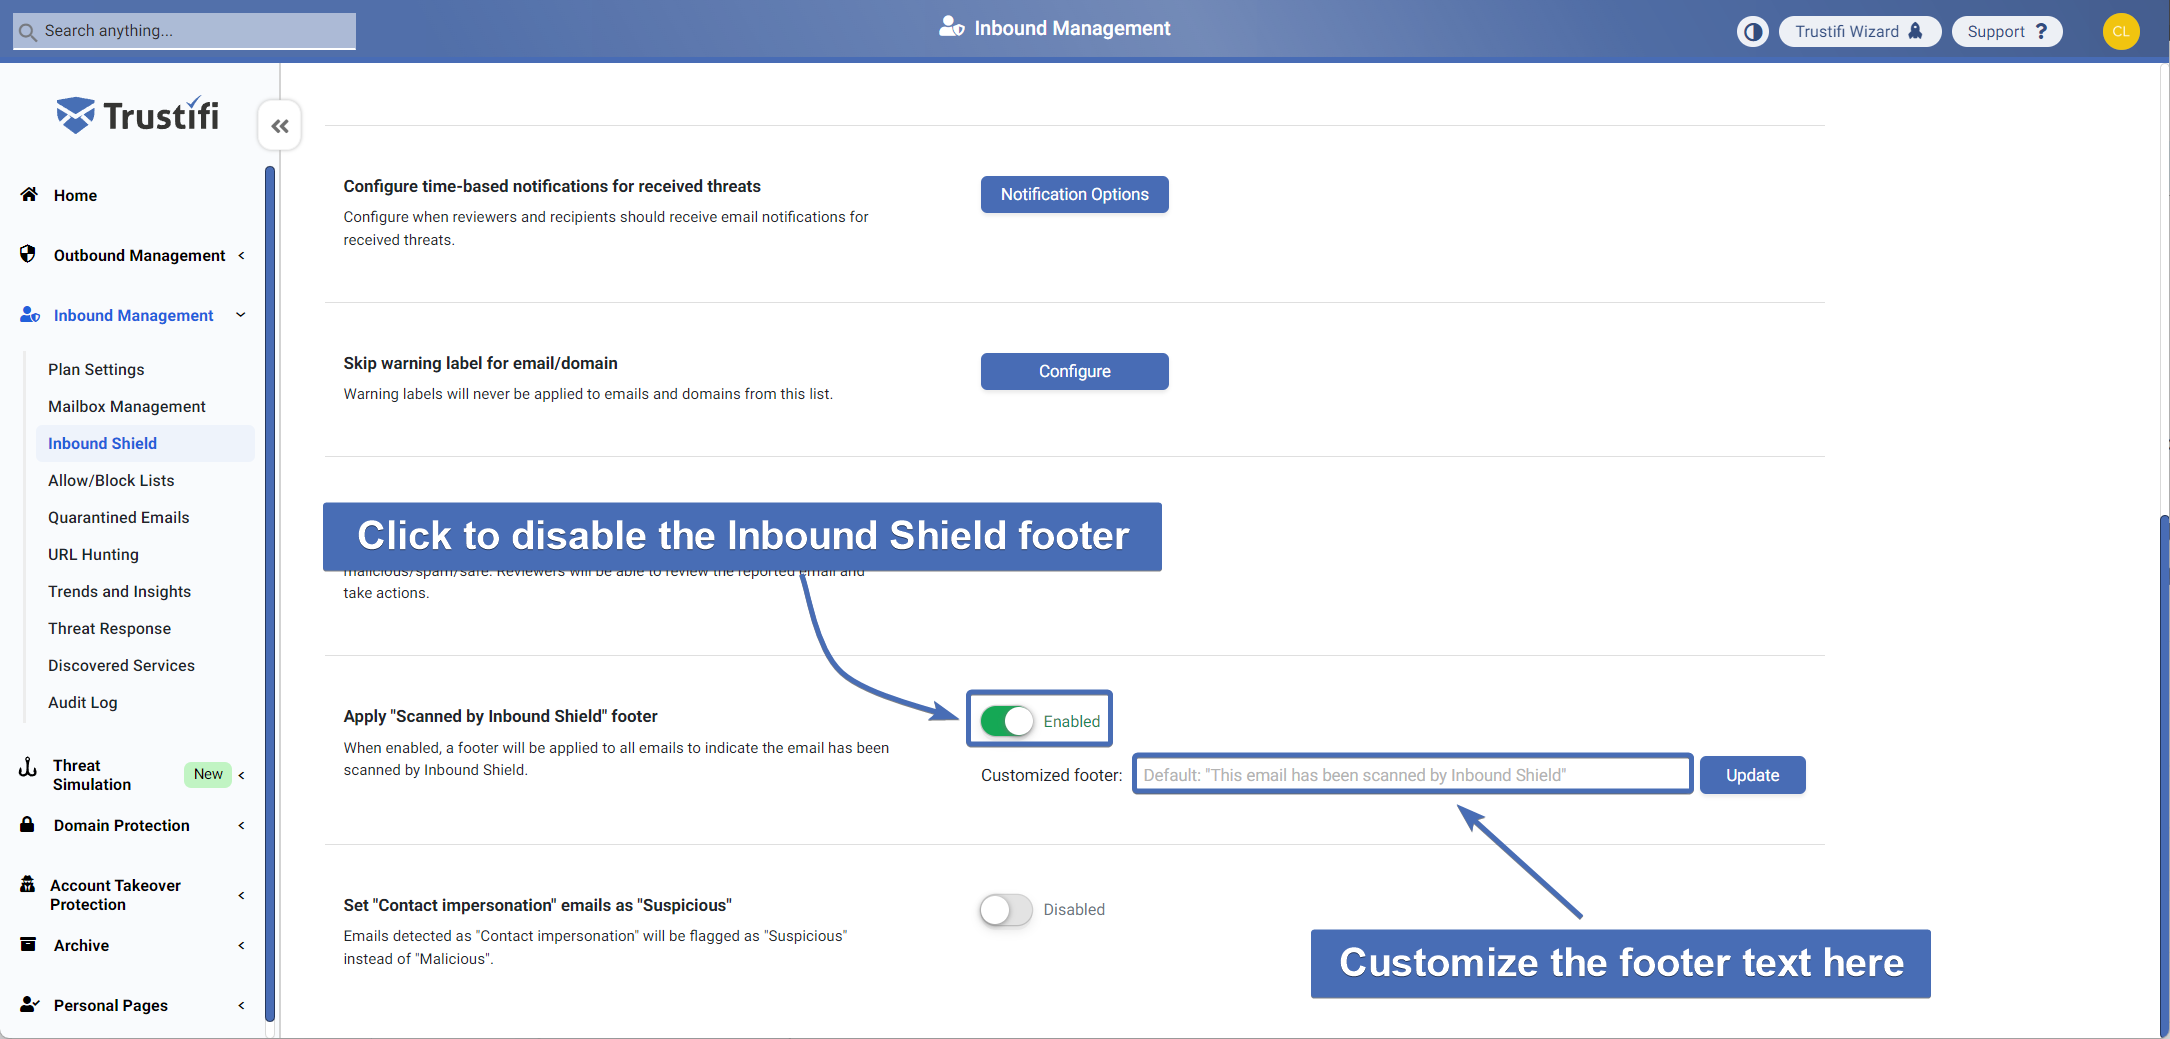
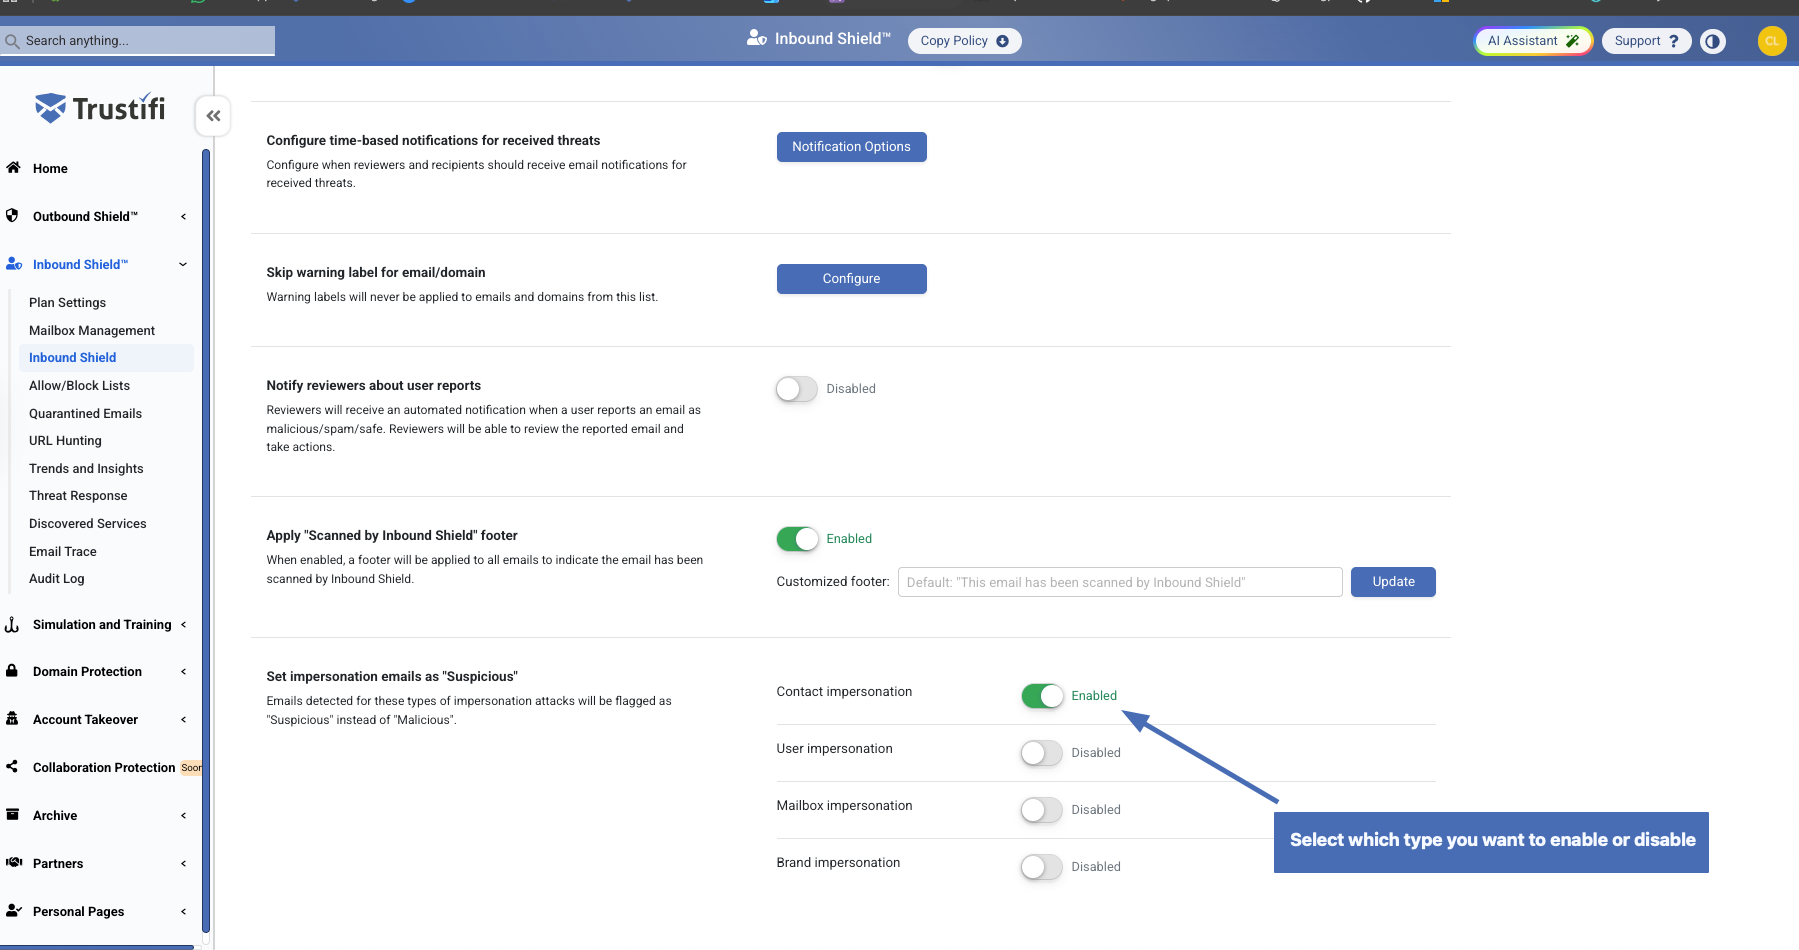
Apply “Scanned by Inbound Shield” footer
By default, all emails that have been scanned by Inbound Shield will display an indicative footer. If you wish to disable this footer for all users, simply click on the toggle next to this setting.
You can also edit and customize the text that will be displayed in the footer from this section.
Set impersonation emails as “Suspicious”
Configure impersonation attack detections so that identified emails are flagged as “Suspicious” instead of “Malicious.”
Choose the impersonation types you want to enable or disable, such as:
Contact impersonation
User impersonation
Mailbox impersonation
Brand impersonation
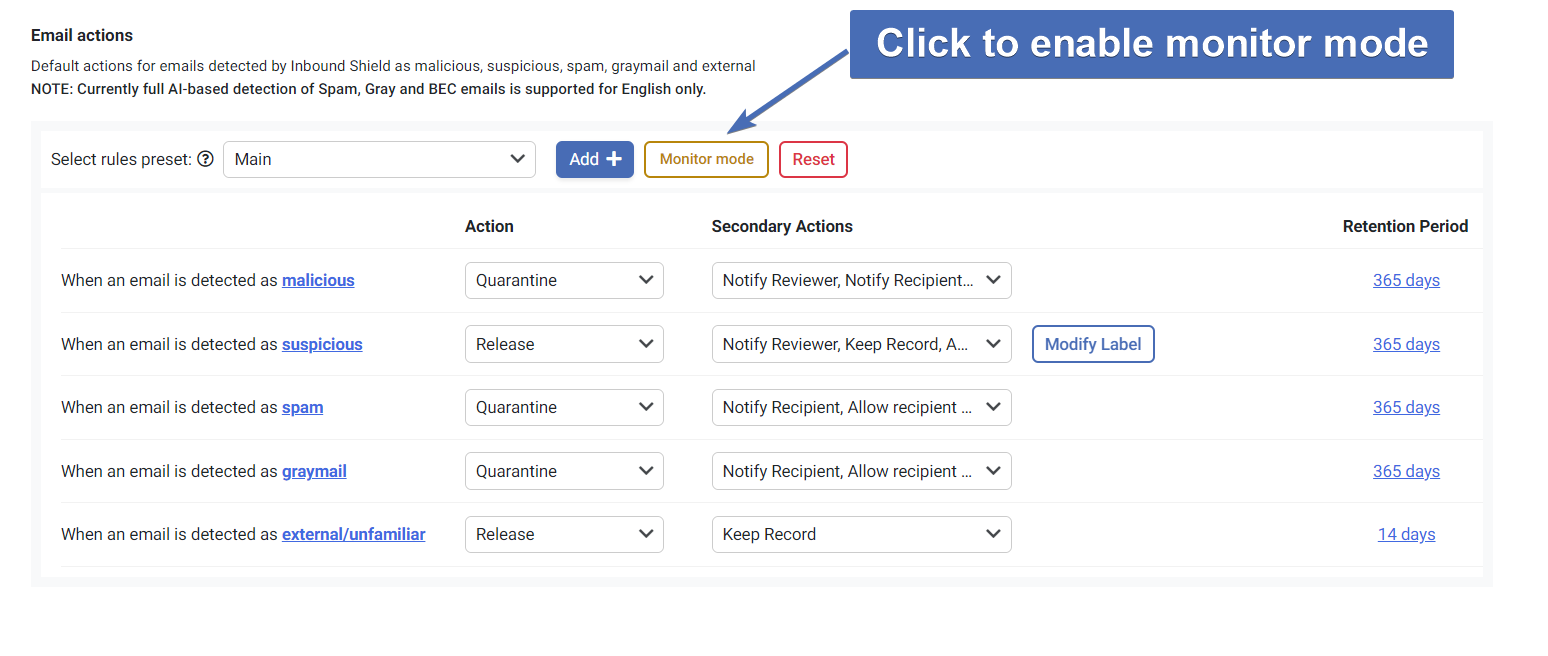
Monitor Mode
Trustifi offers a “Monitor Mode” setting that configures all Threat Prevention rules to be released and to keep a record of the email in the “Quarantined emails” list.
This setting is recommended for new clients in the process of a Proof of Concept, or if you want to see how Trustifi can analyze and categorize emails without blocking any email traffic.
Note: Choosing “Monitor Mode” means Trustifi will only keep a record of received threats, it will not block them.
To enable this, simply click on the “Monitor Mode” button (in yellow) above the threat prevention rules.
 Retention Period
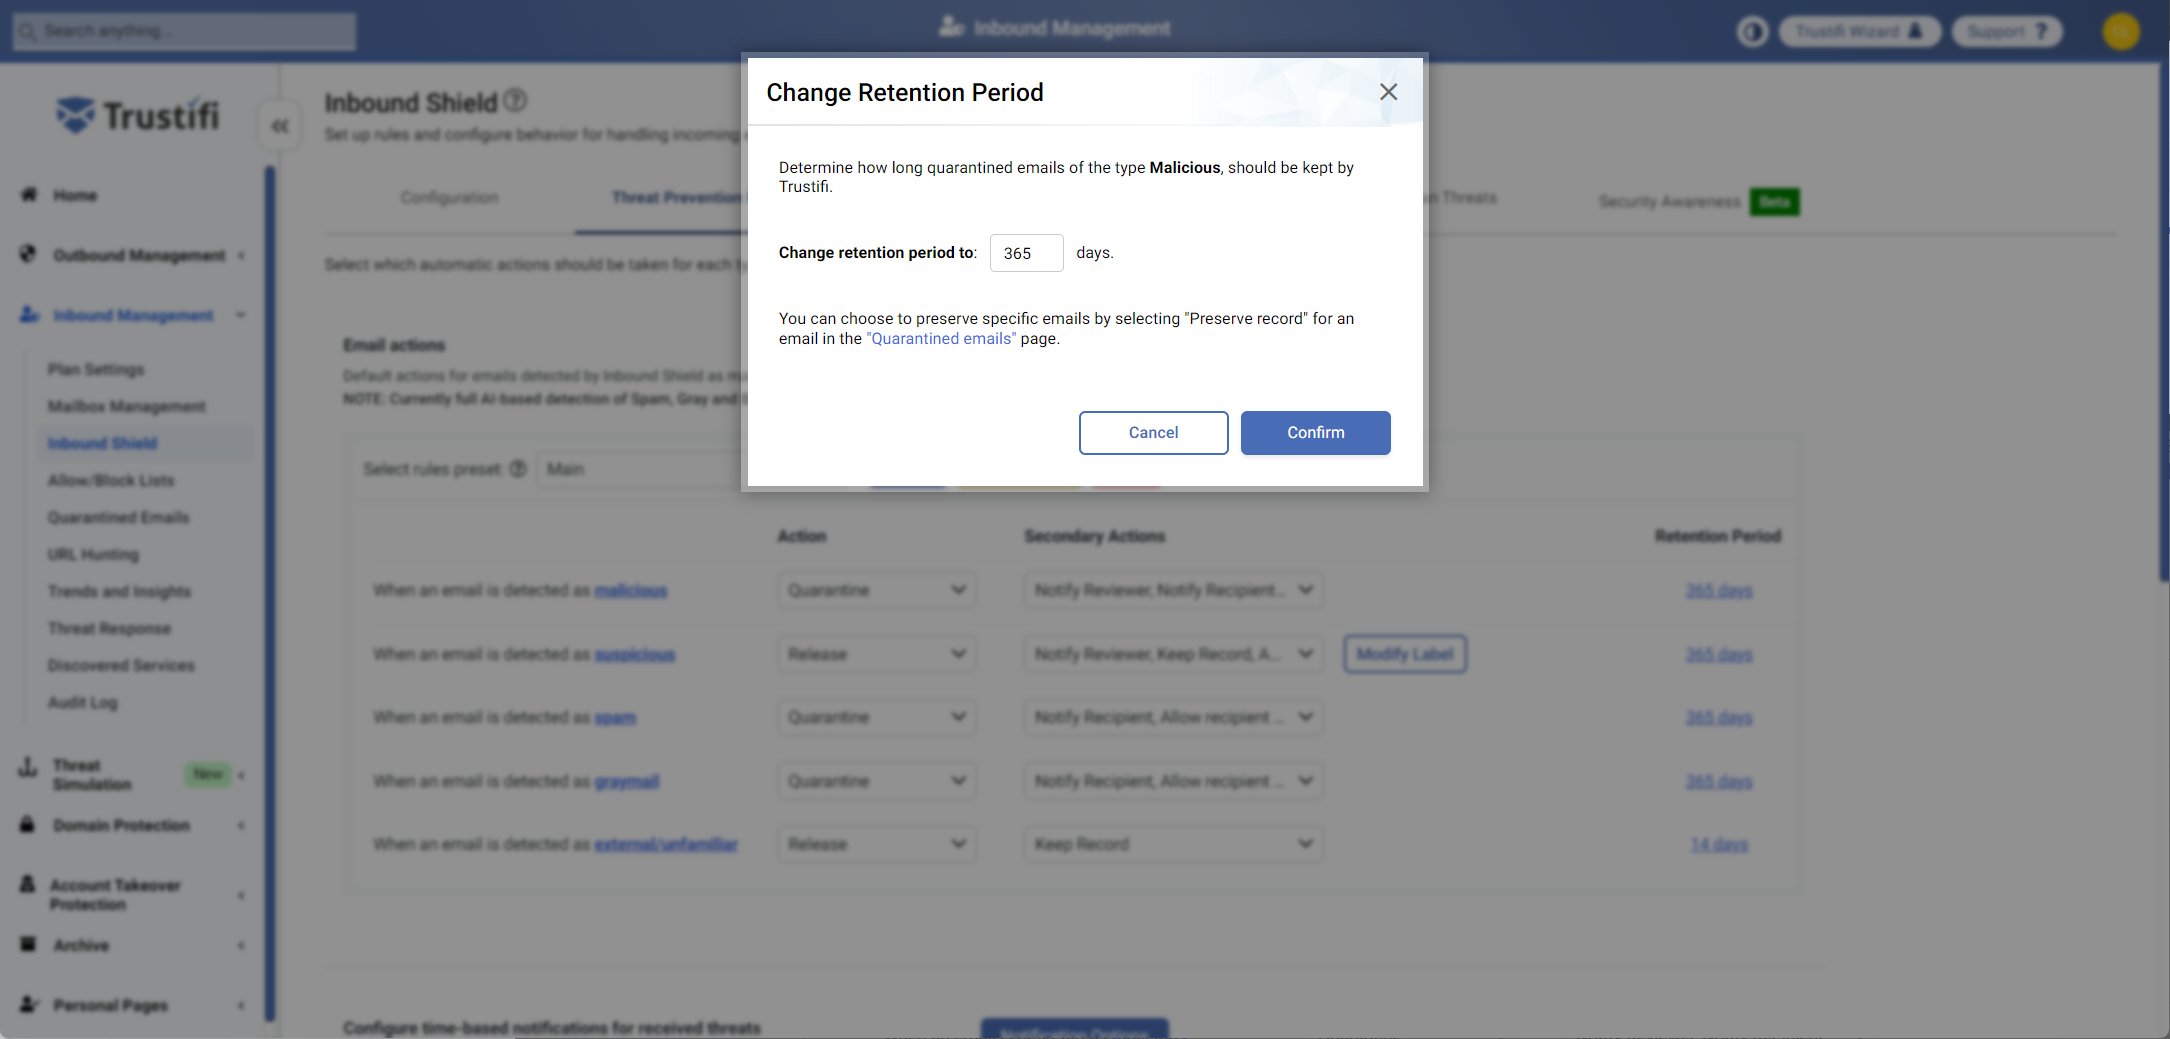
Admins and reviewers can choose how long Trustifi should retain records for each type of email category – malicious, suspicious, spam, graymail, and external. The default retention period for each category of email is 365 days, with the exception of external emails, for which retention is set by default to 14 days.
To modify the retention period for a category of emails, simply click on the number of days to the right of the category.
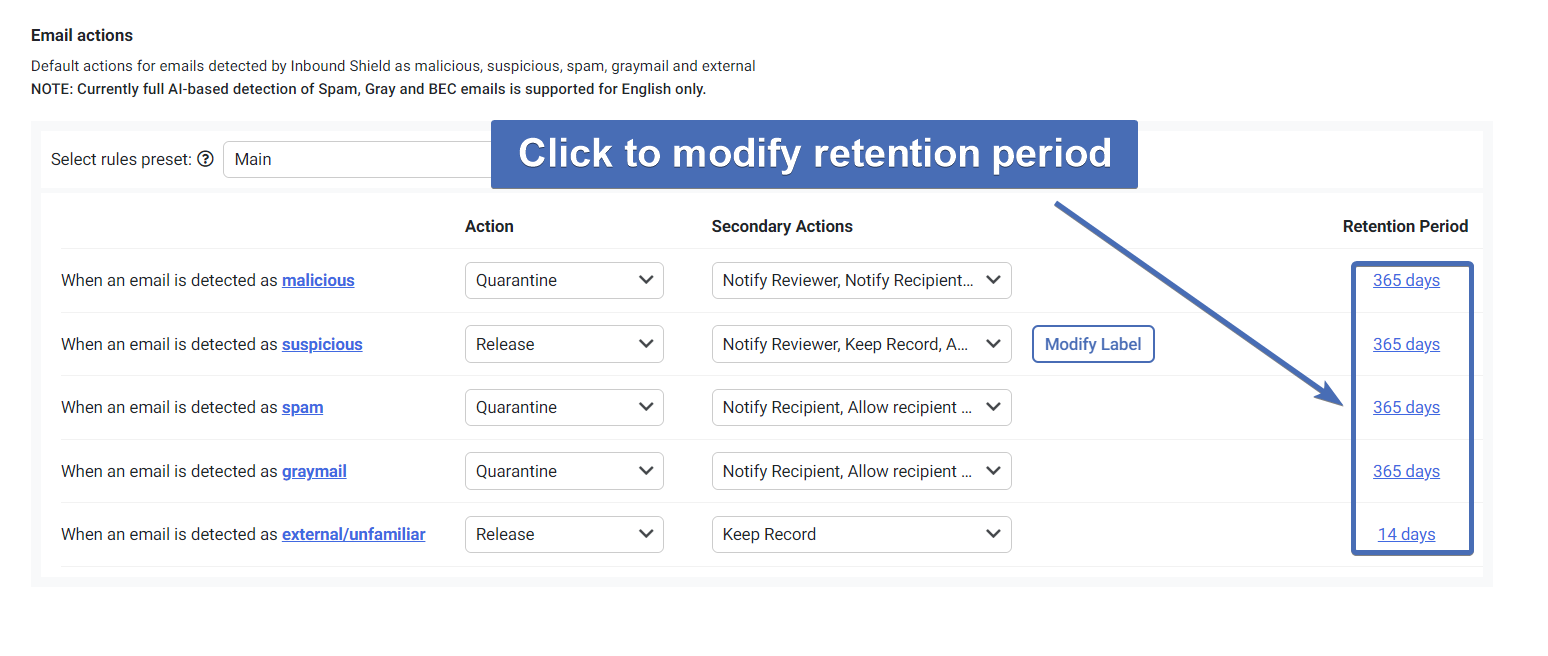 A pop-up window will open where you can set the new retention period and confirm your selection.