Overview
Trustifi’s Email Relay enables organizations using Google Workspace to route outbound email through Trustifi’s secure infrastructure. This allows organizations to apply Trustifi’s encryption, Data Loss Prevention (DLP), tracking, and policy enforcement to outbound messages while continuing to operate within their existing Google Workspace environment.
The purpose of this instruction manual is to help you complete the configuration of your Trustifi Email Relay using Google Workspace.
This manual contains requirements, procedure descriptions, screenshots, usage, and troubleshooting information for Trustifi Email Relay.
Please follow each step provided and read the warning notes.
Requirements
To configure your email environment to work with Trustifi Email Relay you must have the following:
A Google Workspace (G Suite) account for your organization
An administrative account with permissions for the Google Workspace admin center
A Trustifi account with admin permissions
Access and permissions to your domain's DNS management system
Configuration
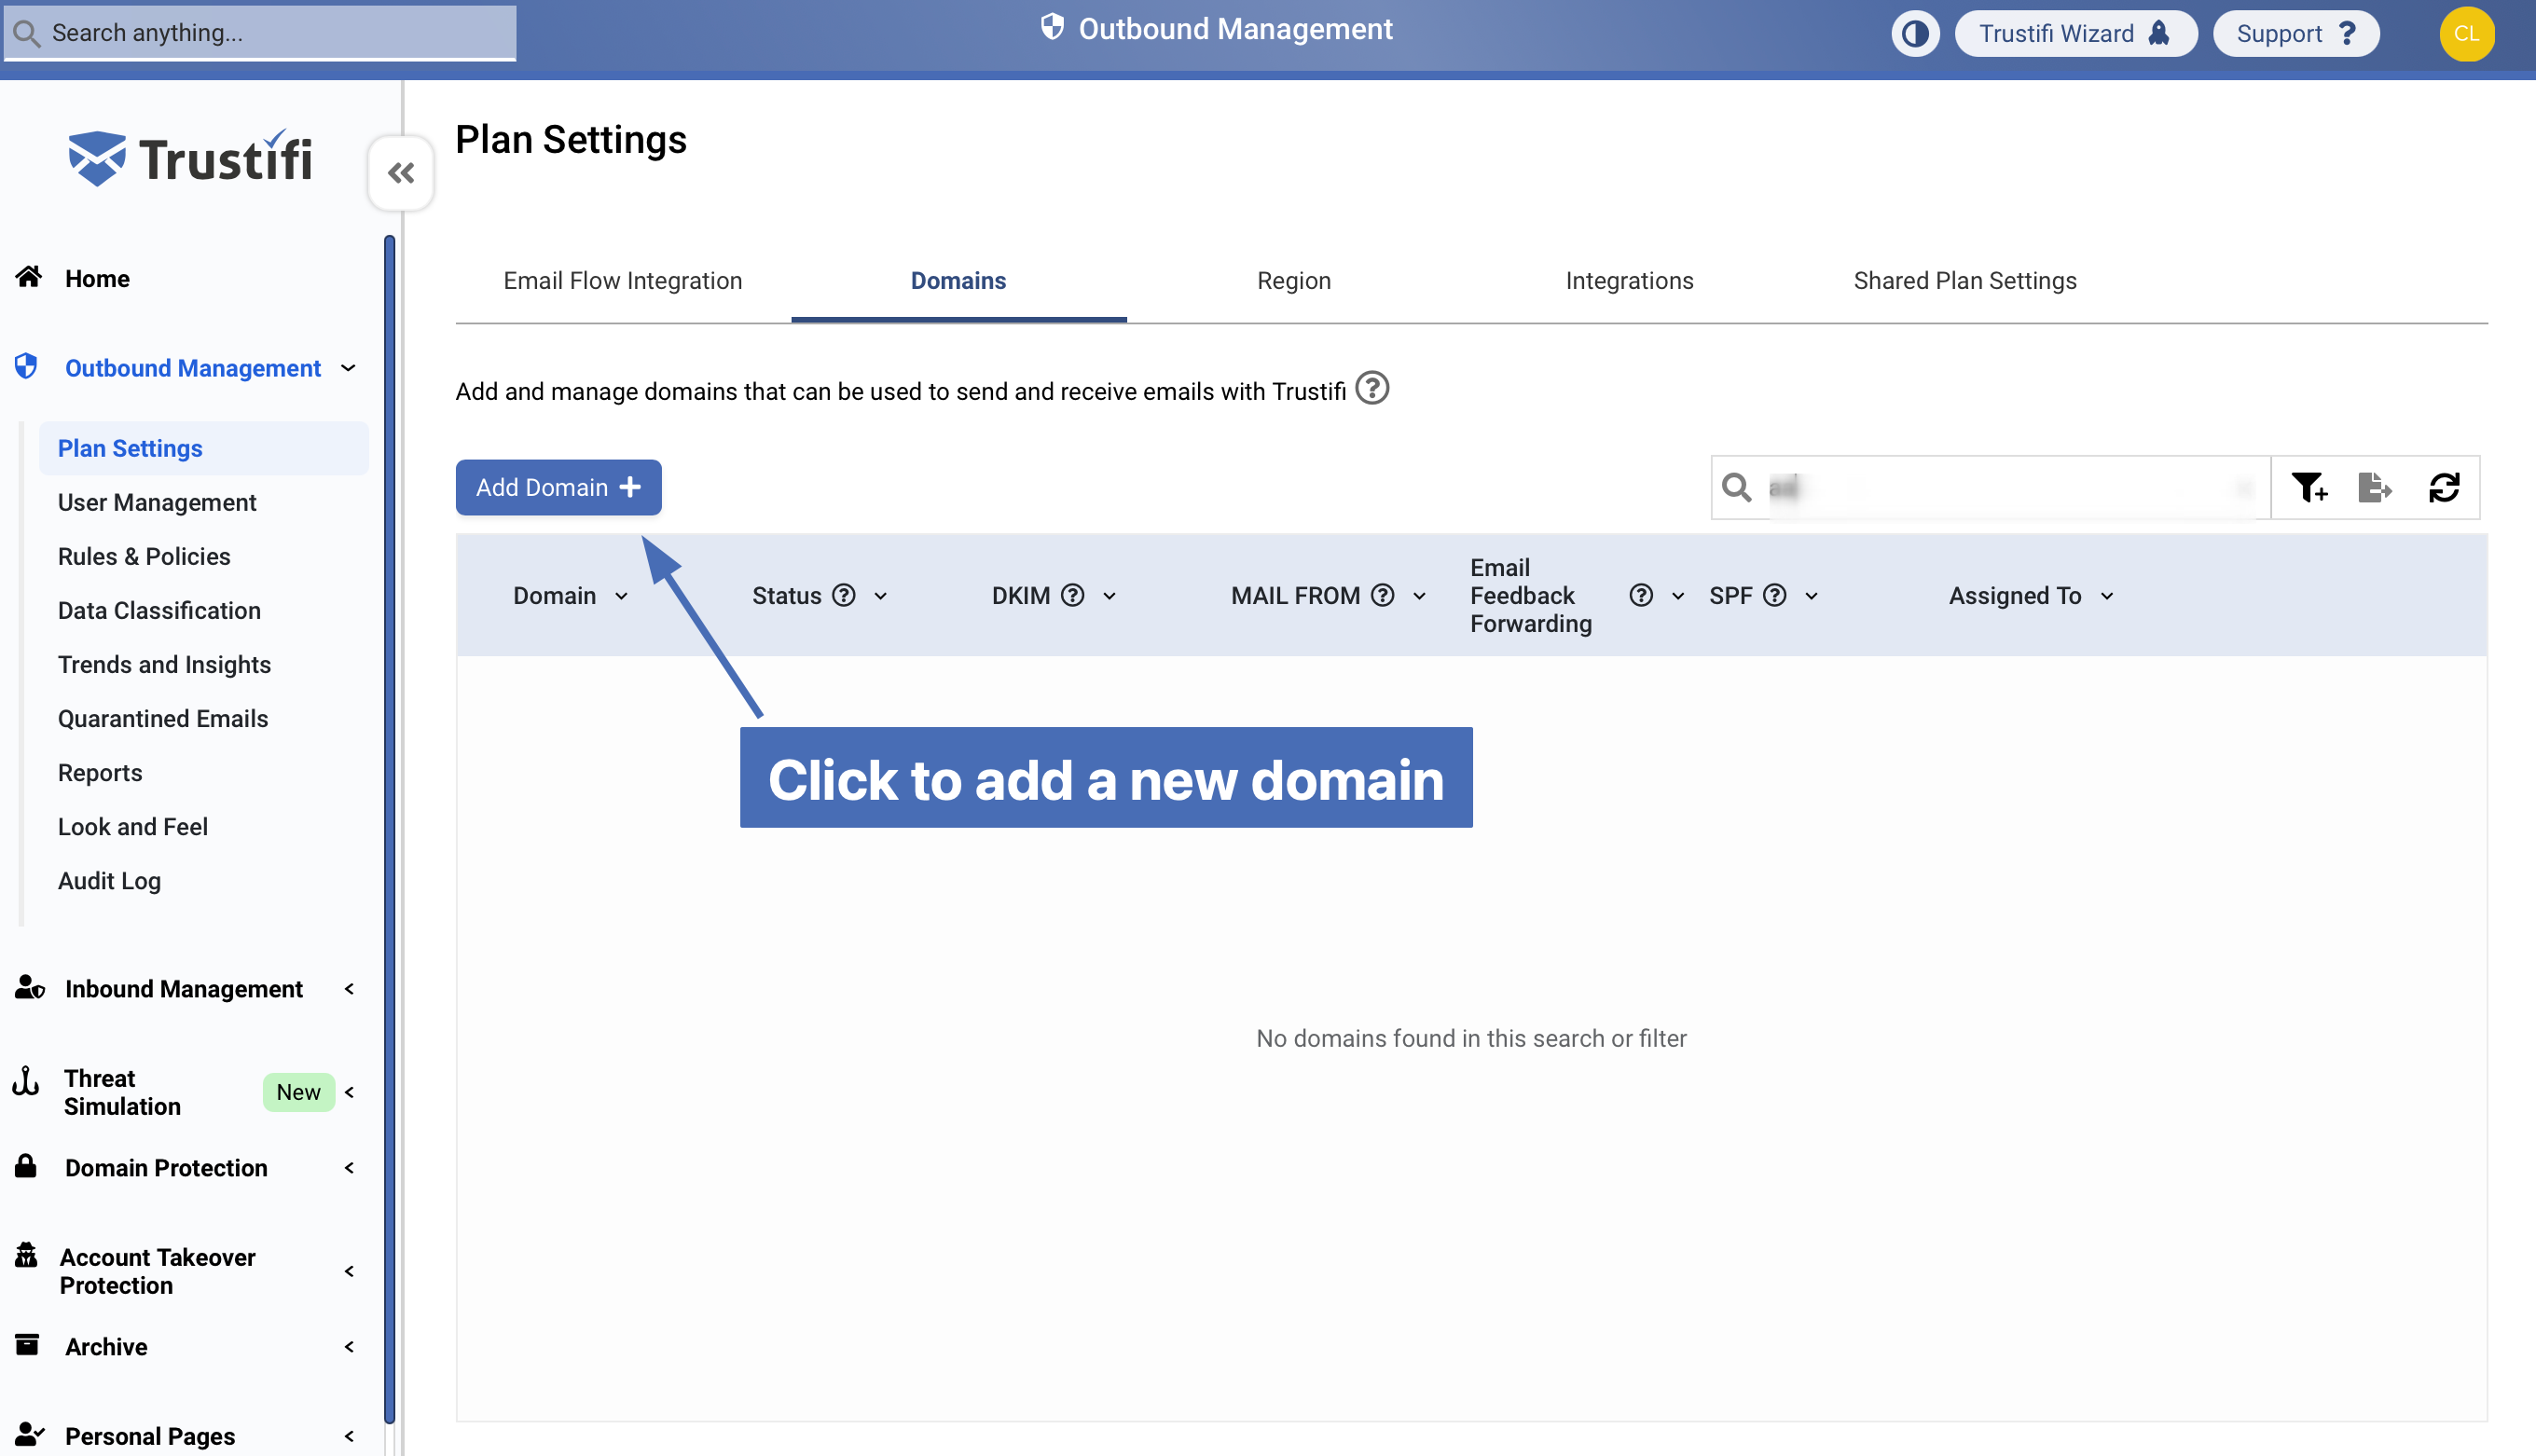
Step 1: Navigating “Domains”
On the left-side navigation panel, click on “Outbound Management” and then open the “Plan Settings” page. Then, click on the “Domains” tab at the top.
.png)
Adding new domain
This is a quick overview of the domain verification process. To view the full guide click here - https://docs.trustifi.com/docs/the-process
Step 2: Adding a new domain
Now, we will need to add the domain(s) that will be used to send emails. Continue by clicking on the “Add Domain” button.
Step 3: Verifying the domain
After adding the domain, you will have to copy and import the records to your DNS provider (e.g. DNS Made Easy, GoDaddy). To view the DNS records, click on “Actions” and then “Show DNS records“.
In the pop-up window, the required DNS records will be arranged by “Identity” (TXT record), “DKIM” (CNAME records), and “MAIL FROM” (TXT and MX records).
Tip: You can click on each record (name and value) to easily copy them to your clipboard.
.png)
Note: You can also click on “Download records CSV” from the “Actions” menu to save these records as a CSV file.
Step 4: Checking if the domain is verified
Make sure all the required records have been added correctly. Typically, DNS records take only a couple of minutes to propagate and finish updating, however in some cases, this process can take up to 24 hours.
Once the DNS records have been added and updated, refresh the Trustifi web portal and check the “Domains” tab again. If all records have been added correctly, the “Status” column should now show as “Can send” and the “DKIM” and “MAIL FROM” columns should now say “Verified“.
.png)
Step 5: Enabling the outbound email relay
In this part, you will need to enable the outbound Email Relay and copy the “Email Relay key” which is the secret key that will be used to authenticate the transport flow of your emails.
Open the “Plan Settings” page under “Outbound Management”, and you should be on the “Email Flow Integration” tab. Click on the toggle next to “Enable Relay” to enable the integration.
.png)
After the integration is enabled, your secret key will be generated. You can click on the “copy” button to copy the Email Relay secret key for later use.
.png)
Google Admin Center
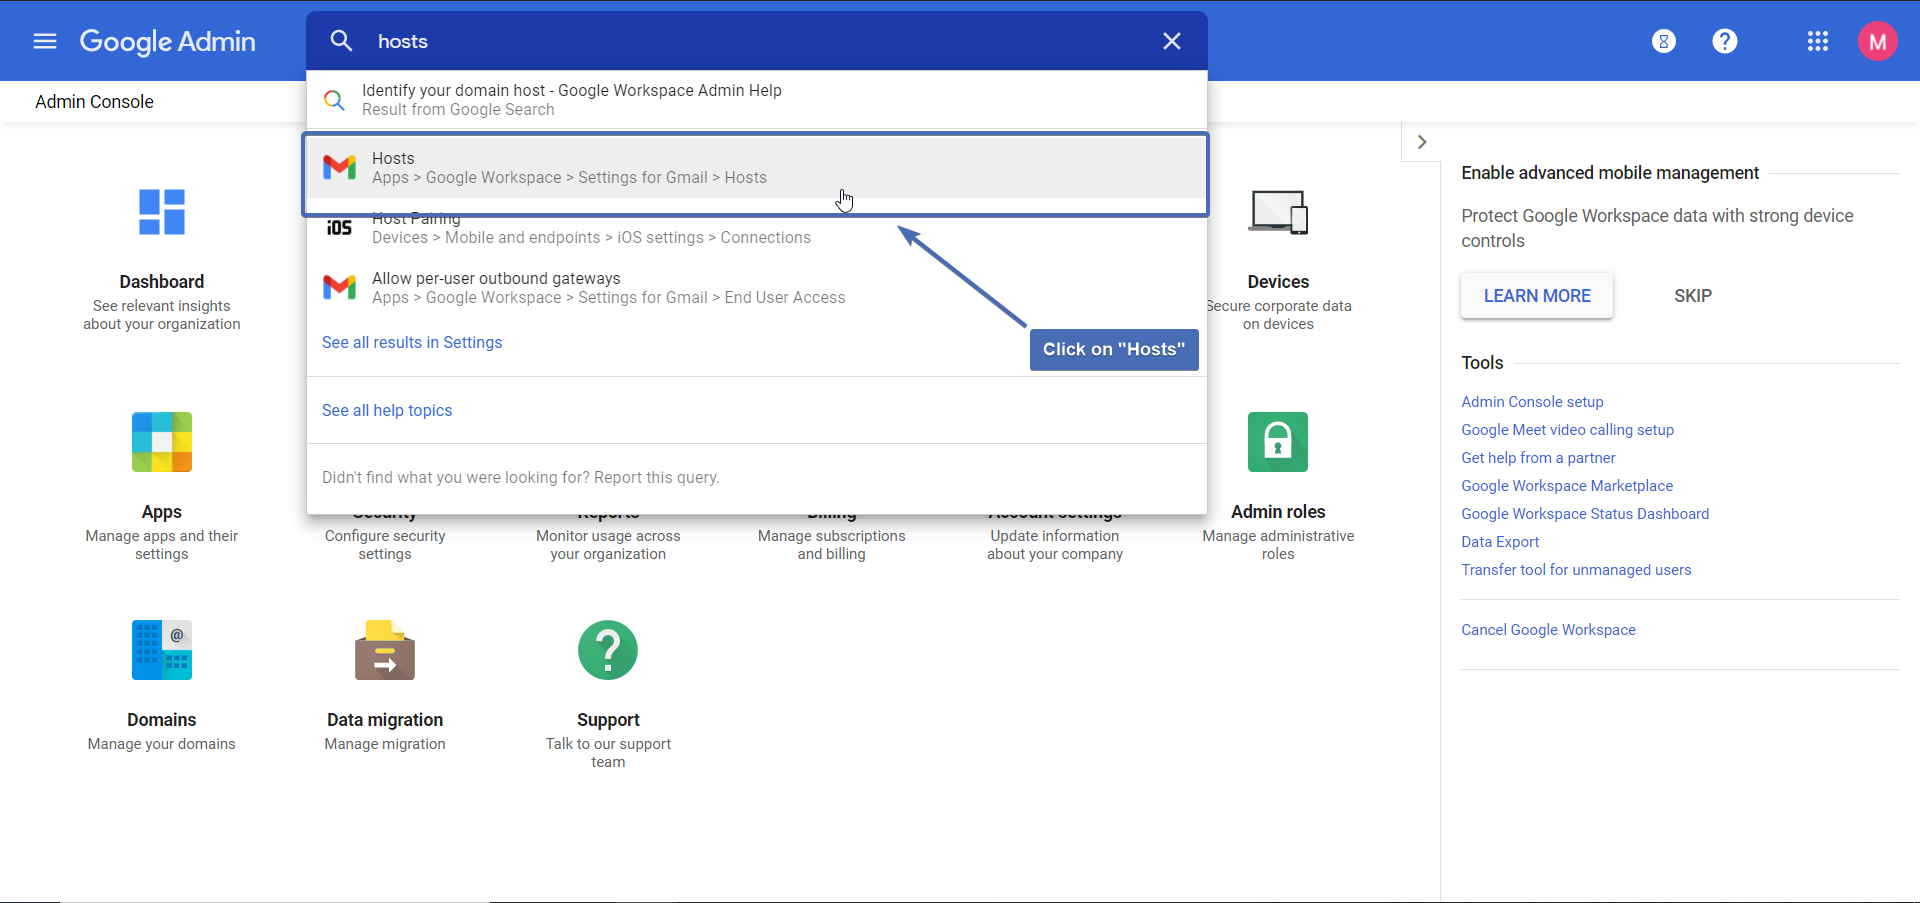
Step 6: Navigating to the Google Admin Center – Mail flow
Navigate to the “Google Admin Center” via the following link: https://admin.google.com/. After you have logged in, type “hosts” in the search bar and select the first option “Apps > Google Workspace > Settings for Gmail > Hosts”.
Adding host route
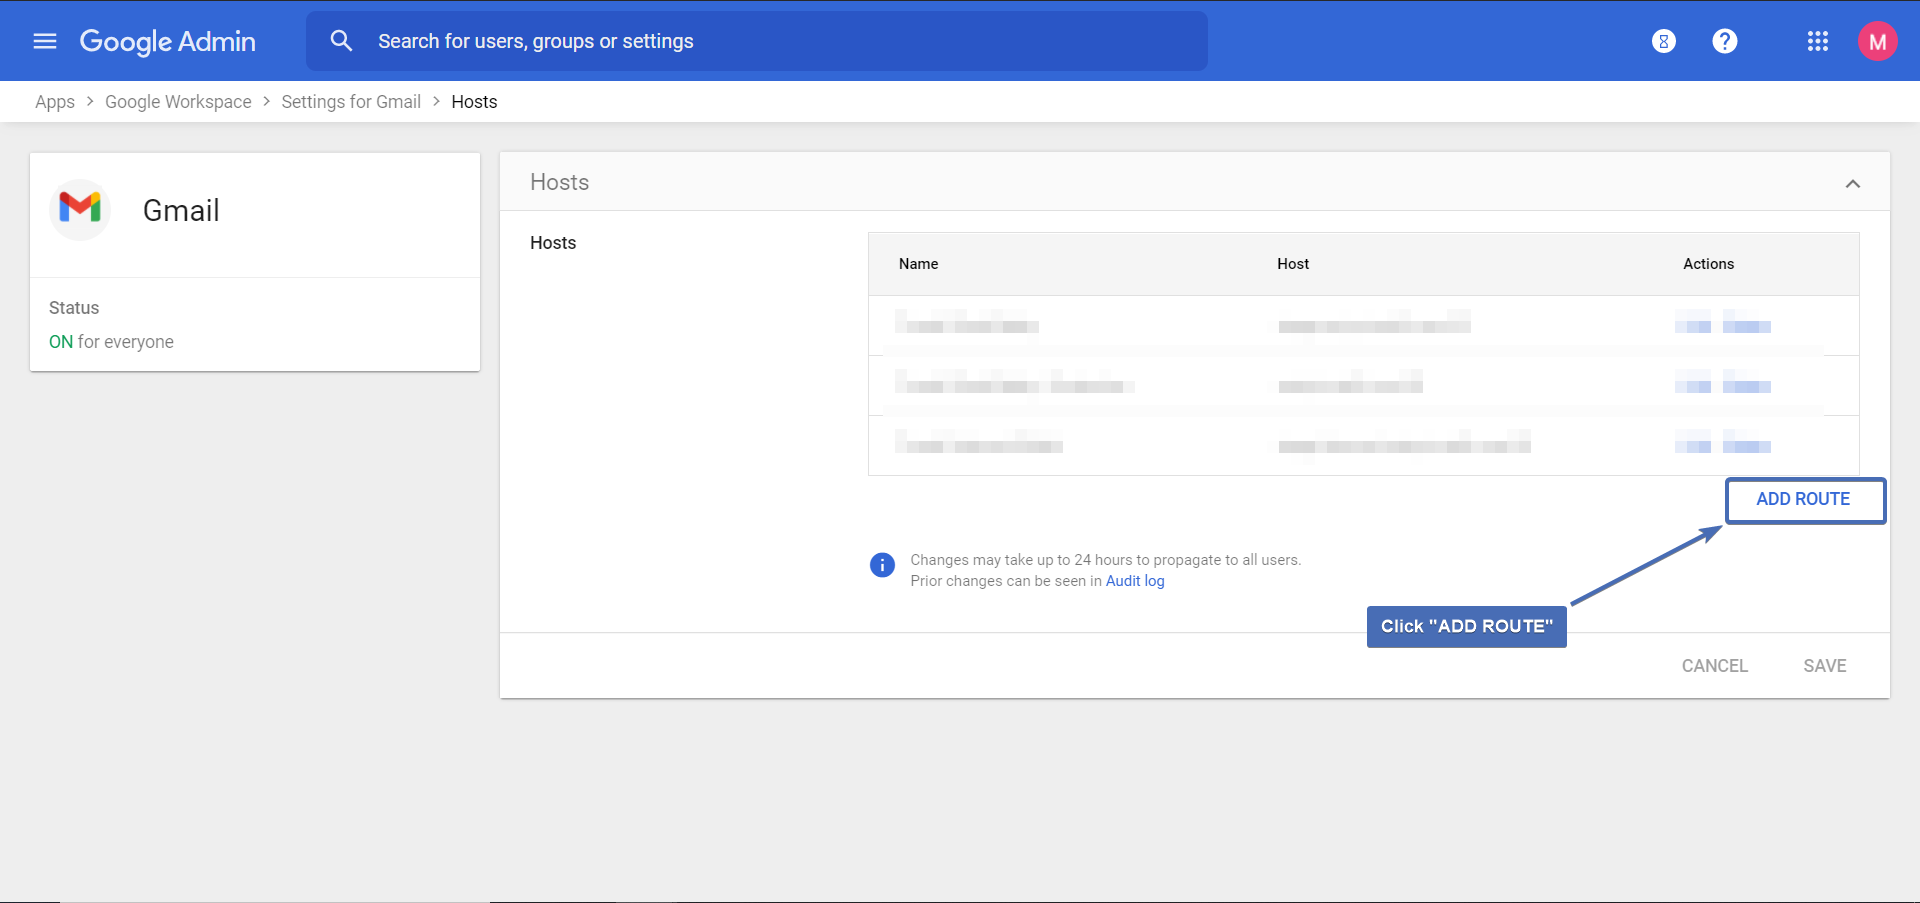
Step 7: Adding a new route
Click on “ADD ROUTE” under the “Hosts“ section.
Step 8: Creating the host
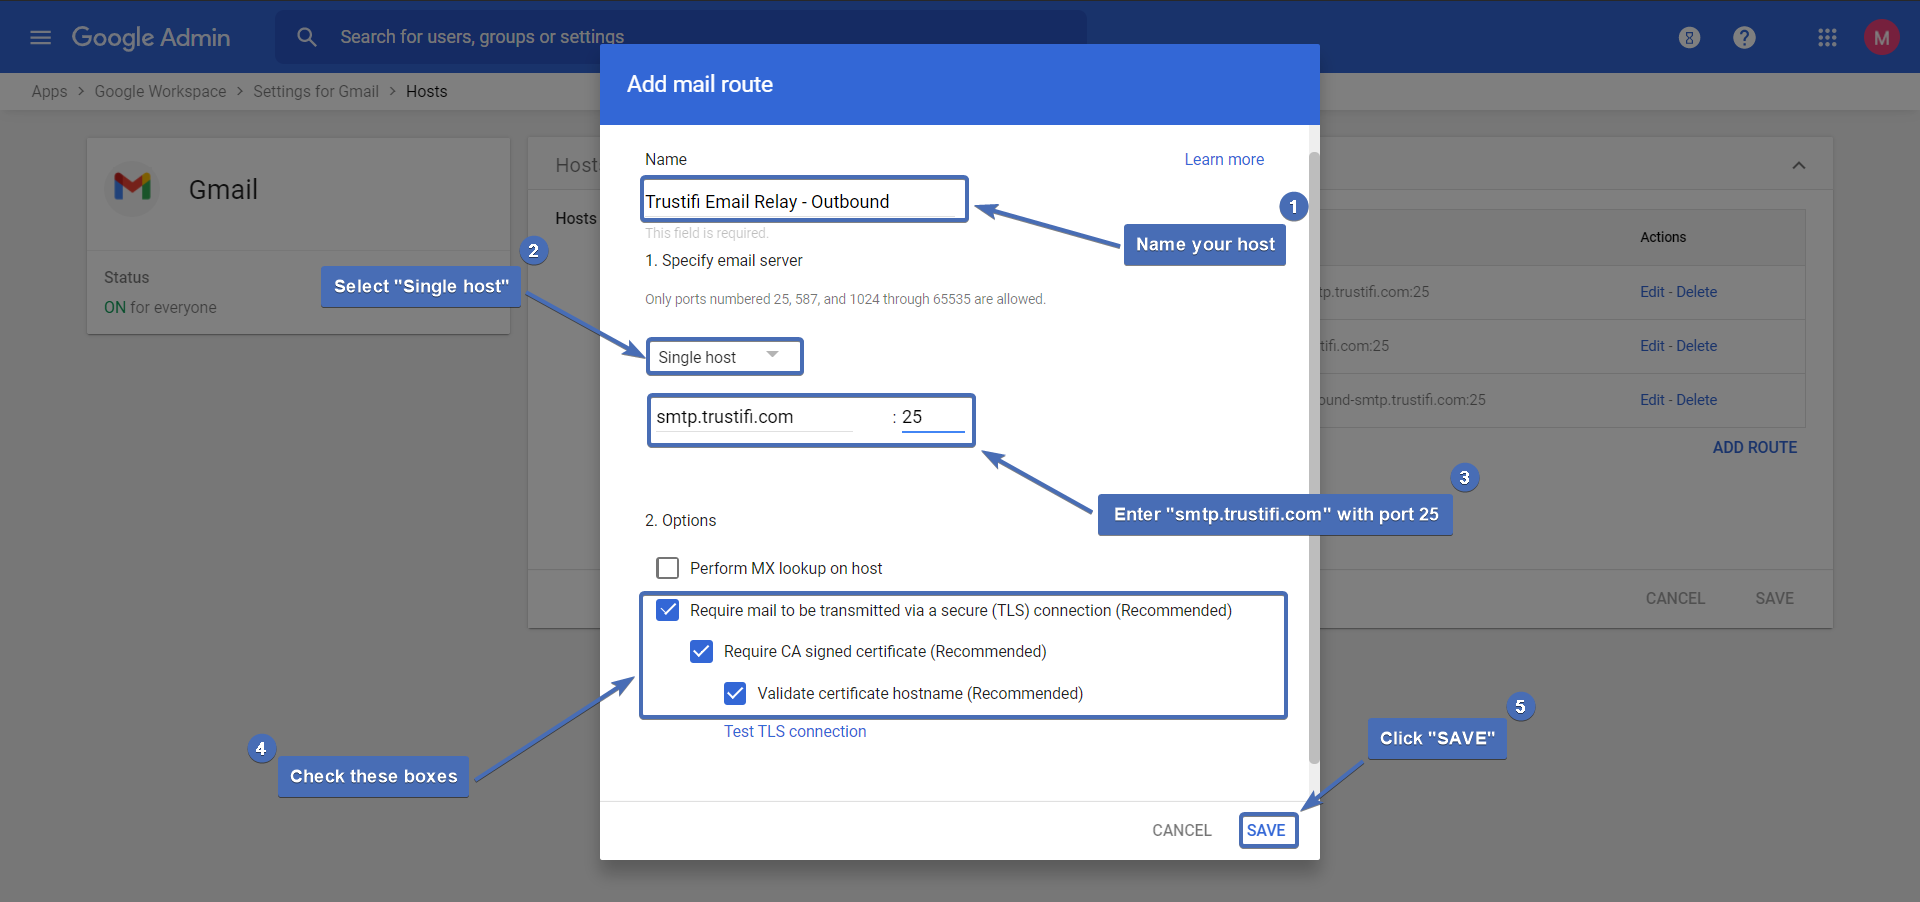
Follow the steps below to configure the host:
Name your host
Select “Single host“
In the “Host name” field enter the Trustifi smart host endpoint.
If you are located in the US and would like your outbound traffic to be routed through a US endpoint, enter:smtp.trustifi.com
If you are not located in the US and would like your outbound traffic to be routed through an EU endpoint, enter:smtp-eu.trustifi.com
In both cases, enter port 25Check the following boxes:
Require mail to be transmitted via a secure (TLS) connection
Require CA signed certificate
Validate certificate hostname
Click “Save“
Step 9: Validate the host
Make sure your host’s address and port are correct.

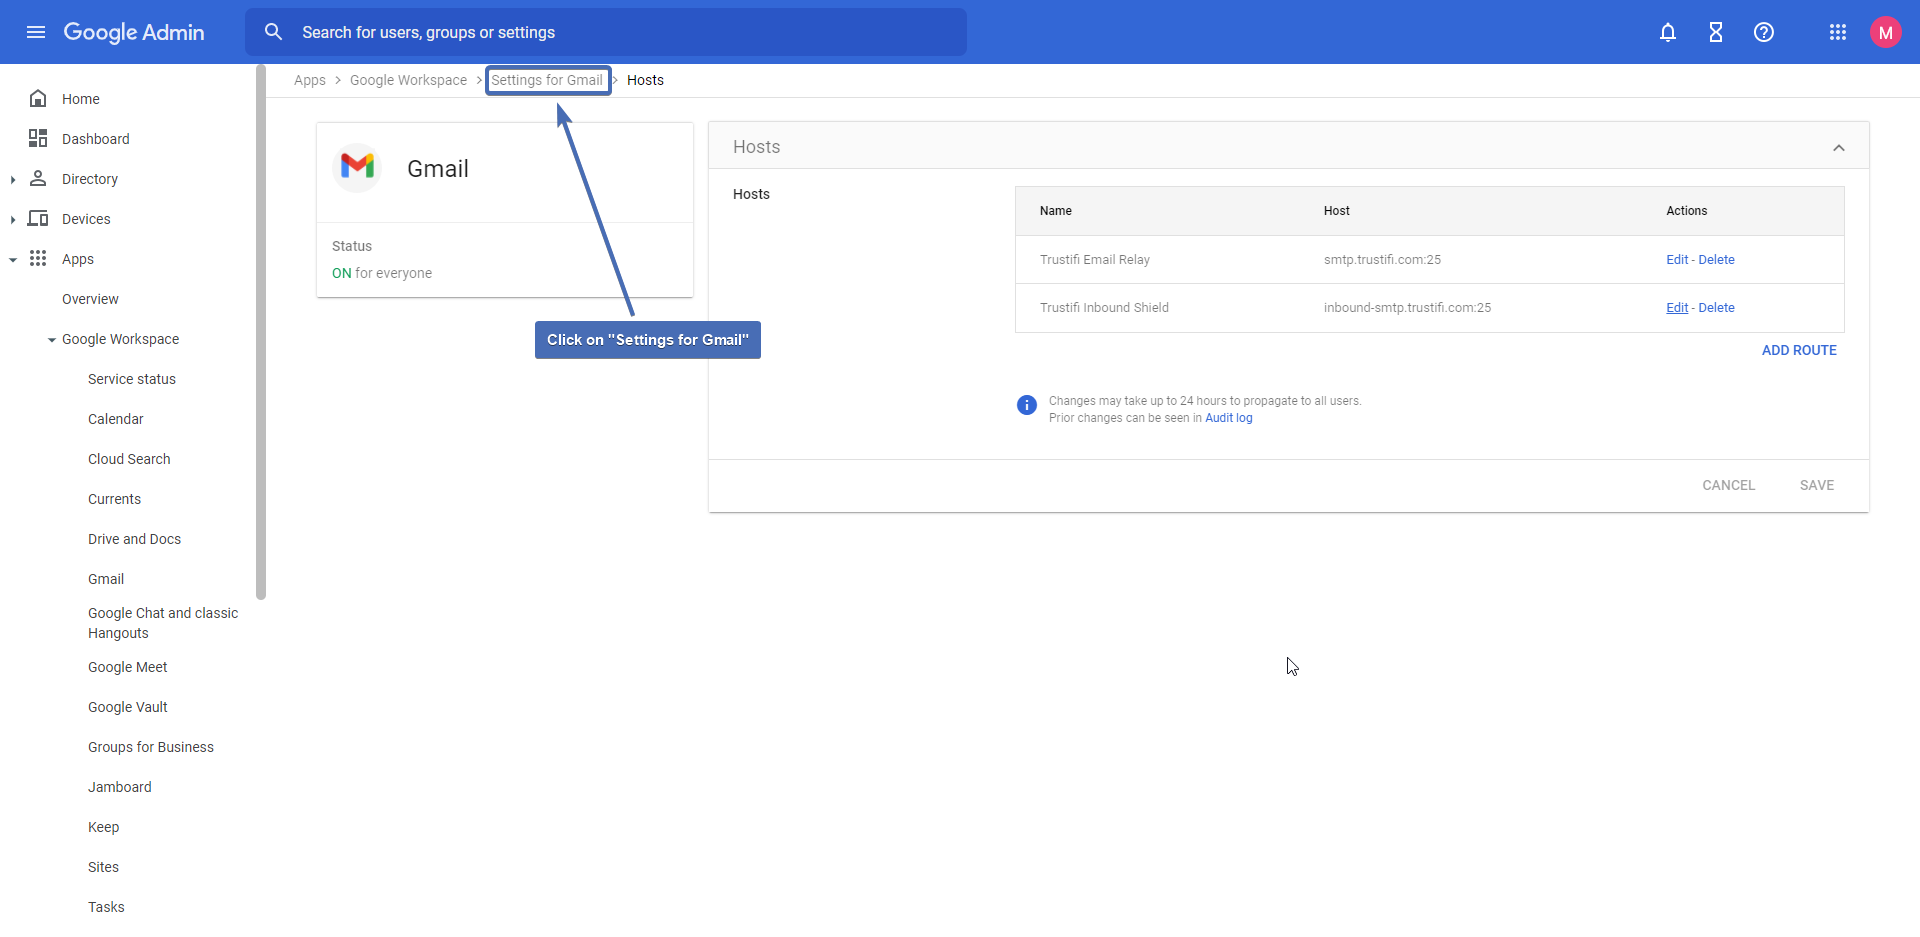
Step 10: Navigating to “Settings for Gmail”
In the navigation bar at the top of the screen, click on “Settings for Gmail“.
Step 11: Navigating to “Compliance”
Scroll down to the bottom of the page and click on “Compliance“.

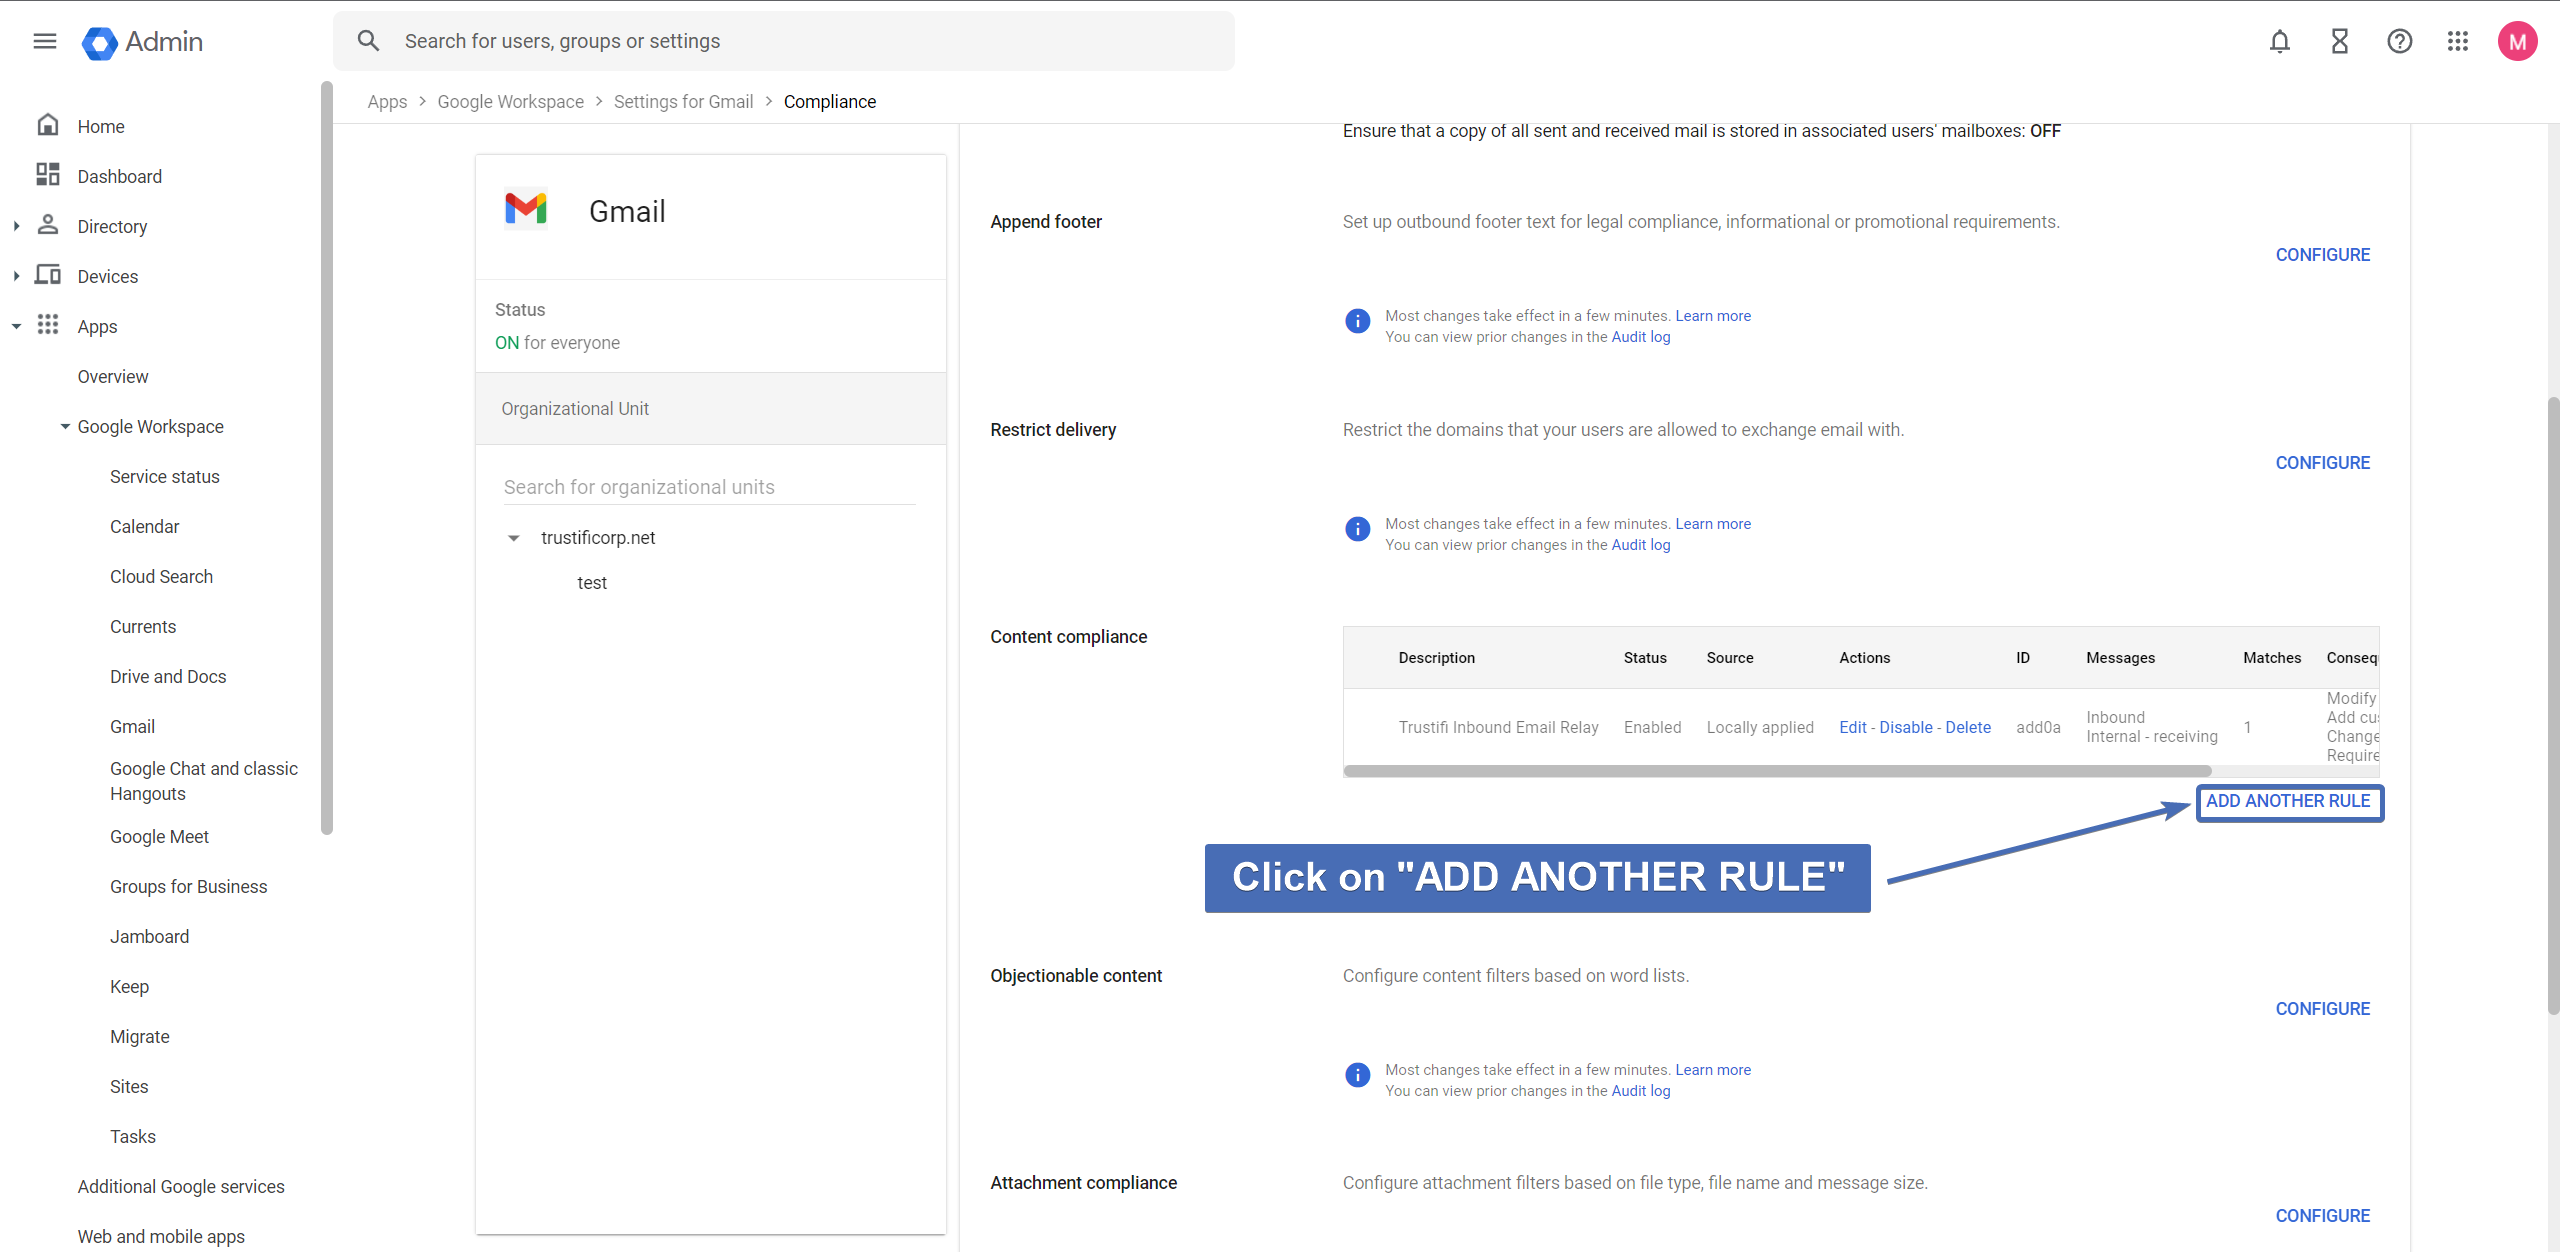
Step 12: Adding a new rule
Now we will need to configure a set of rules to guide mail flow to our new host. In the “Compliance” page, scroll down to the “Content Compliance” section and click on “Add another rule“.
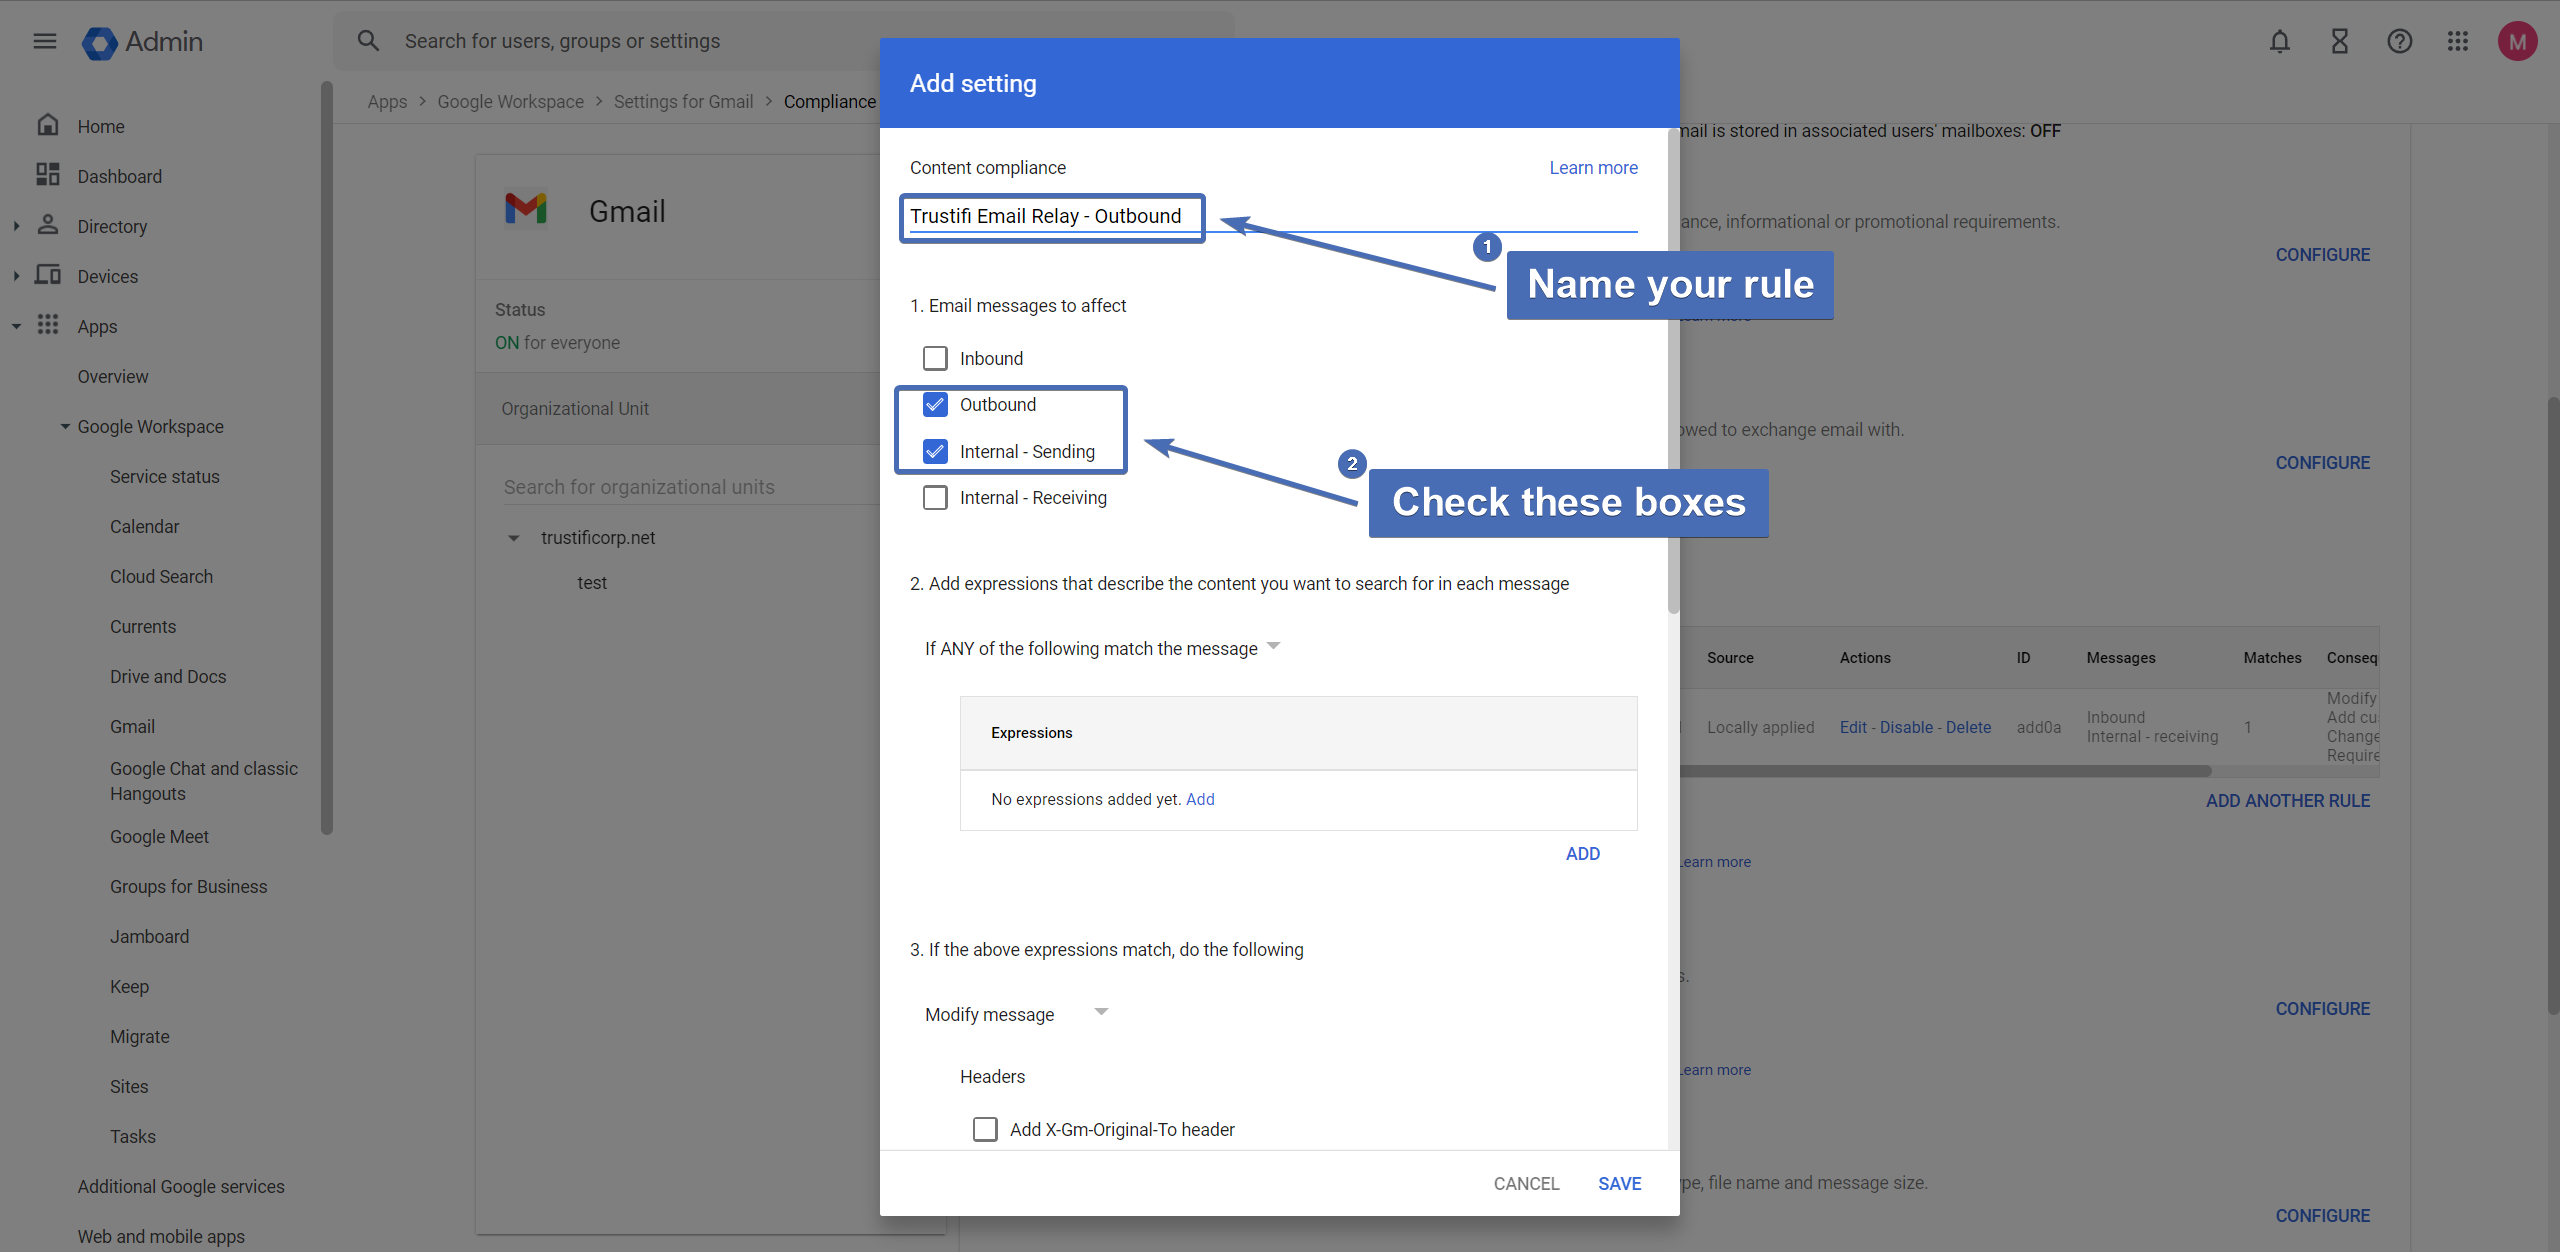
Step 13: Configuring the rule
Name your compliance rule, and check the “Outbound” and “Internal Sending” boxes.
Step 14: Configuring the IP routing condition
In section 2, select “If ALL of the following match the message” and click “Add“.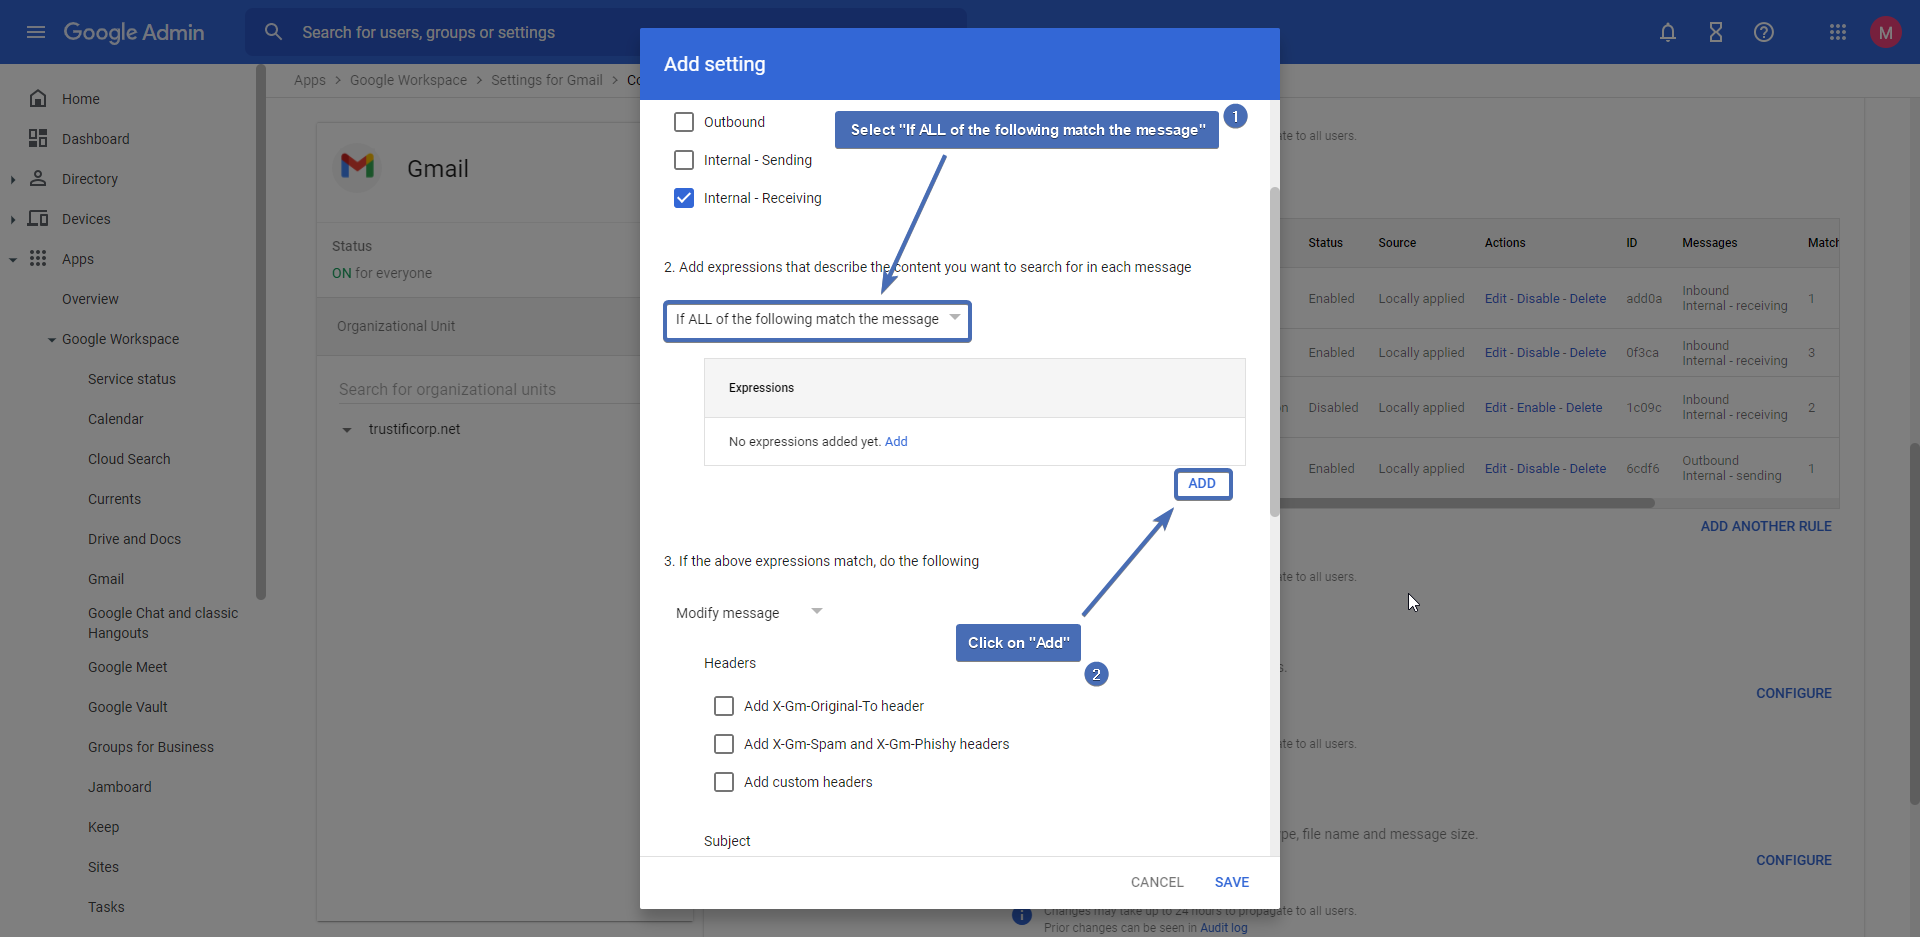
Step 15: Configuring the IP routing condition
This condition is made to skip emails that have already been sent by Trustifi’s inbound IPs, which can result in email loops. Set the following configurations:
Select "Advanced content match"
Under "Location", select "Full headers"
Under "Match type", select "Not matches regex"
Add this regex expression:
^Received[:].+(3[.]93[.]139[.]220|3[.]93[.]243[.]176|3[.]221[.]25[.]19|34[.]192[.]117[.]166|44[.]209[.]231[.]3|35[.]172[.]145[.]174|52[.]54[.]159[.]237|52[.]73[.]143[.]252|3[.]251[.]32[.]127|54[.]195[.]145[.]1|3[.]227[.]182[.]193|54[.]161[.]96[.]109|52[.]89[.]220[.]23|52[.]37[.]228[.]167)
Click "Save"
.png)
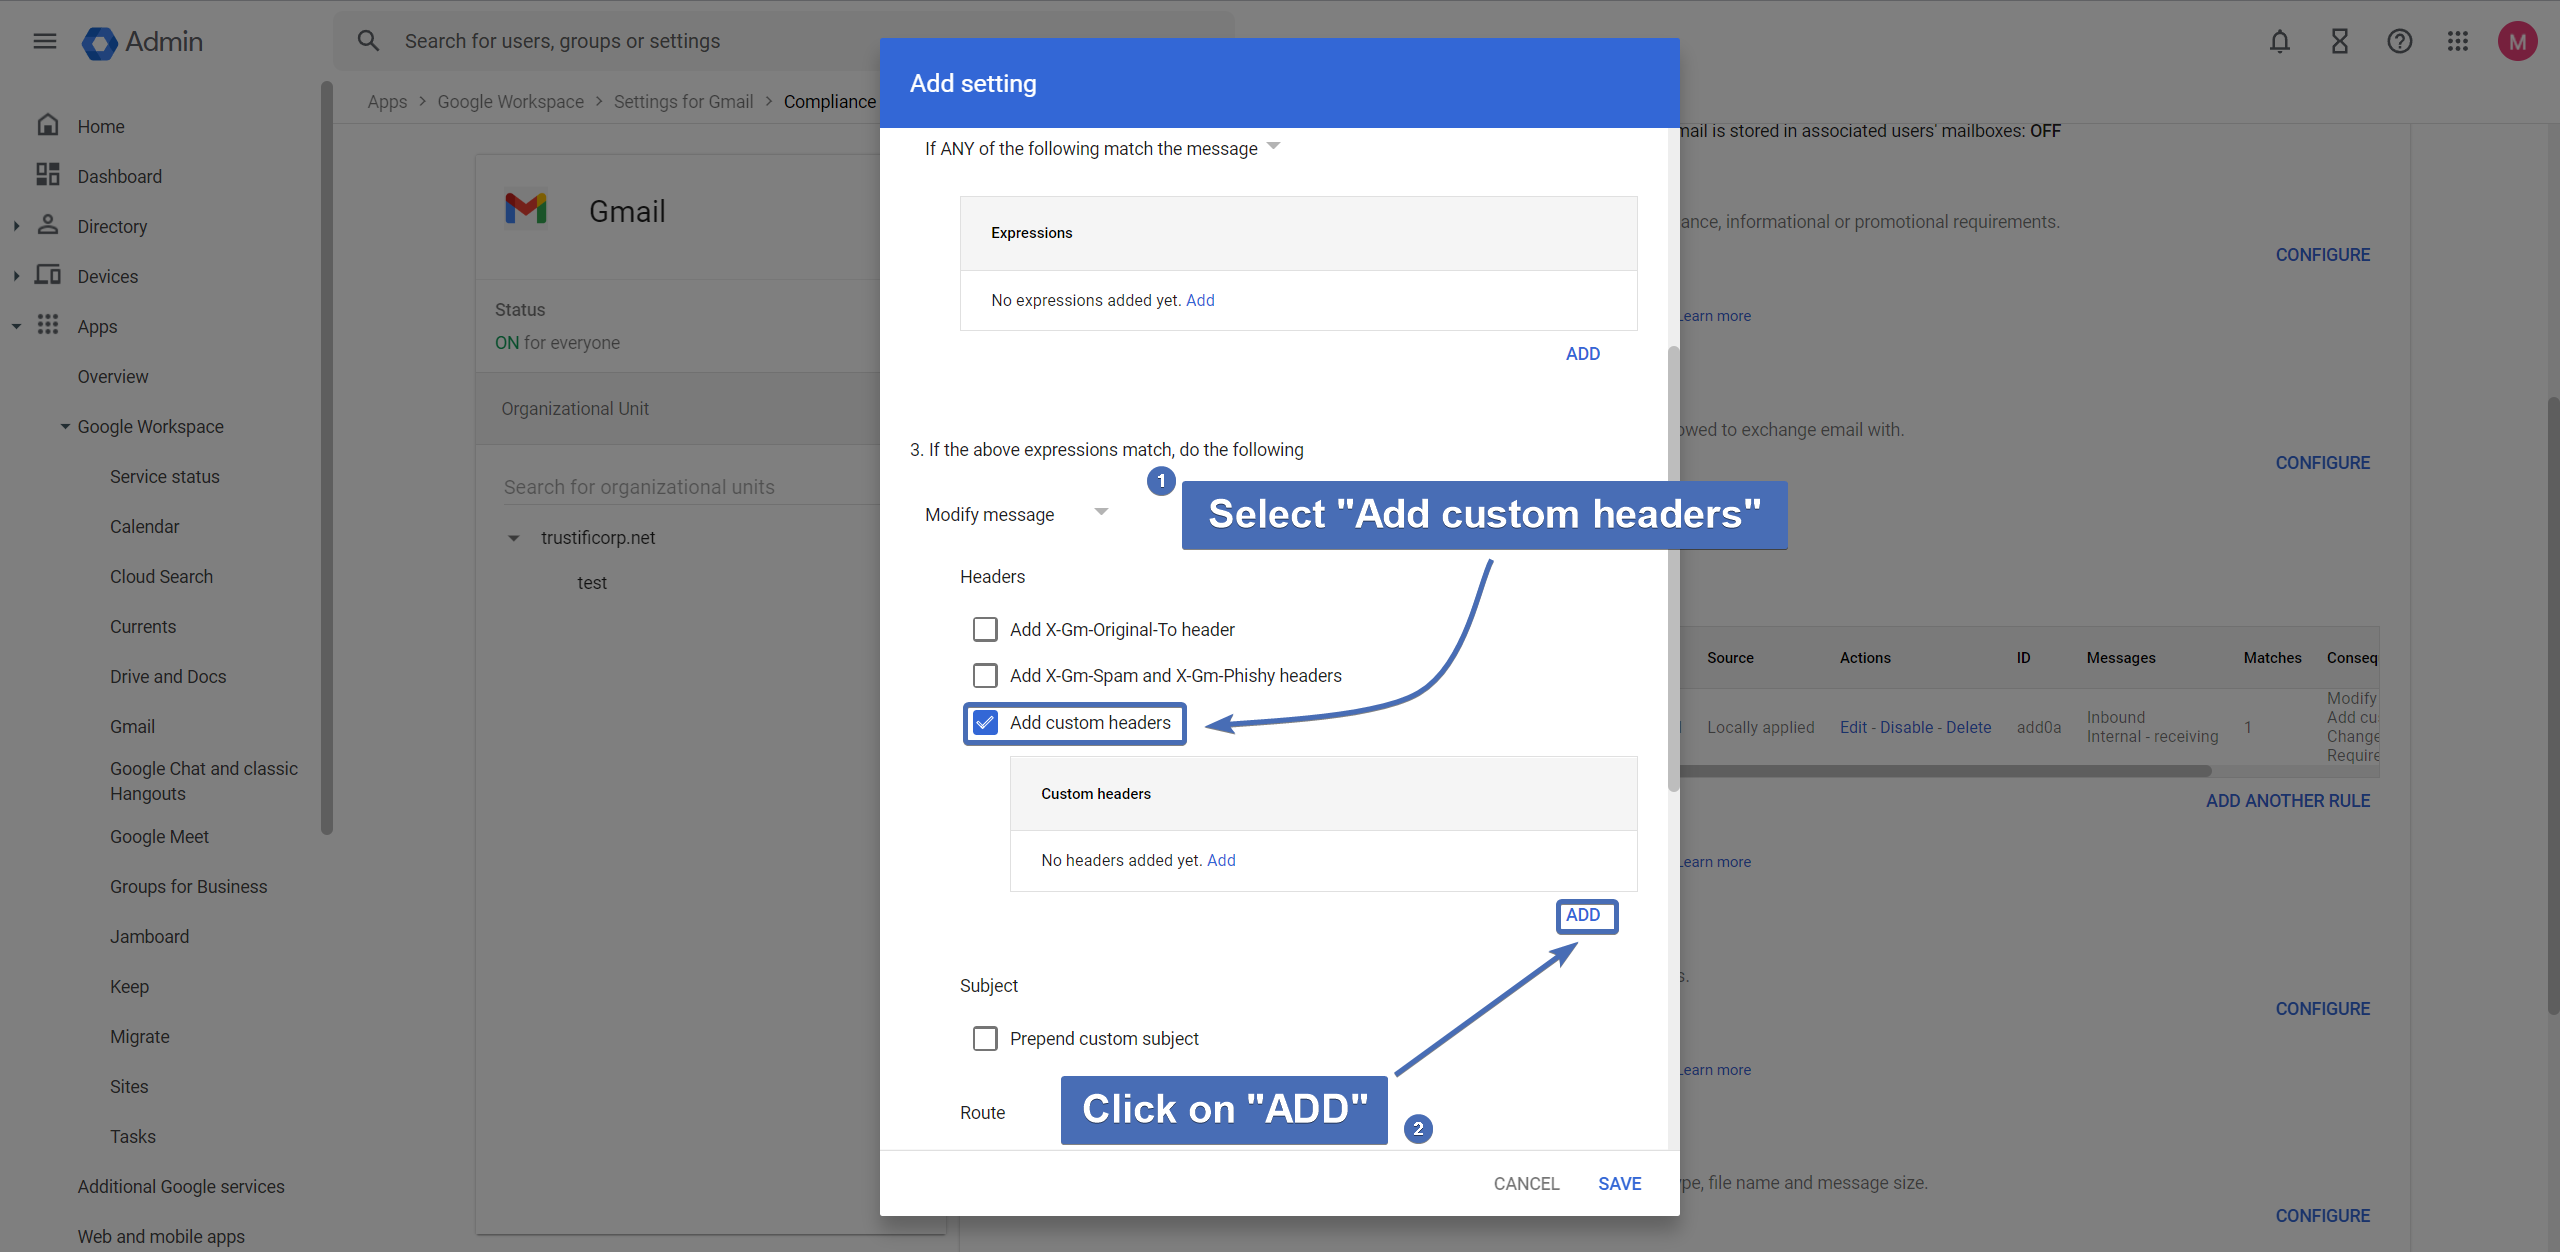
Step 16: Adding a custom header
Scroll down to section number 3, make sure the “Modify message” is selected, and check the “Add custom headers” checkbox. Click on “Add” to add the headers (see next step).
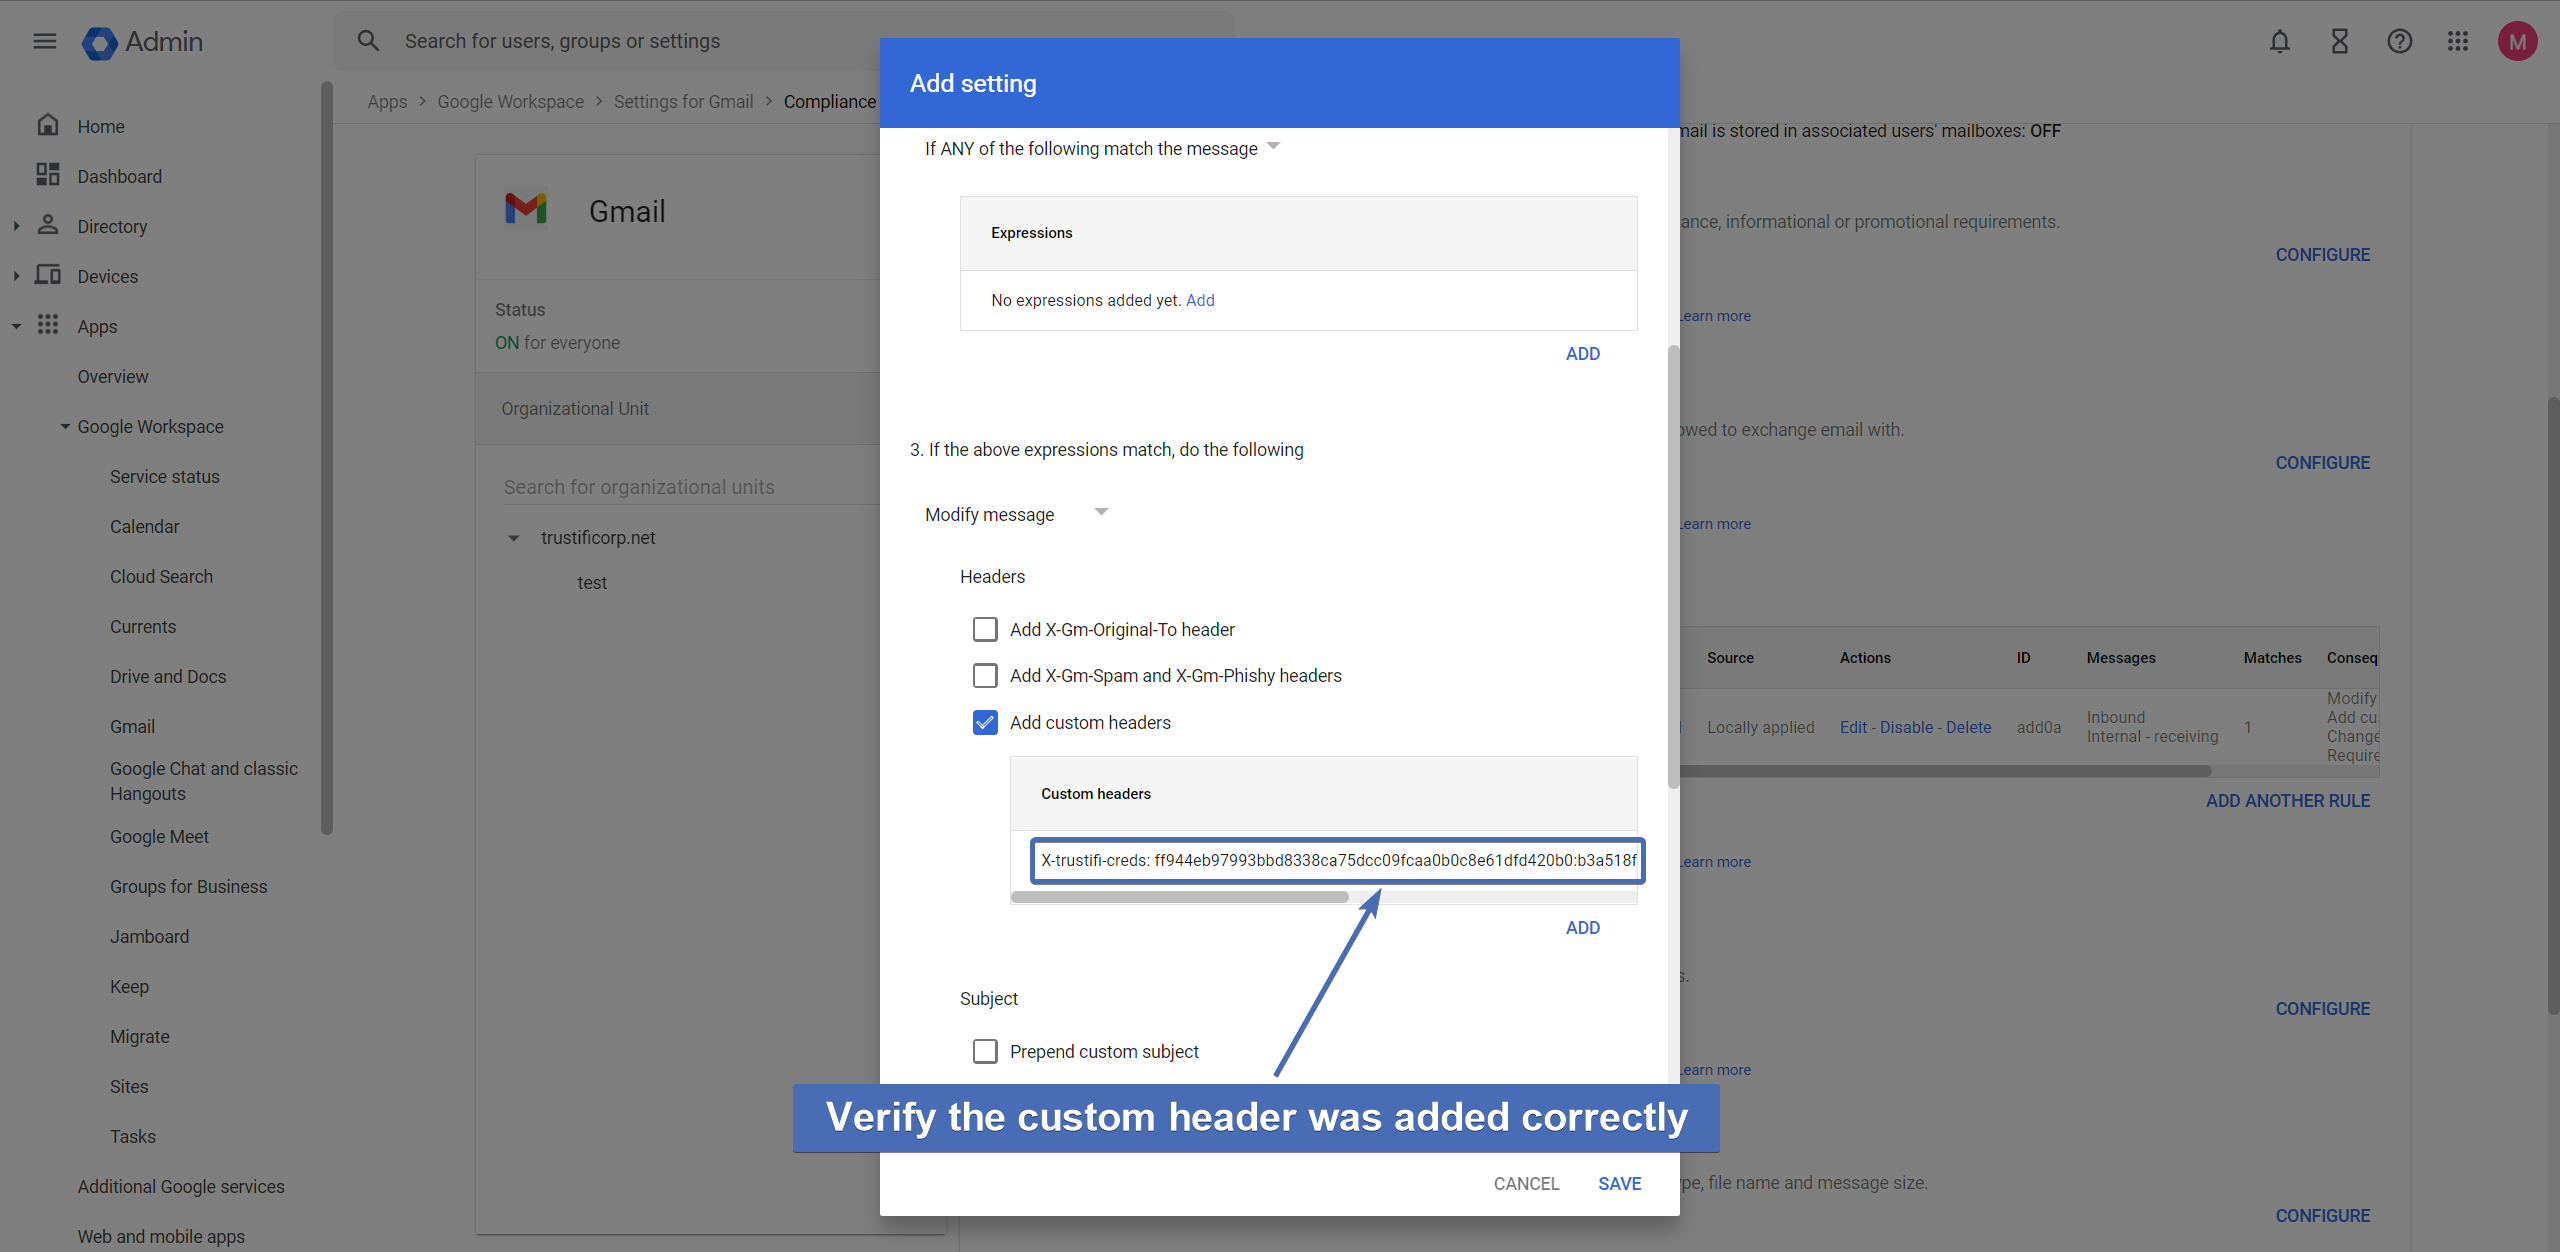
Step 17: Adding the custom header
In the “Header key” field, enter the value “trustifi-creds” (without the quotes).
Note: the full header value is “x-trustifi-creds“. However, since Google adds the initial “X” by default, it’s important to only add the value “trustifi-creds” here to avoid a malformed header.
In the “Header value” field, enter the value copied over from step 6. Once both values have been entered, click on “Save“.

Step 18: Verifying the custom header
Make sure the custom header key and value were added correctly before continuing.
Step 19: Setting the route
Now we will have to set the route for this routing rule for our new host. Check the “Change route” box, click on “Normal routing” and select the host you’ve created by it’s name.
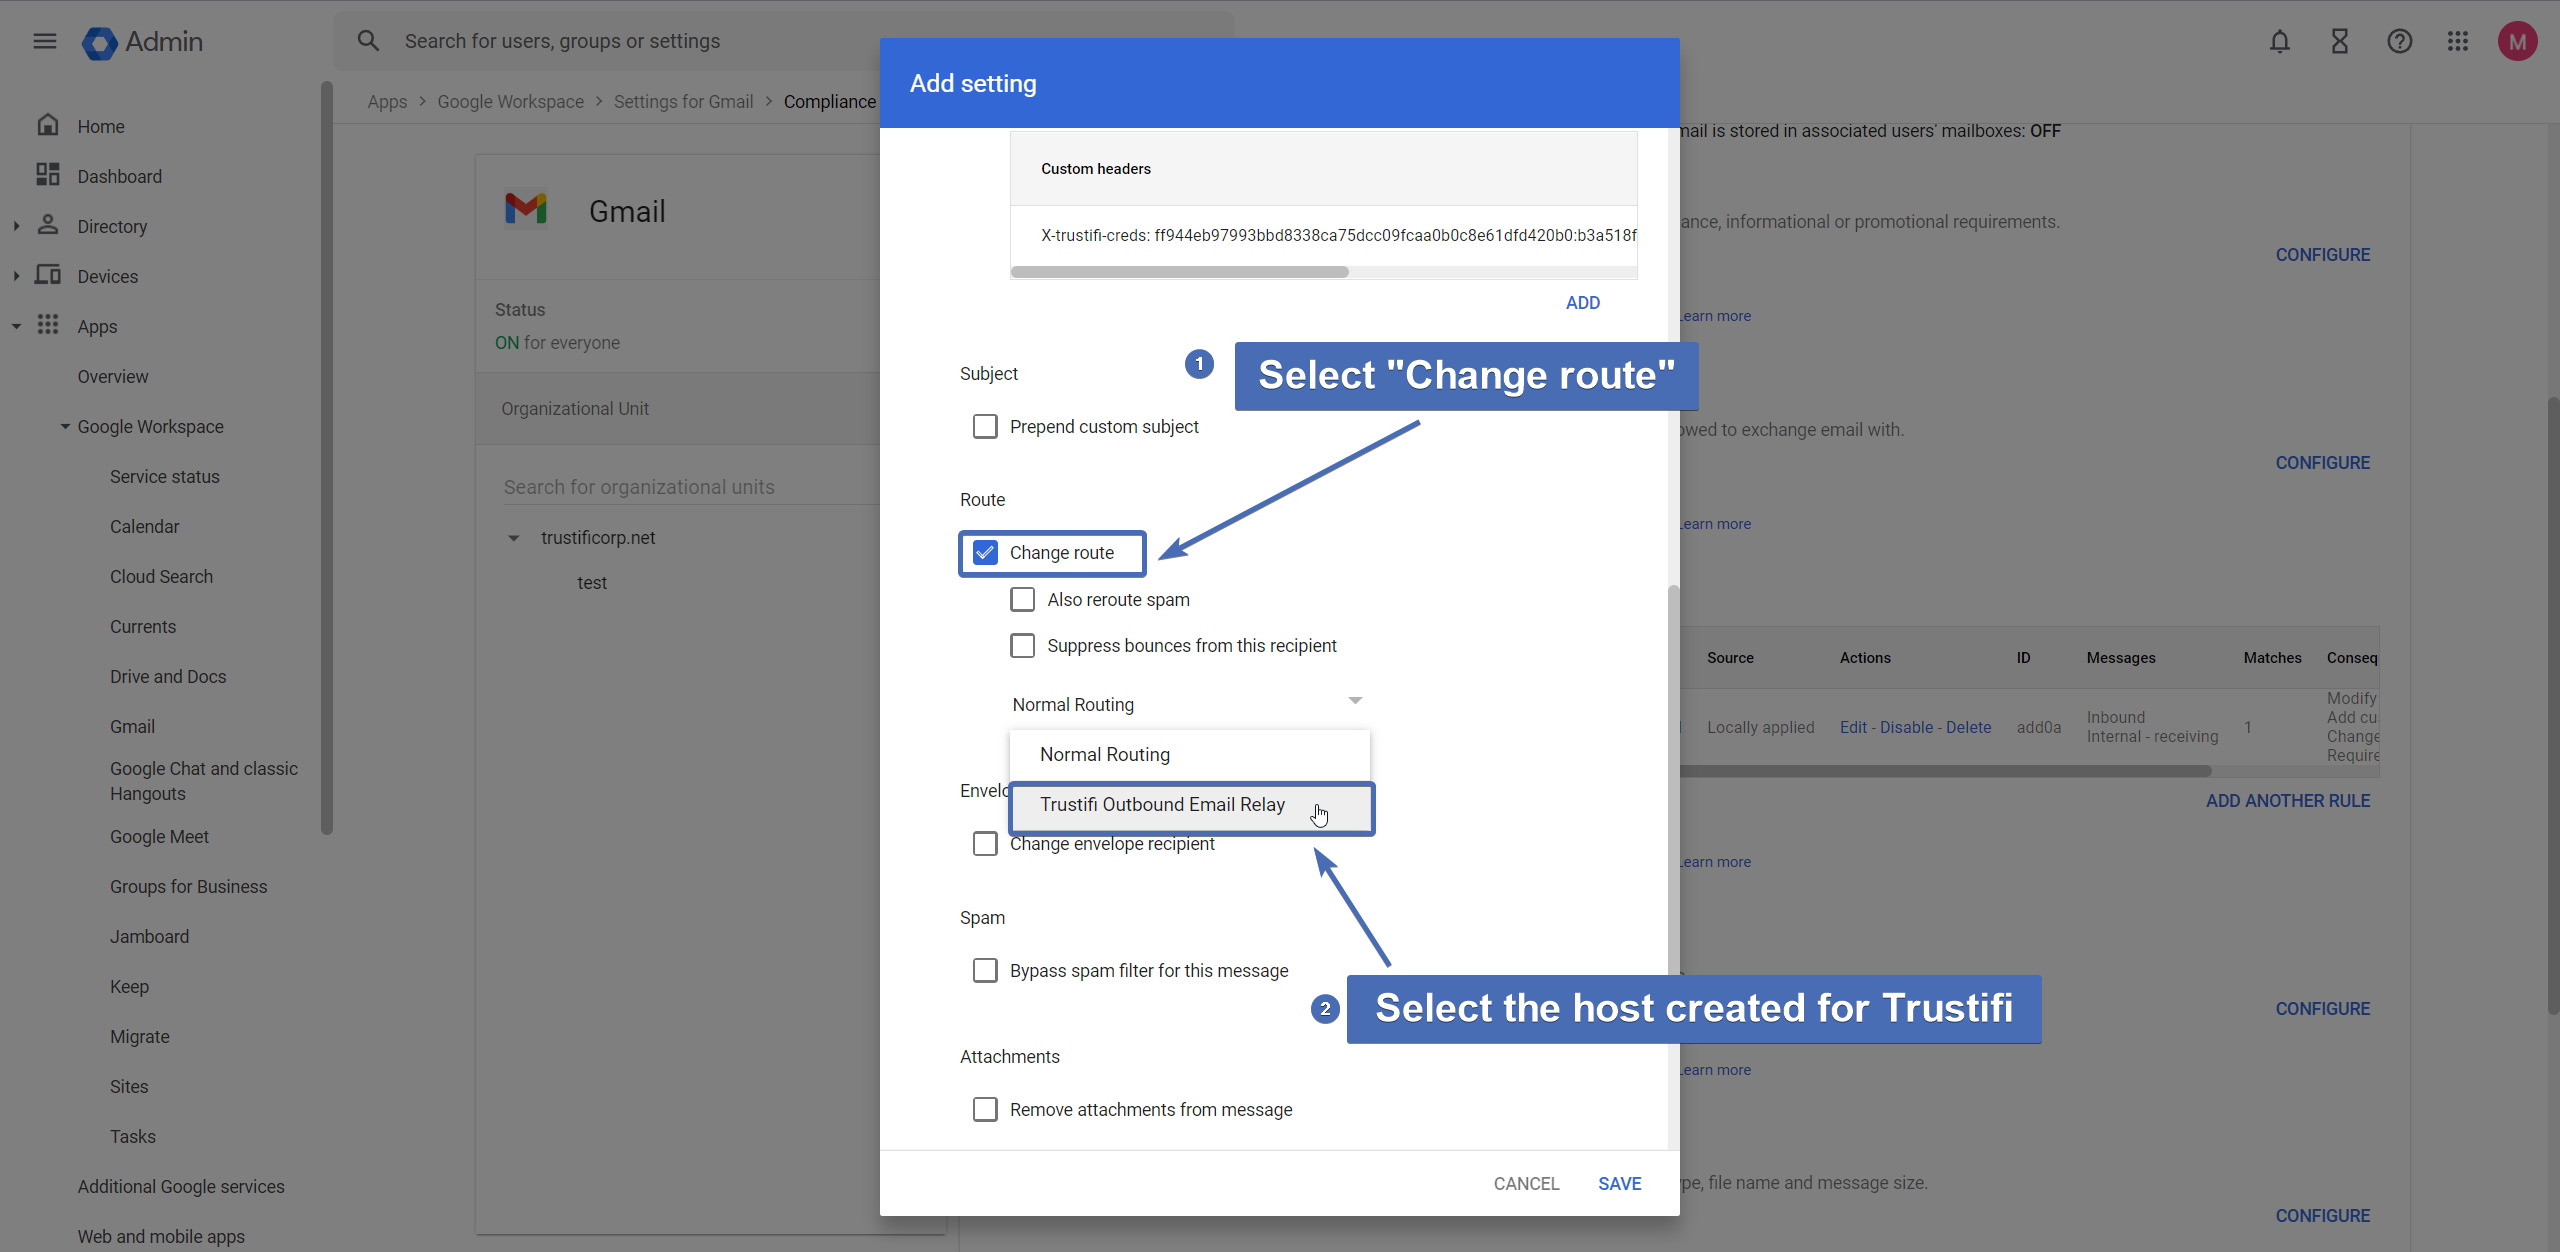
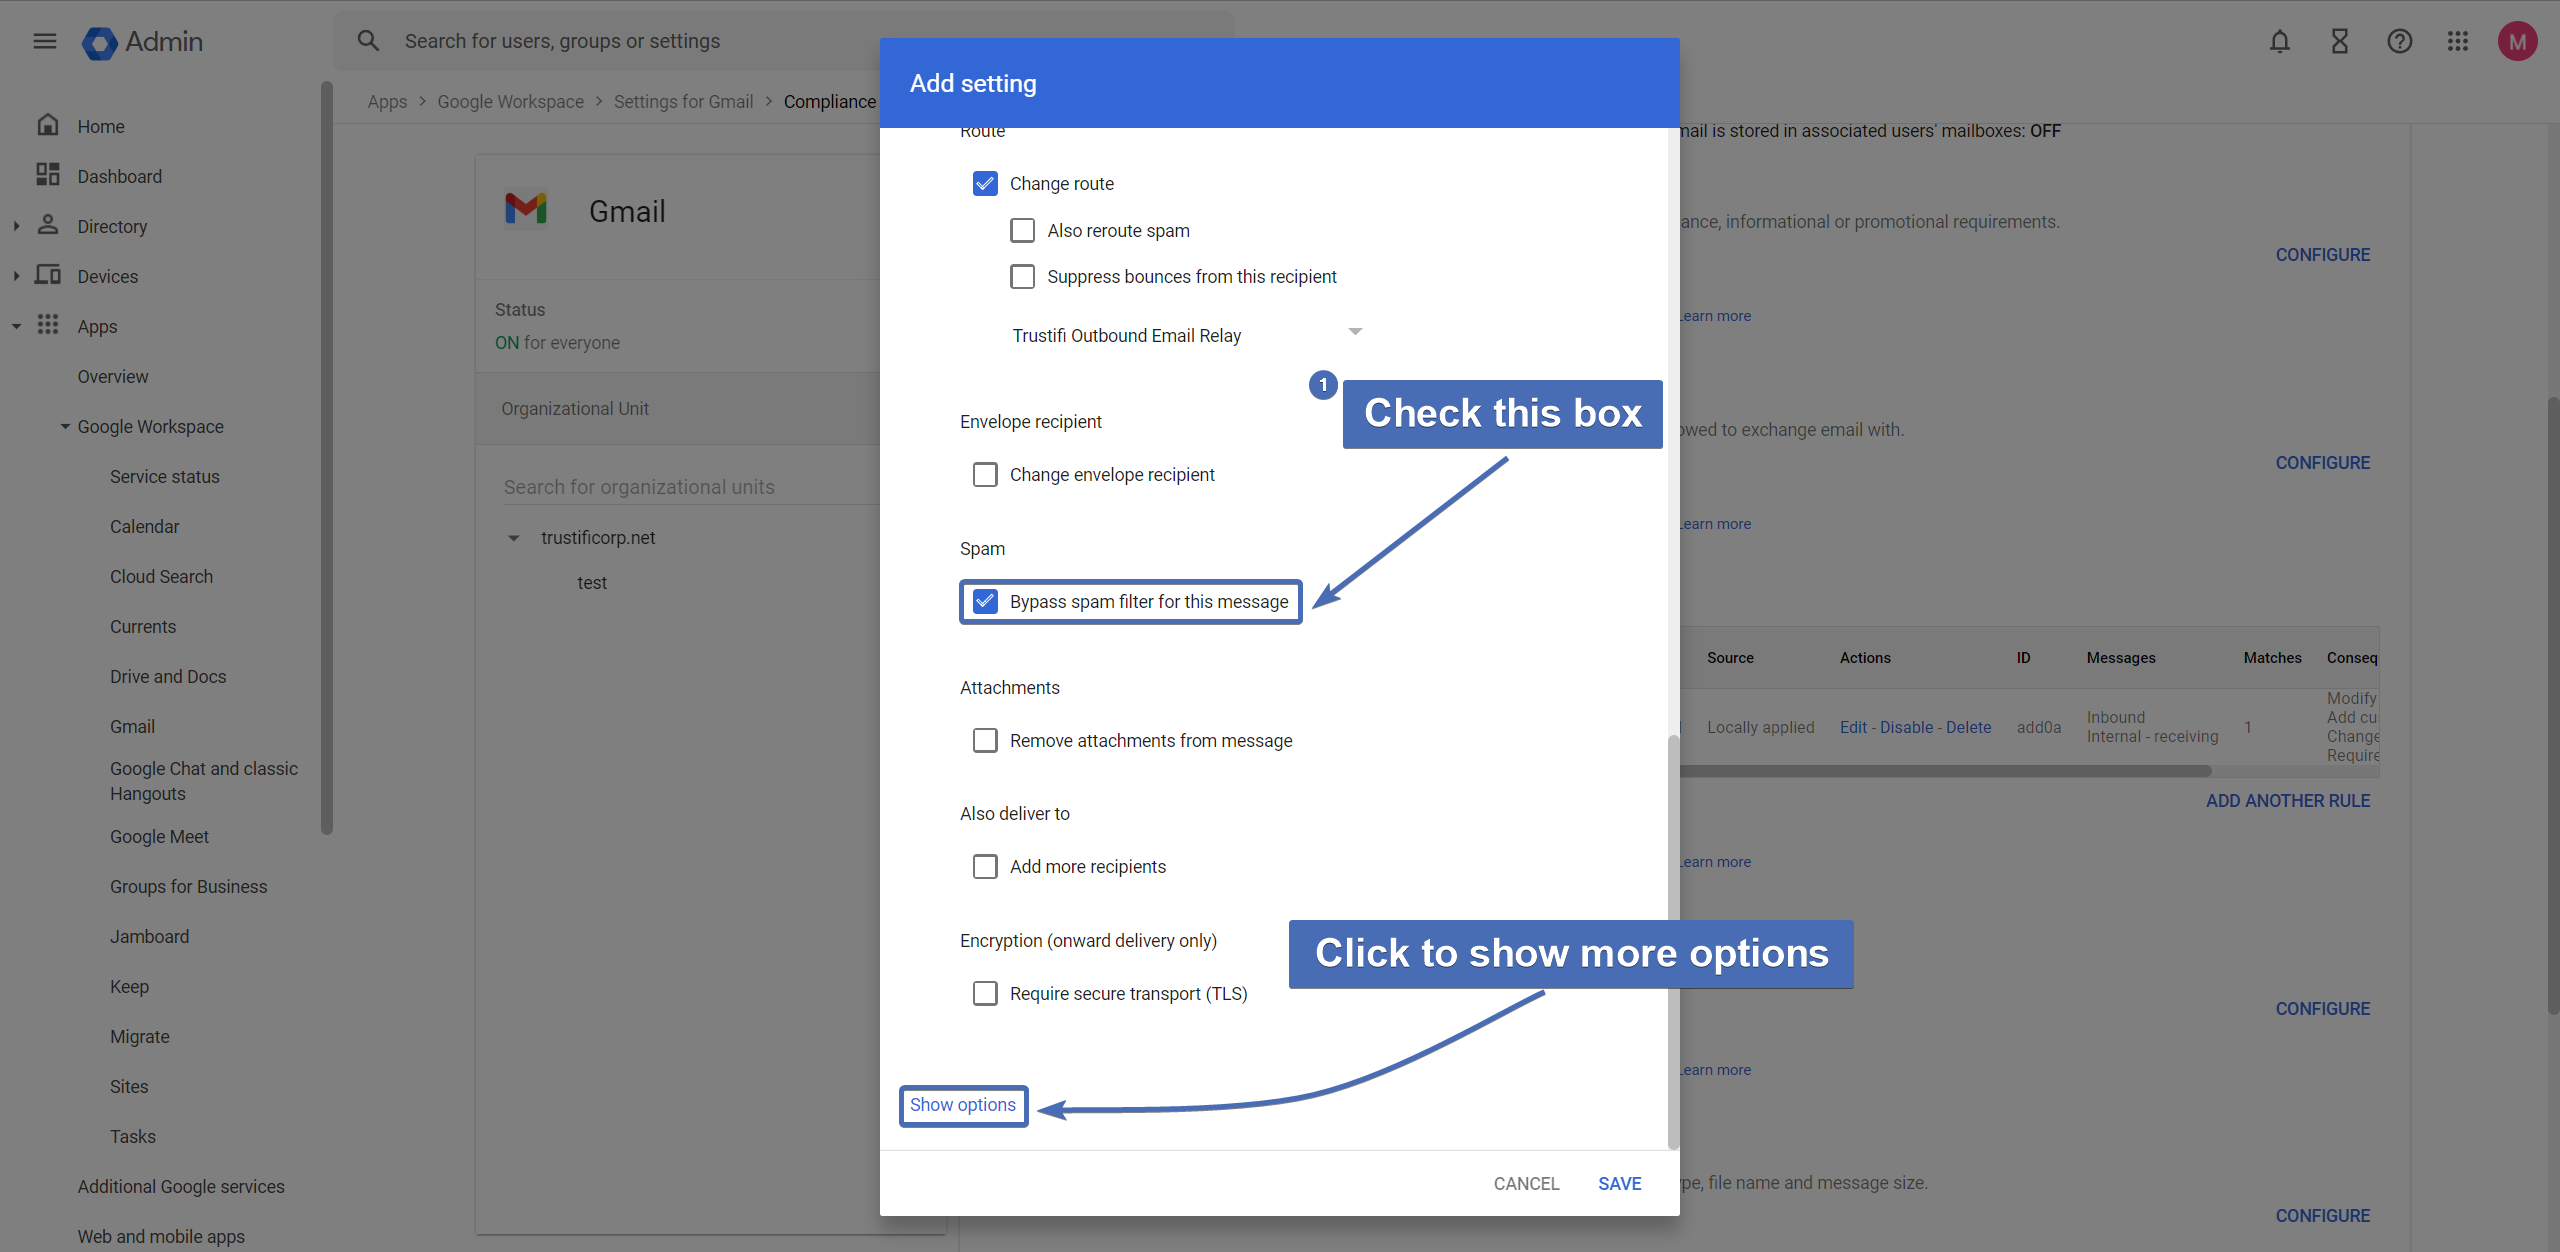
Step 20: Bypassing spam and displaying more options
Under the “Spam” section, check the box for “Bypass spam filter for this message“. Then, click the “Show options” button to display advanced routing options.
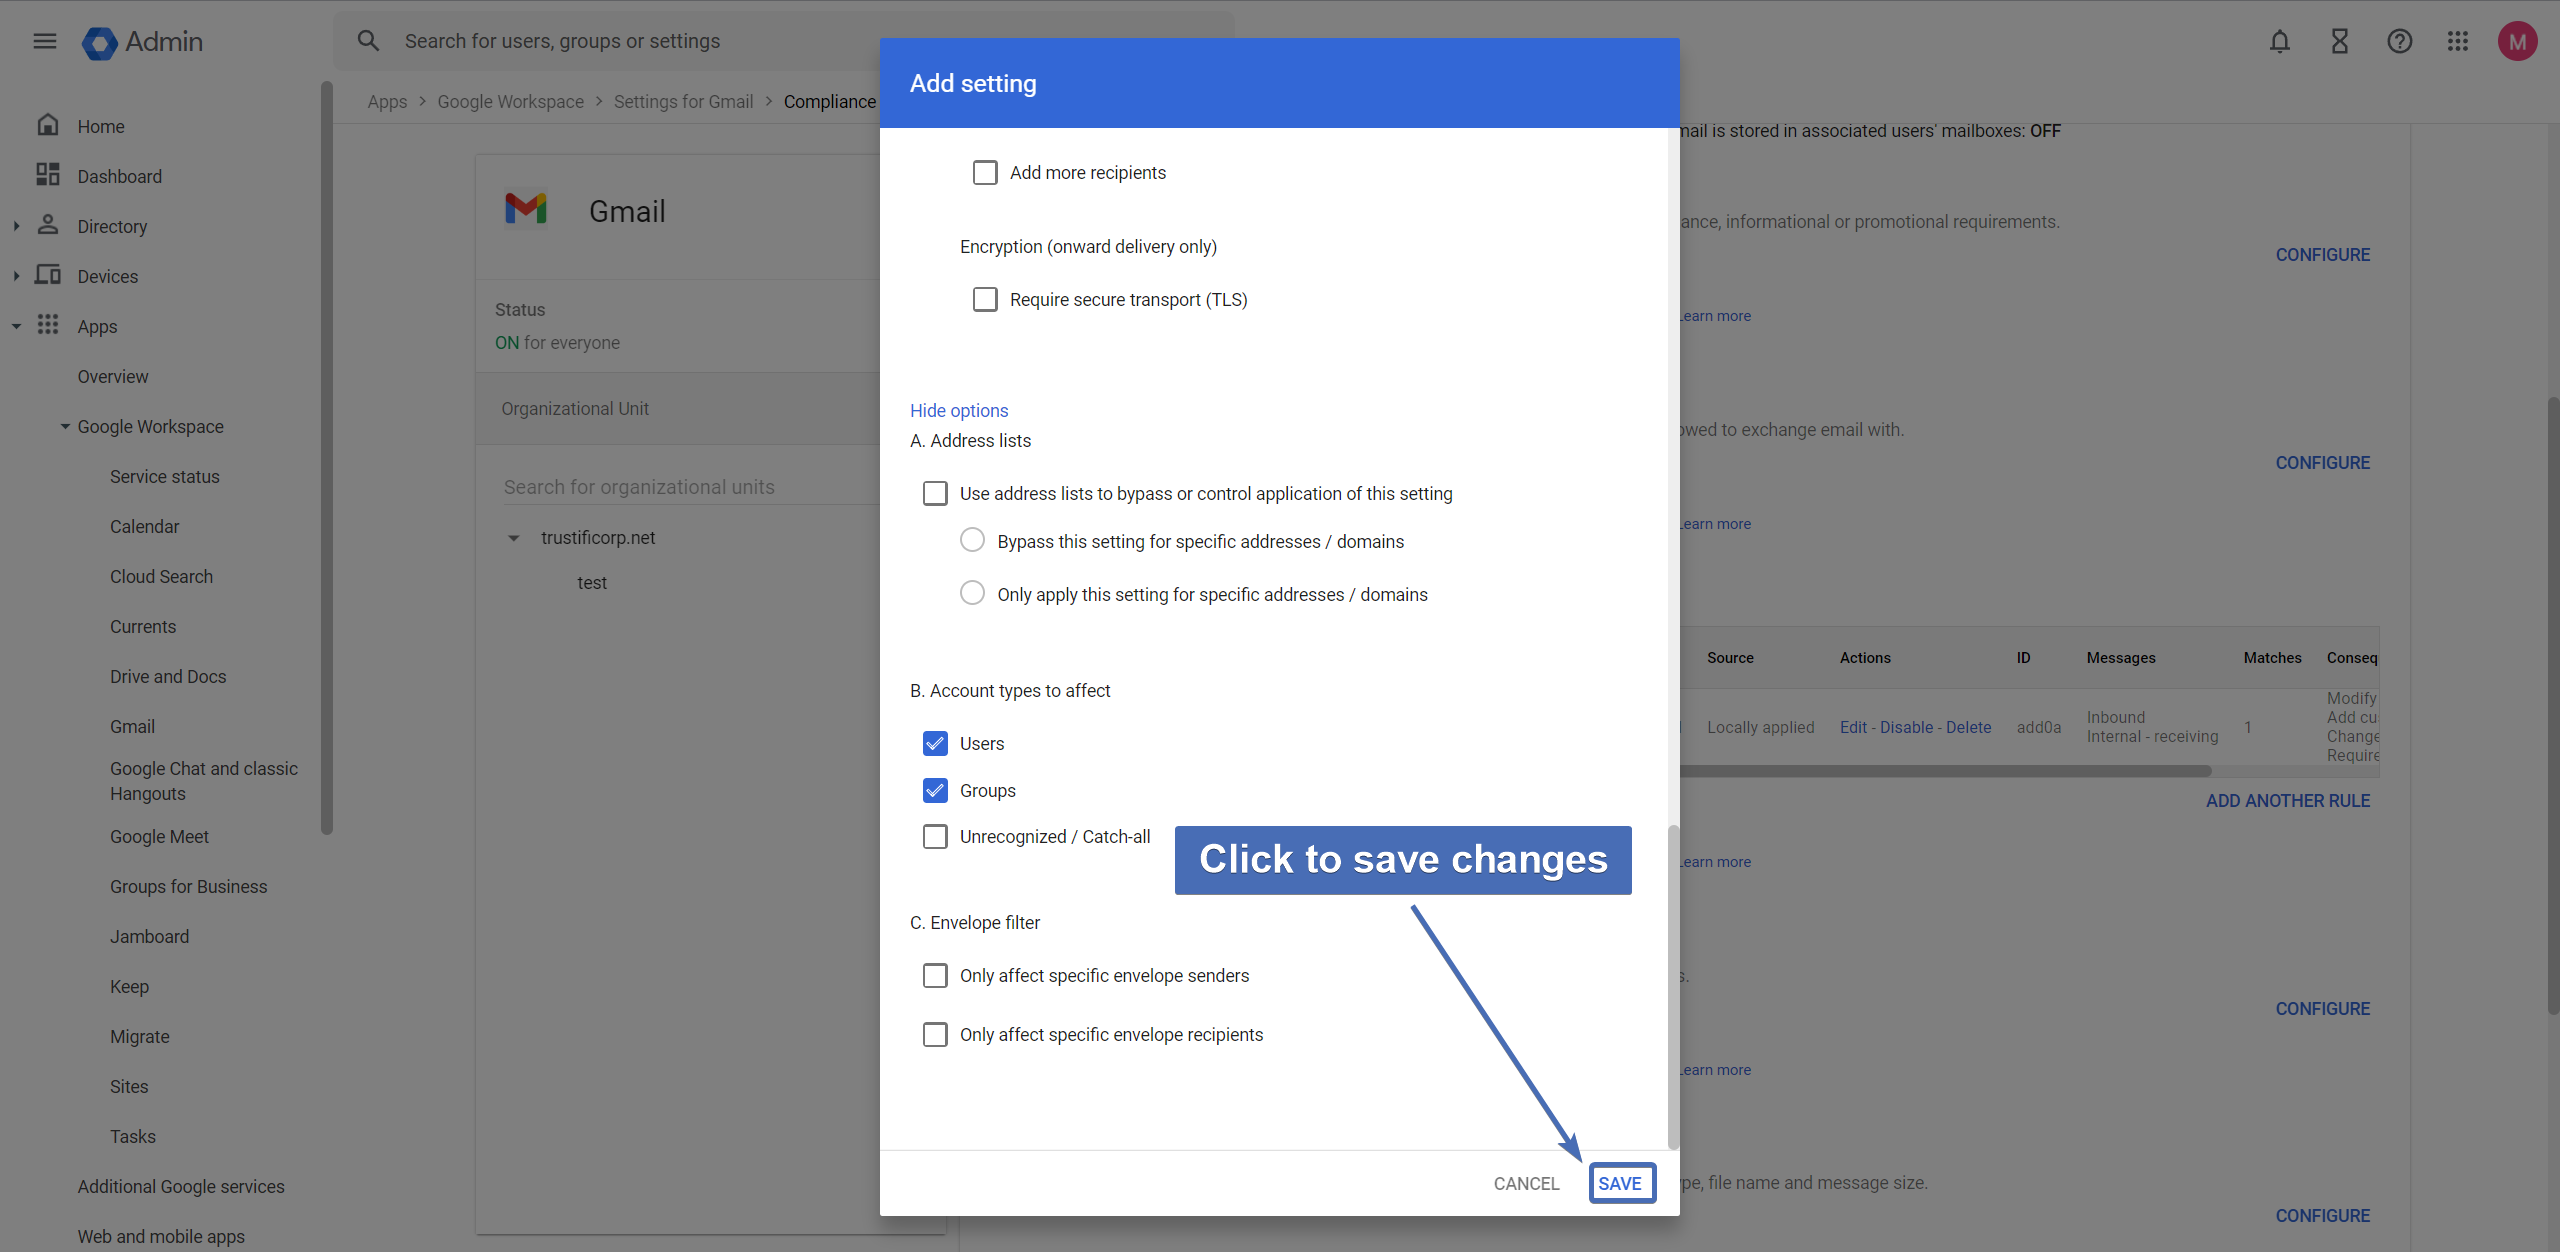
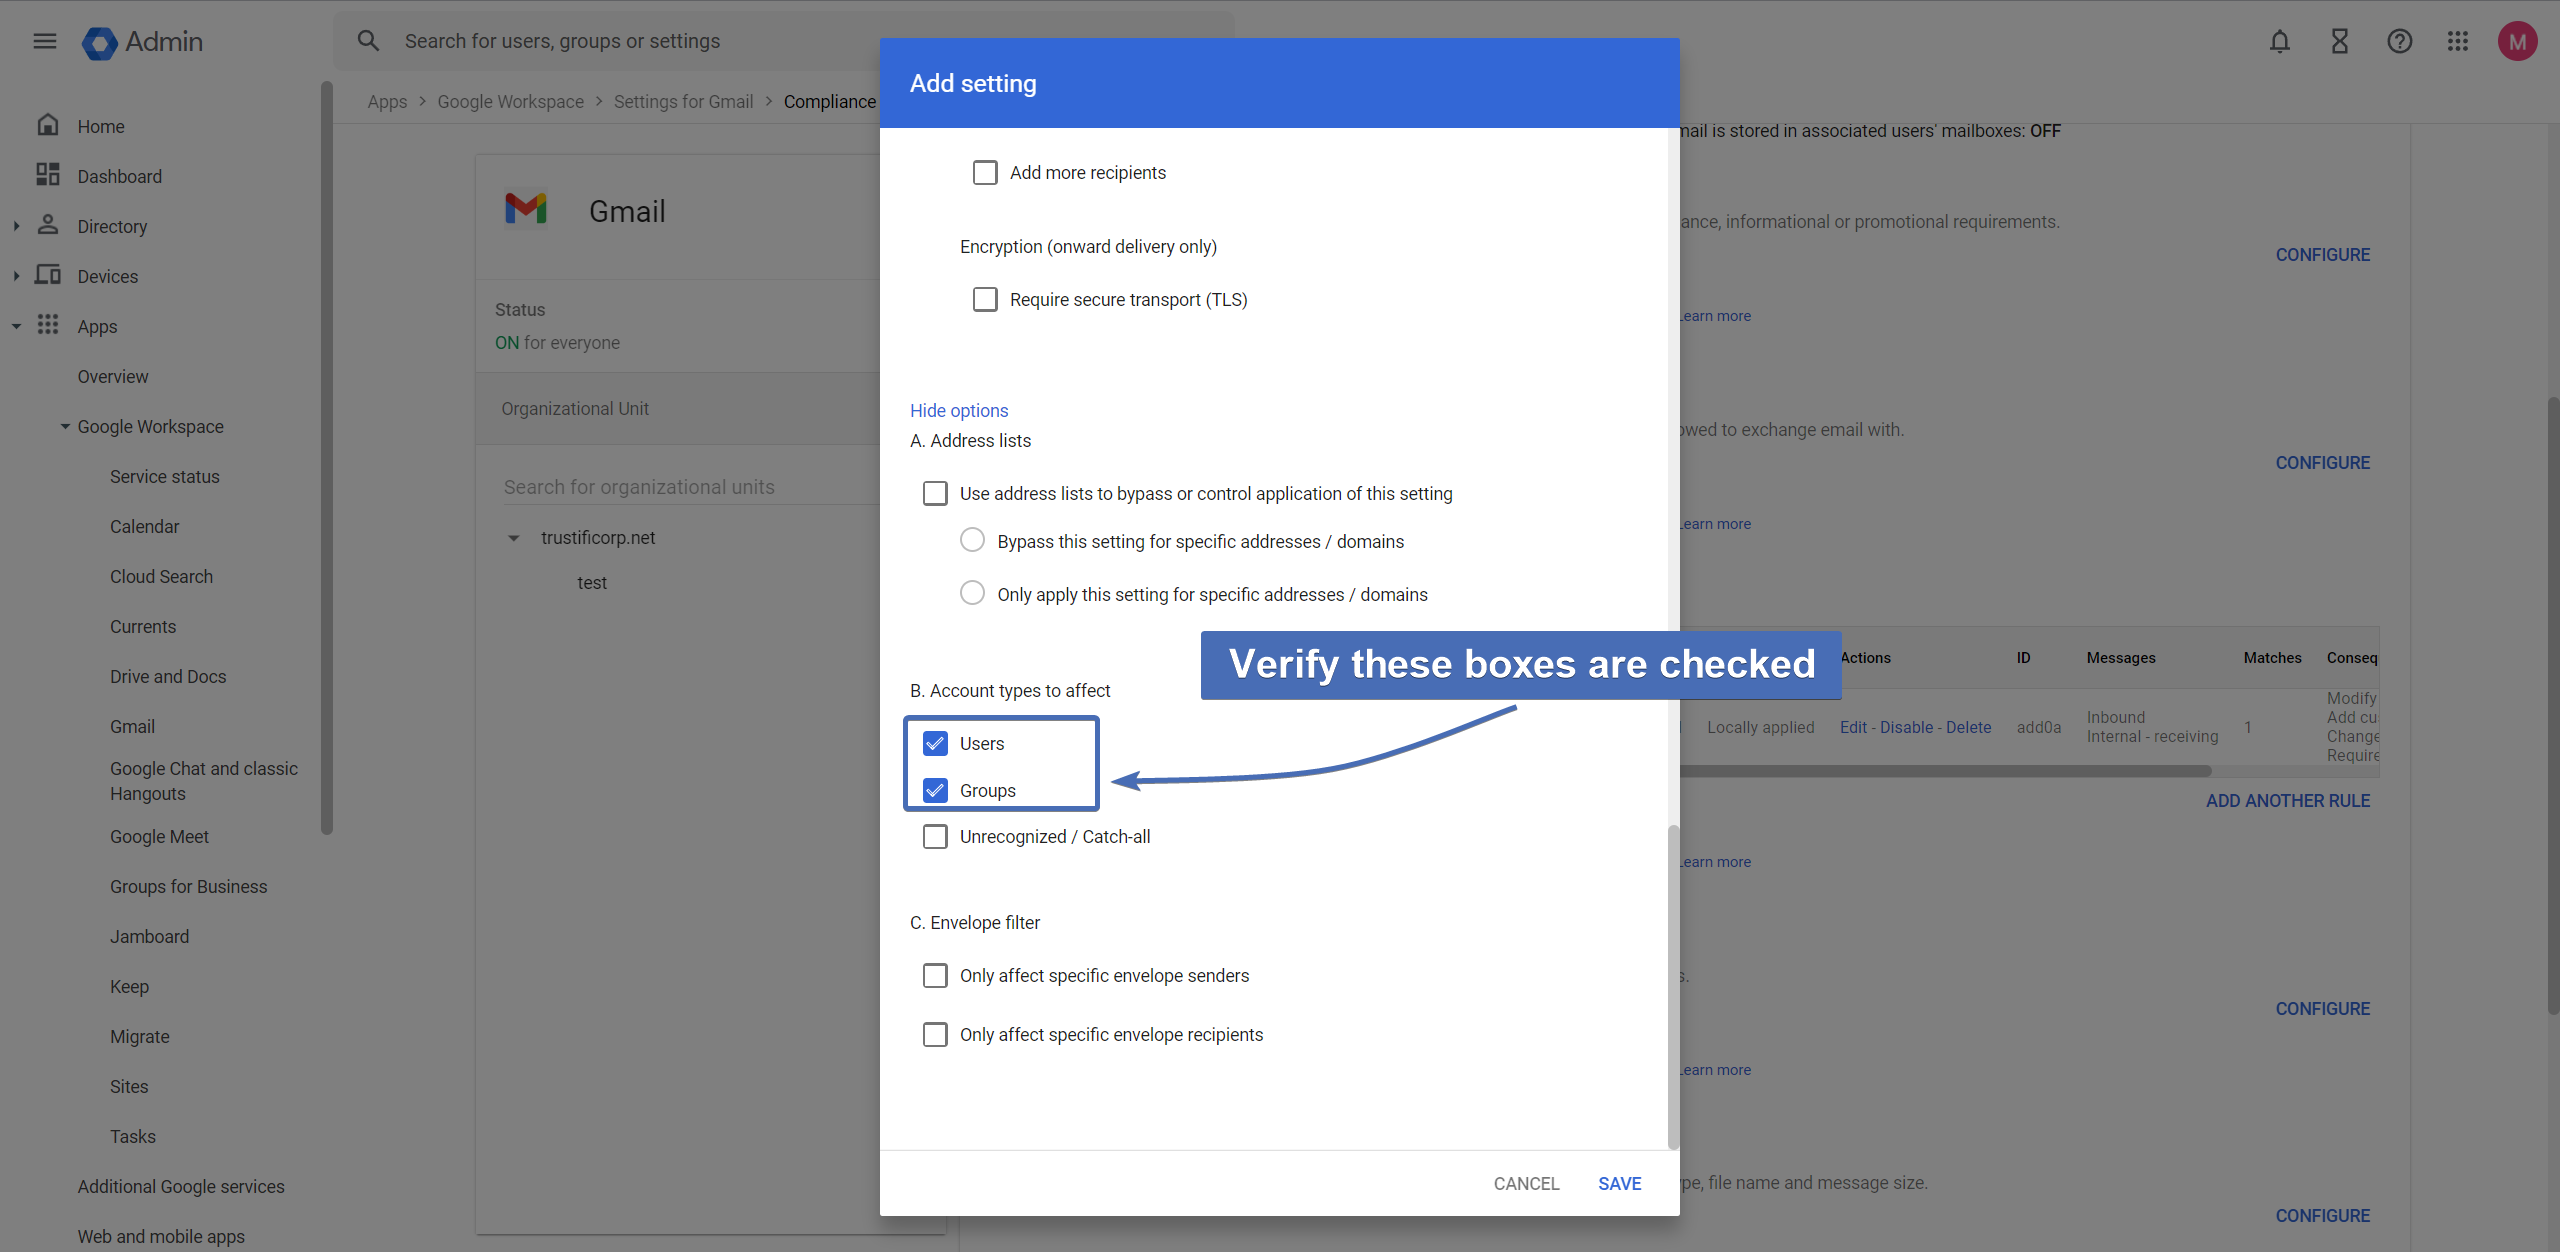
Step 21: Selecting account types to affect
Under “Account types to affect“, make sure both “Users” and “Groups” are selected.
Step 22: Deployment for a limited scope
If you wish to deploy the email relay in a limited scope (instead of having all users affected), view our guide for Limited Scope Deployment and follow the steps there.
Step 24: Saving the changes
Once all the correct route changes have been made, click on “SAVE” at the bottom-right corner.