To make sure emails sent to groups are delivered correctly, you will need to import your groups from Google Workspace into Trustifi.
Follow the steps below to perform the groups integration.
Step 1: navigating to “Mail Server Integration”
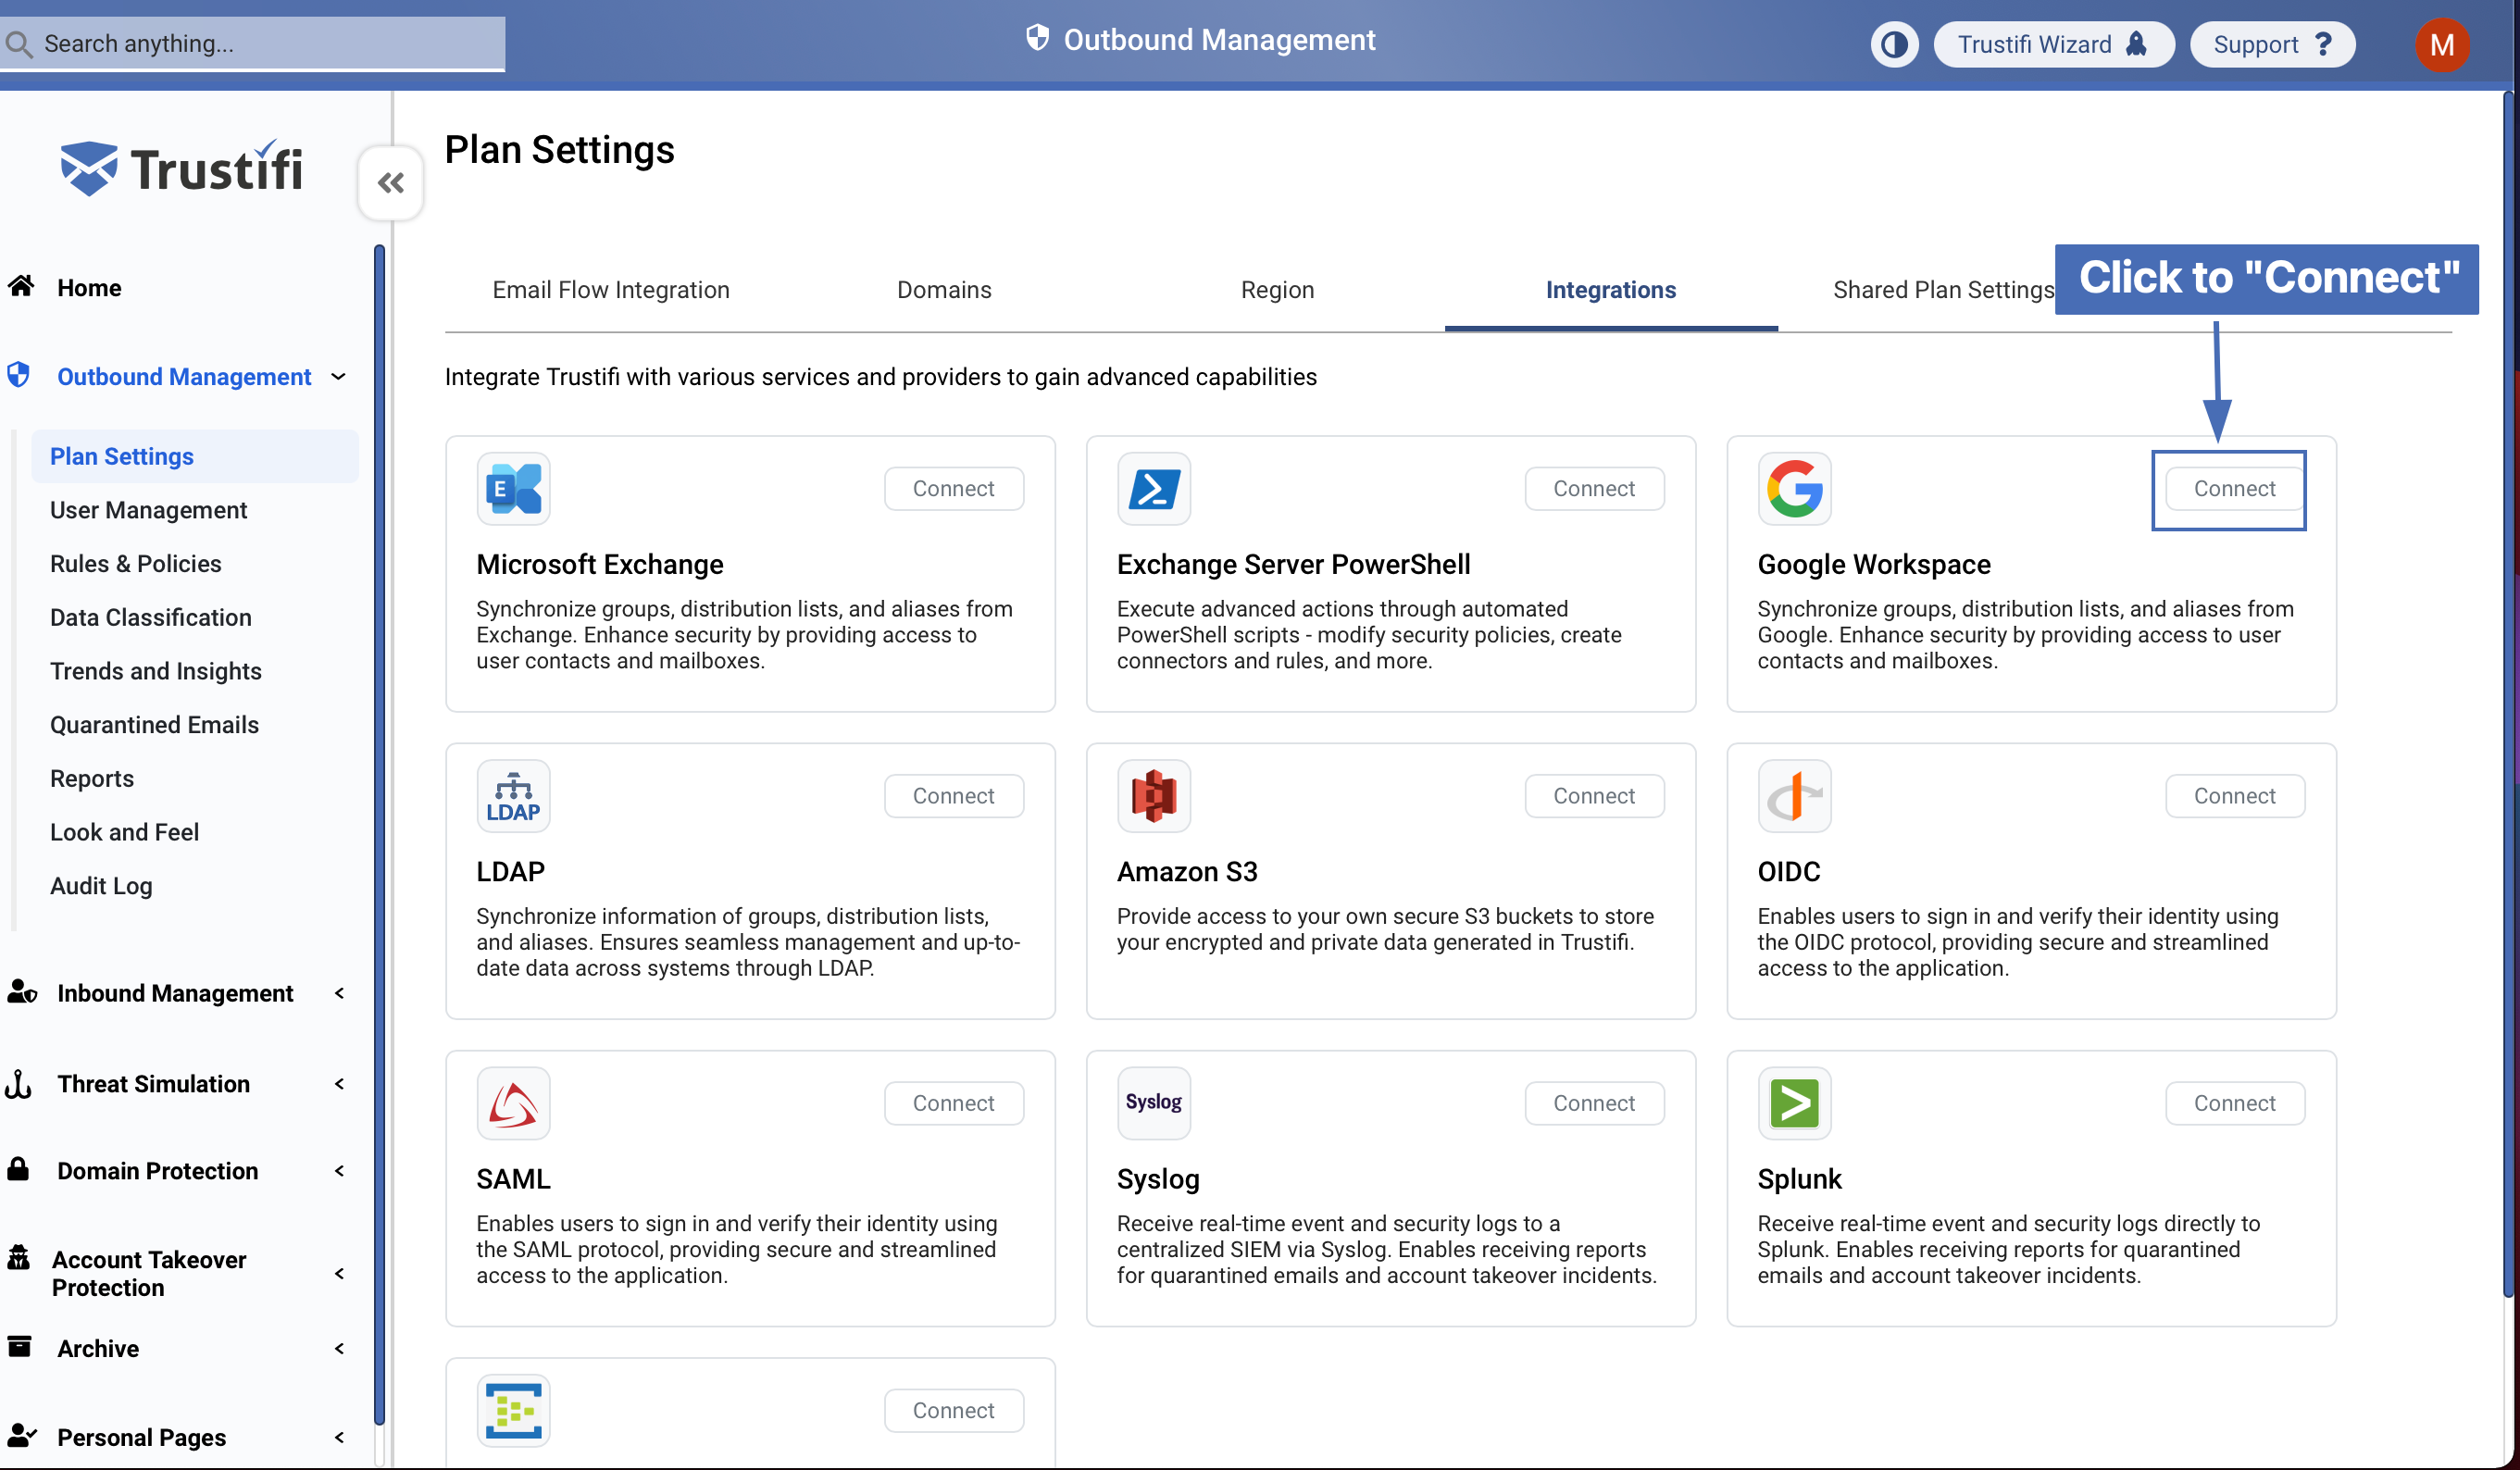
First, log in to the Trustifi web portal and click on “Outbound Management” and then the “Plan settings” page.
Now, click on the “Integrations” tab.
Step 2: connecting to Google Workspace
Under “Integrations”, make sure the selected integration is “Google Workspace”. The initial status will be “Disconnected”. Now, click on the “Connect” button.
After the “Connect” button is clicked, a pop-up window will open. In this pop-up click on the “Connect” button again.
Step 3: navigating to the Google Admin portal
After the “Connect” button is clicked, a pop-up window will open. In this pop-up, we will enter the relevant credentials for creating the integration.
First, we will need to open the Google Admin portal in a new tab or window and enter the Google Admin credentials to connect.
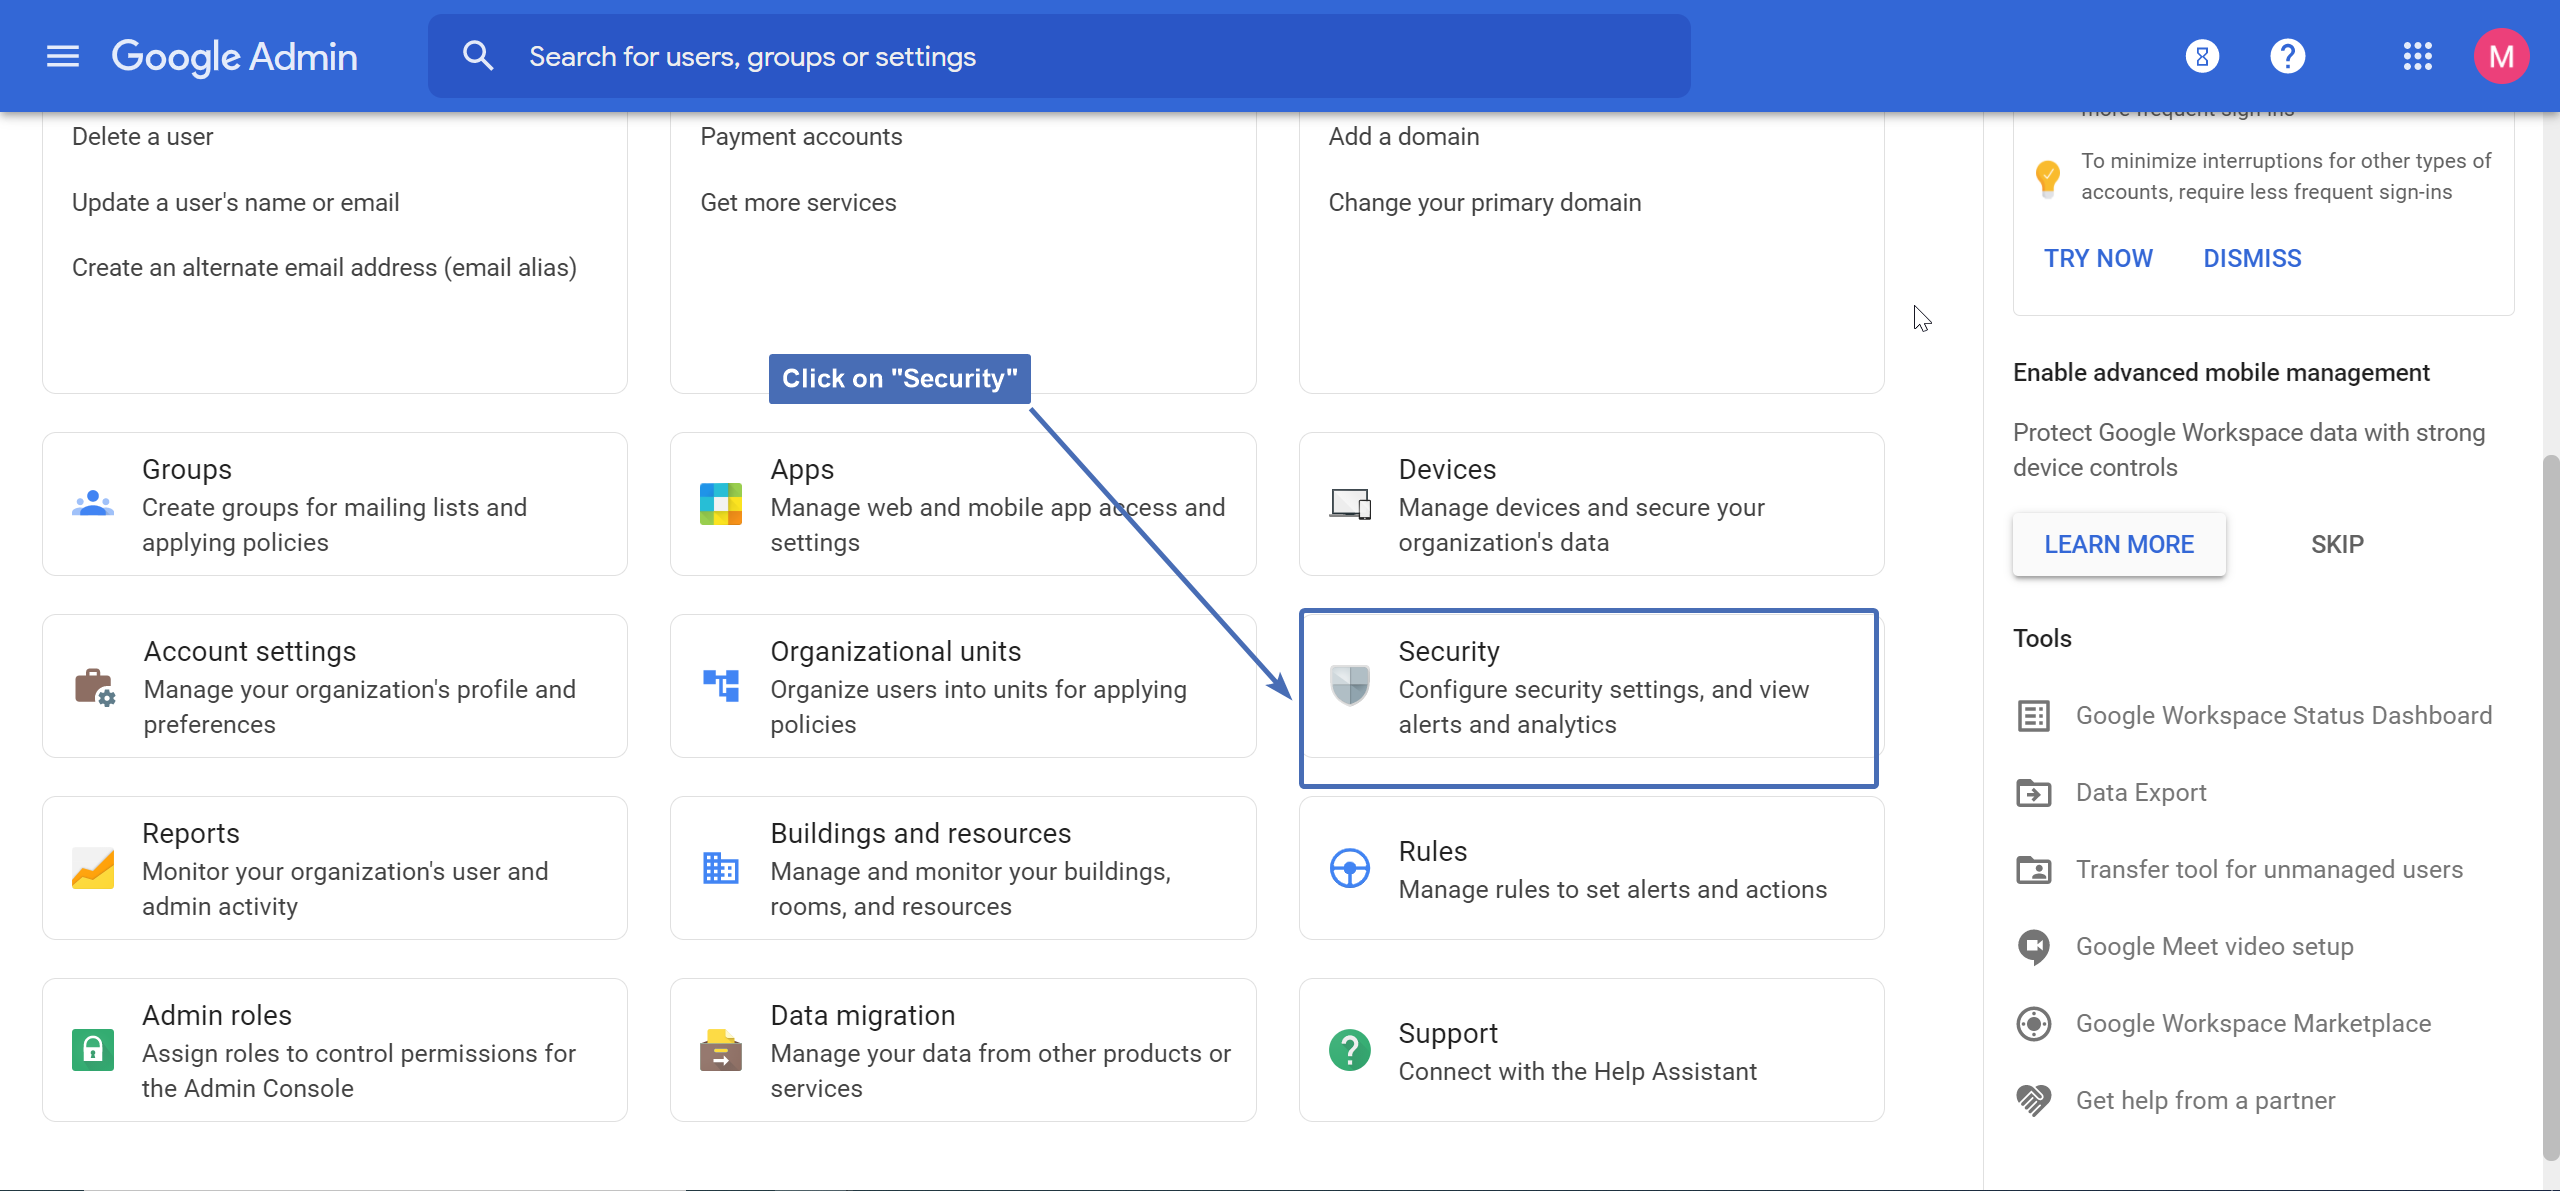
Step 4: navigating to “Security”
In the Google Admin dashboard, locate and click on the icon labeled “Security”.
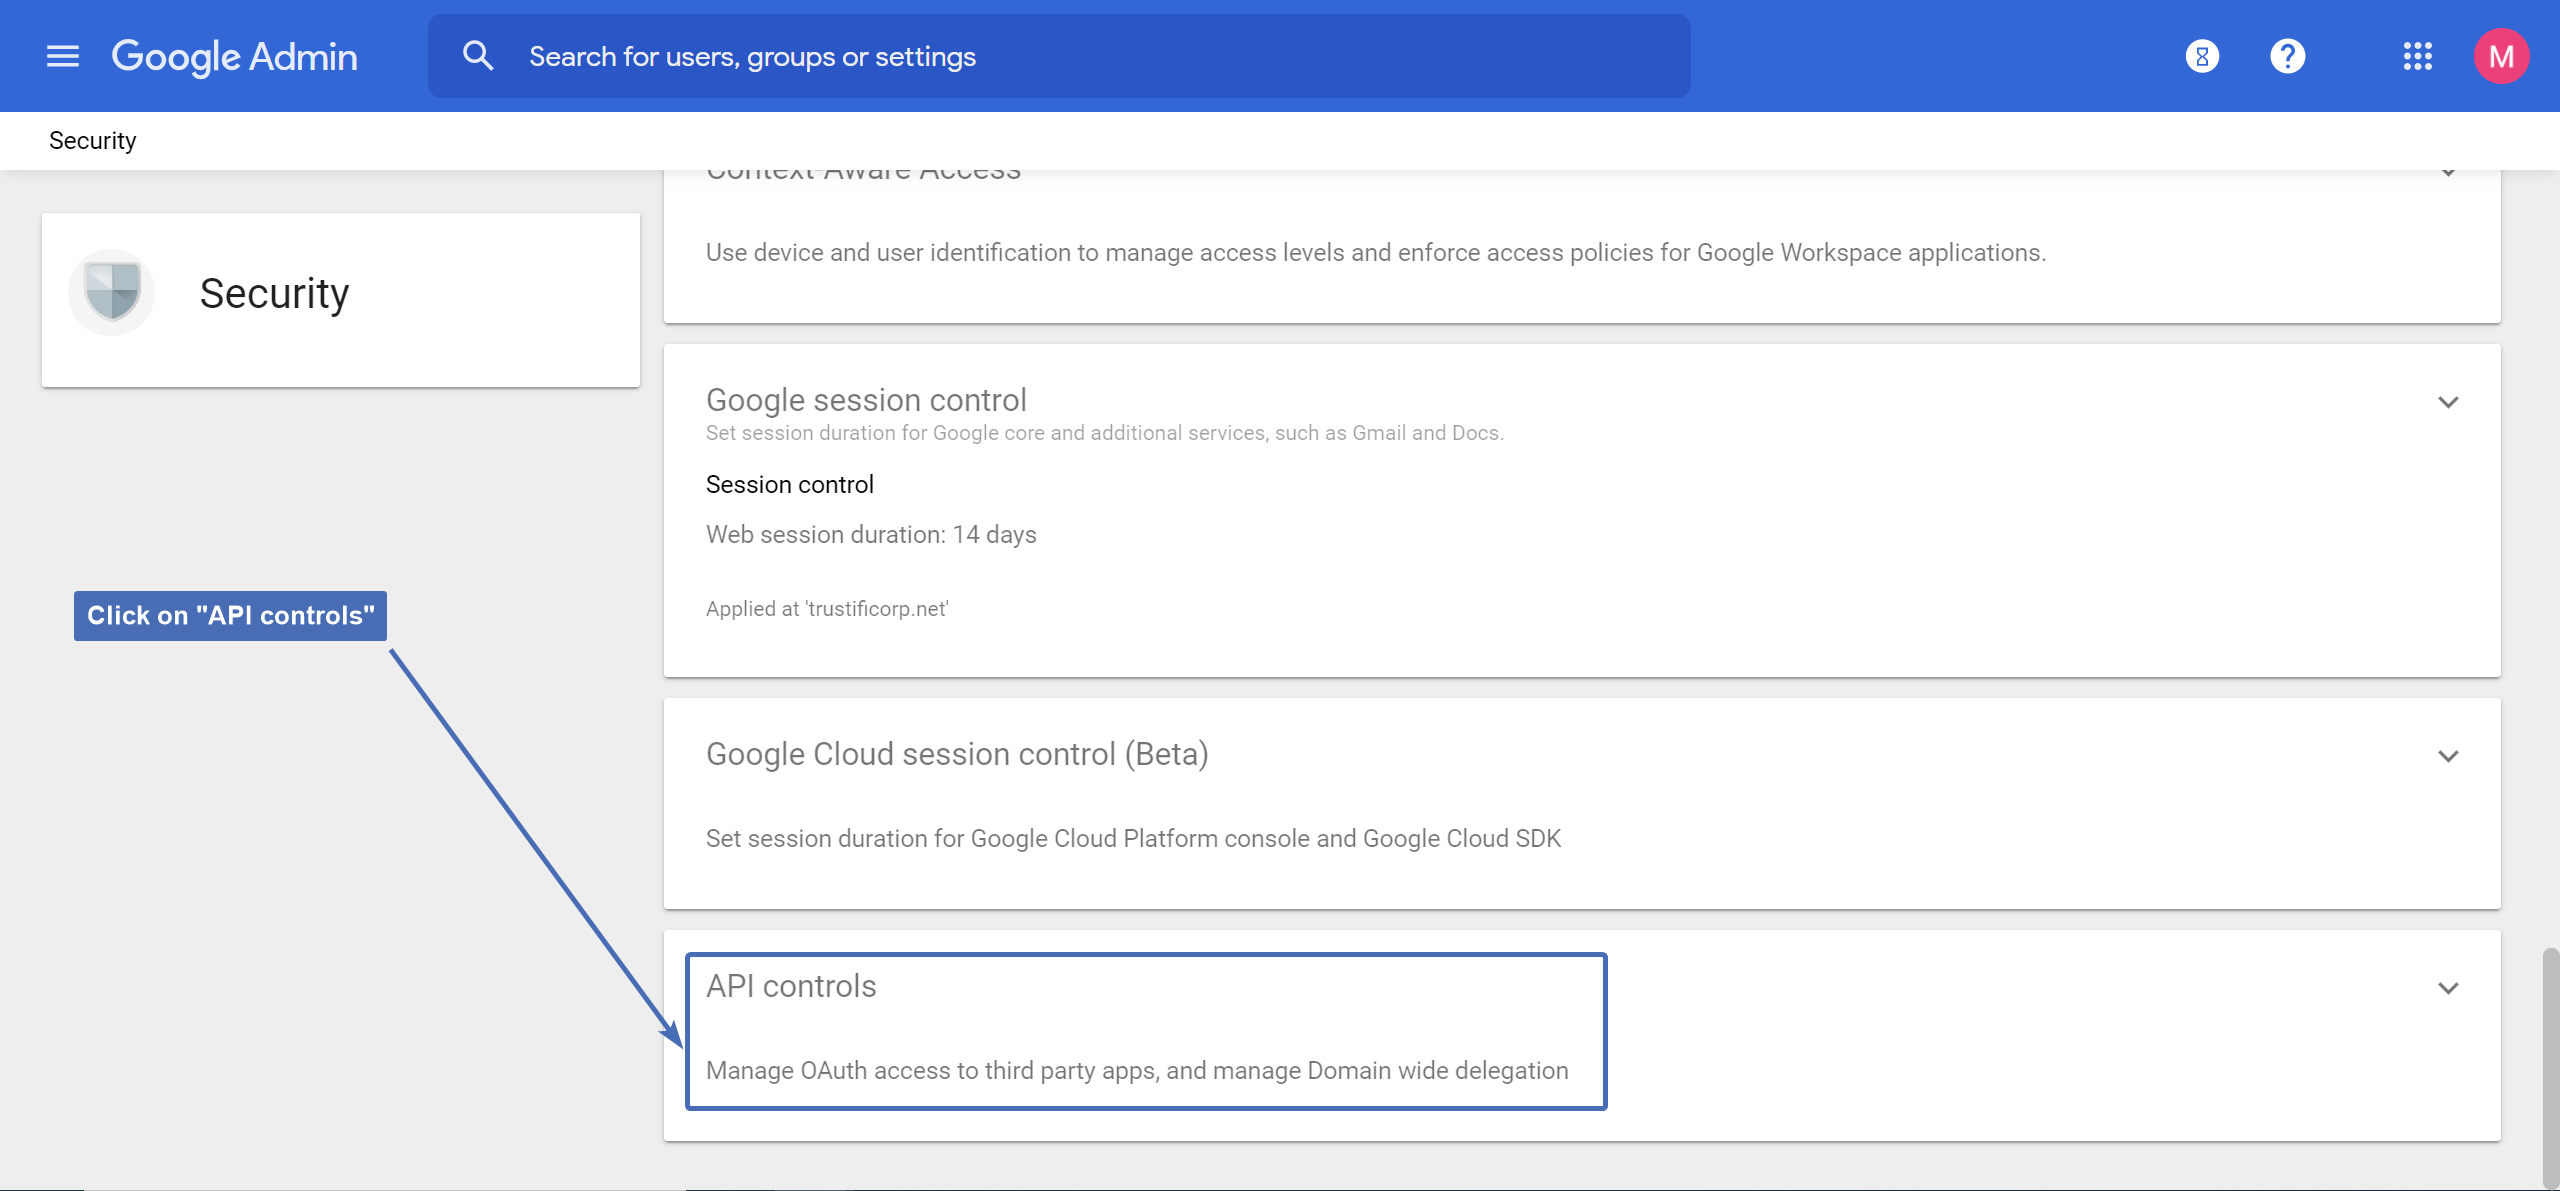
Step 5: navigating to “API Controls”
Under the “Security” section, locate and click on “API Controls”.
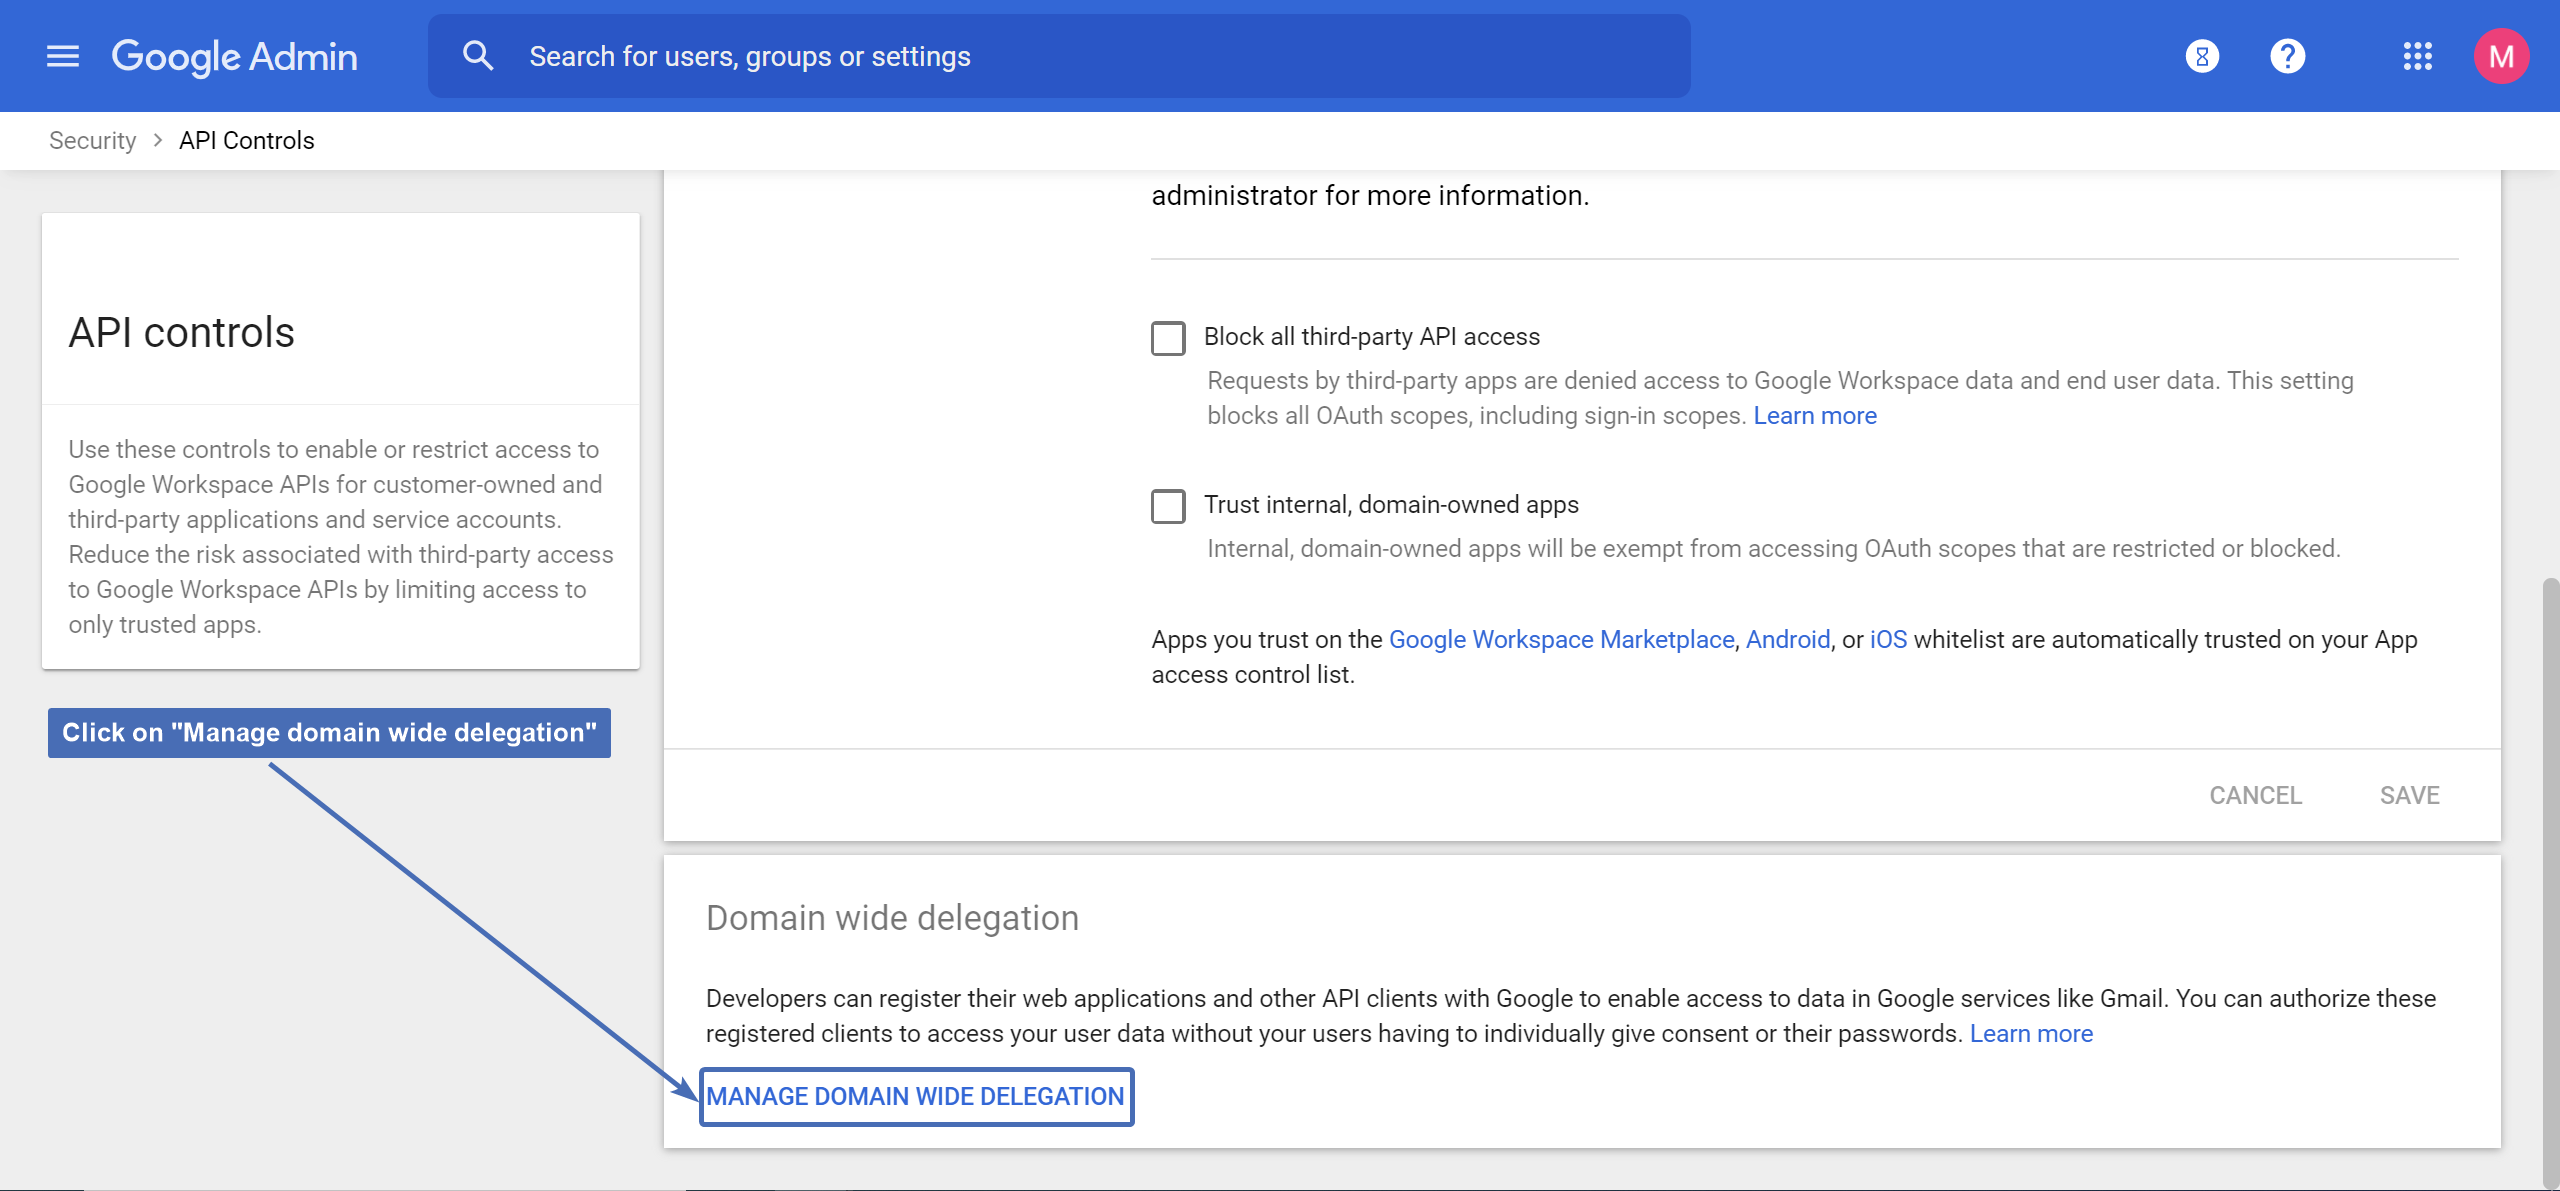
Step 6: navigating to “Domain wide delegation”
Under “API controls”, locate the “Domain wide delegation” section and click on “Manage domain wide delegation”.
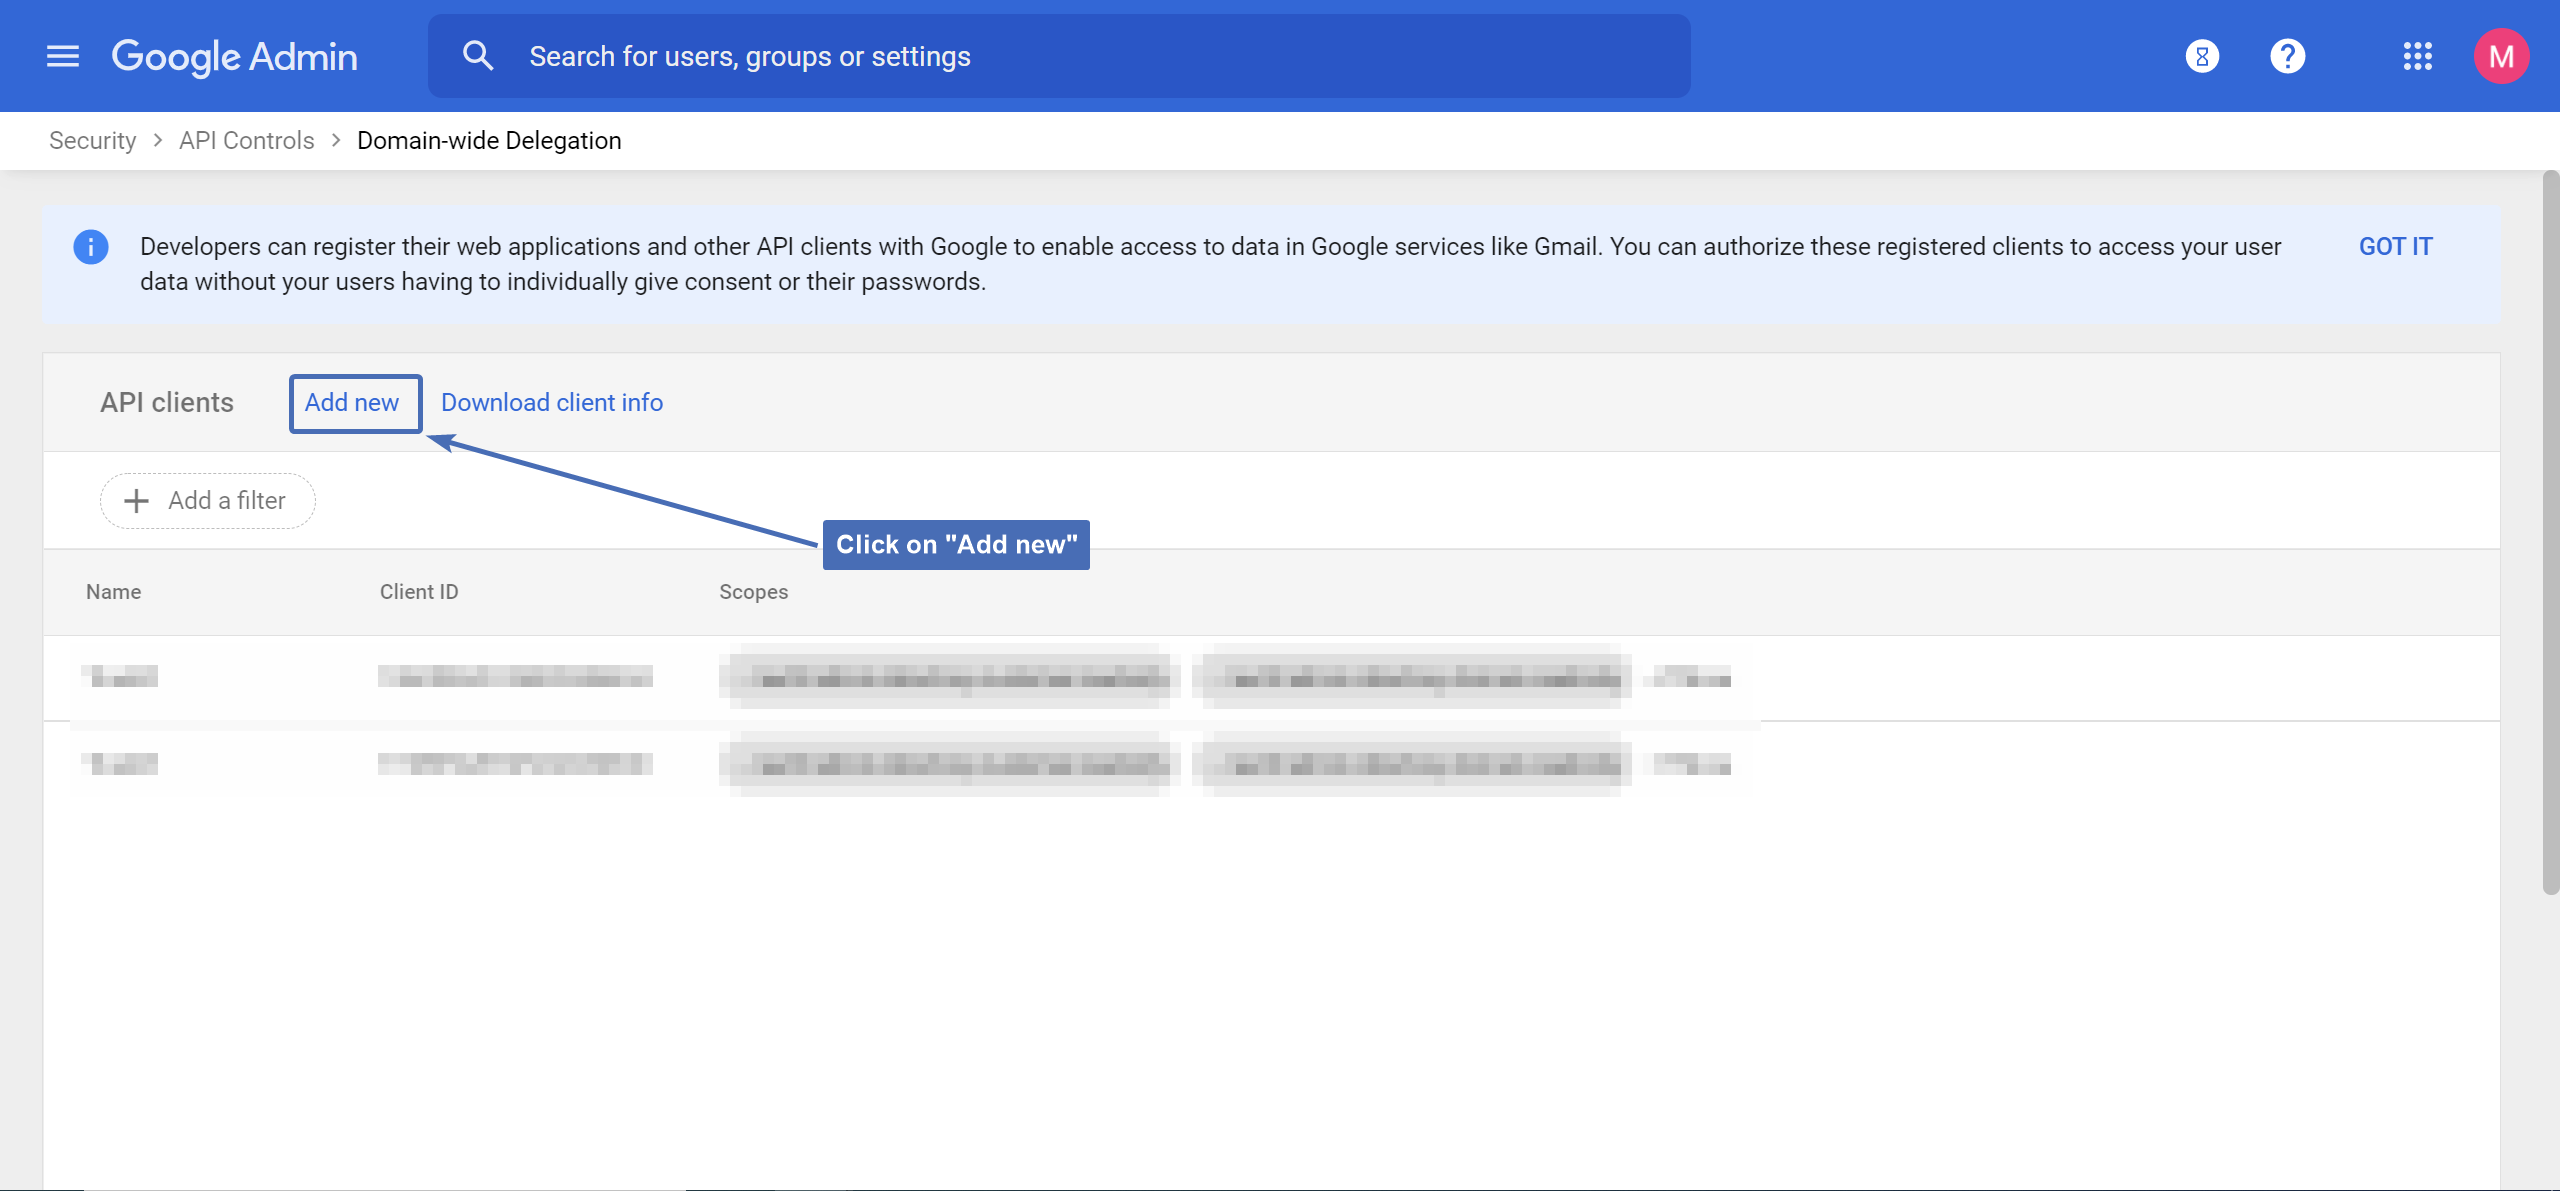
Step 7: creating a new API client
Under “API clients”, click on “Add new” to add a new API client.
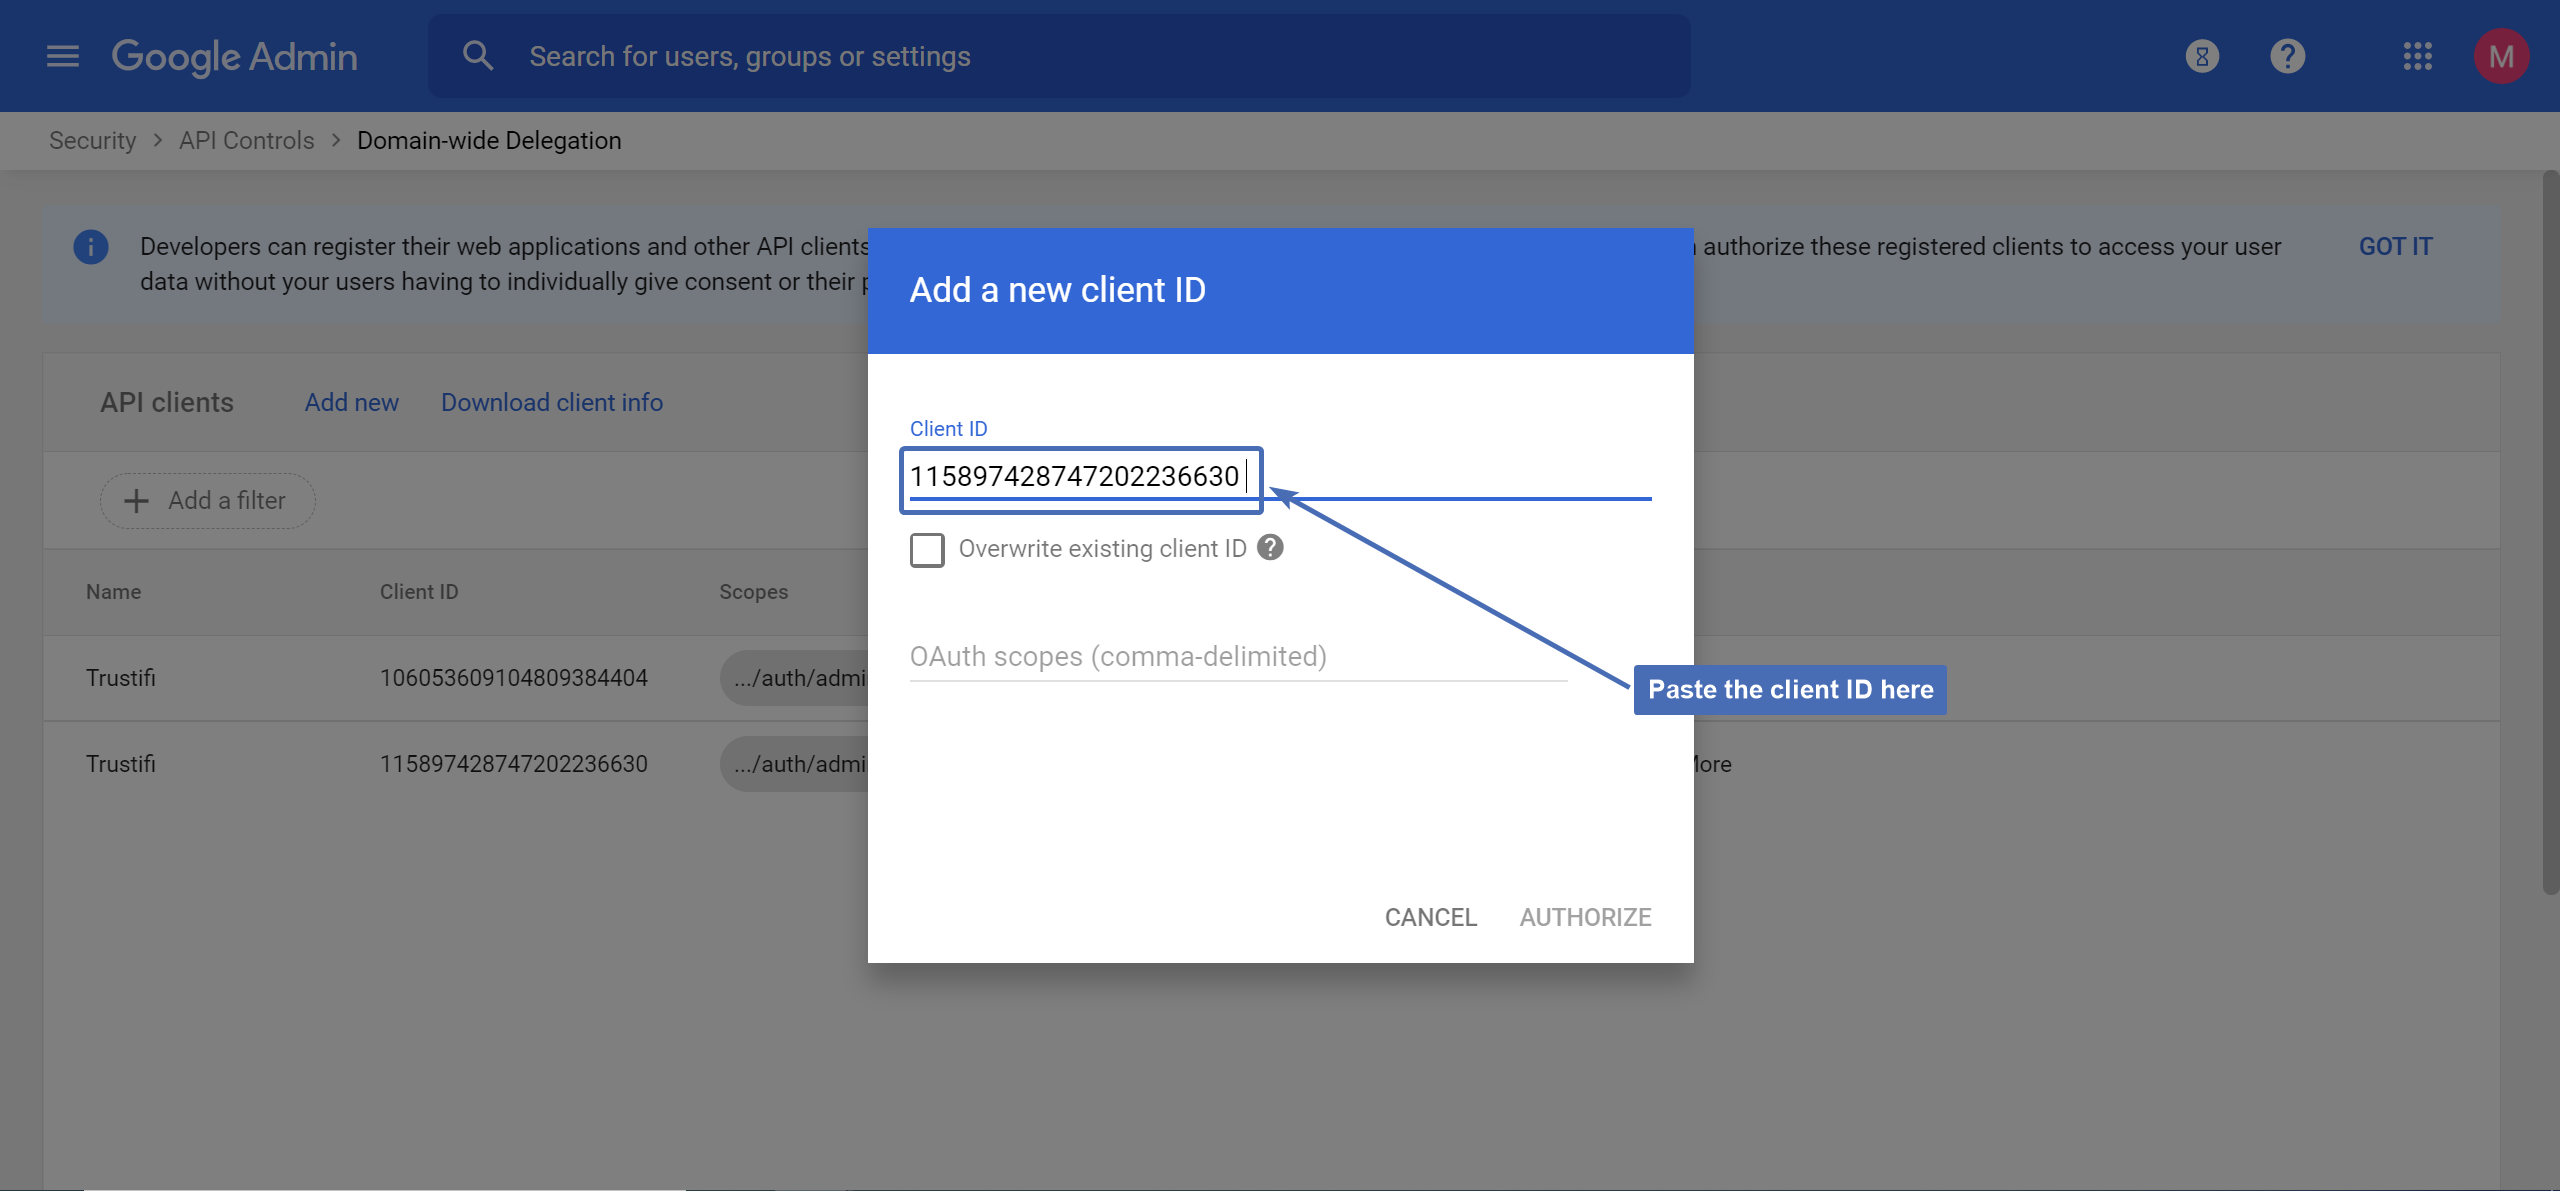
Step 8: adding the client ID
Go back to the Trustifi portal and view the pop-up window for connecting to Google Workspace.
From here, copy the code to be used as the client ID.
Paste this code in the field under “Client ID” in the “Add a new client ID” window.
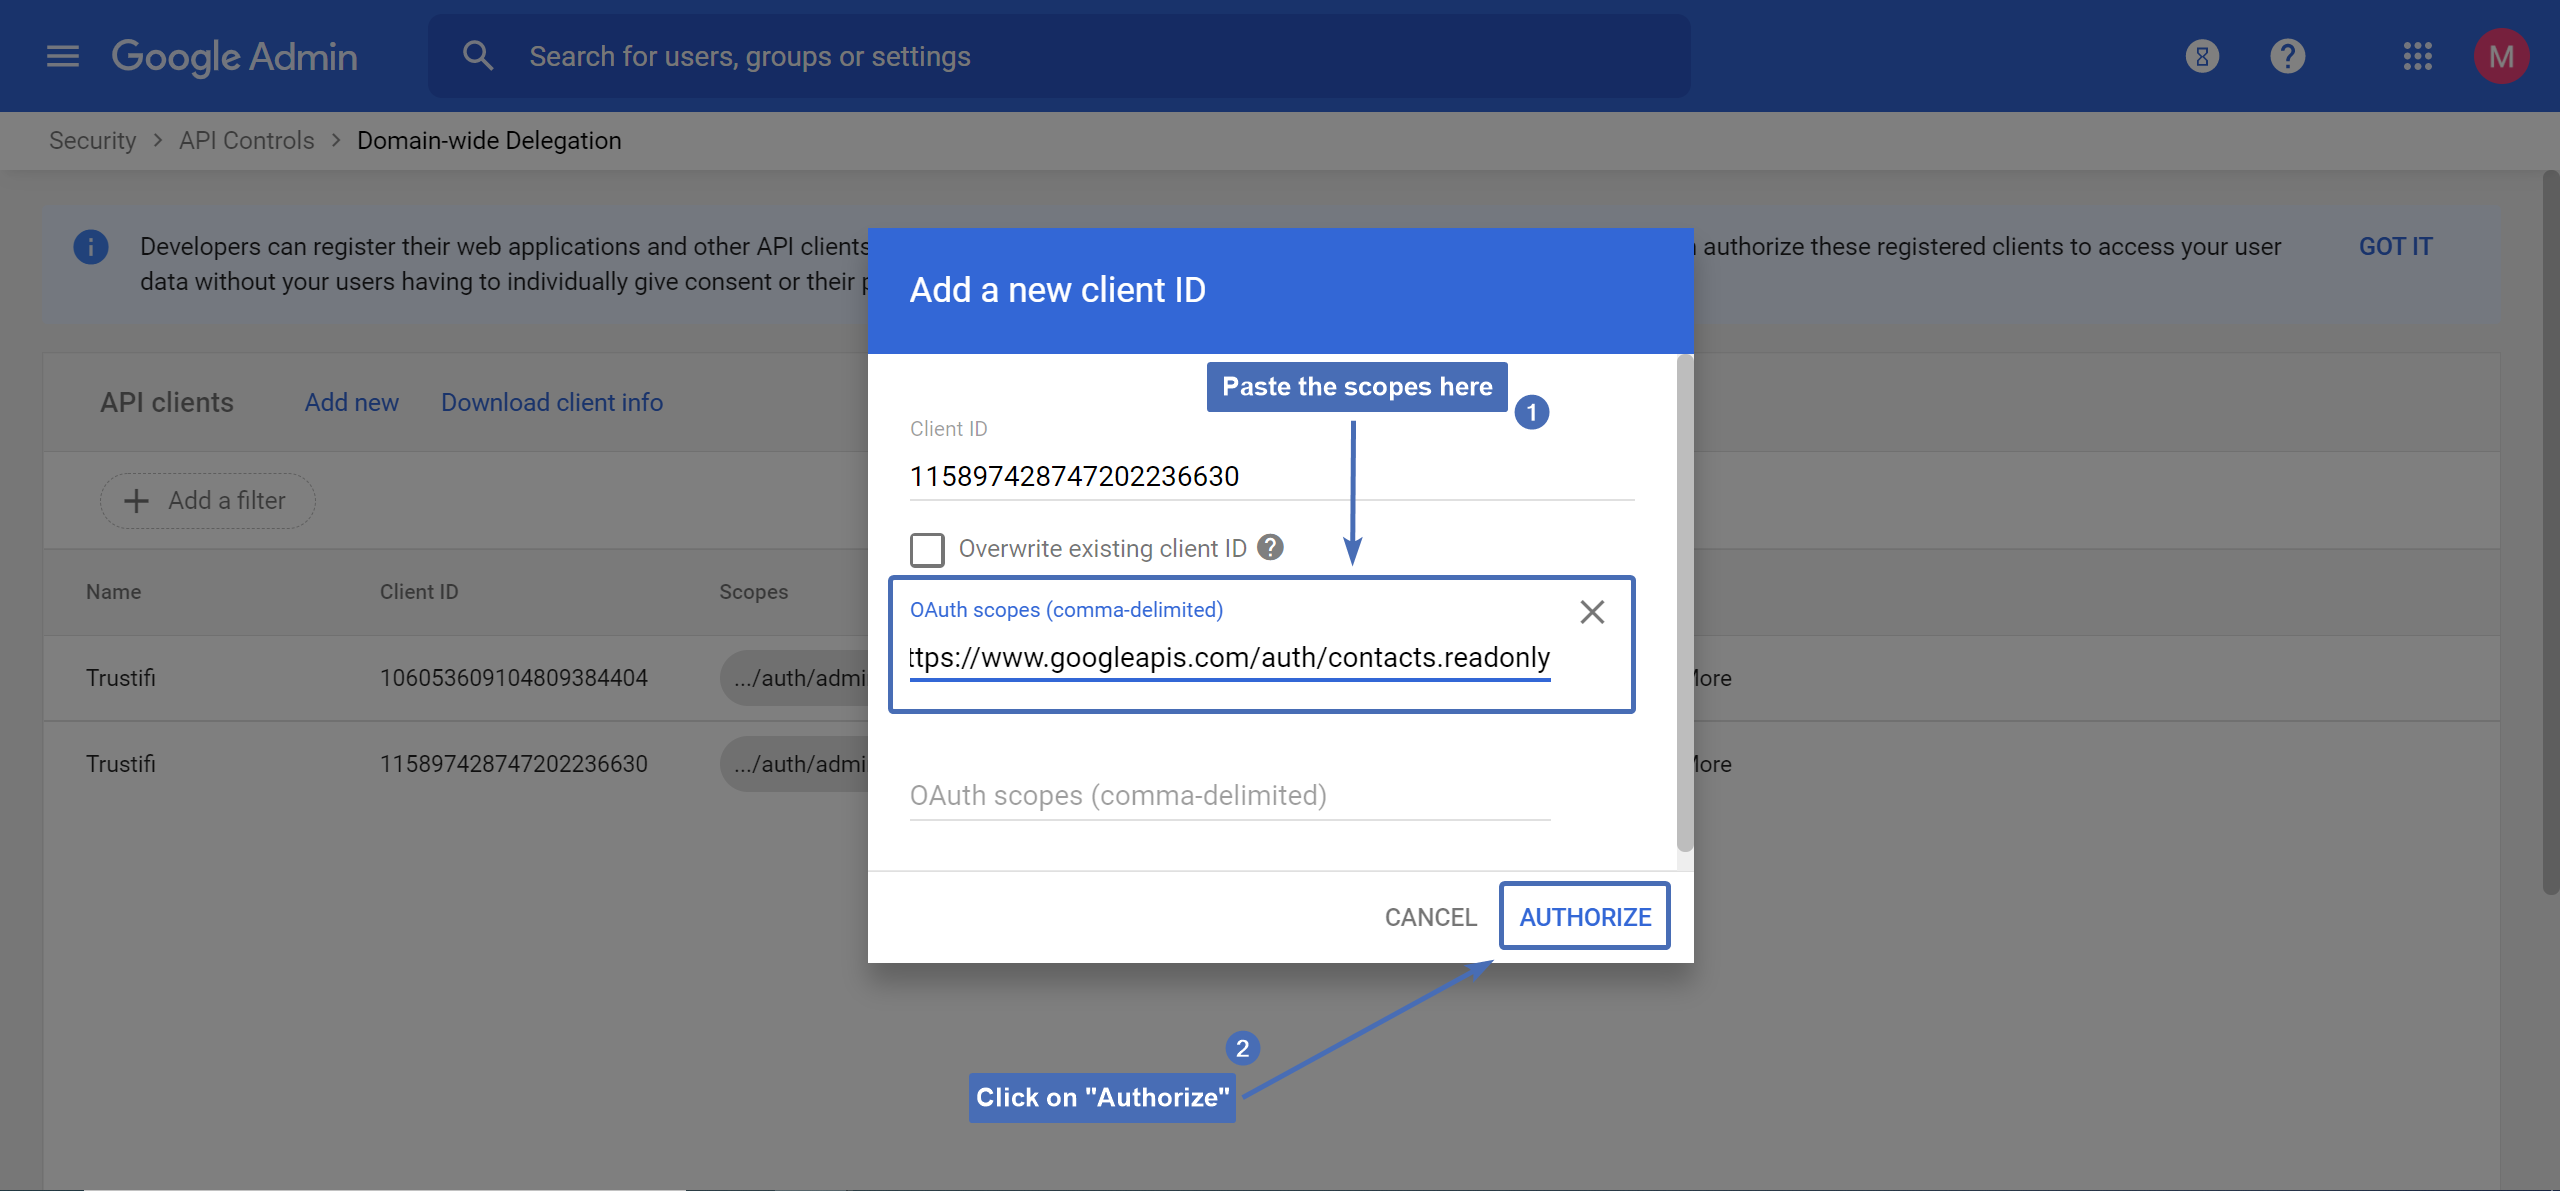
Step 9: adding the scopes
Go back once again to the Trustifi portal and view the pop-up window for connecting to Google Workspace.
From here, copy the scopes to be used in the integration.
Paste these scopes in the field under “OAuth scopes” in the “Add a new client ID” window.
After the scopes have been added, click on “Authorize” to add the API client,
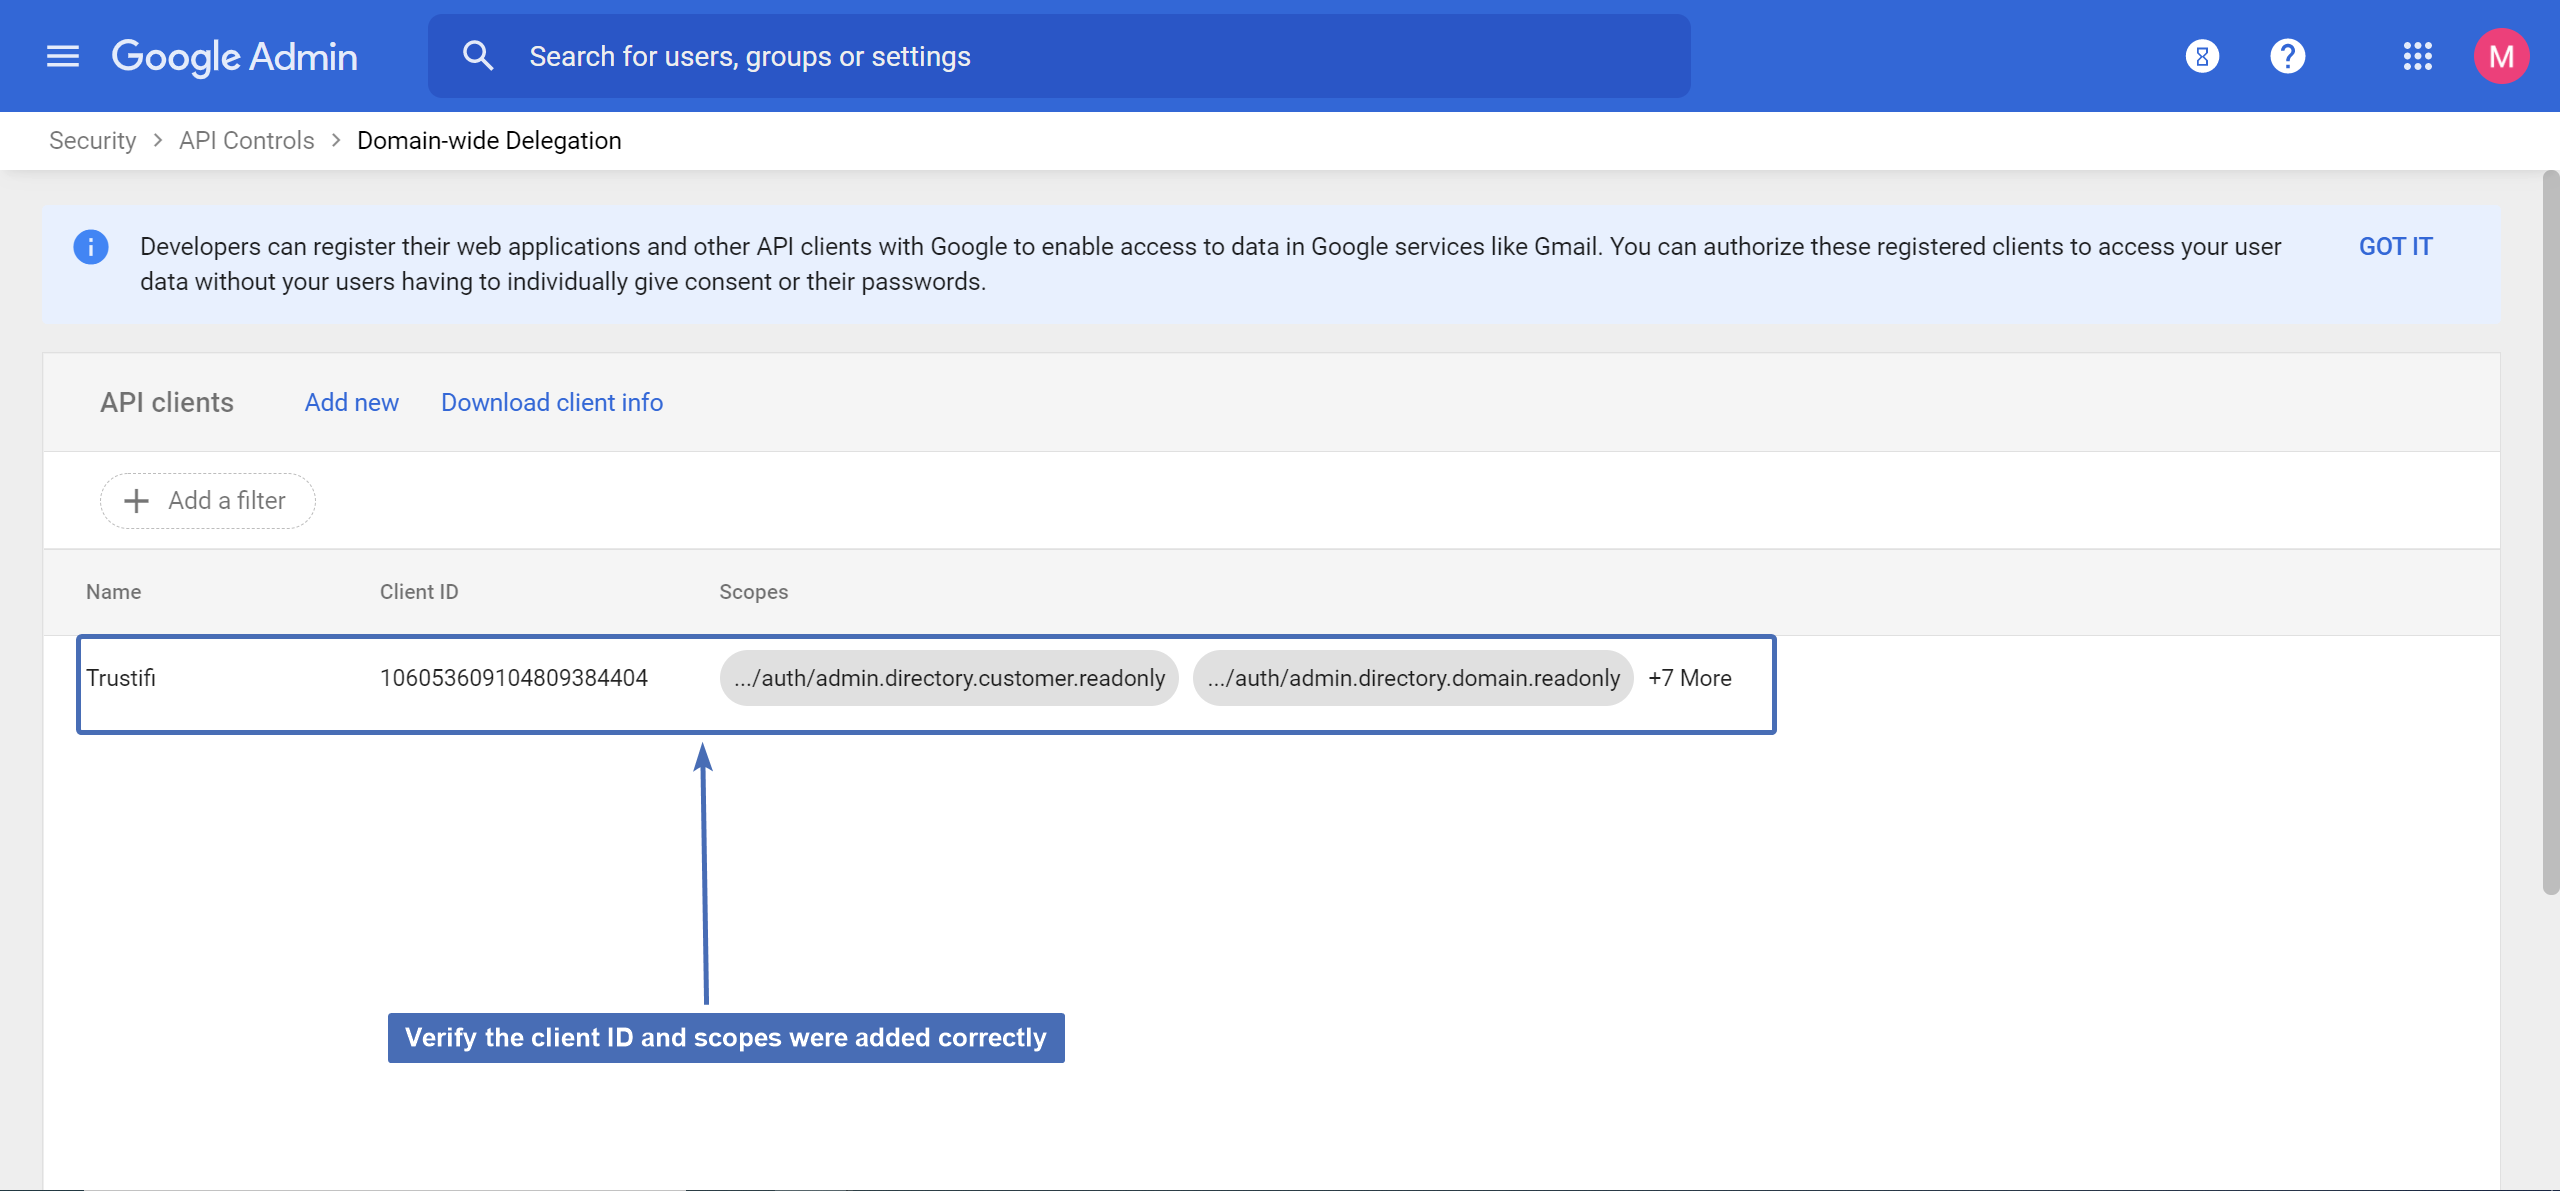
Step 10: verifying the API client
Check the newly added API client and verify the Client ID and the scopes are correct according to the details in the Trustifi portal.
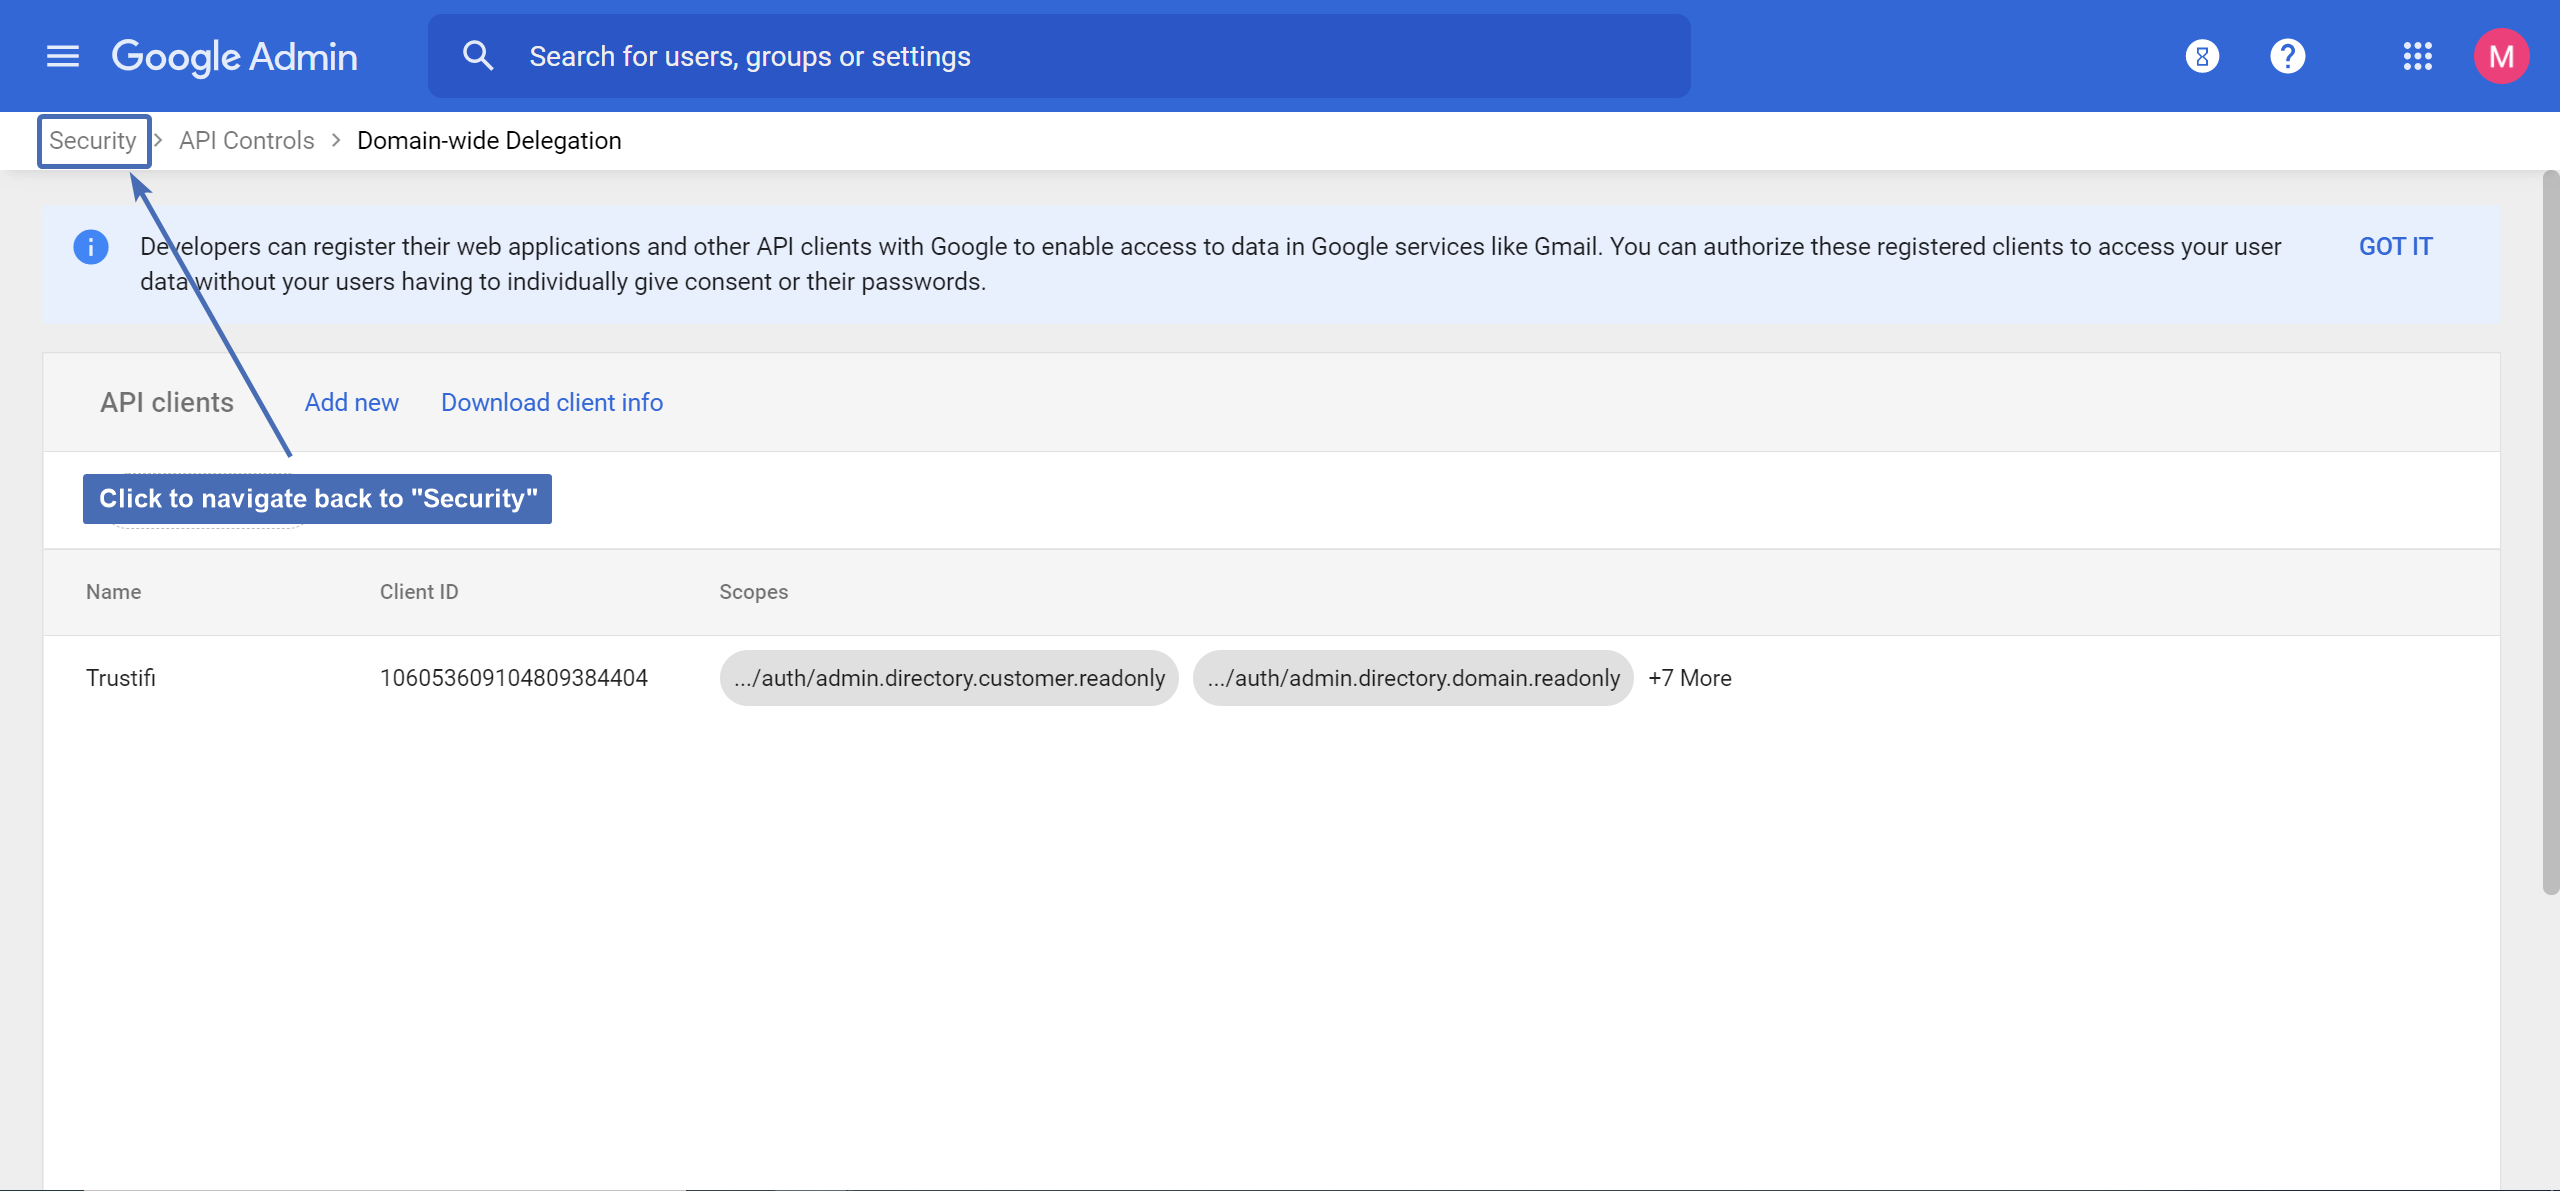
Step 11: navigating back to “Security”
Click on “Security” at the top navigation bar to go back to the “Security” page.
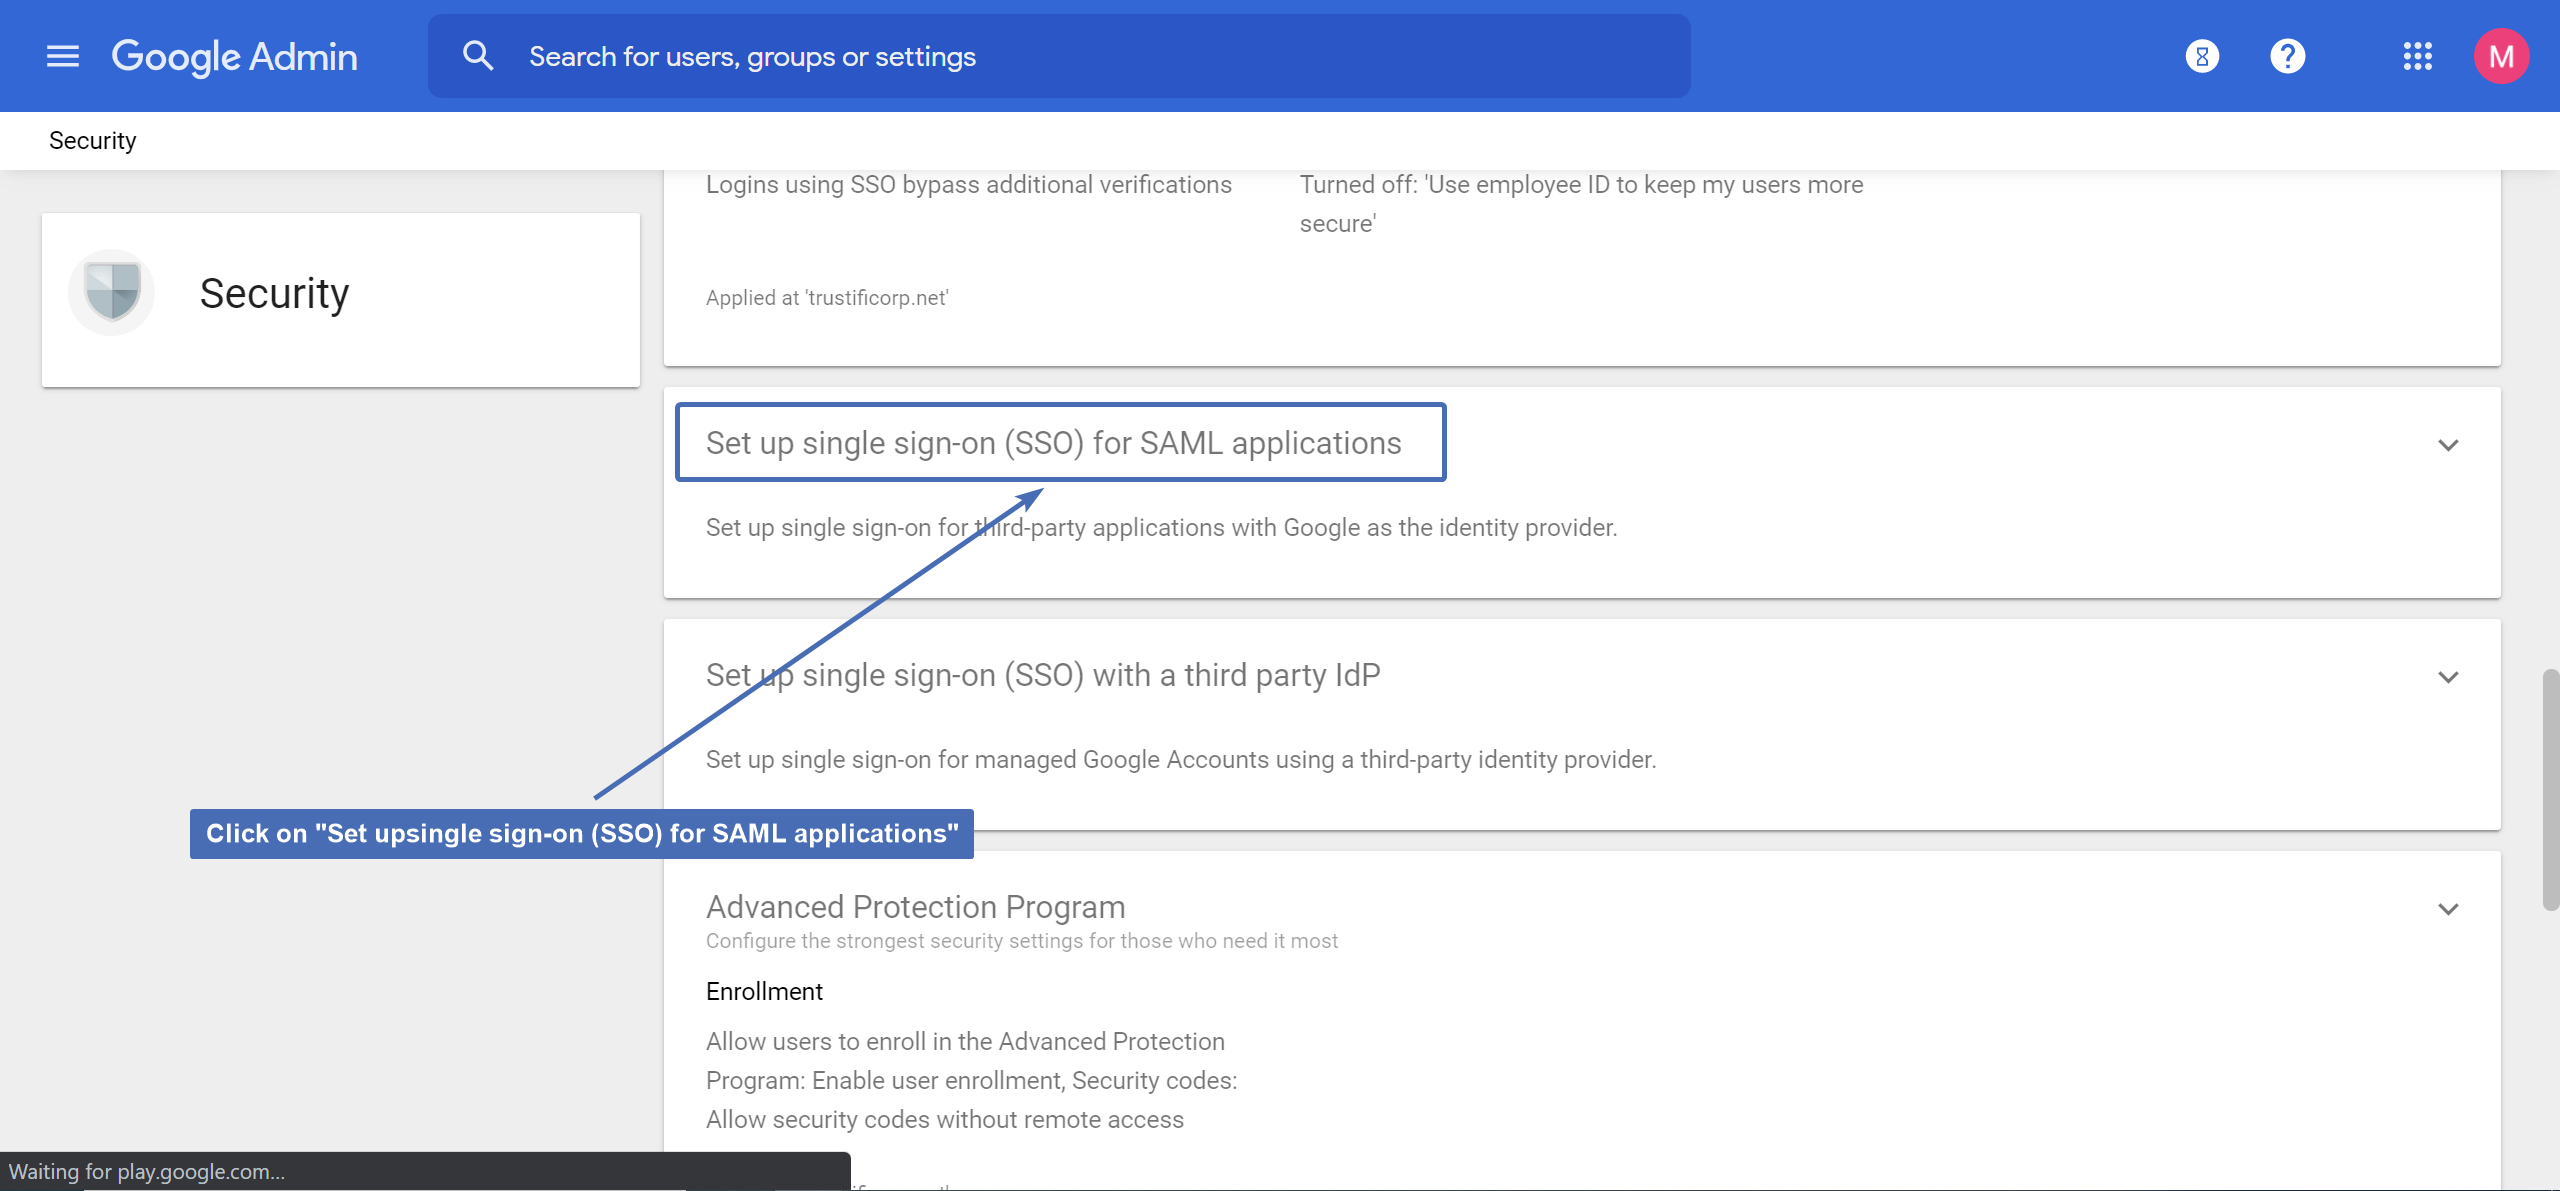
Step 12: navigating to “Set up single sign-on (SSO) for SAML applications”
Locate the section titled “Set up single sign-on (SSO) for SAML applications” and click on it.
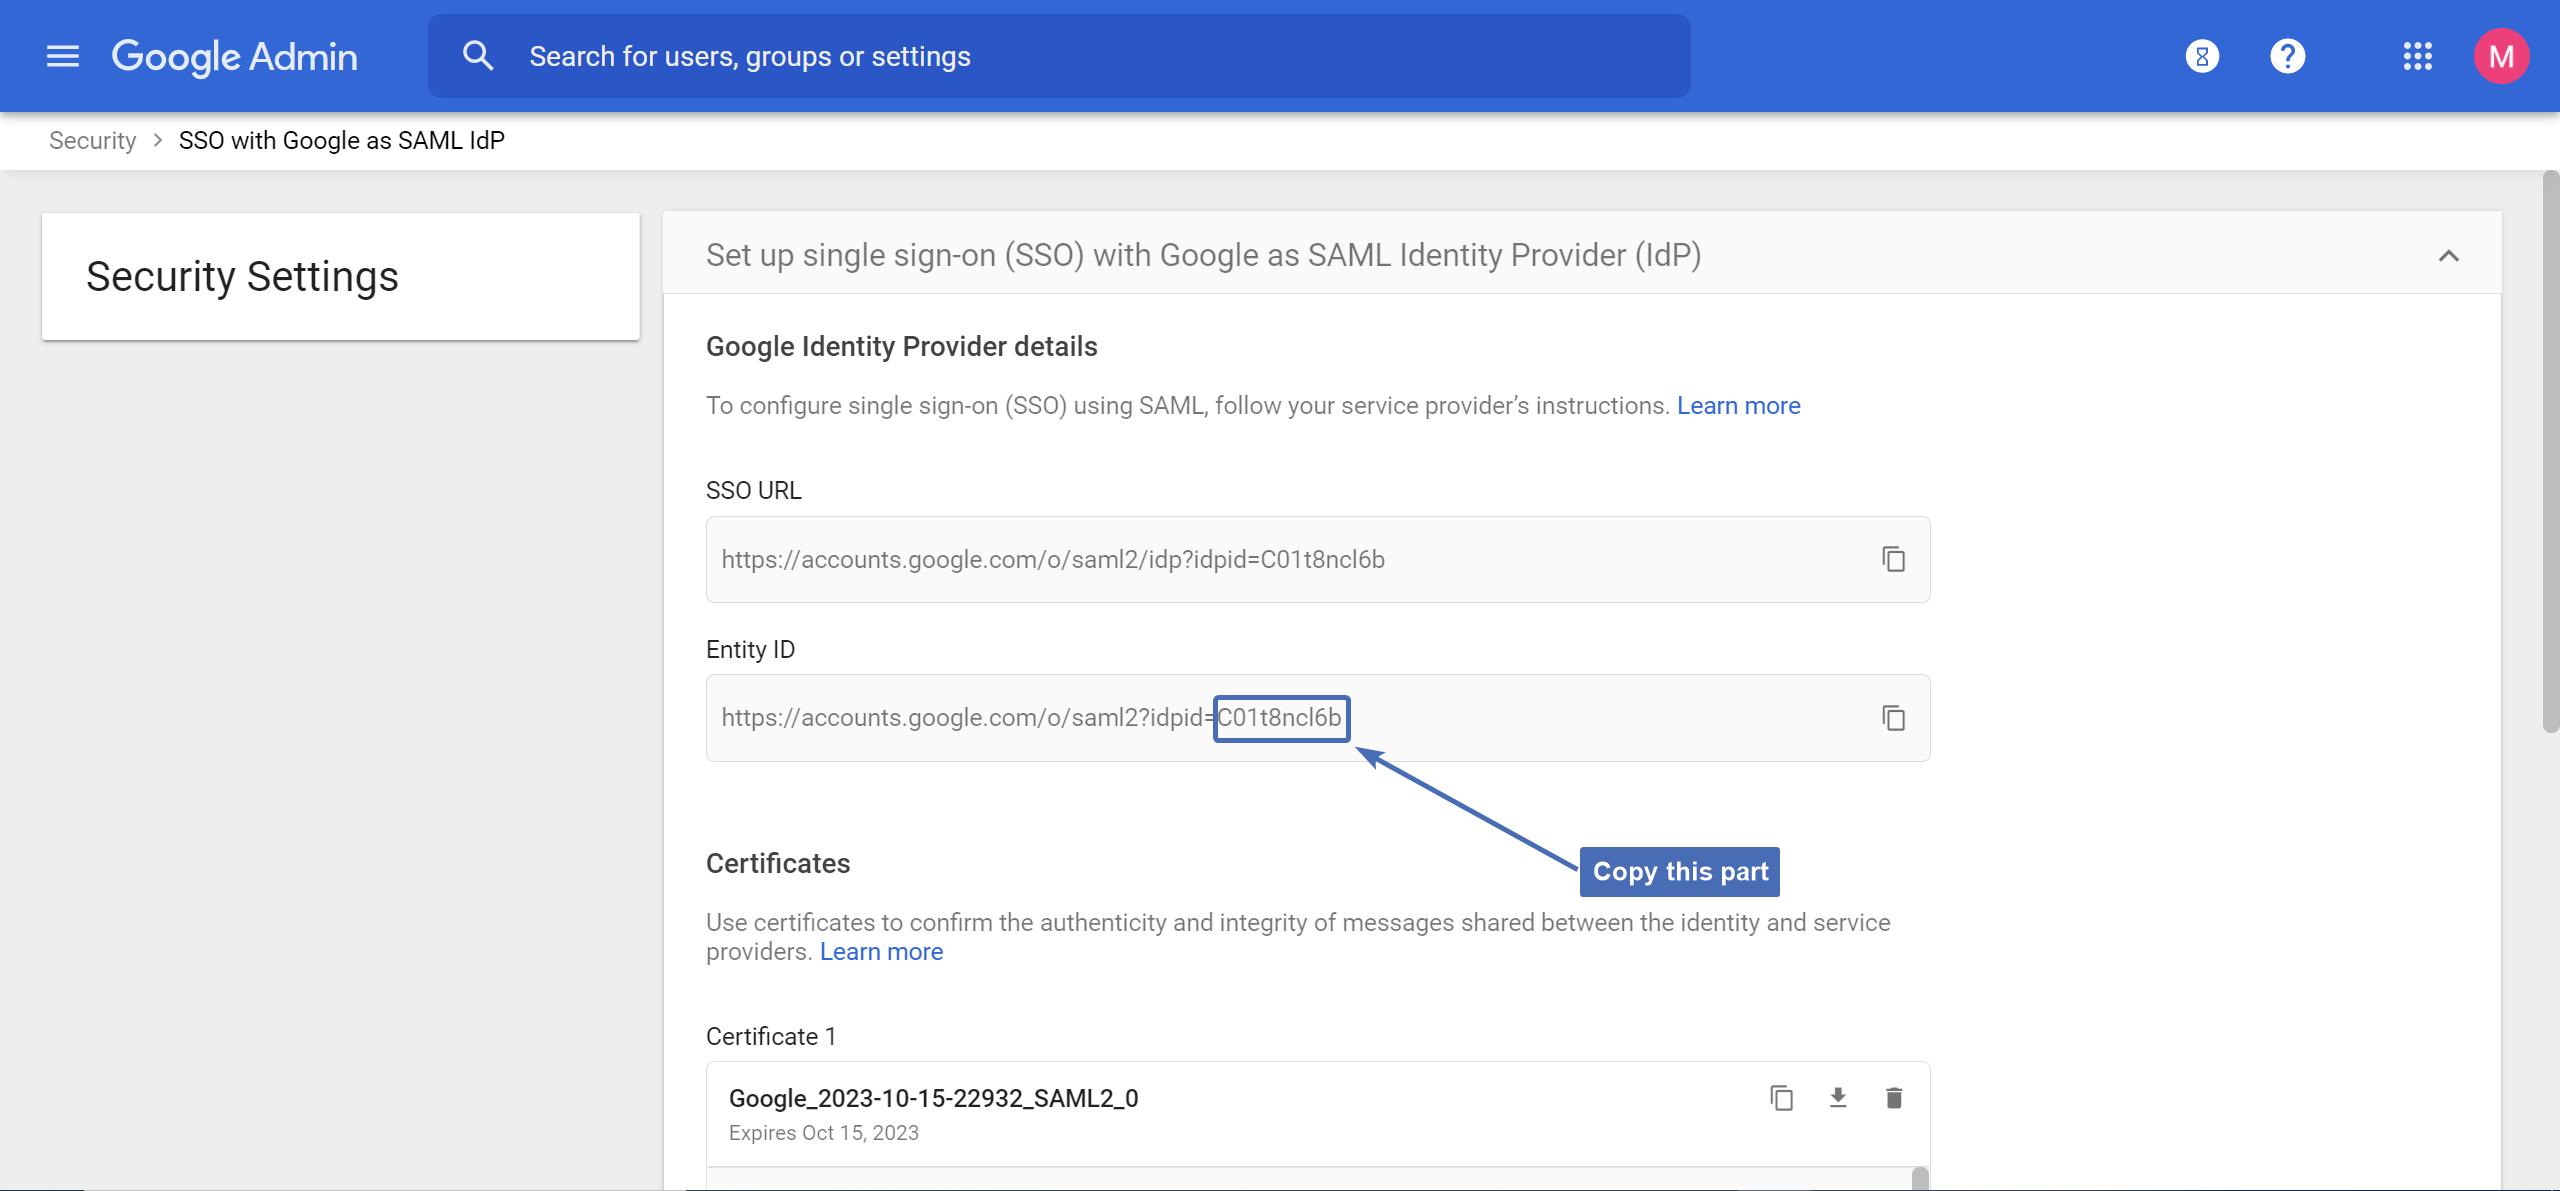
Step 13: copying the entity ID
Under “Set up single sign-on (SSO) for SAML applications”, find the section titled “Entity ID” and copy the last part of the provided URL.
For example, copy only the “XXX” part from this URL: https://accounts.google.com/o/saml2?idpid=XXX
Step 14: finalizing the connection
Go back to the Trustifi portal and view the “Configure Google Workspace” window.
Under “Admin email” enter the email of the Google admin.
Under “Entity ID” enter the ID recently copied from the “Set up single sign-on (SSO) for SAM applications” page.
Click on “Connect” to finalize the connection.
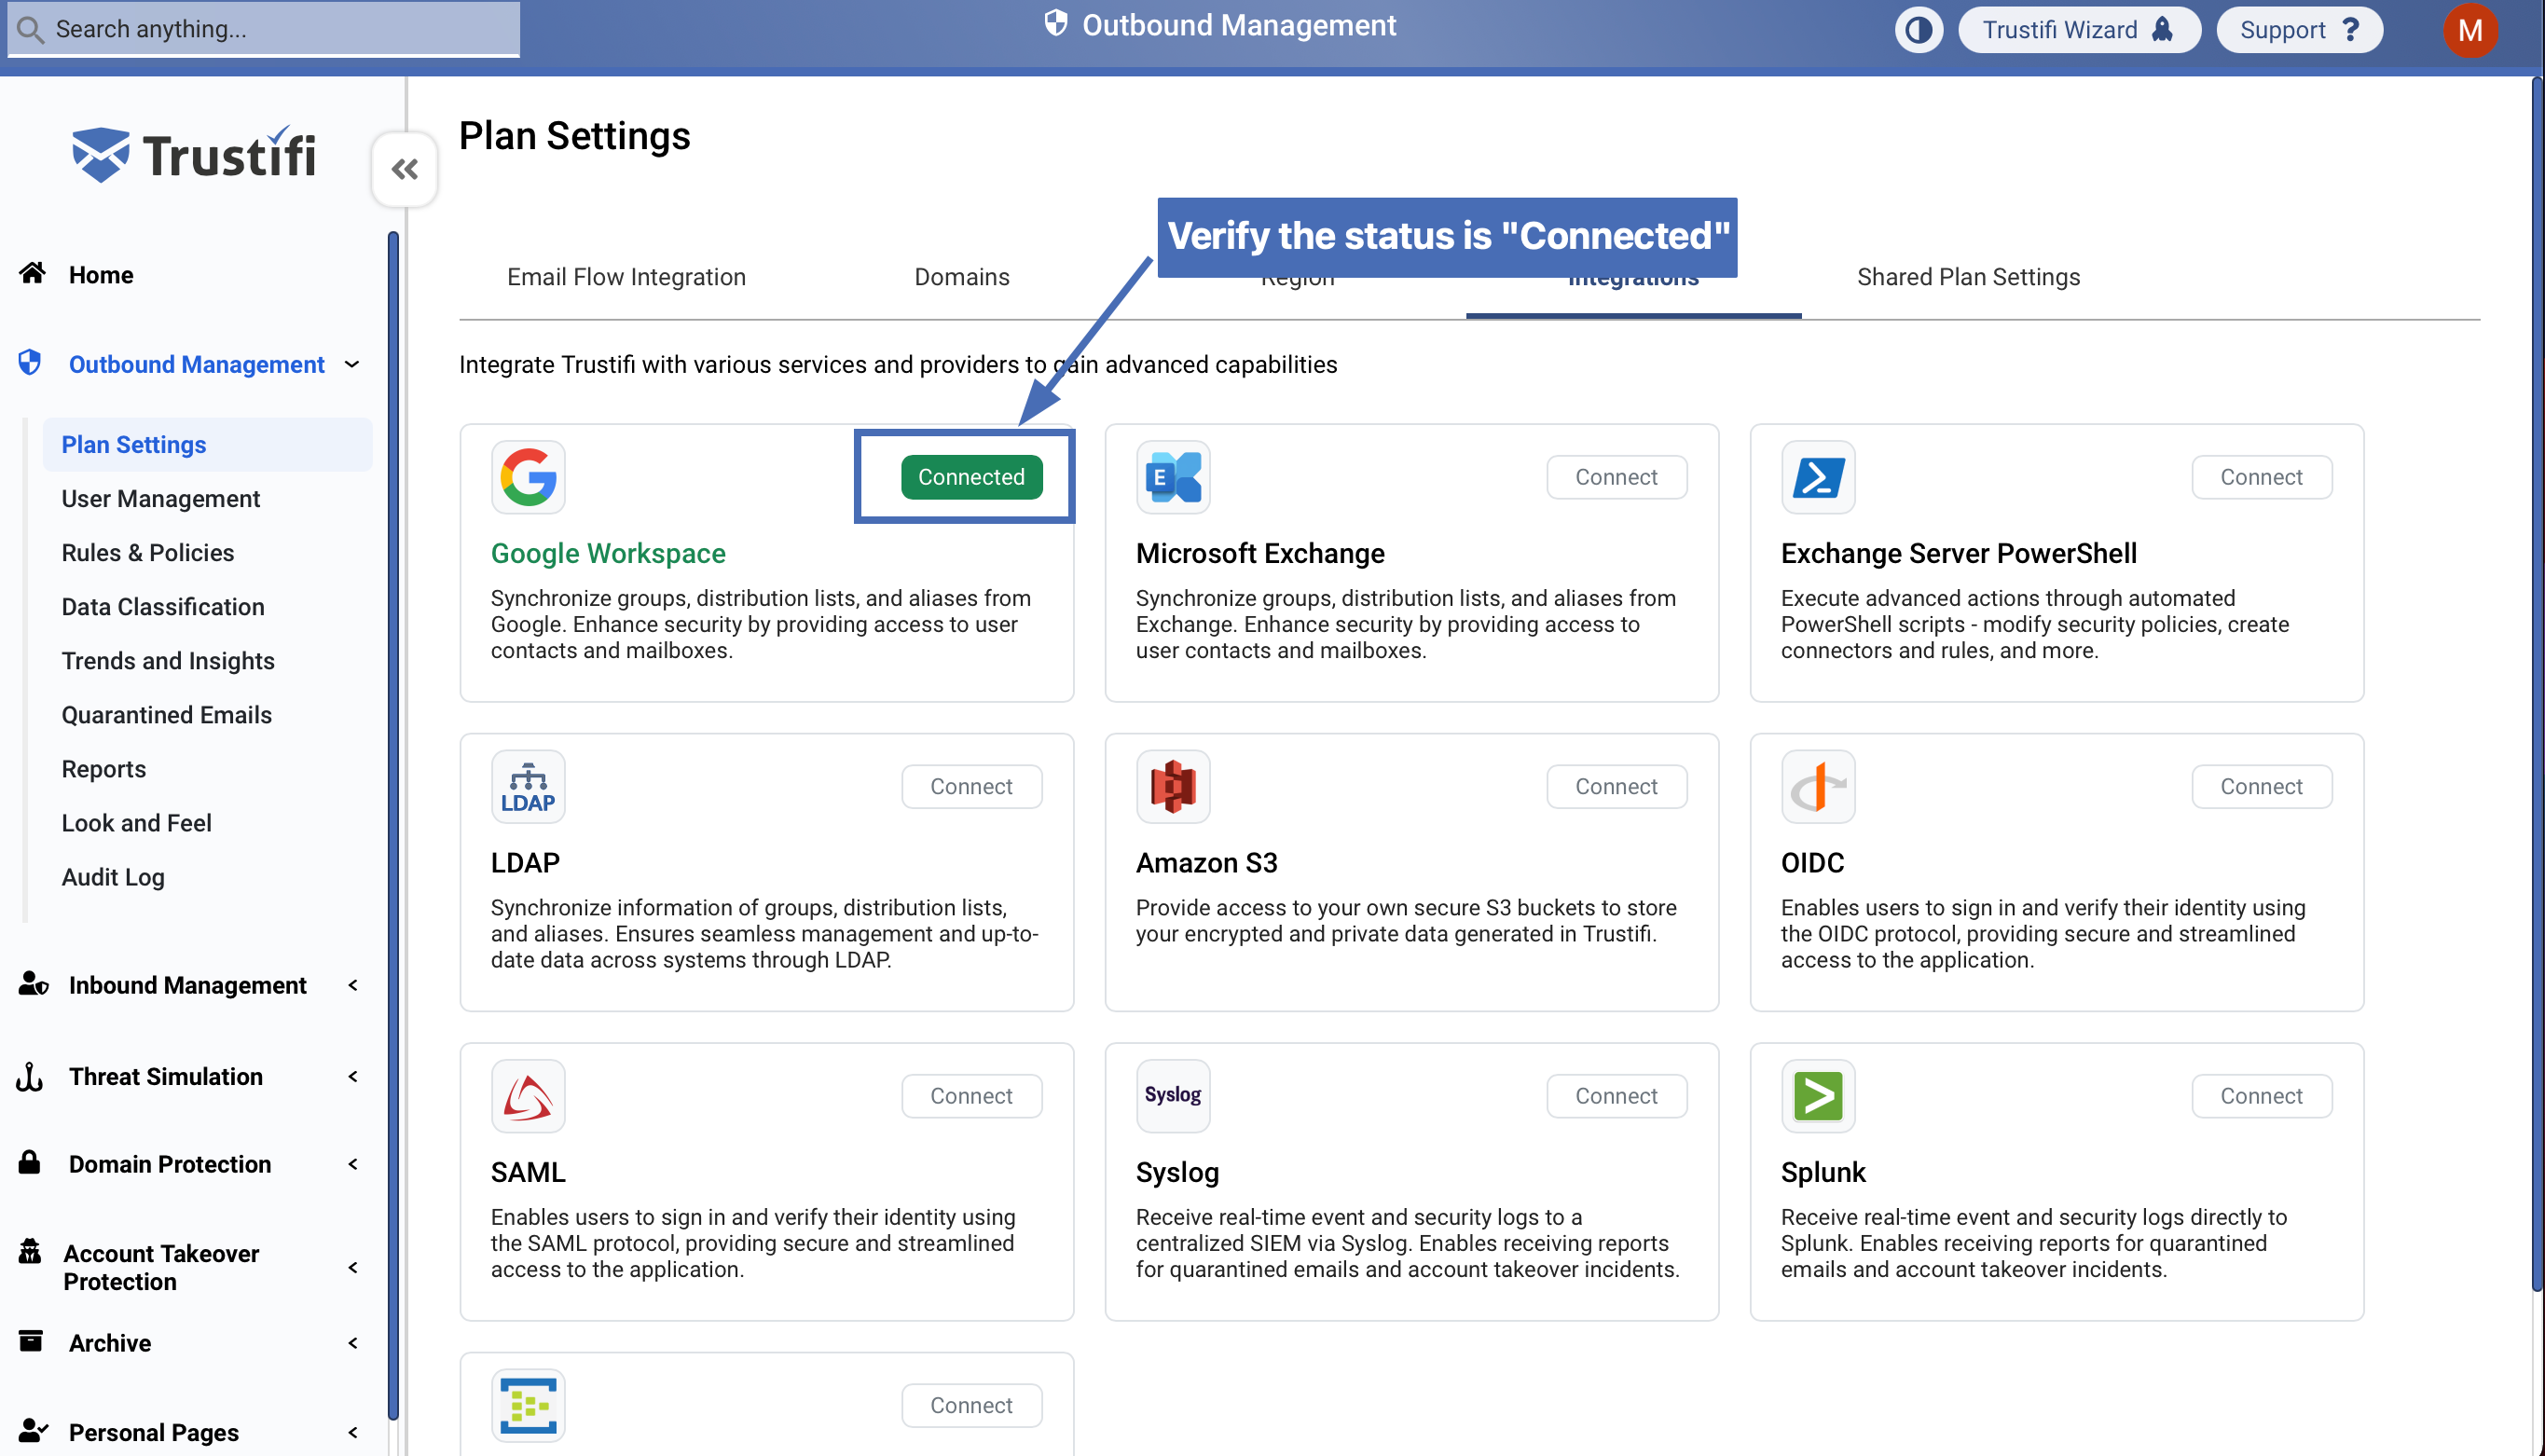
Step 15: verifying the connection
Verify that the status for the Google Workspace integration now shows up as “Connected”.
Step 16: syncing the groups
To retrieve and sync your groups from Google Workspace, click on the “Connected” button inside the “Google Workspace” tab. A pop-up will open, in the pop-up click on the “Sync” button to synced your groups.
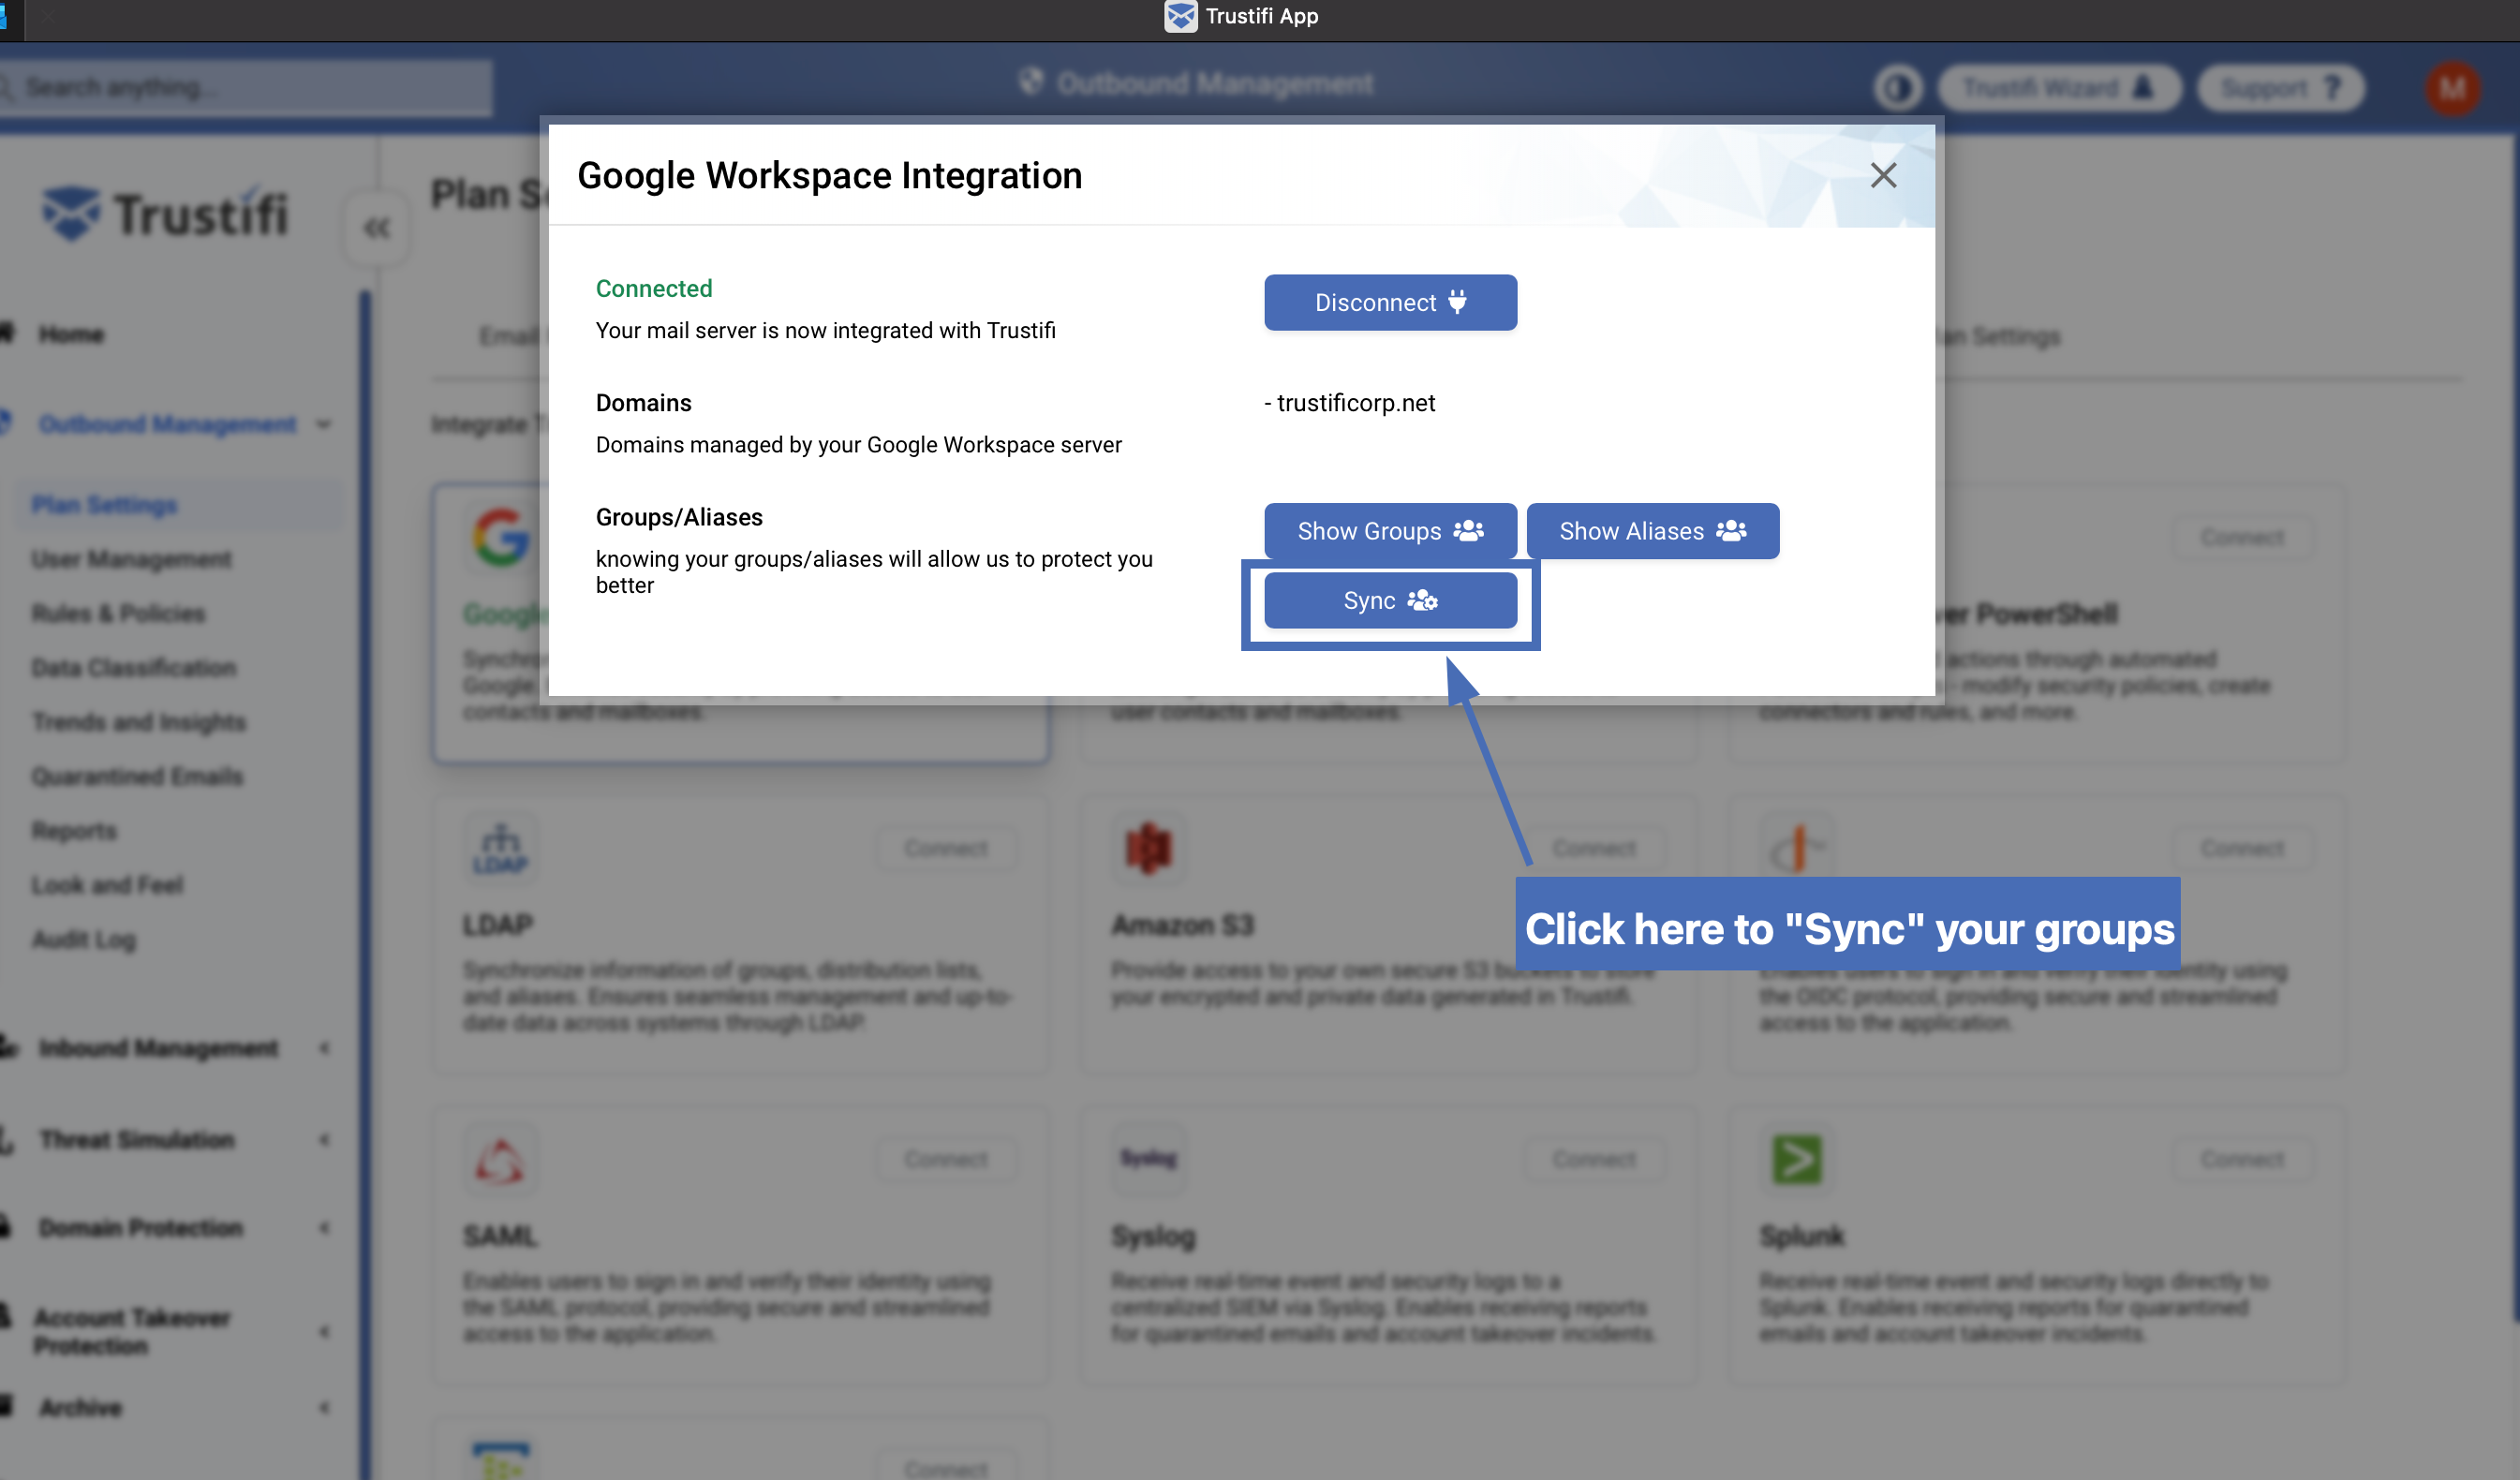
After you click the “Sync” button should see a confirmation notification that the process has started.
Please allow a few minutes for the process to finish (may take longer if you have many groups) and refresh the page.
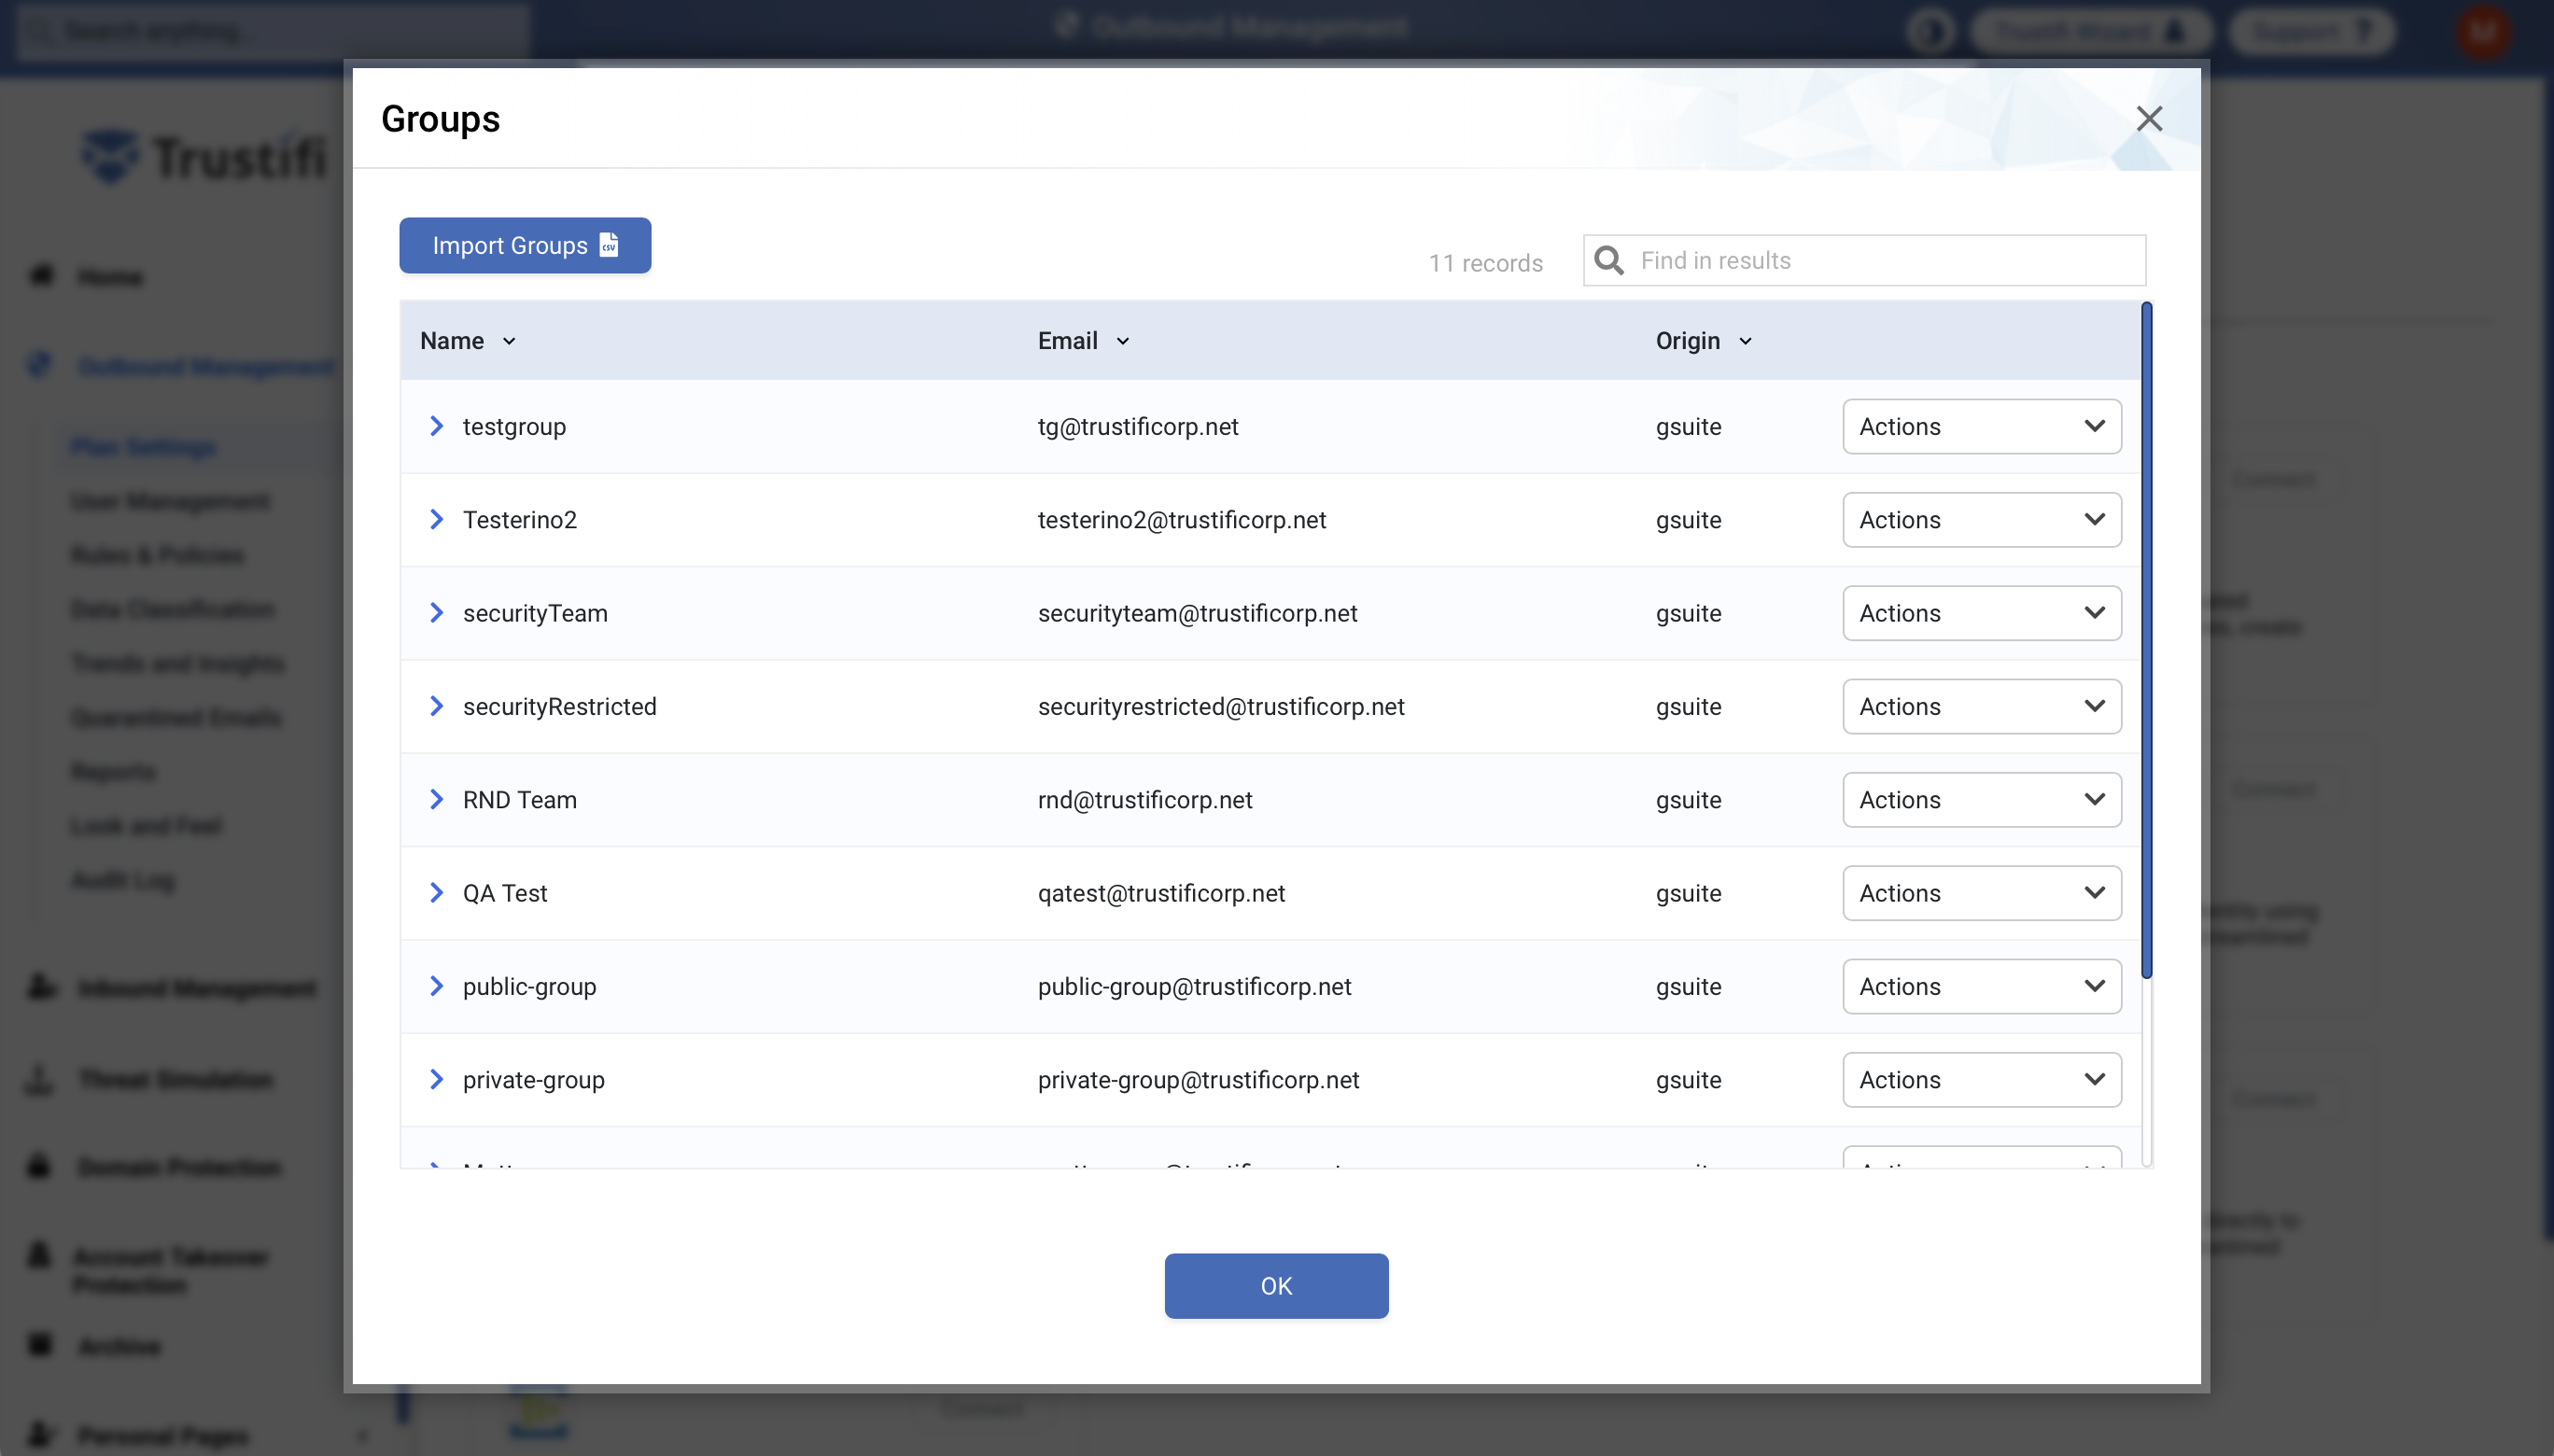
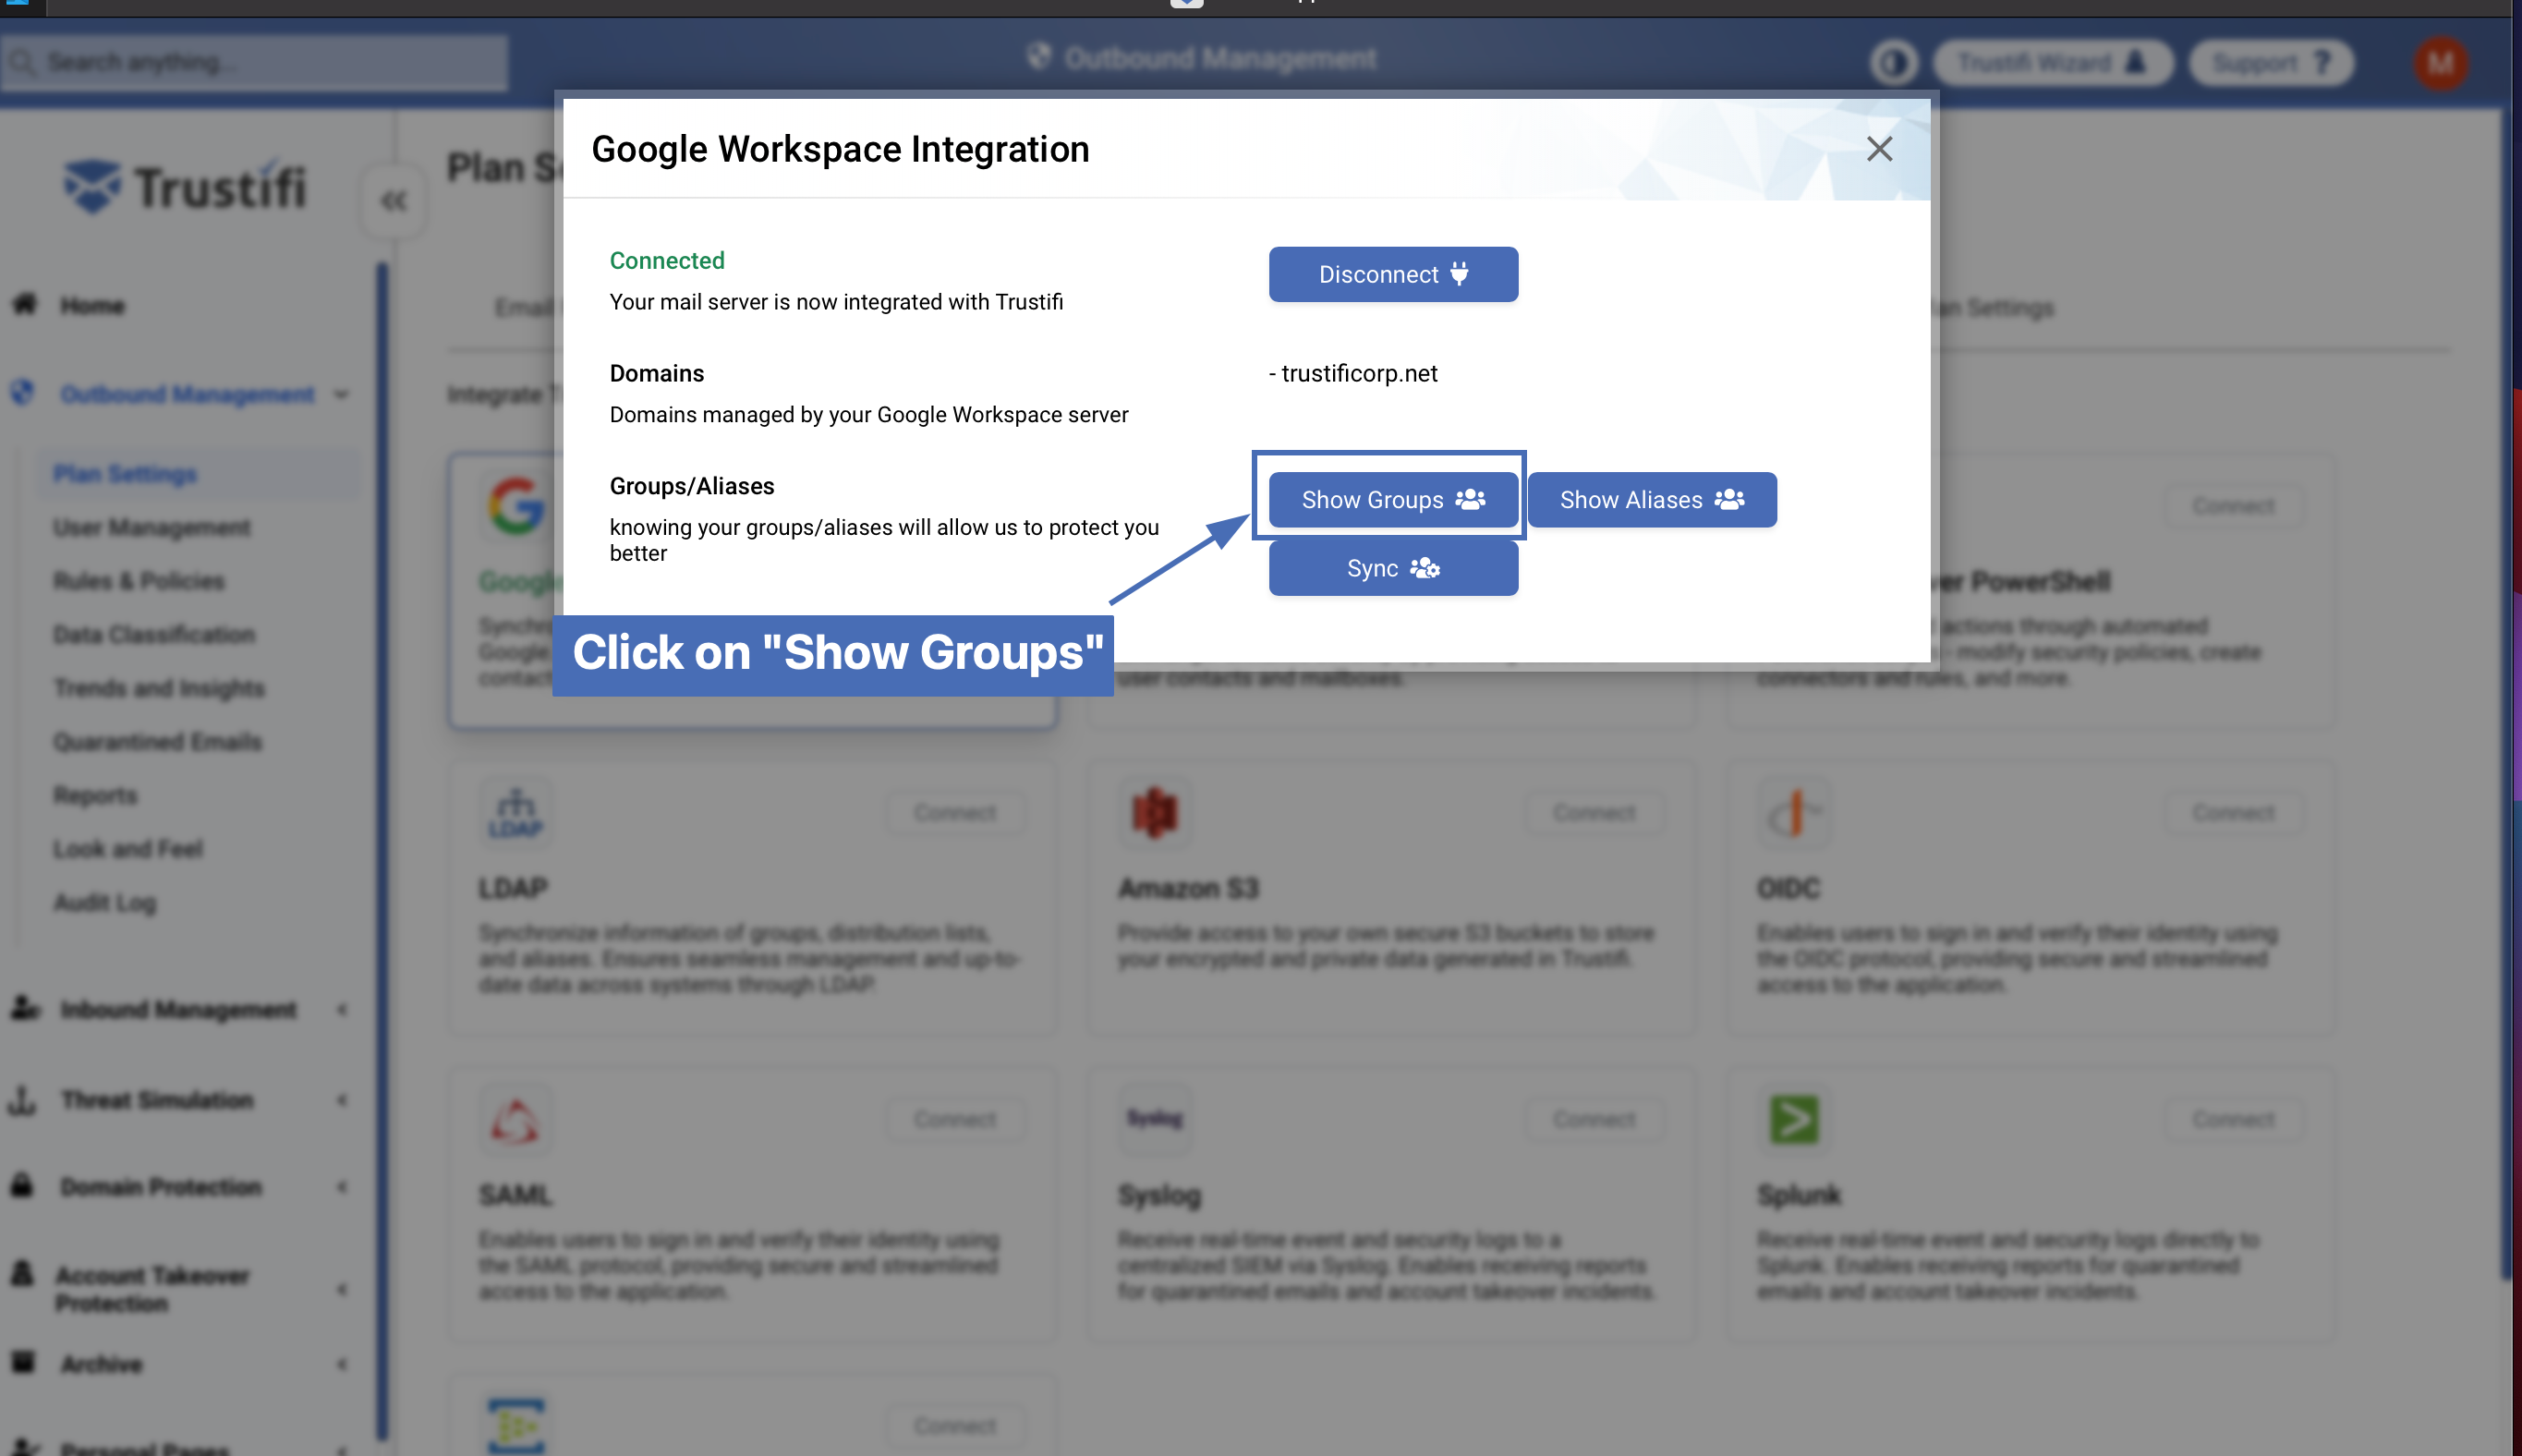
Step 17: viewing the groups
To view the list of groups and distribution lists retrieved from Google Workspace, click on the “Show Groups” button.
Step 18: verifying the groups
Go over the groups and distribution lists in the “Show Groups” window. Clicking on each group/DL should display its members.