Users of Office365 who want to deploy the Trustifi outbound relay can use Trustifi’s PowerShell deployment script to automatically and quickly create the necessary connectors, rules, and configurations in your O365 tenant.
This automated deployment process is recommended for all O365 tenants since it assures a quick and mistake-free deployment process.
To use this deployment script, first make sure the “Exchange Server PowerShell” integration is enabled and connected in your Trustifi plan.
For a full explanation on how to enable this integration, see this guide: https://docs.trustifi.com/docs/exchange-server-powershell
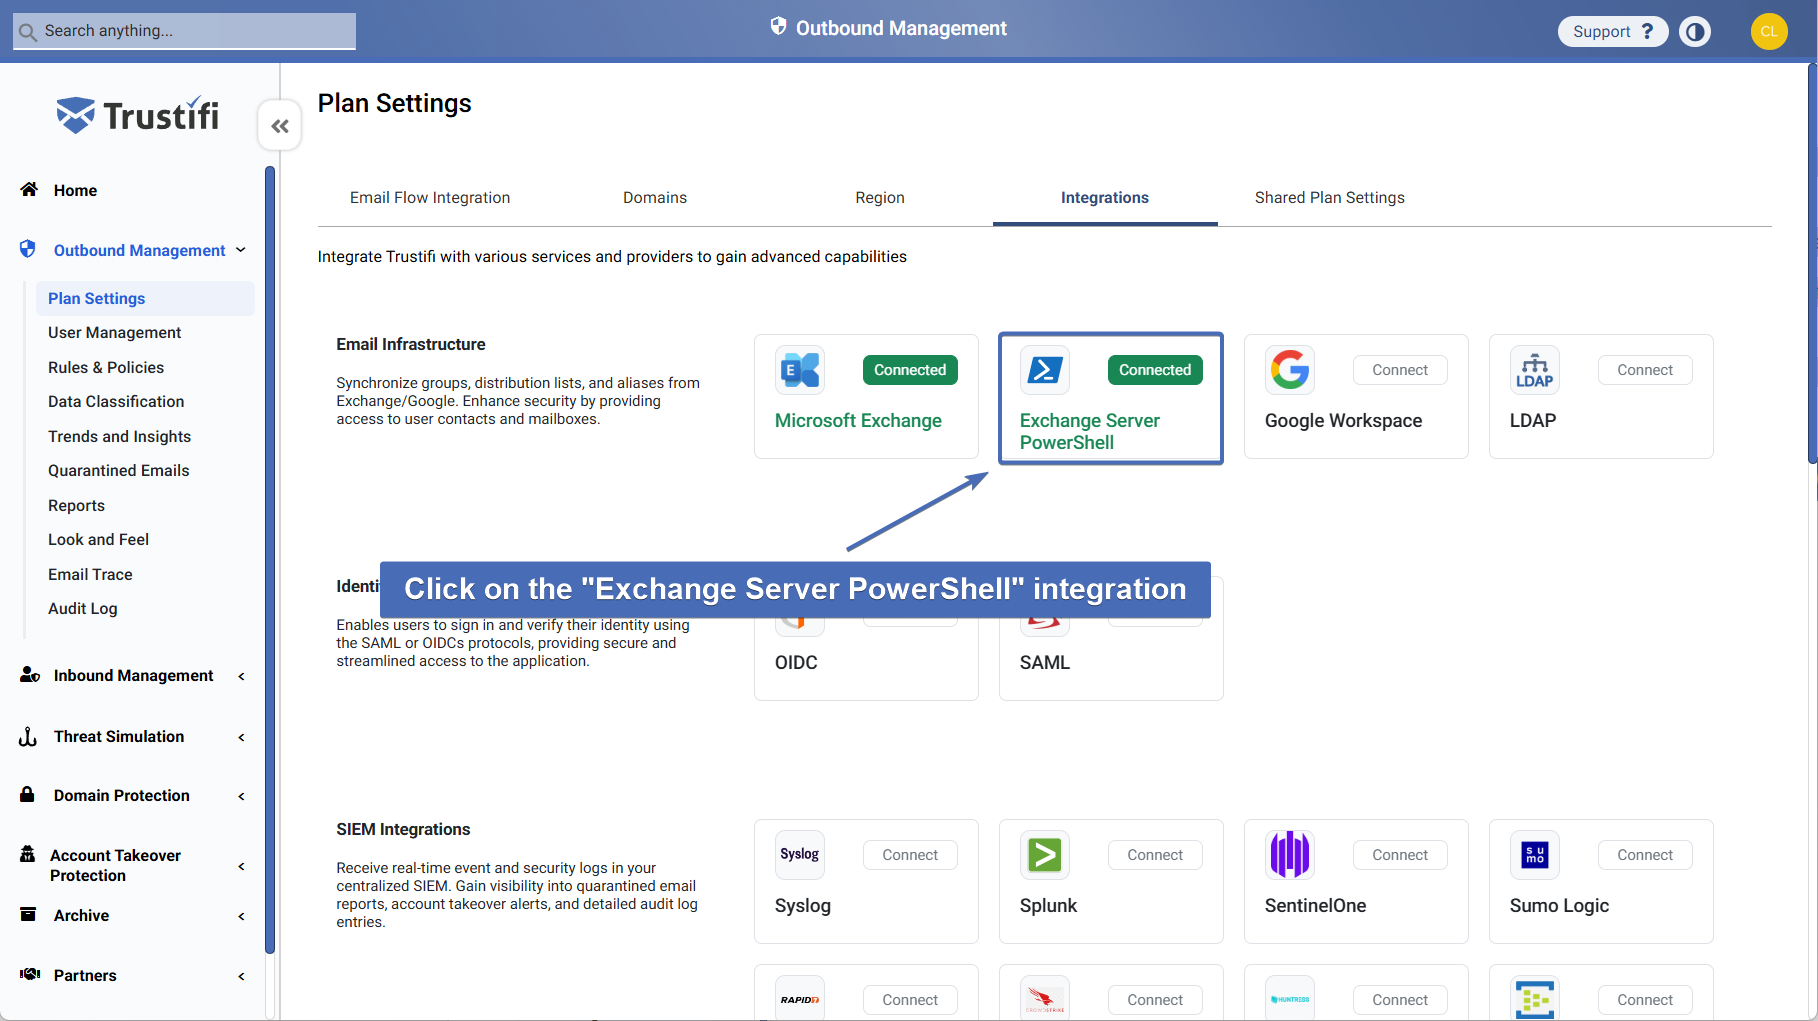
To access the deployment wizard, log into your Trustifi portal and navigate to the Integrations tab (Outbound Management > Plan Settings > Integrations tab)
There, click on the “Exchange Server PowerShell” integration.
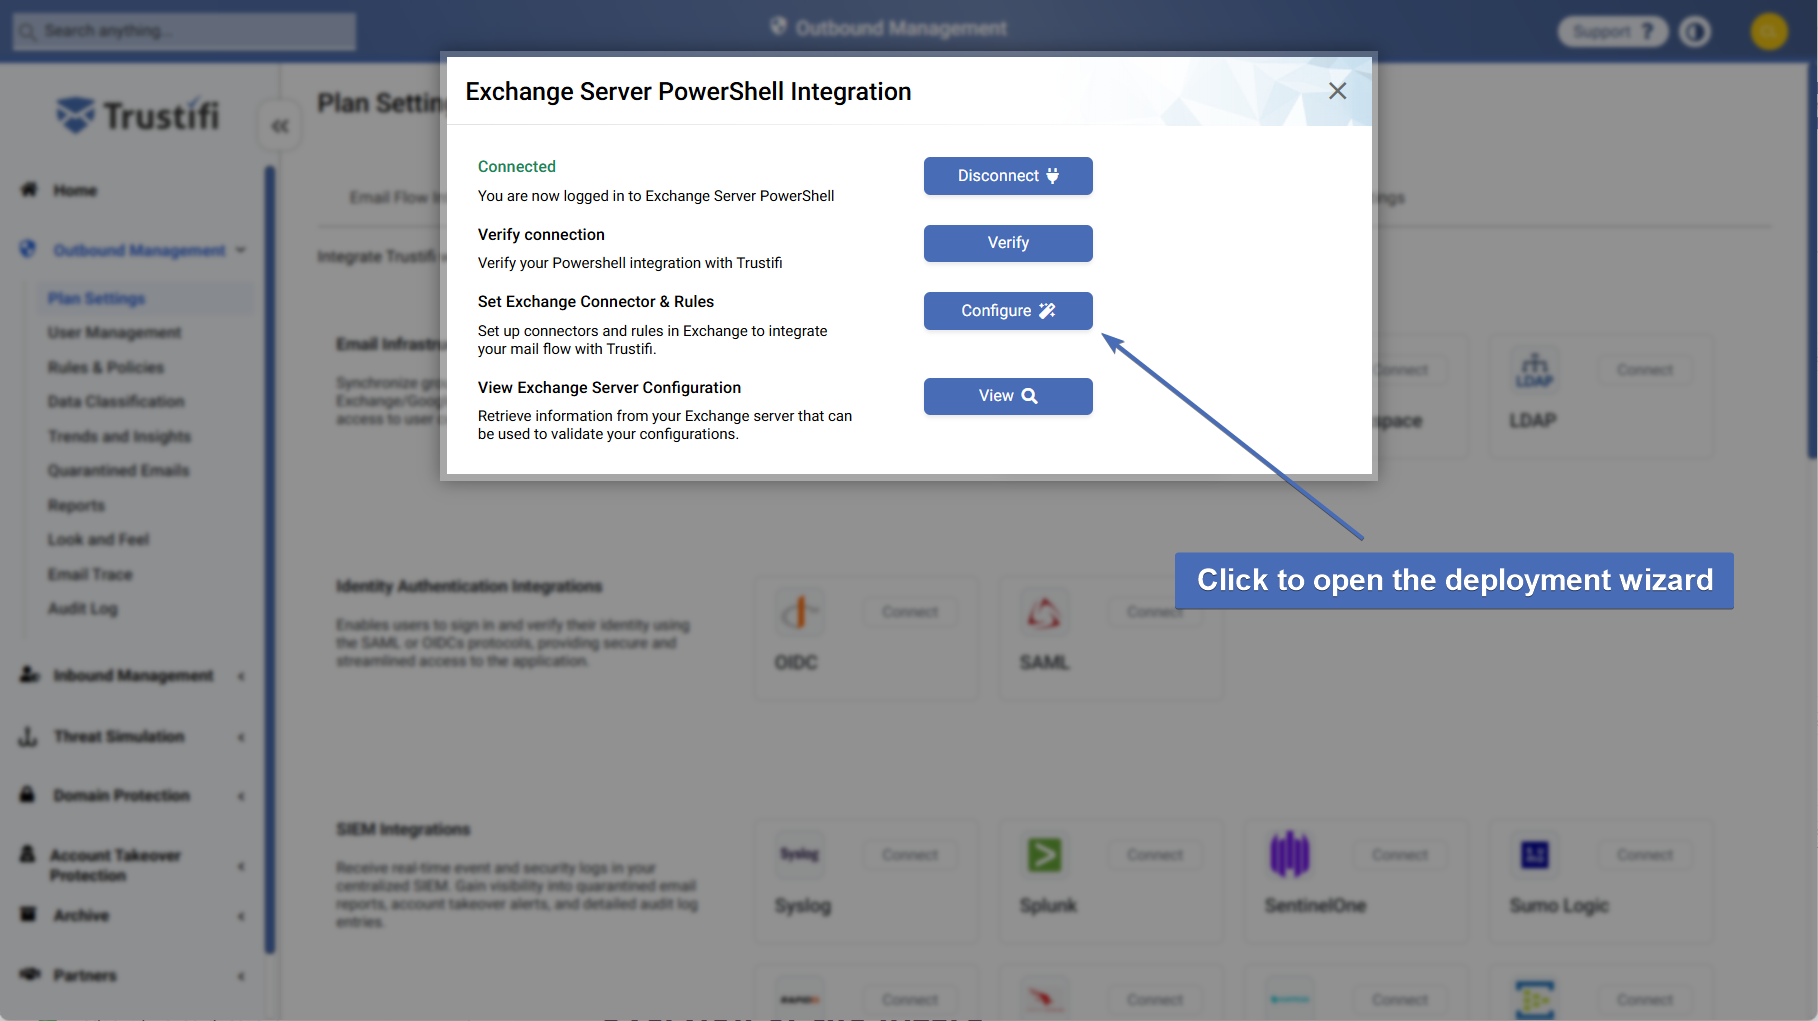
Within the Exchange Server PowerShell Integration window, click on the Configure button next to the Set Exchange Connector & Rules section.
Overview of the wizard
When you launch the wizard from the Set Exchange Connector & Rules button in the Exchange Server PowerShell integration, Trustifi opens a multi‑step window.
The steps in the progress bar are General Information, Select Domains, Configuration, and Summary. You can move back and forth between steps using the Back and Next buttons.
The final Configure button runs the PowerShell commands to create or update connectors and rules, but until you click this button no changes are made in Exchange. The steps are outlined below.
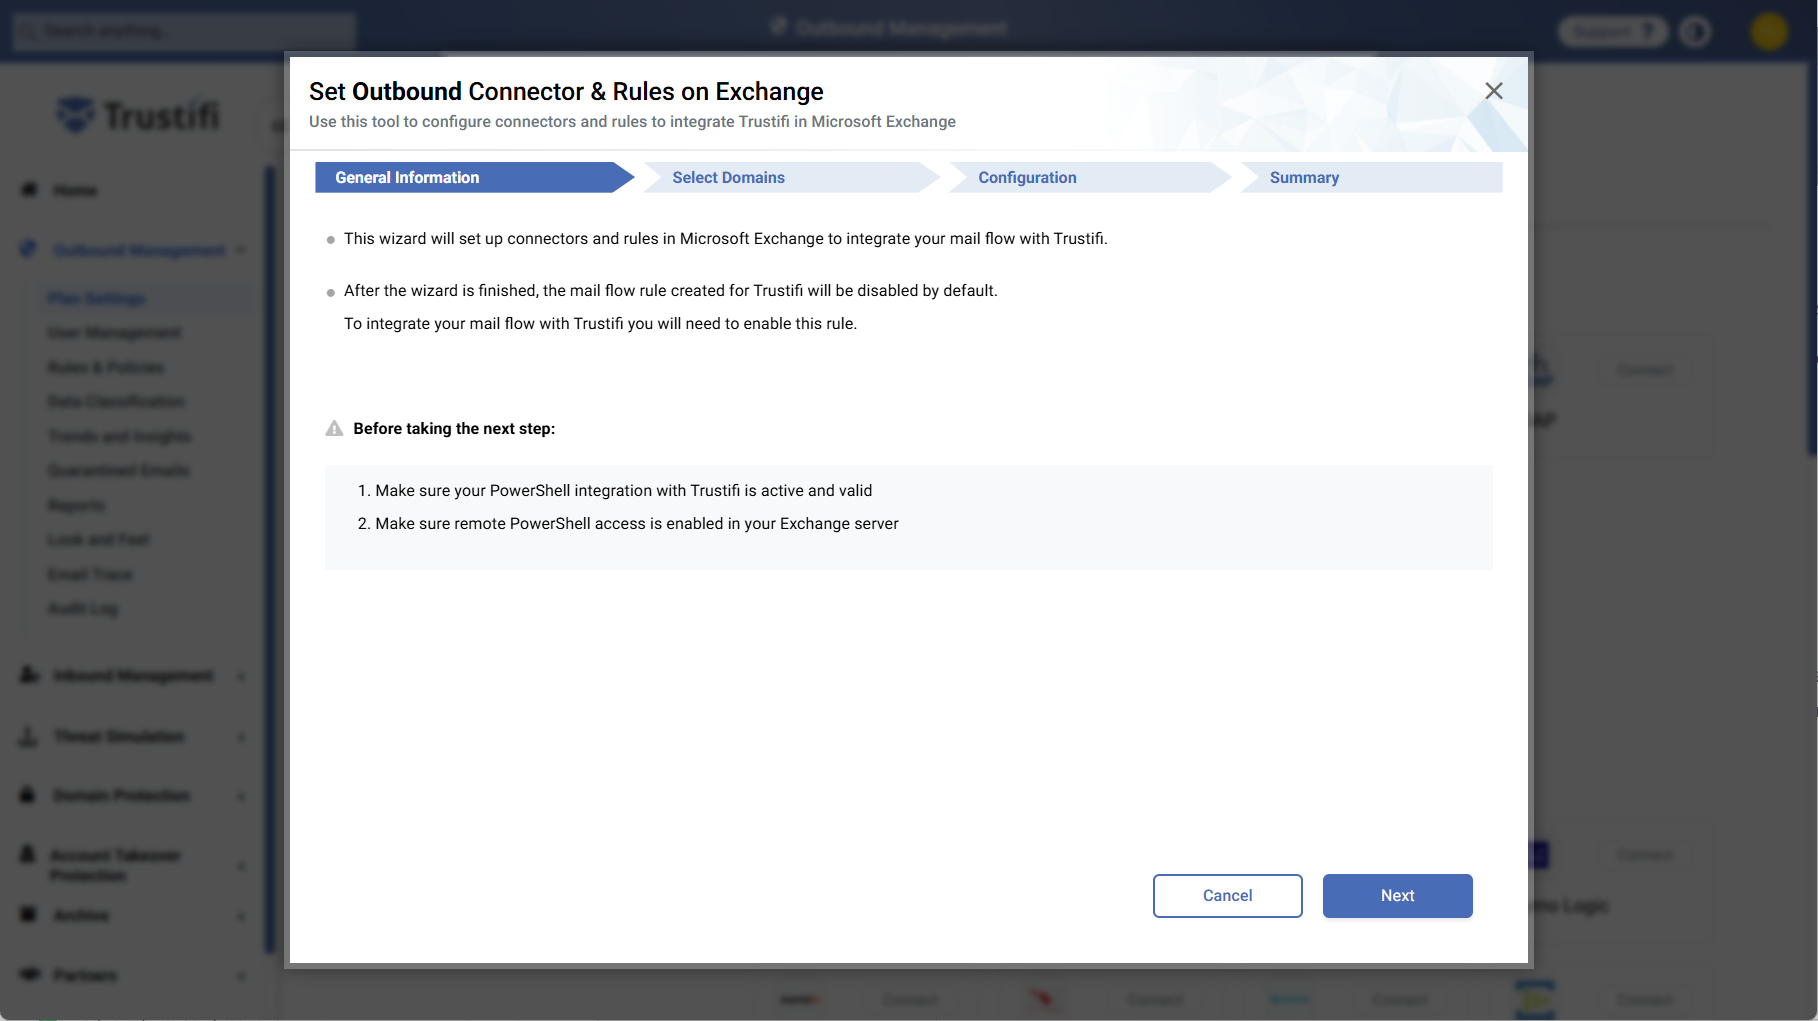
1 – General Information
The opening page outlines what the wizard will do and notes the prerequisites:
Actions performed – the tool will create an Exchange connector and a mail‑flow rule so that outbound mail can be routed through Trustifi.
Rule status – the new rule is created disabled by default. You can choose to enable it in the configuration step or enable it manually later.
Prerequisites – your PowerShell integration with Trustifi must be active, and remote PowerShell access must be enabled on your Exchange server.
After reviewing these details, click Next to proceed.
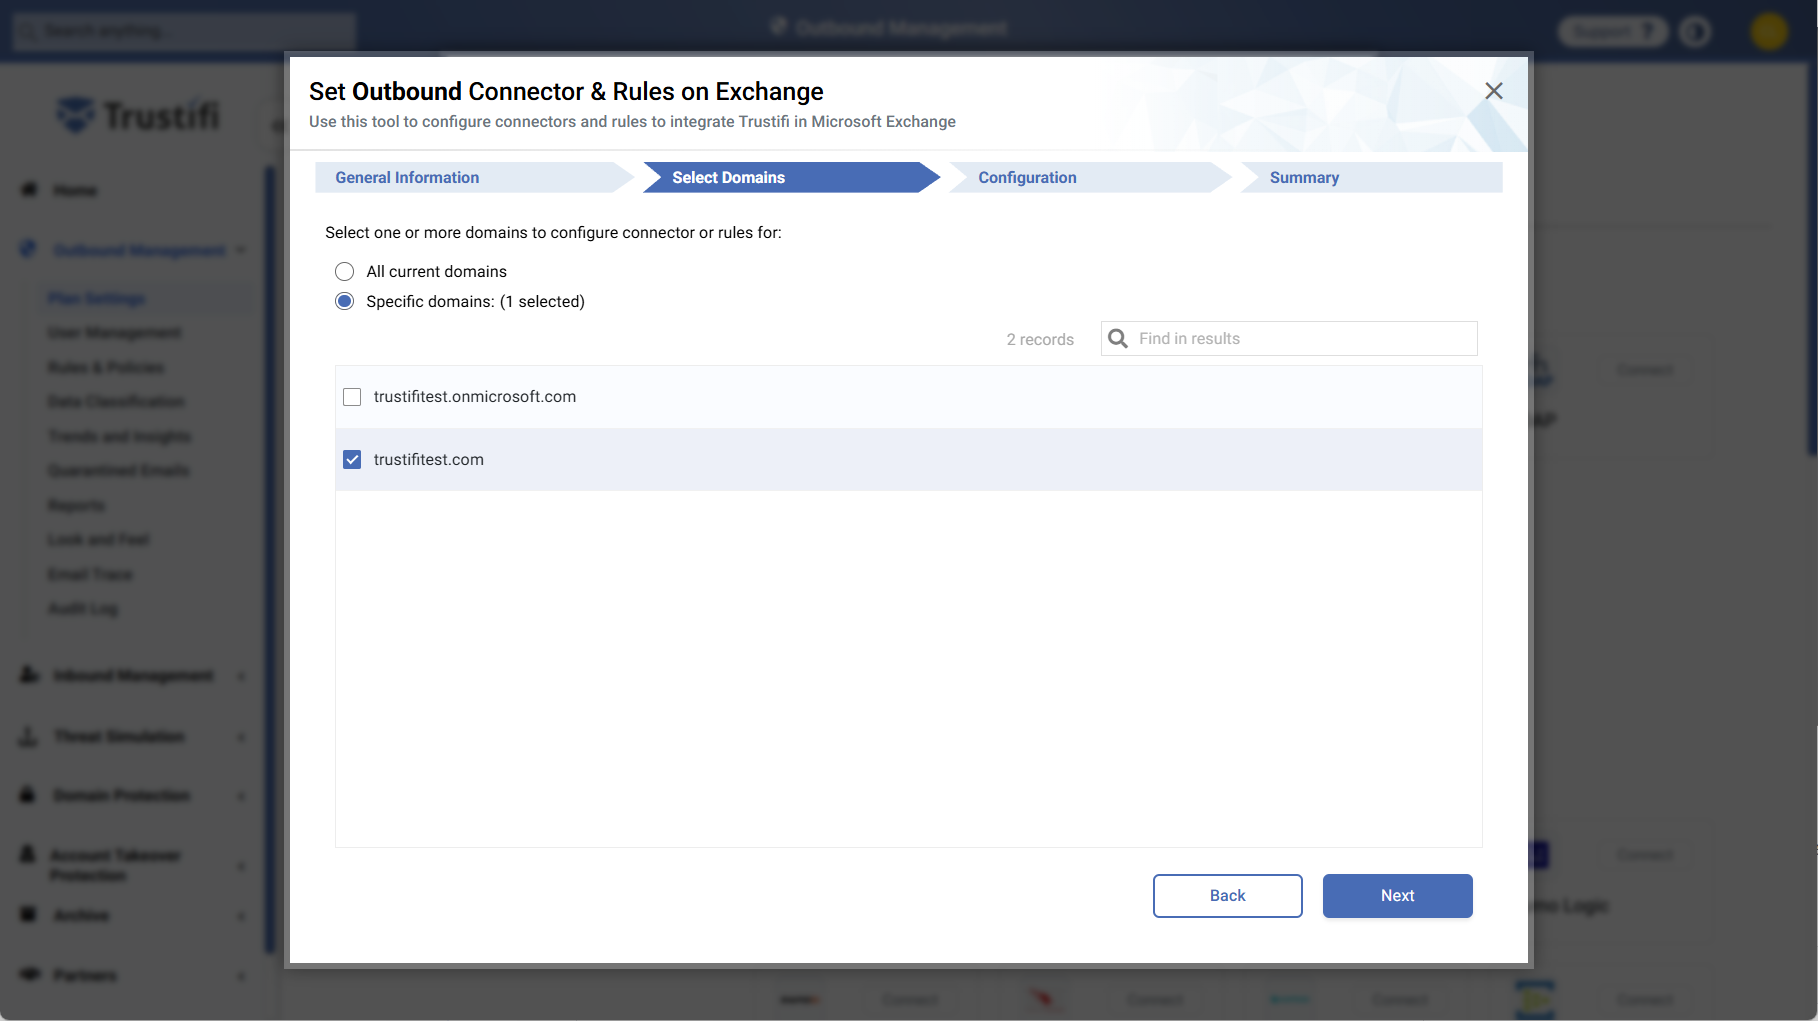
2 – Select Domains
Select which Exchange domains will use the Trustifi outbound connector and rule. You have two options:
Selection | Description |
|---|---|
All current domains | Applies the connector and rule to every domain associated with your Trustifi tenant (default). |
Specific domains | Lets you select individual domains from a list, with a search box to filter the list. |
Choose the appropriate option and click Next.
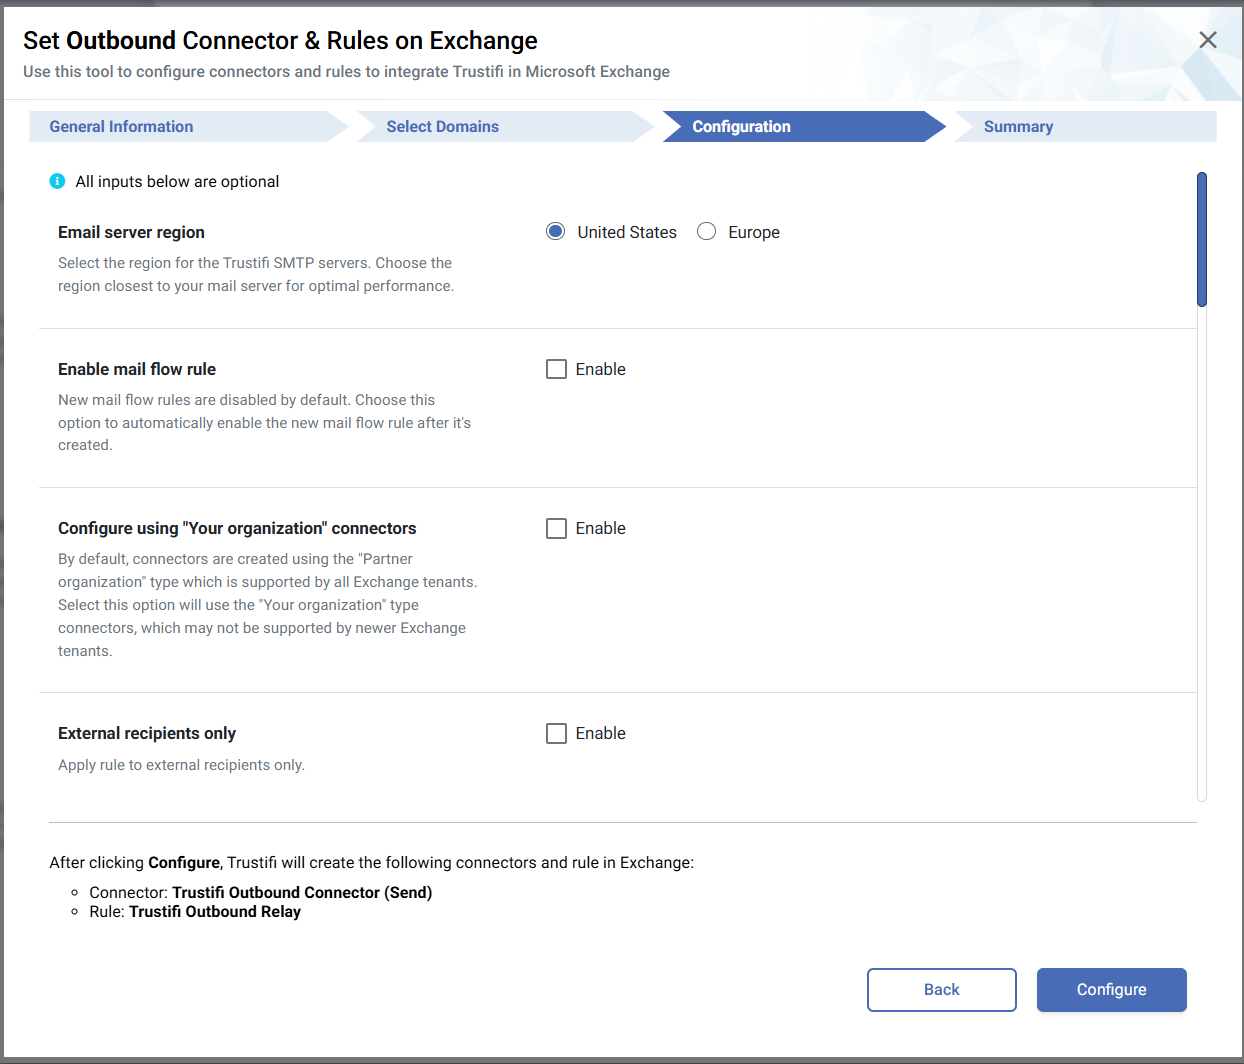
3 – Configuration options
This step provides several optional settings and allows you to define exceptions. None of these selections are required, but they allow you to tailor how outbound mail is routed.
Primary options
Option | Purpose | Default behaviour |
|---|---|---|
Email server region | Determines whether outbound traffic should be routed via the US endpoint or the EU endpoint. | Default selection is based on the plan’s configured AWS region. If a US region is configured, the default SMTP endpoint will be “US”. If a non-US region is configured, the default SMTP endpoint will be “EU”. |
Enable mail‑flow rule | Automatically enable the new mail‑flow rule once it is created. Without this option, Trustifi creates the rule but leaves it disabled. | Disabled – rule is created but not enabled. |
Configure using “Your organization” connectors | Creates the connector using the Your organization type rather than the default Partner organization type. Some Exchange tenants may require the Your organization type; others may not support it. | Off – connectors are created as Partner connectors. |
External recipients only | Applies the rule only to messages addressed to external recipients. Internal recipients (same domain) are excluded. | Off – the rule applies to all recipients. |
In the bottom part of this page, the wizard provides options to apply this rule for specific mailboxes/groups only or to exclude certain mailboxes/groups from the mail flow.
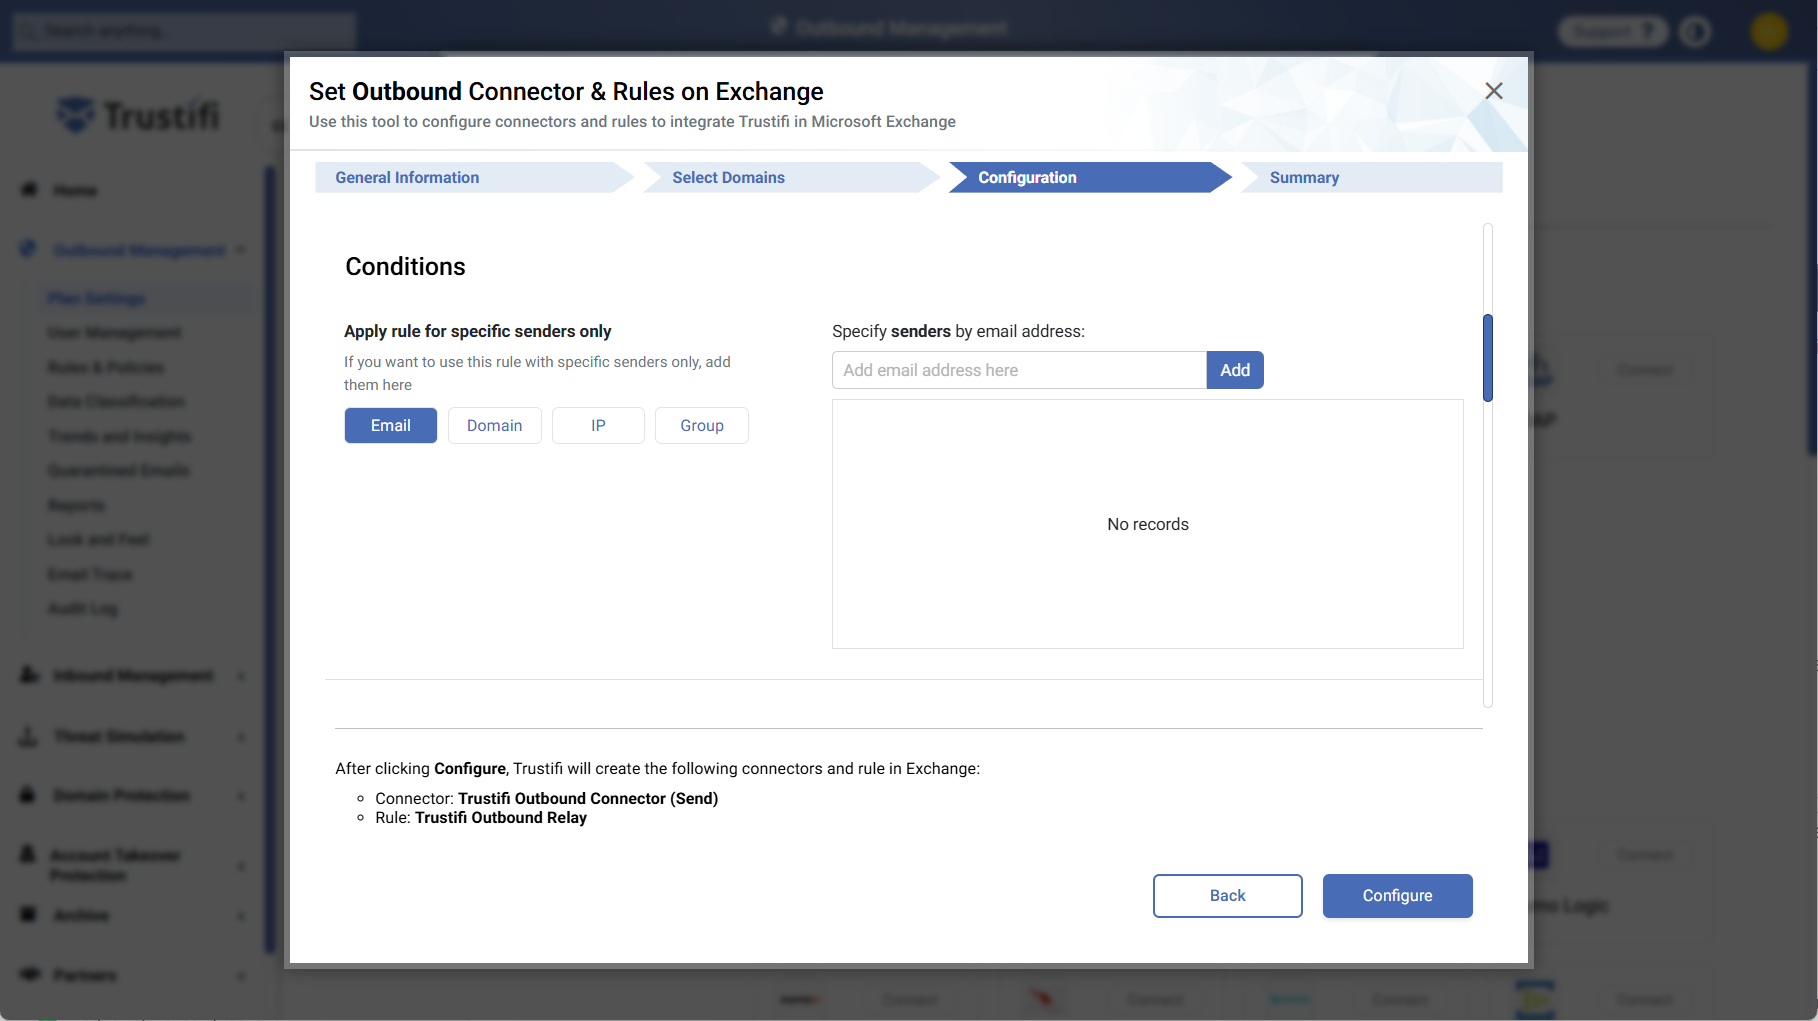
To use these inclusion/exclusion conditions, select the type of entity you want to specify (mailbox/domain/IP/group) and add it on the right side. Multiple values of the same type can be added as well.
Note: All configurations can be changed post-deployment by editing the Trustifi inbound relay mail flow rule in O365.
Objects created
At the bottom of the configuration page, the wizard lists the objects that will be created if you proceed:
Trustifi Outbound Connector (Send) – an Exchange connector that sends mail from your tenant to the Trustifi outbound SMTP endpoint.
Trustifi Outbound Relay – an Exchange mail‑flow rule that applies the connector based on your chosen options.
Use the Back button to revisit earlier steps.
4 – Summary and execution
The final step runs after you click the Configure button in the configuration step.
Trustifi connects to Exchange via PowerShell and executes a script to create or update the connectors and rule. While the script runs, the summary page displays a progress indicator and a message such as “The Trustifi connectors and rules are being configured on Exchange … please wait”.
When finished, you will see a success notification if the process finished successfully, or an error if there was an issue in the configuration process.
Important points:
The wizard only creates connectors and a mail‑flow rule; it does not enable the rule unless you selected the Enable mail‑flow rule option.
You can close the wizard at any time before clicking Configure without affecting your Exchange environment.
After running the wizard
Enable the mail‑flow rule (if necessary) – open Exchange Admin Center → Mail flow → Rules, find Trustifi Outbound Relay and enable it.
Test outbound mail – send messages to internal and external recipients to ensure mail is routed through Trustifi when expected.
Review exceptions – verify that any senders or recipients you exempted are correctly bypassing the rule.
Use the “View Exchange Server Configuration” option – the Exchange Server PowerShell integration modal provides a read‑only report showing the current connector and rule configuration.
Troubleshooting
If the wizard cannot connect or fails to create the connectors, verify the following:
PowerShell integration is active – under the Exchange Server PowerShell integration, click Verify to confirm the connection.
Remote PowerShell access is enabled – on your Exchange server, ensure PowerShell Remoting (WinRM) is configured and accessible from Trustifi.
Permissions – the account used for PowerShell integration must have global admin permissions to create connectors and mail‑flow rules.
If problems persist, contact Trustifi support with any error messages displayed in the wizard.