Overview
Trustifi provides a built-in integration with Syslog to support Security Information and Event Management (SIEM) workflows. This integration automatically exports security-relevant events and logs from the Trustifi platform to your Syslog instance for centralized monitoring, alerting, and retention.
Integration Capabilities
Once connected, the Syslog integration automatically sends the following event types from Trustifi:
Newly created entries in inbound quarantined emails
Account Takeover Protection incidents
Newly created audit log entries from the Trustifi dashboard
These logs allow SOC teams to correlate Trustifi security events with other infrastructure logs in their SIEM environment.
Accessing the Syslog Integration Window
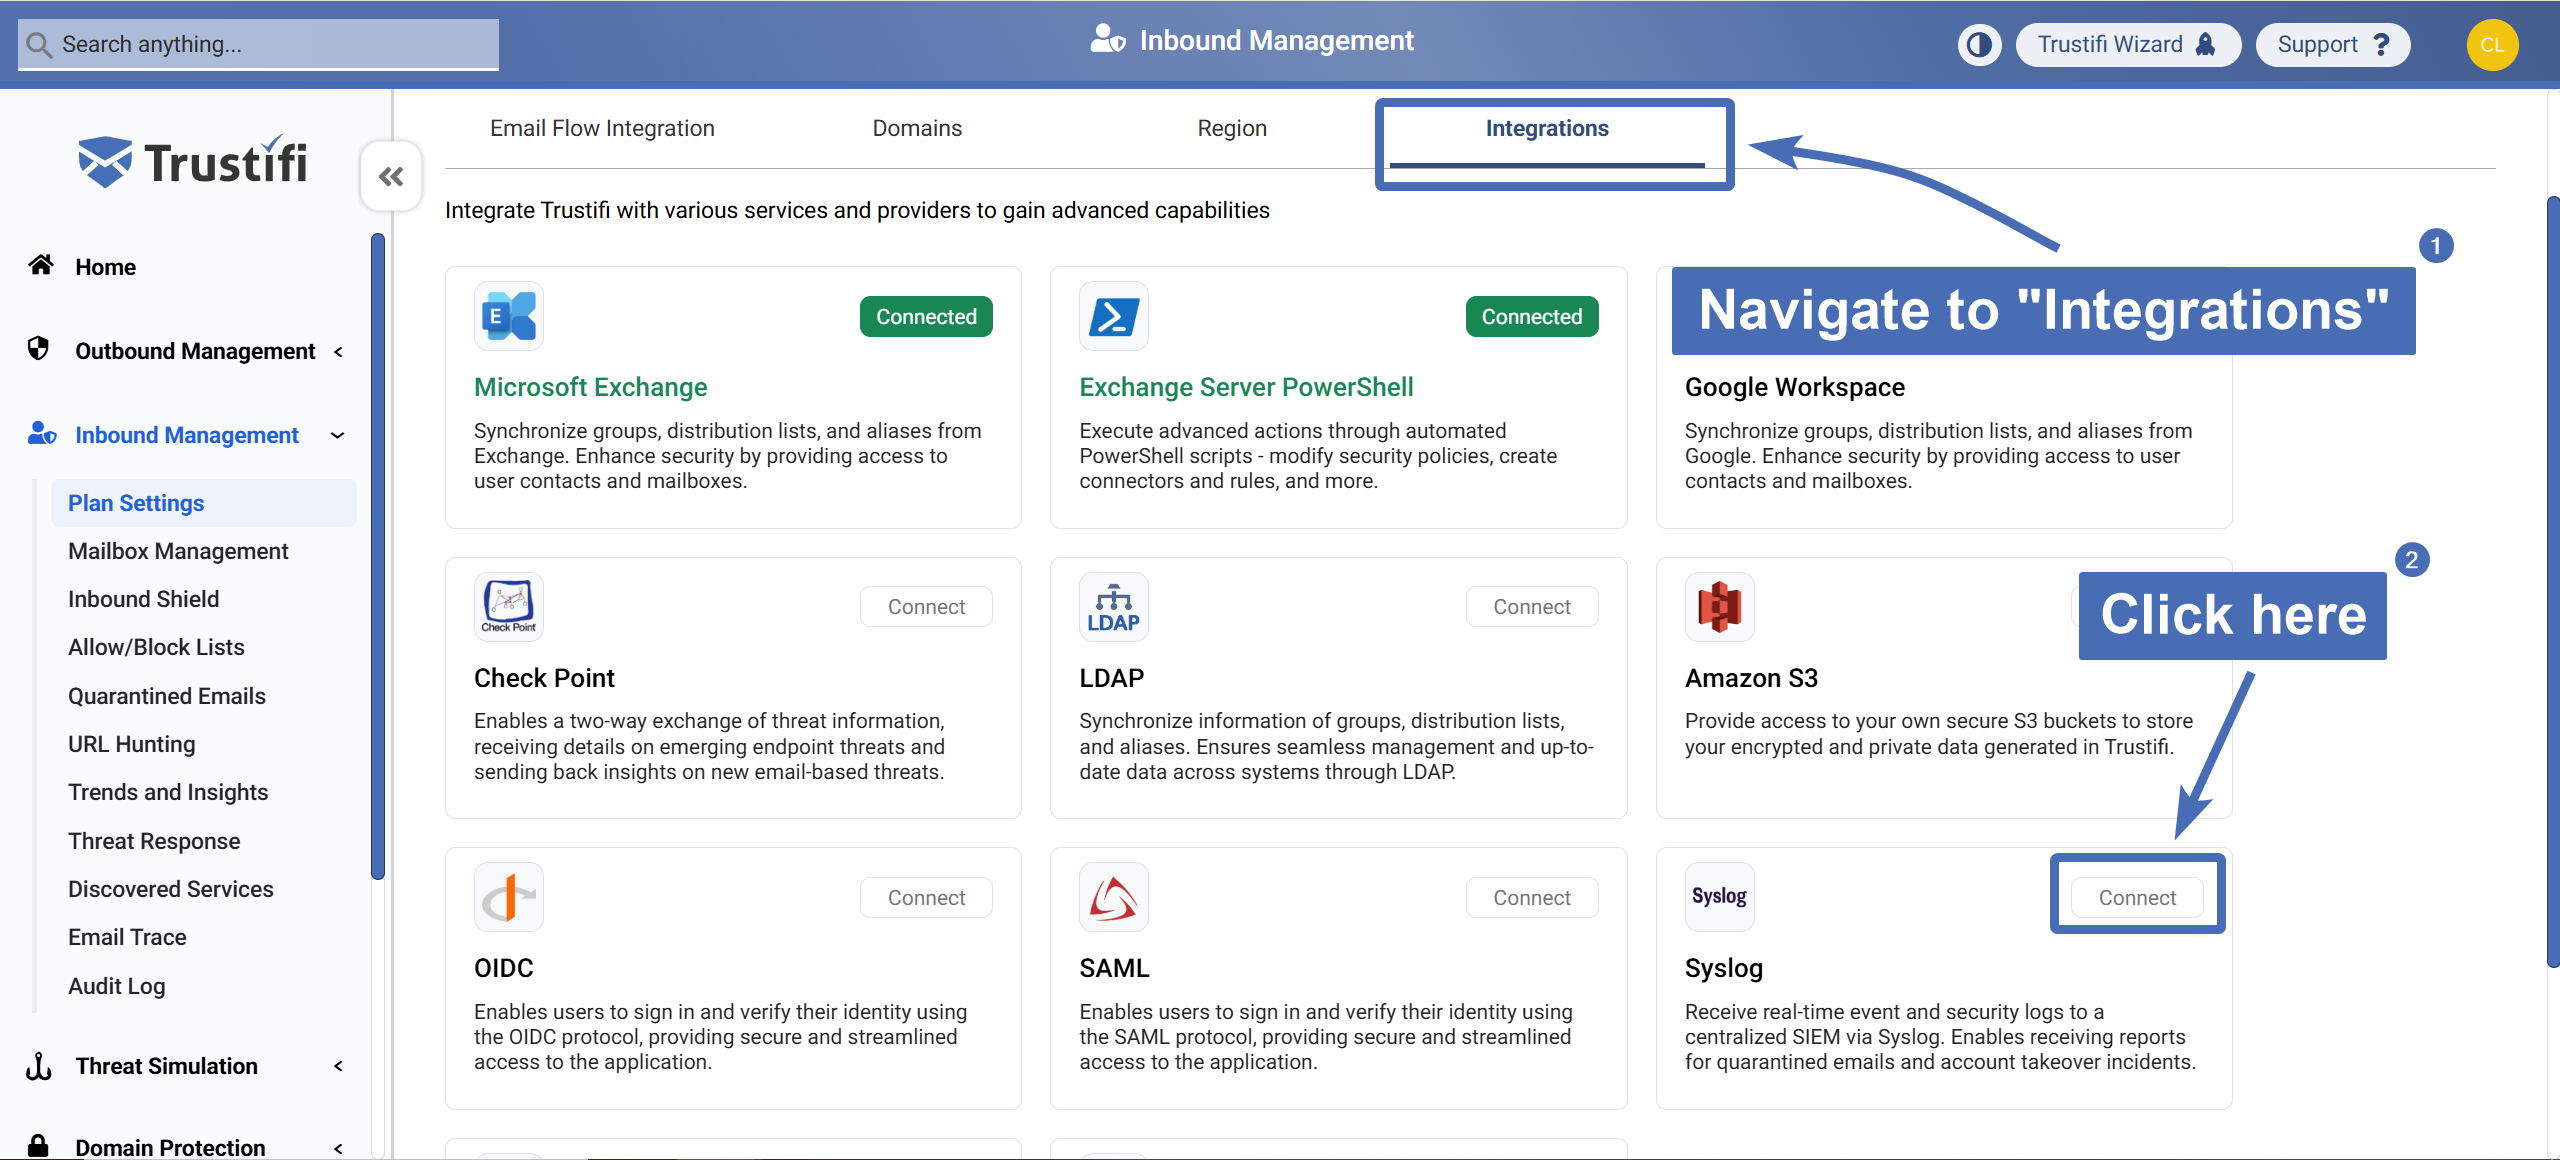
The Syslog integration settings are located in the Trustifi admin portal under the “Integrations” section. The integration may appear under either “Inbound Integrations” or “Outbound Integrations”, depending on your portal layout.
To open the Syslog integration window:
Navigate to the “Integrations” page in the Trustifi admin portal.
Locate the “Syslog” integration tile.
Click the Syslog tile to open the connection pop-up.
Opening the Connection Credentials Section
The “Syslog Integration” pop-up displays:
A general description of how the integration works
The list of event types that will be sent
The current connection status, which initially displays “Disconnected”
Click “Connect” to open the connection credentials section.
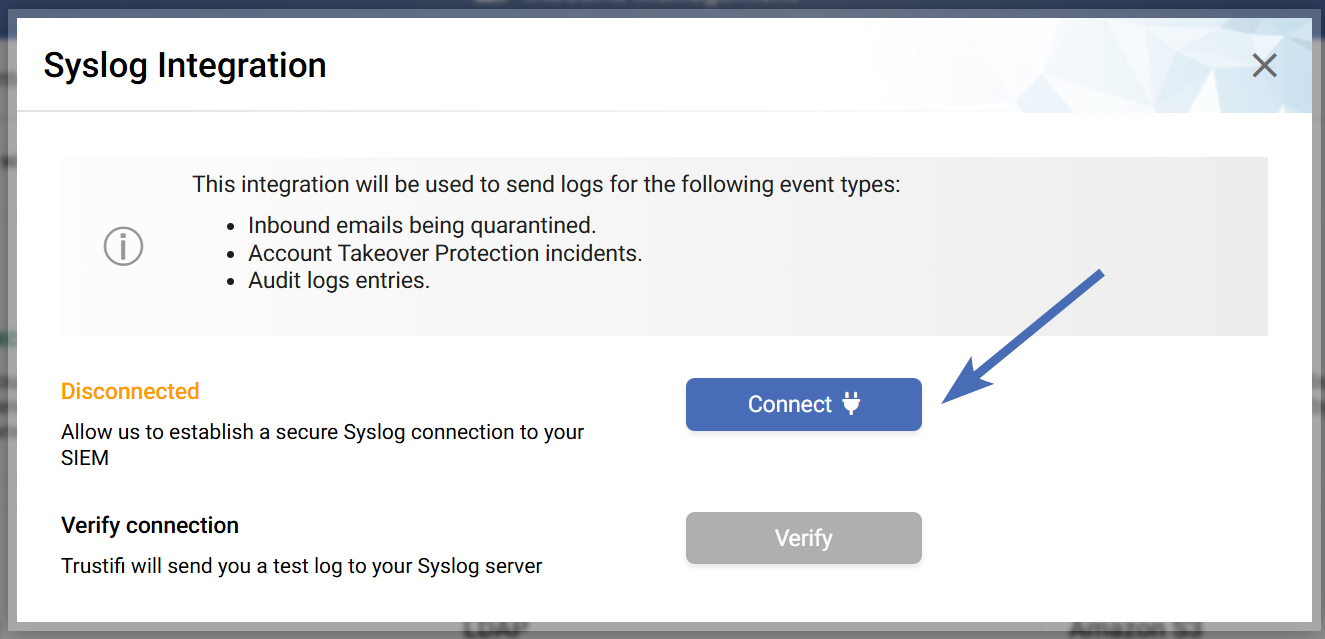
After the connection is established, this same window provides a “Verify connection” option that allows sending a test log from Trustifi to your Syslog instance.
Entering Connection Credentials and Connecting
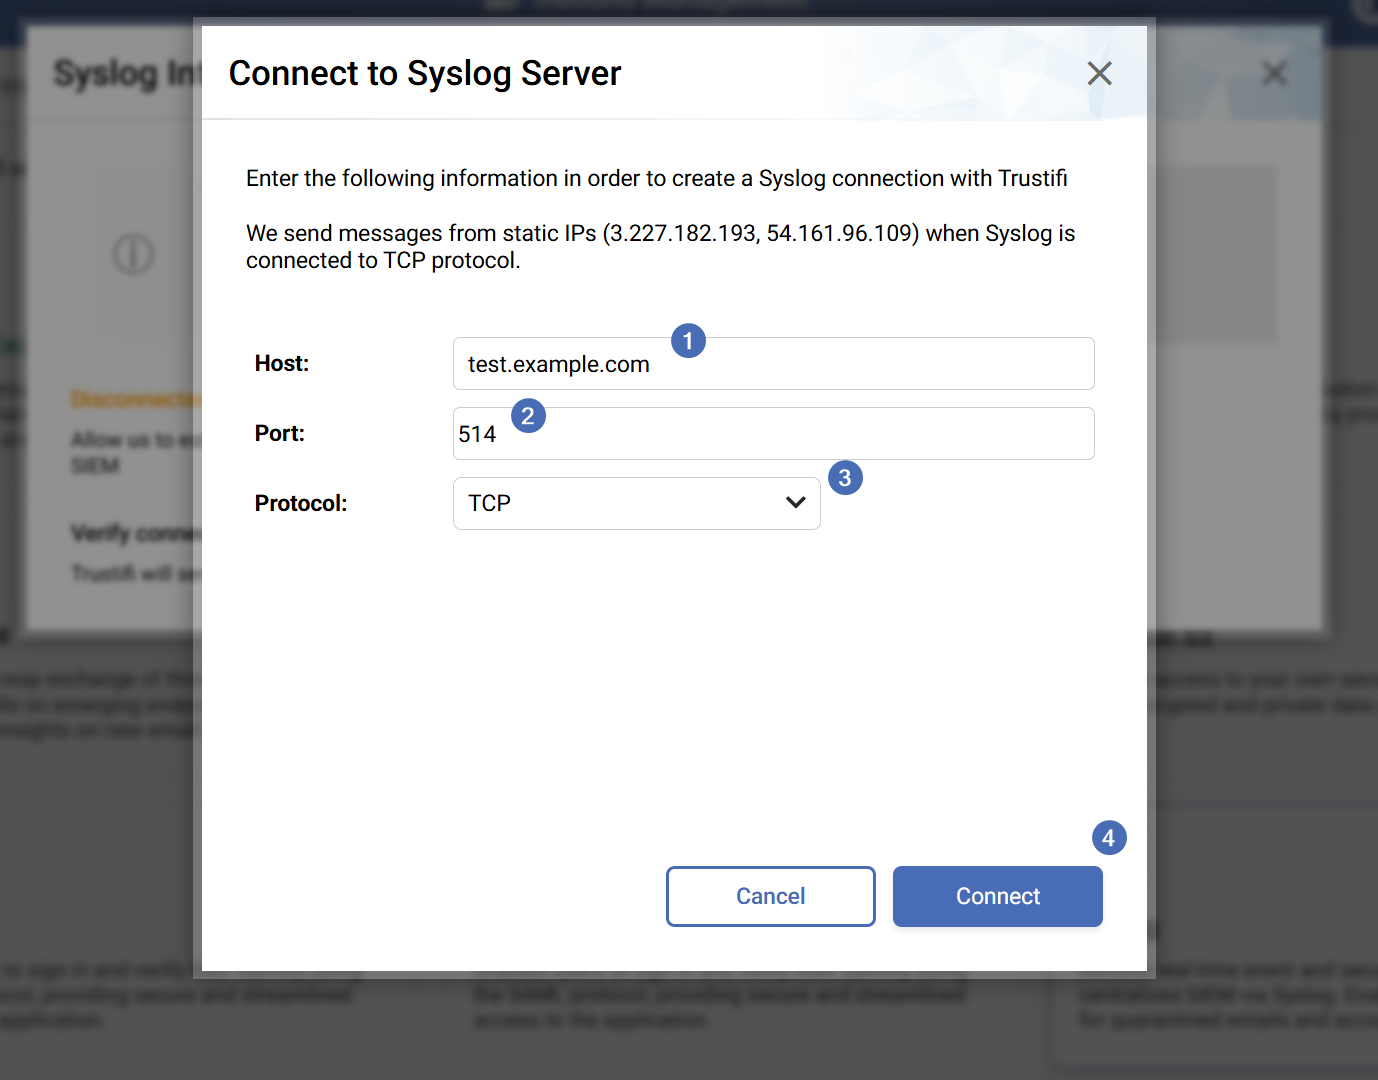
In the next window, enter the required connection details to establish communication between Trustifi and your Syslog server.
To complete the connection:
Enter “Host” — the Syslog server endpoint that will receive logs from Trustifi.
Enter “Port” — the open port on your Syslog server configured to receive logs from Trustifi.
Select “Protocol” — the protocol supported by your Syslog server (typically TCP).
Once all fields are completed, click “Connect”.
Connection Persistence
This connection process only needs to be performed once. After the connection is successfully established:
The connection status updates to “Connected”
Trustifi continuously sends configured event logs to your Syslog instance
The “Verify connection” option may be used at any time to confirm connectivity
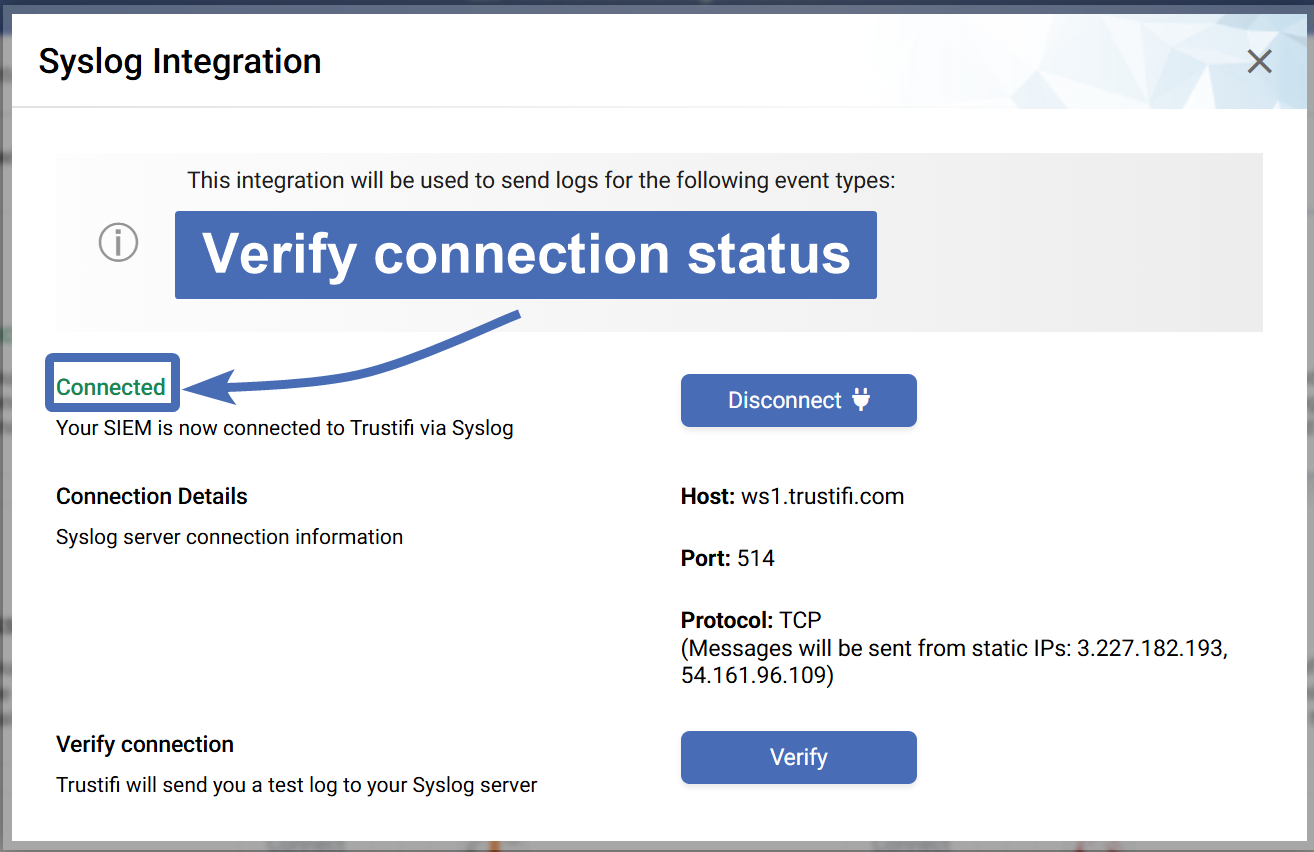
After completing the connection step, return to the Syslog Integration pop-up and confirm that the connection status shows “Connected.”
Optionally, click “Verify connection” to send a test log from Trustifi to your Syslog instance.
Notes
The Syslog Host, Port, and Protocol values must match your SIEM server configuration. Once connected, Trustifi continuously exports logs without requiring additional manual configuration. The “Verify connection” option should be used after setup to confirm successful log delivery.