Trustifi has a built-in Integration with Splunk as an SIEM system which can be used to automatically send different types of data and events from your Trustifi dashboard to your Splunk instance. The integration can automatically send these types of data:
Newly created entries in your inbound quarantined emails in Trustifi
“Account Takeover Protection” incidents
Any newly created audit logs from your Trustifi dashboard
To connect the integration between Trustifi and your Splunk instance, follow the simple steps below:
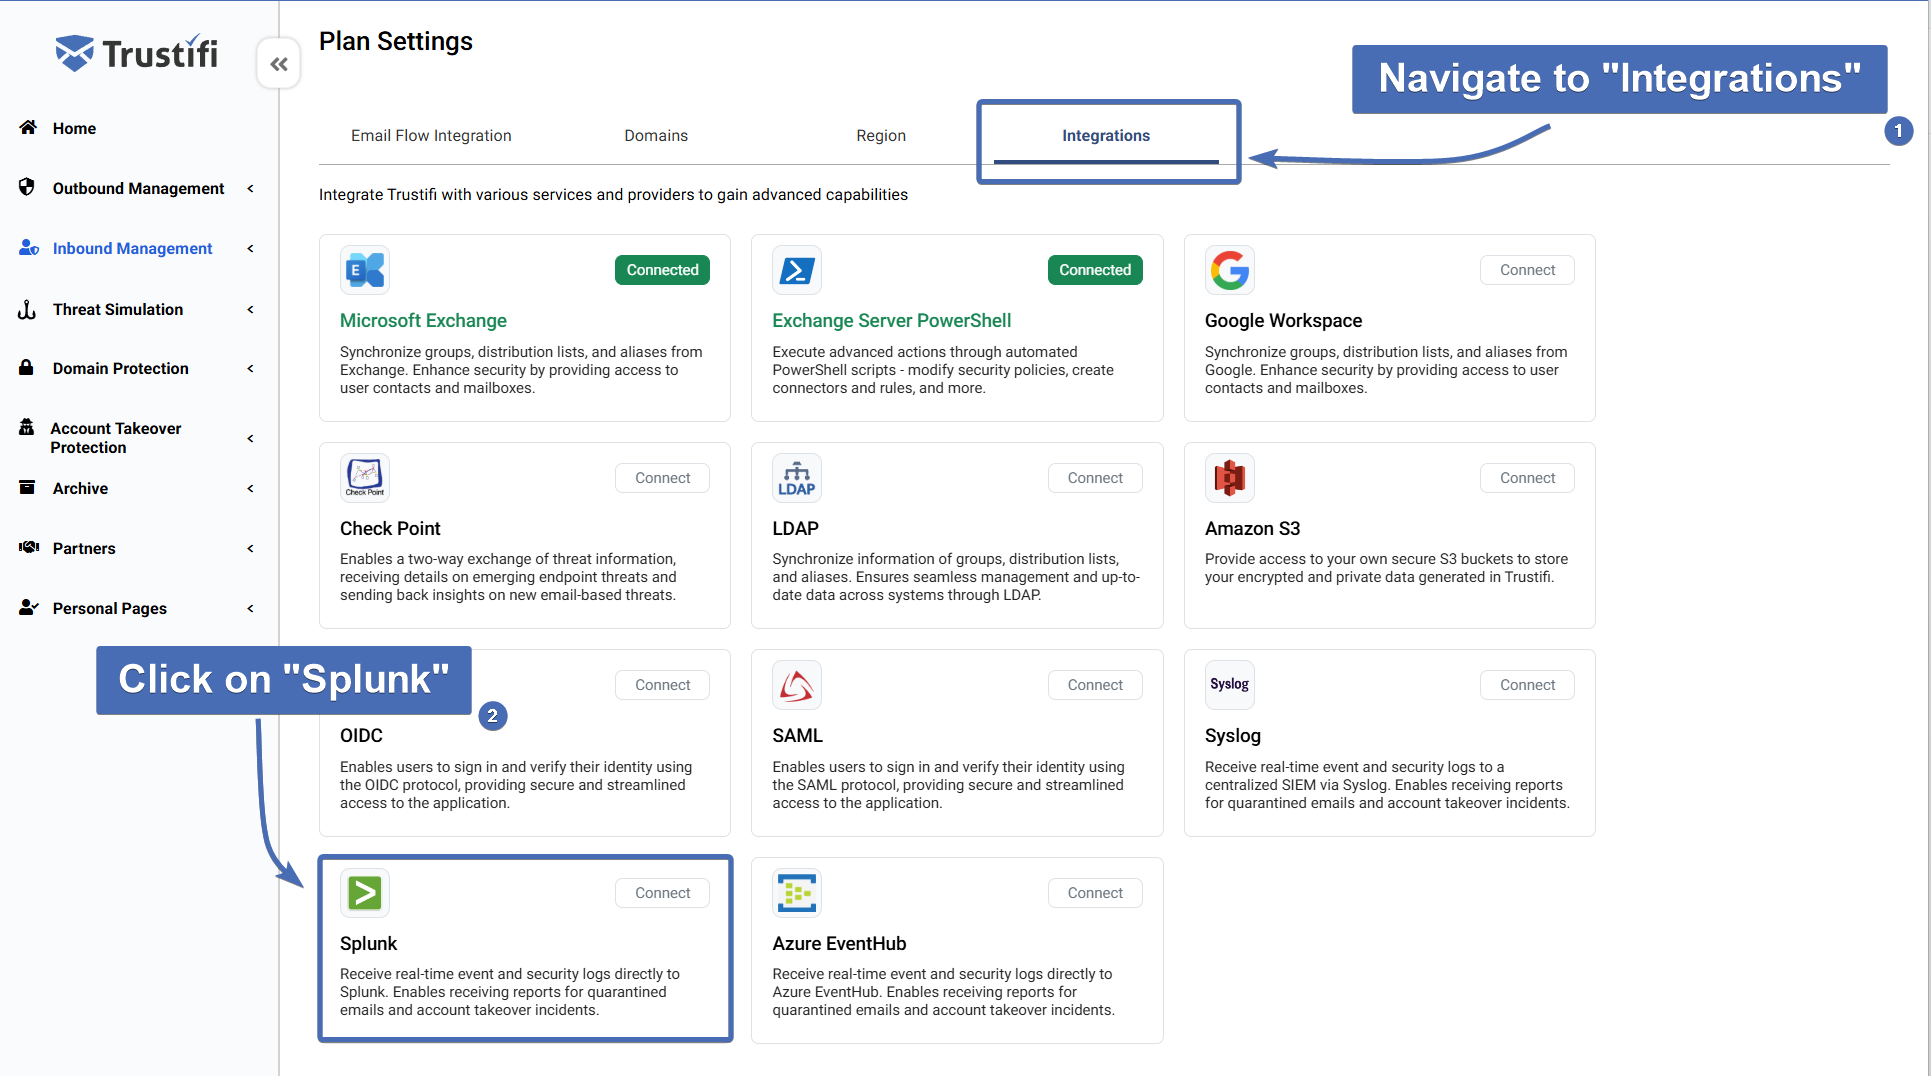
Step 1 - Navigate to the Splunk Integration Window
The Splunk integration section can be found in either the Inbound Integrations or Outbound Integrations pages in the Trustifi dashboard.
When you are in the “Integrations” page, find the Splunk section and click on it to open the connection pop-up.
Step 2 - Open the Connection Credentials Section
In the “Splunk Integration” pop-up, you will see a general description of how the integration works, as well as the current connection status (initially should be “Disconnected”).
Click on the “Connect” button to open the connection credentials section.
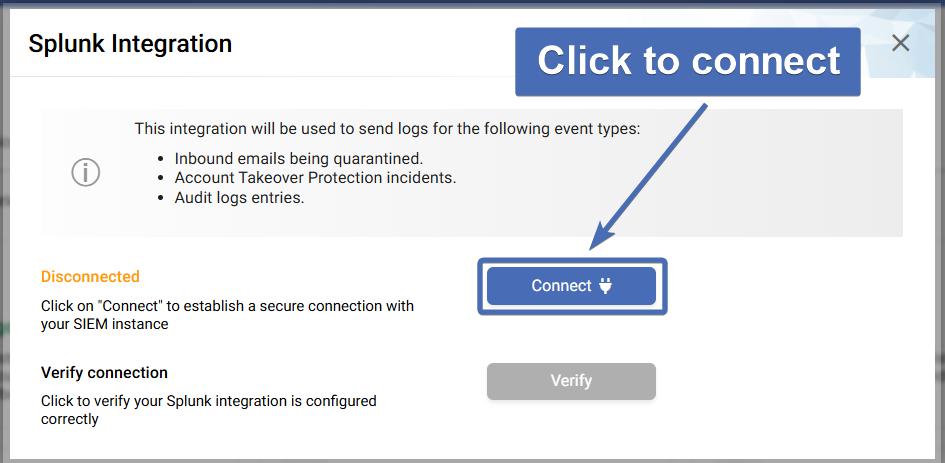
After the connection has been established for this integration (in the next step), you can go back to this screen to use the “Verify connection” option to send a test log from Trustifi to your Splunk instance.
Step 3 - Entering Connection Credentials and Connecting
In the next window you will need to enter 2 inputs to establish the connection between Trustifi and your Splunk instance:
Host: your specific Splunk endpoint to which logs will be sent from Trustifi
Token: the authentication token which will be used to establish the connection
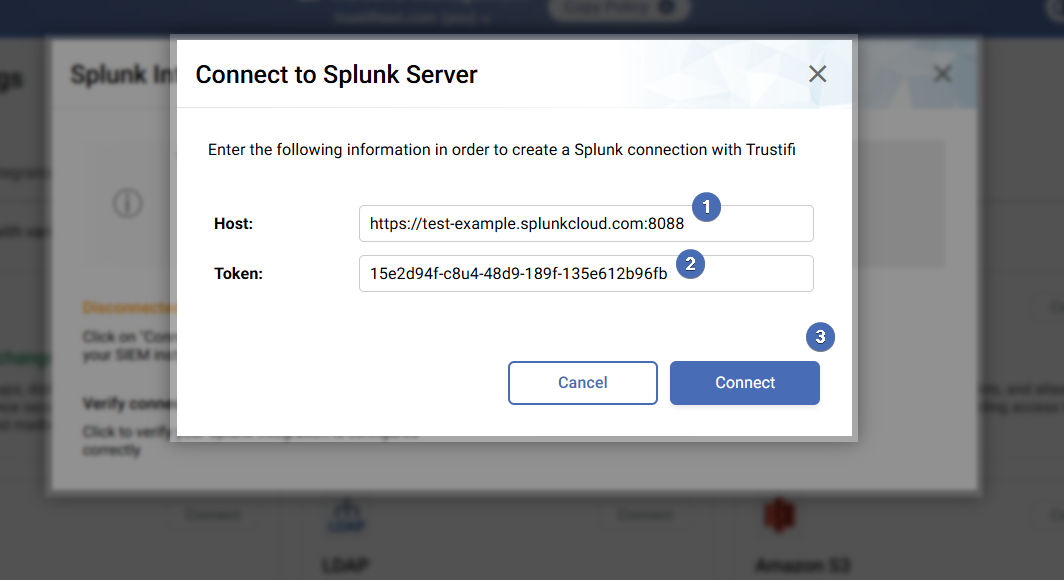
Once both inputs have been correctly added, you can click on the “Connect” button to establish the connection.
This connection process only needs to be done once, after the connection has been established Trustifi will continue to send logs to your Splunk instance continuously.