Overview
The Trustifi Archive allows administrators to migrate existing archived emails into the Trustifi archive environment so they can be searched, reviewed, and managed centrally.
There are two supported migration methods:
File-based migration
Uploading ZIP files containing EML files or PST files exported from Exchange or Microsoft 365 e-discovery.Microsoft Graph API migration
An automated migration process that connects directly to Microsoft 365 and imports archived emails using Microsoft Graph API.
Both methods are managed from the Archive Migration interface within the Trustifi web app.
Accessing the Archive Migration Page
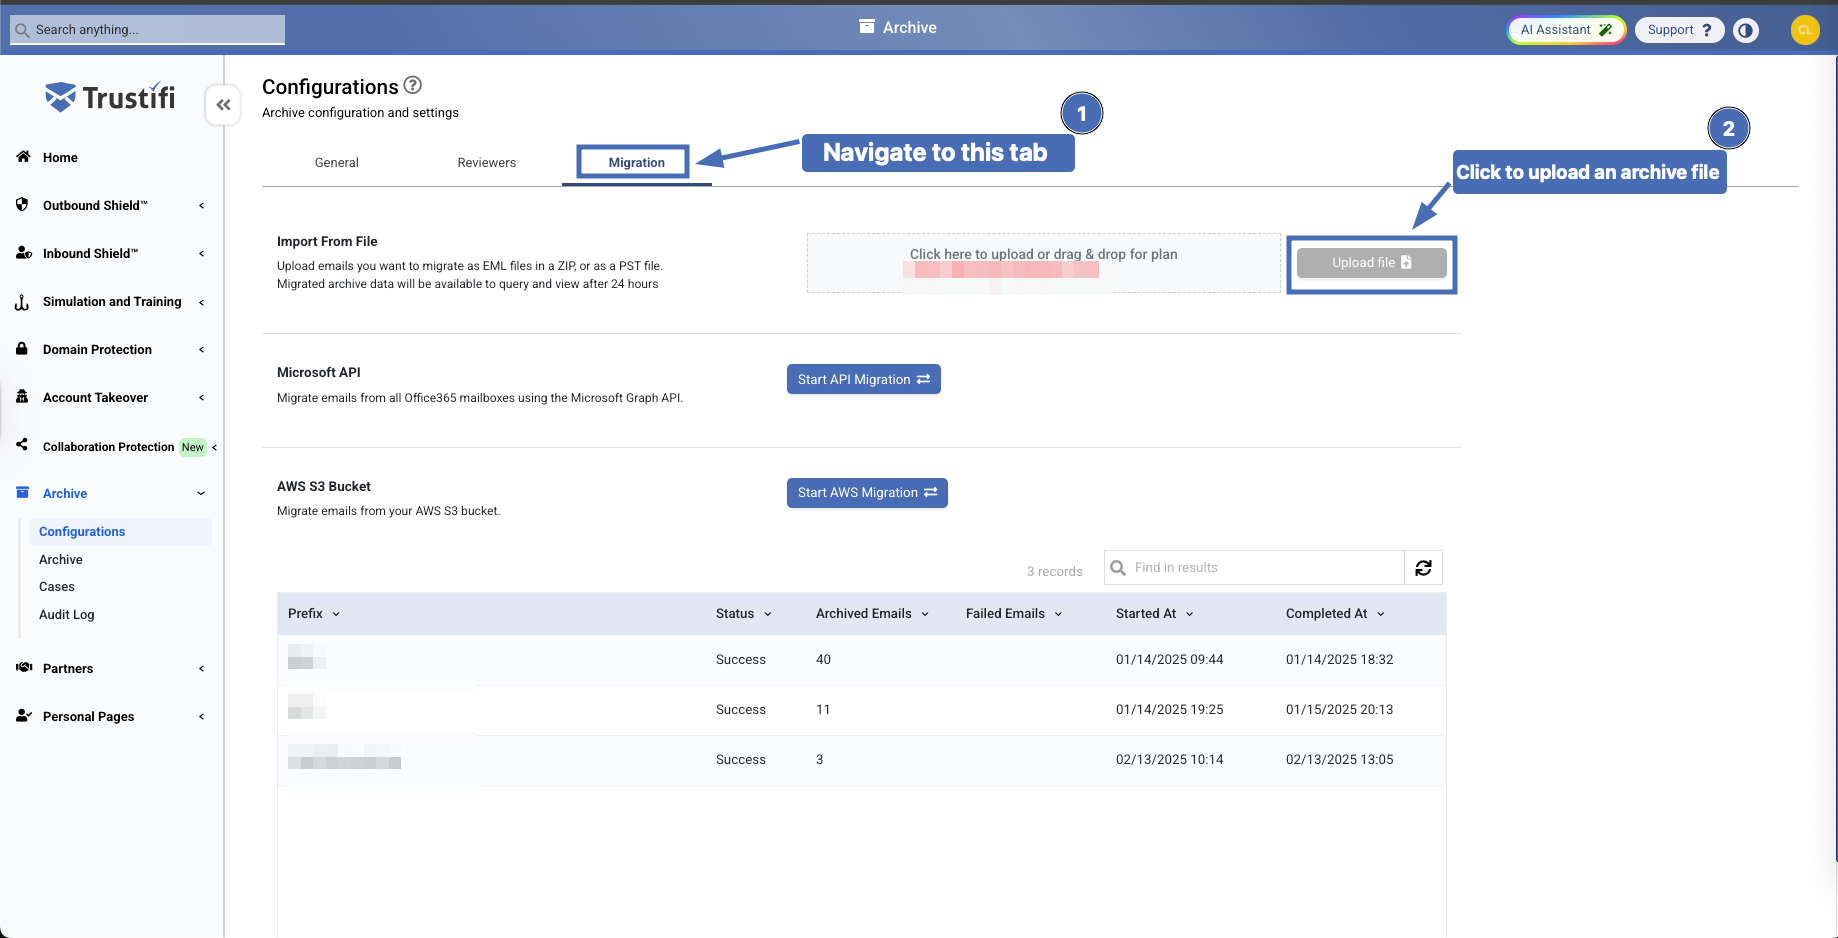
Navigate to the Archive Migration page in the Trustifi web app (Archive > Configuration).
Within this page, you will find:
File upload migration options
Start API Migration button (for Microsoft 365 automated migration)
Migration progress and status indicators
Supported File Types
Currently, the Trustifi archive supports 2 types of files for archive migration:
ZIP files containing EML files.
Note: the EML files within the ZIP don’t need to be organized into folders by sender/recipient mailbox.PST files generated by Exchange/O365 e-discovery.
Method 1: File-Based Archive Migration
Supported File Types
Trustifi supports the following file formats for archive migration:
ZIP files containing EML files
EML files do not need to be organized by sender or mailbox.
Folder structure is not required.
PST files
PST files generated by Exchange or Microsoft 365 e-discovery.
Step 1: Upload File
First, navigate to the Archive Migration page and to upload archive files, click on the “Upload file” button.
You can select one or more files to upload.
Step 2: Monitor Upload Progress
Once the files have been selected for upload, Trustifi will display the upload progress in a notification window on the top right corner of the page.
Do not close this page while the upload is in progress.
Once your files have been fully uploaded, you may close the page.
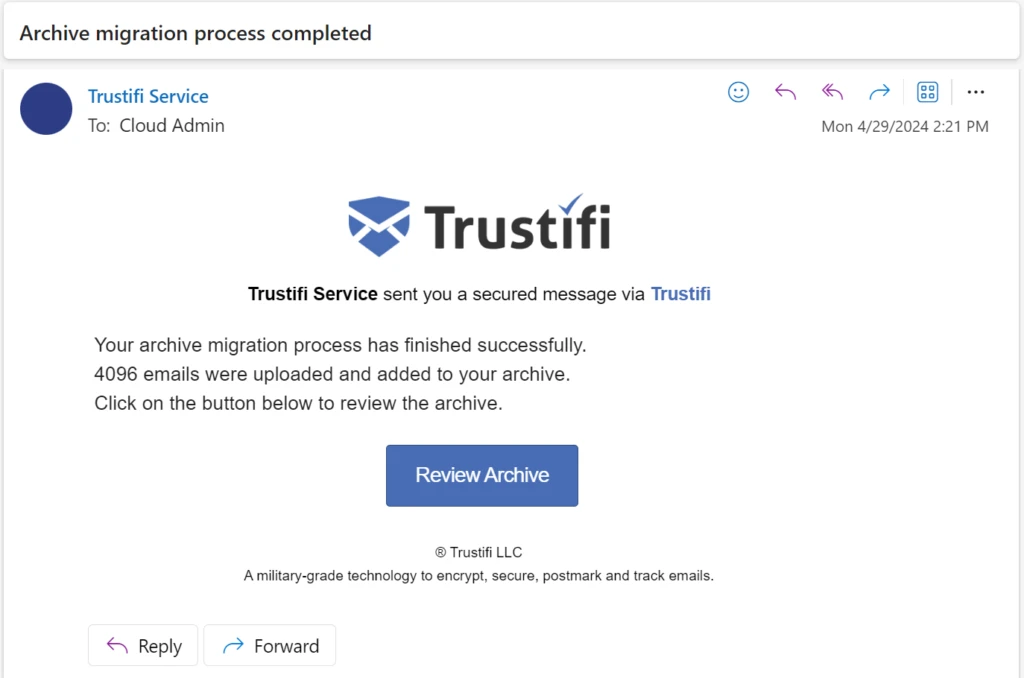
Note: it will still take some time until these archived emails are available for review in Trustifi. When Trustifi successfully finishes processing the archived emails, you will receive a notification similar to this one:
Step 3: Processing
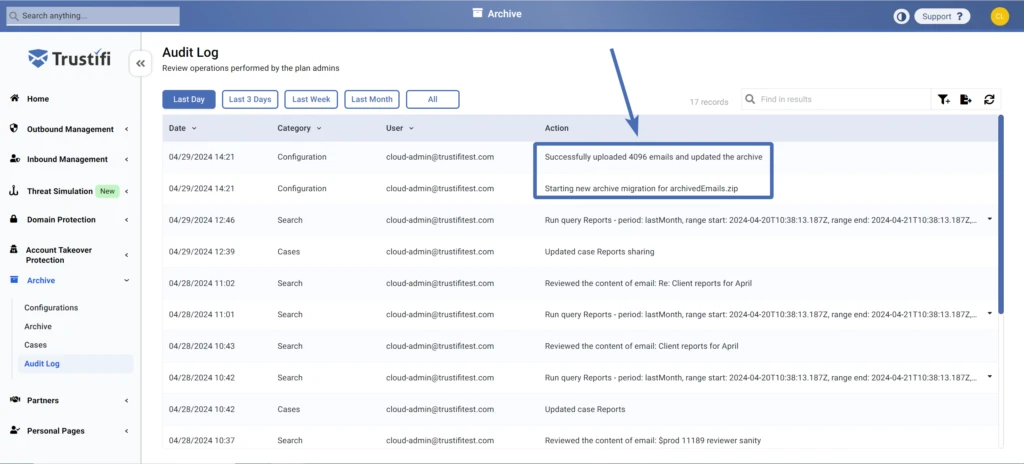
If any of your uploaded archive files have failed to be processed, a failure notification will be sent.
You may also view the archive Audit Log page to see which archive migration files have been successfully uploaded and processed.
Method 2: Archive Migration with Microsoft Graph API
This method is intended for organizations with existing archived emails in Microsoft 365.
It allows automated retrieval of archived emails directly from Microsoft 365 using Microsoft Graph API.
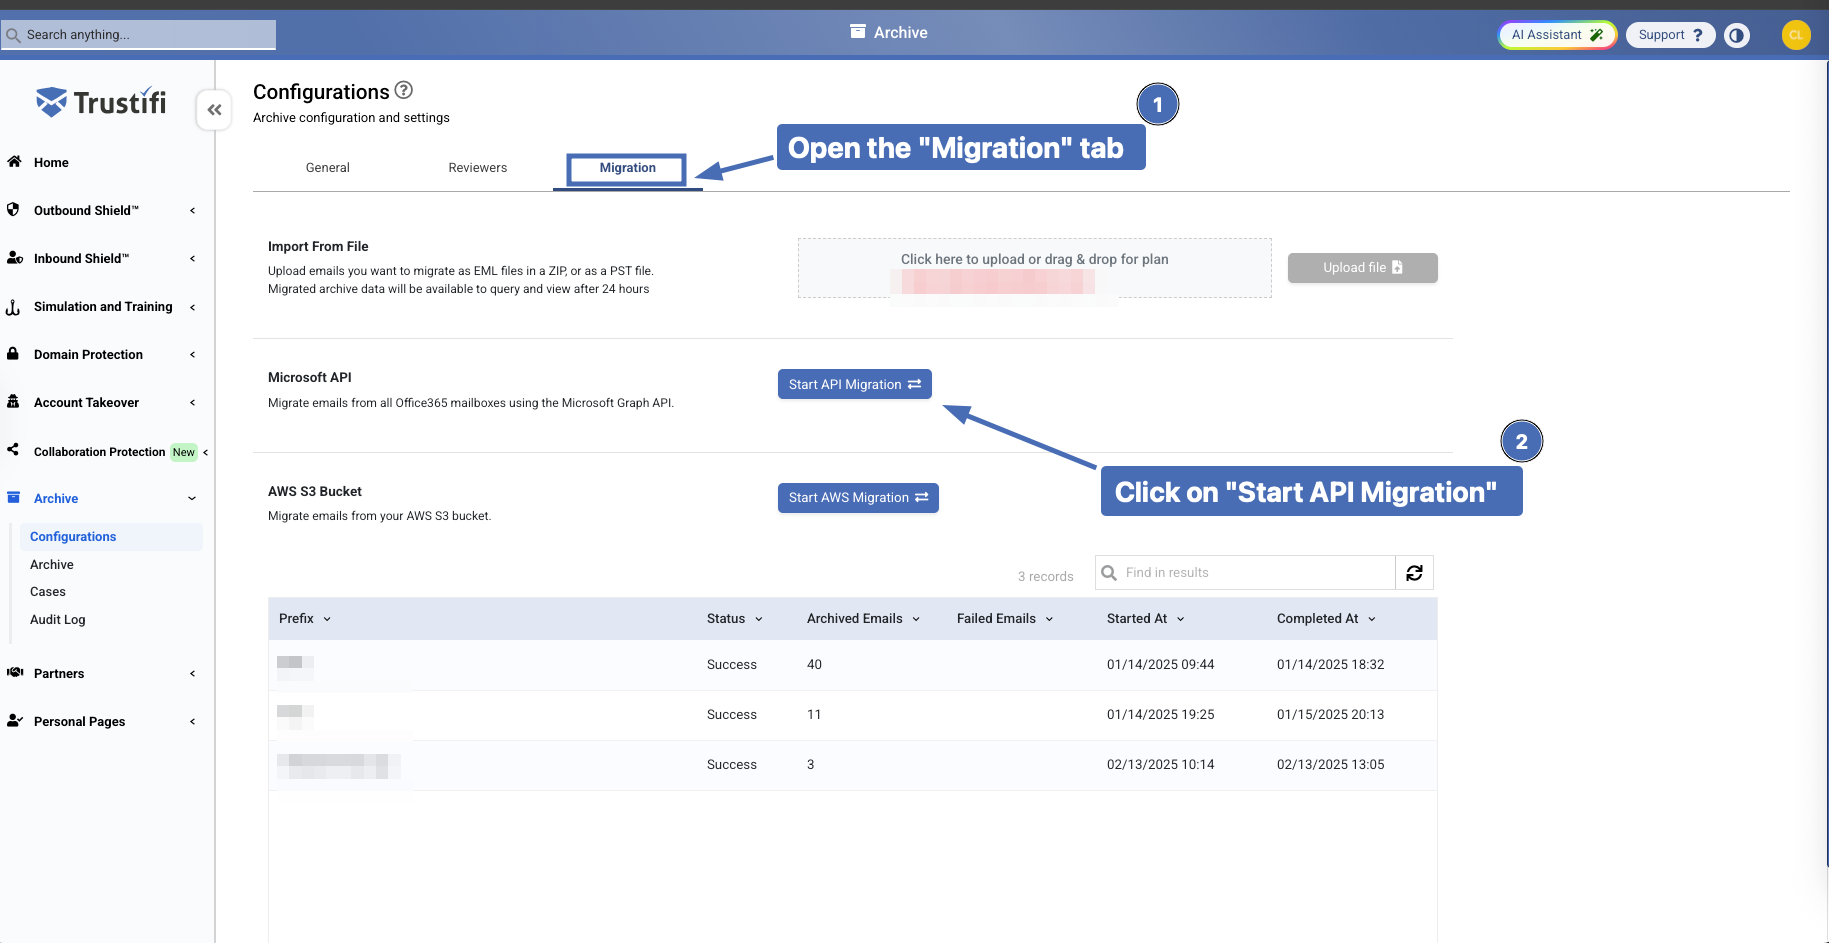
Step 1: Start API Migration
To start the API migration process, you will need to navigate to the Archive Migration tab (Archive > Configuration).
In this tab, click on the “Start API Migration” button.
Note: You may receive a notification that says this feature is not available to you. If that happens and you wish to use the API migration, please contact our team at [email protected]
Step 2: Select Number of Years to Migrate
In the pop-up window, you will need to select the number of years you would like the API to go back and fetch emails from.
For example, if you select “5 years”, the API will retrieve emails from your Office365 archive as old as 5 years.
Note: the maximum number of years that can be selected here is 7.
Click “Confirm” to proceed once you’ve selected the number of years.
.png)
Step 3: Provide Access Permissions
In the next step, a pop-up window from Microsoft will open that will require you to sign in with your Office365 global admin credentials.
Select the correct user from the list, or connect with another user that has the correct level of admin credentials.
Once you’ve signed in, you will also need to agree to grant Trustifi access to the necessary resources to complete this migration.
.png)
Note: Trustifi will create an Azure app named “Trustifi archive” for the purpose of this migration. After the migration process has finished, you may delete this app.
Step 4: Monitoring the Ongoing Process
After you’ve signed in and provided the necessary permissions, the migration process will start.
Important notes about the migration process:
The migration process can take anywhere between a few hours and multiple weeks to complete, depending on the amount and size of emails you are migrating over from Office365
You can click on the “Refresh Data” button to show updated data regarding the amount of emails that have been migrated, and any failures
Some emails may fail to be migrated either due to temporary errors, or file corruption. You can view the amount of emails that failed to be migrated in the “Failed Emails” section
.png)
Step 5: Migration Completion
When the migration process has been completed, you will see a new “Migration Complete Time” field in the page.
.png)
If for any reason the migration process did not go as expected, please contact our team at [email protected]