Overview
The Trustifi Archive module allows your organization to retain, search, and manage inbound and outbound email activity for compliance, legal investigations, case management, and long-term storage. Once enabled, the Archive service provides access to the Archive dashboard, retention settings, case management tools, and reviewer permissions within your tenant. However, activating the feature alone does not begin capturing emails. In order for messages to appear in the Archive, your mail flow must be properly configured through either Trustifi’s email relay integration or a Microsoft 365 journaling rule.
Before You Begin
Enabling Archive only unlocks the feature in your tenant. It does not automatically route emails into the Archive.
For messages to be captured, your mail system must be configured to send traffic through Trustifi by one of the following methods:
1. Email Relay Integration (recommended)
If your tenant is already configured to use Trustifi’s inbound and/or outbound relays, email archiving begins automatically once Archive is enabled.
Relay configuration instructions can be found here in our configuration for email relay users guide
2. Journaling Rule (Microsoft 365)
Organizations using Trustifi without relaying can route email into Archive using an Exchange Online journaling rule.
This method forwards copies of messages to the Archive in real time.
Setup instructions are available in our configuration via journaling rule guide
If neither relay integration nor journaling is set up, no messages will appear in the Archive, even after the service is enabled.
How to Enable the Archive Module
Contact your Trustifi account manager or the Trustifi support team to activate the Archive service for your tenant.
Note: Archive is only available for plans that include archiving features.Once enabled, the Archive section will appear in your left-hand navigation menu.
Navigate to Archive → Configurations → General to verify that the service is active.
After activation, you can:
Configure retention settings
Assign Archive reviewer permissions
Create and manage cases
Review archived emails (once messages are flowing into the system)
Permissions Required
Only tenant administrators or users with Archive administrator privileges can:
Enable/disable the Archive service
Adjust retention settings
Manage reviewers
View all archived data
How to Change Archive Reviewer Permissions
There are two ways to add a user as an archive reviewer:
Through the Archive Reviewers page:
Log in to the Trustifi web app with admin permissions and navigate to the Reviewers tab (Archive > Configurations > Reviewers).
Click on the “Add Reviewer +” button and enter the reviewers email in the form below.
You can also add a reviewer by clicking the “<“ just to the right of the “Add Reviewer +” button to add a reviewers from the users listed in your plan.
Through the User Management page:
Log in to the Trustifi web app with admin permissions and navigate to the User Management page (Outbound Management > User Management).
Click on the “Actions” drop down menu to thr right of the user you wish to add reviewer permissions to and select the “Modify Permissions” option
On the top of the pop-up window select “Plan Reviewer”, scroll down to the “Set as Archive Reviewer” option and enable it by clicking on the toggle
Configuration for Email Relay Users (Recommended)
If you are already connected to the Trustifi email relay for inbound and/or outbound protection, you only need to enable the Trustifi archive to start archiving your email traffic.
To enable the Trustifi archive, first Navigate to the Archive Configurations page (Archive > Configuration
Then, click on the “Enable” toggle in the “Enable Email Archive” section
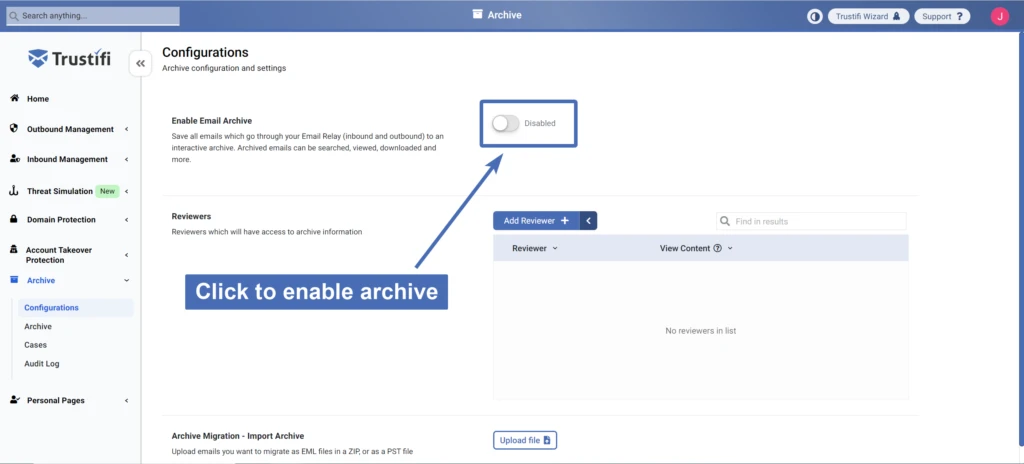
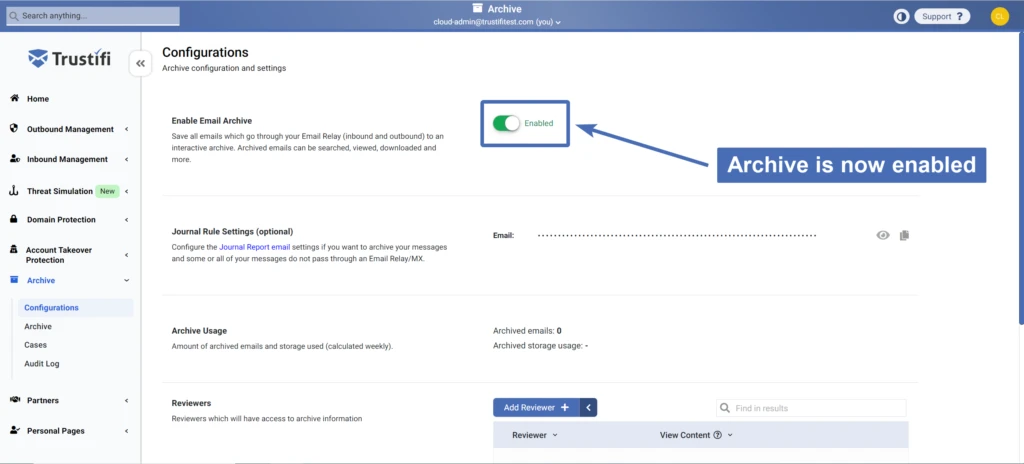
After enabling and confirming this change, the toggle should change to “Enabled” to indicate emails are now being archived
Configuration via Journaling Rule (Microsoft 365 / Office 365)
If you are not connected to either of the Trustifi email relays, and you are on Office365, you can still use the Trustifi archiving feature by setting up a journaling rule. Follow the steps below to complete this
Prerequisites
Microsoft 365 / Office 365 subscription
Access to Microsoft Purview (Compliance Portal)
Trustifi Archive service enabled for your tenant
Step-by-Step Configuration
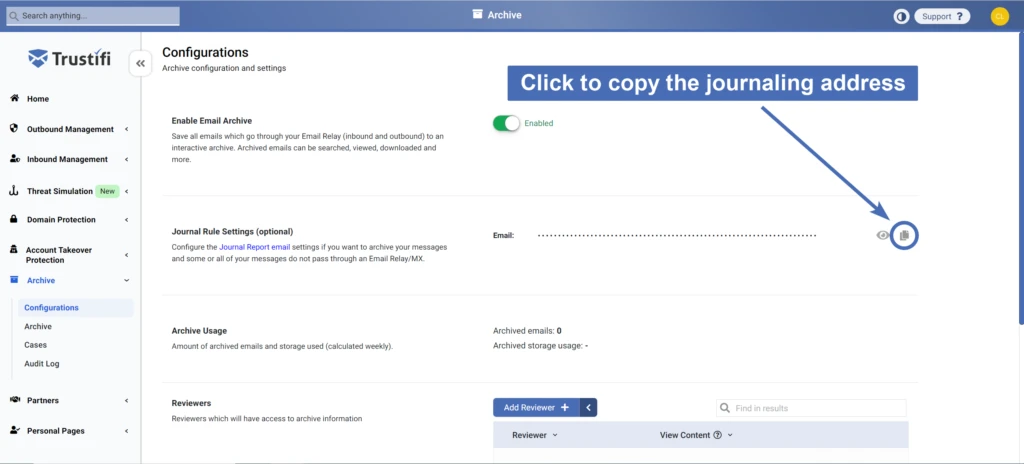
Navigate to the Archive Configurations page and make sure the archive is enabled.
If it isn’t, click on the “Enable” toggle and confirm.Make sure you can view your journaling email address in the “Journal Rule Settings” section. Then, click on the copy icon next to it to copy the journaling email address.
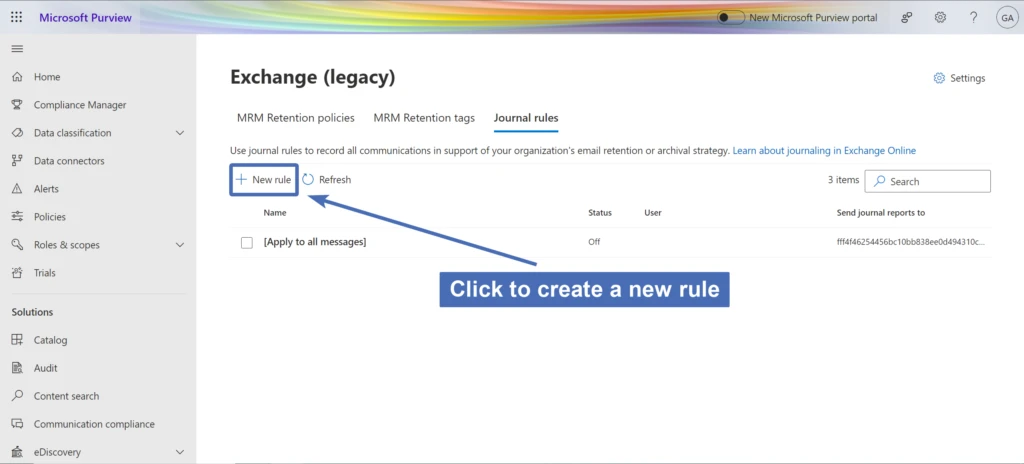
3. In the Microsoft compliance section, open the Journal rules page. Then, click to create a new rule:
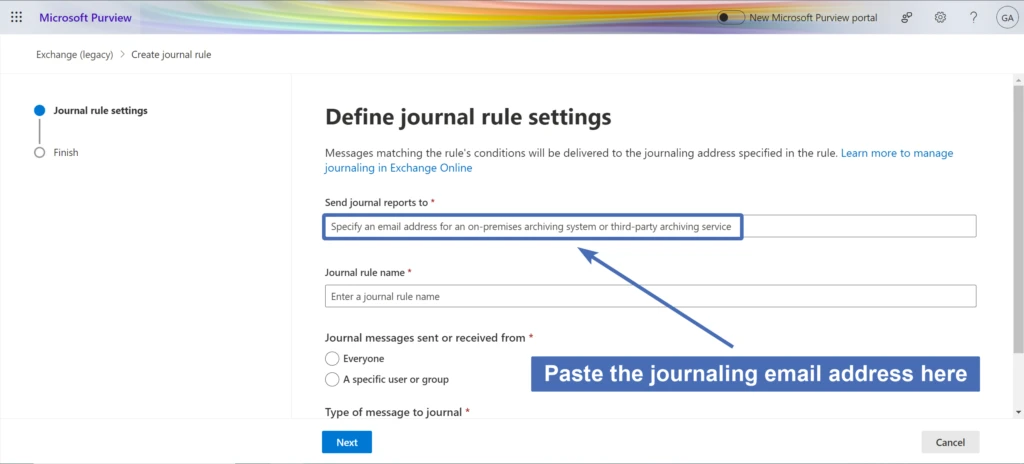
4. Under “Send journal reports to“, paste the journal email address you’ve copied from the Trustifi portal earlier.
Note:All journaled emails will be sent to this address, and as a result, they will be stored in the Trustifi archive.
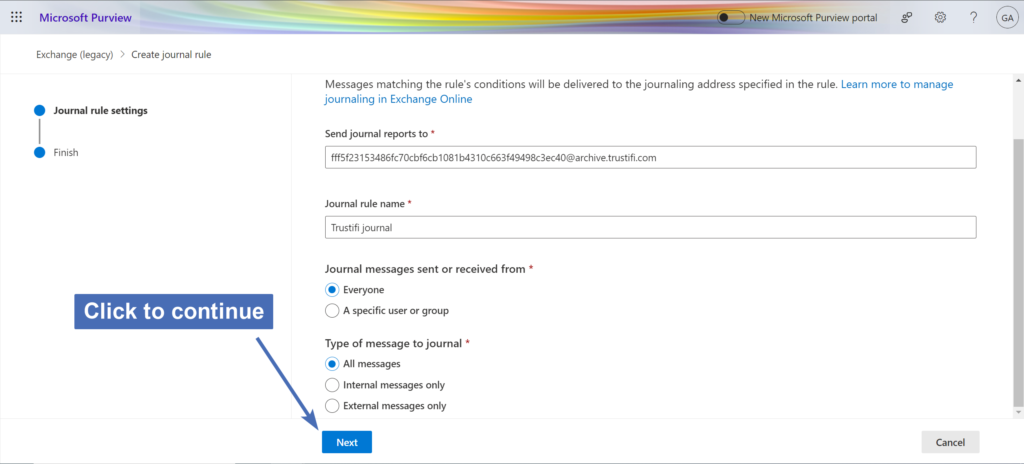
5. Under “Journal rule name“, enter any name you like. For example: “Trustifi archiving”.
6. Under “Journal messages sent or received from“, you can select if you want to journal all email traffic or only emails sent to or from specific users or groups.
7. Under “Type of message to journal“, you can select if you want to journal all emails or only external/internal emails.
8. Click on “Next” at the bottom left to continue.
9. Review the rule to make sure all of the settings are correct. Then, click on “Submit” at the bottom to create the rule.
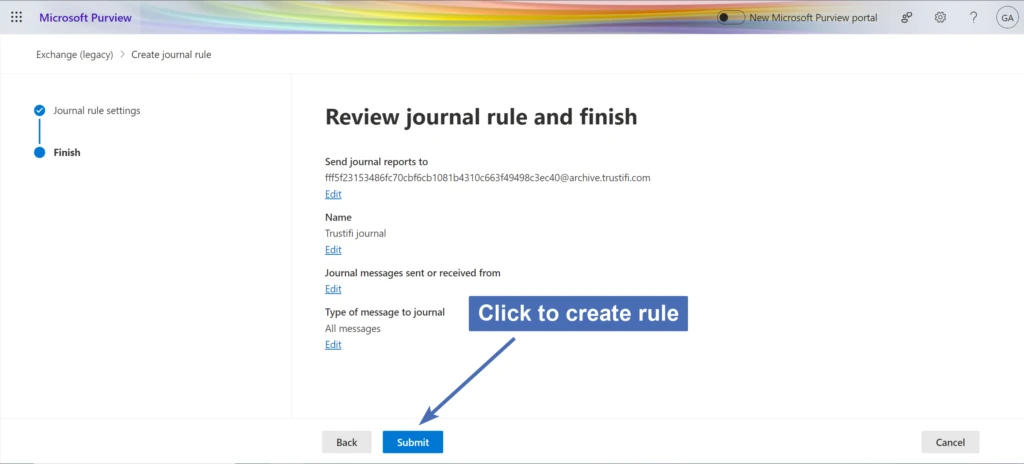
Once this journaling rule is created and enabled, all of the email traffic that was configured to be journaled will be saved in the Trustifi archive.