To make sure emails sent to groups are delivered correctly, you will need to import your groups from Exchange into Trustifi.
Follow the steps below to perform the groups integration.
Step 1 – navigating to “Mail Server Integration”
First, log in to the Trustifi web portal and click on “Outbound Management”.
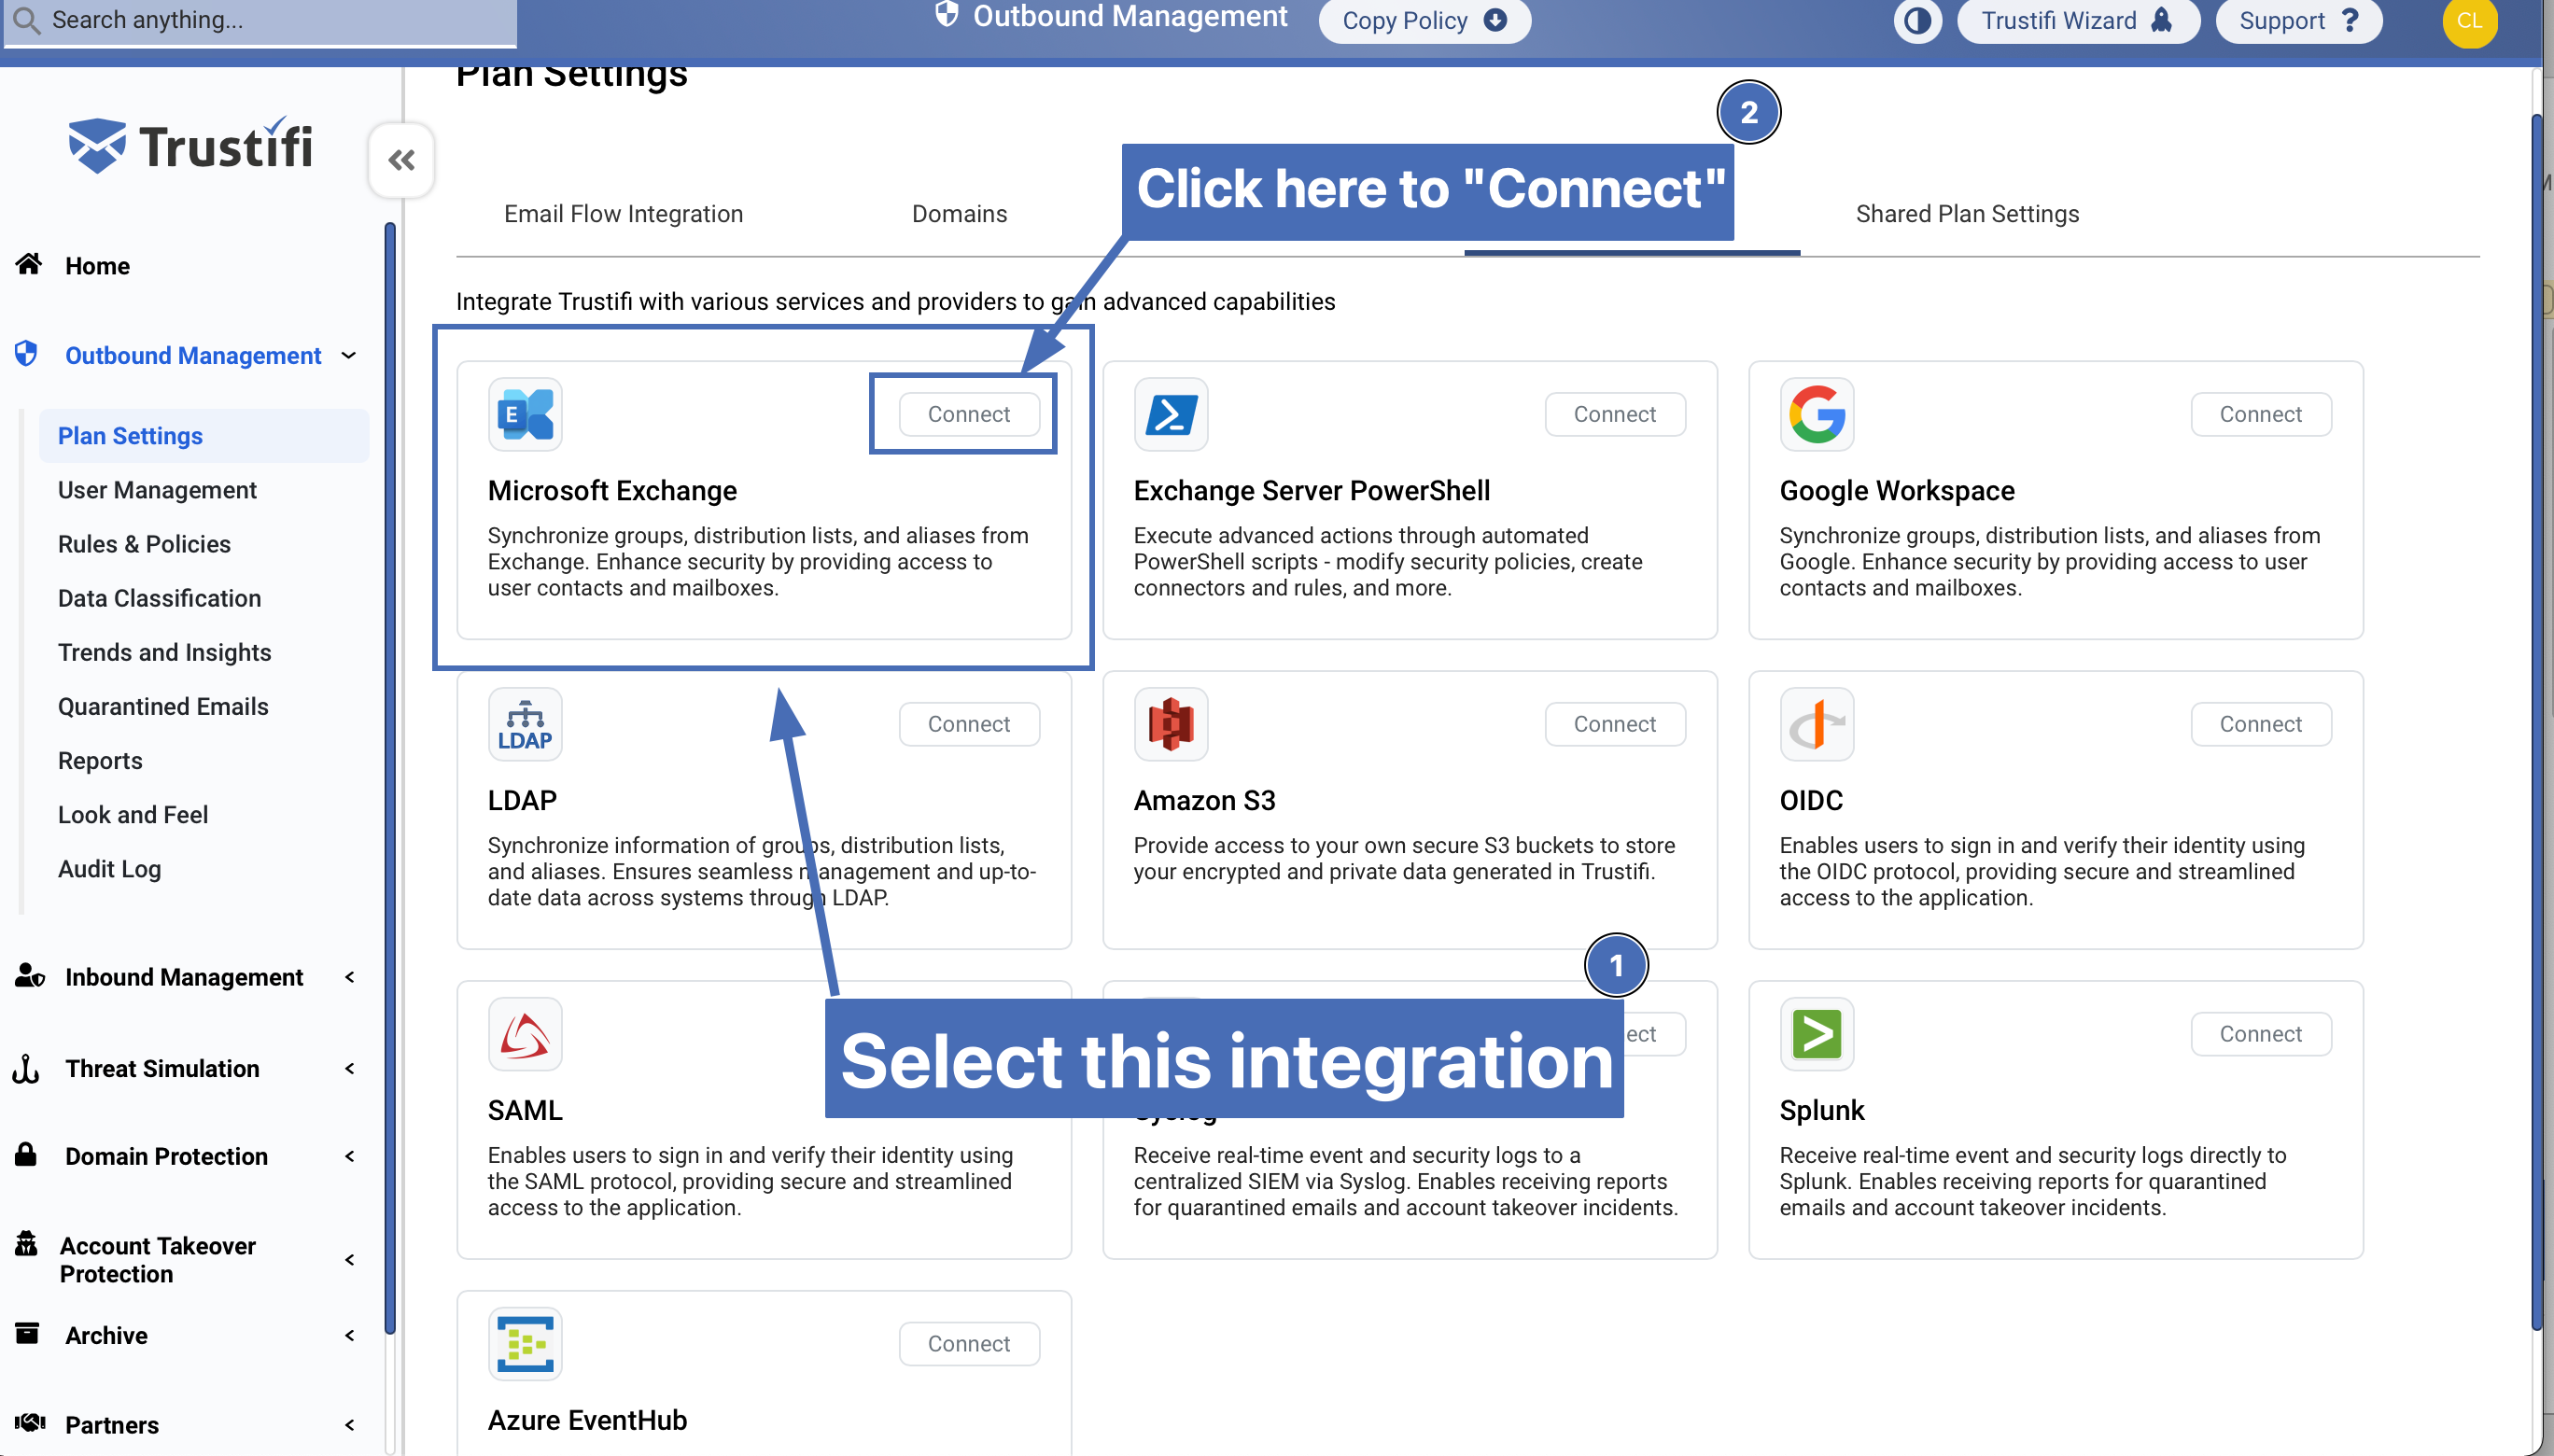
Now, click on the “Plan settings” page, then go to the “Integrations” tab.
Step 2 – connecting to Exchange
In the “Integrations” tab, make sure the selected integration is “Microsoft Exchange”. The initial status will be “Disconnected”.
Now, click on the “Connect” button.
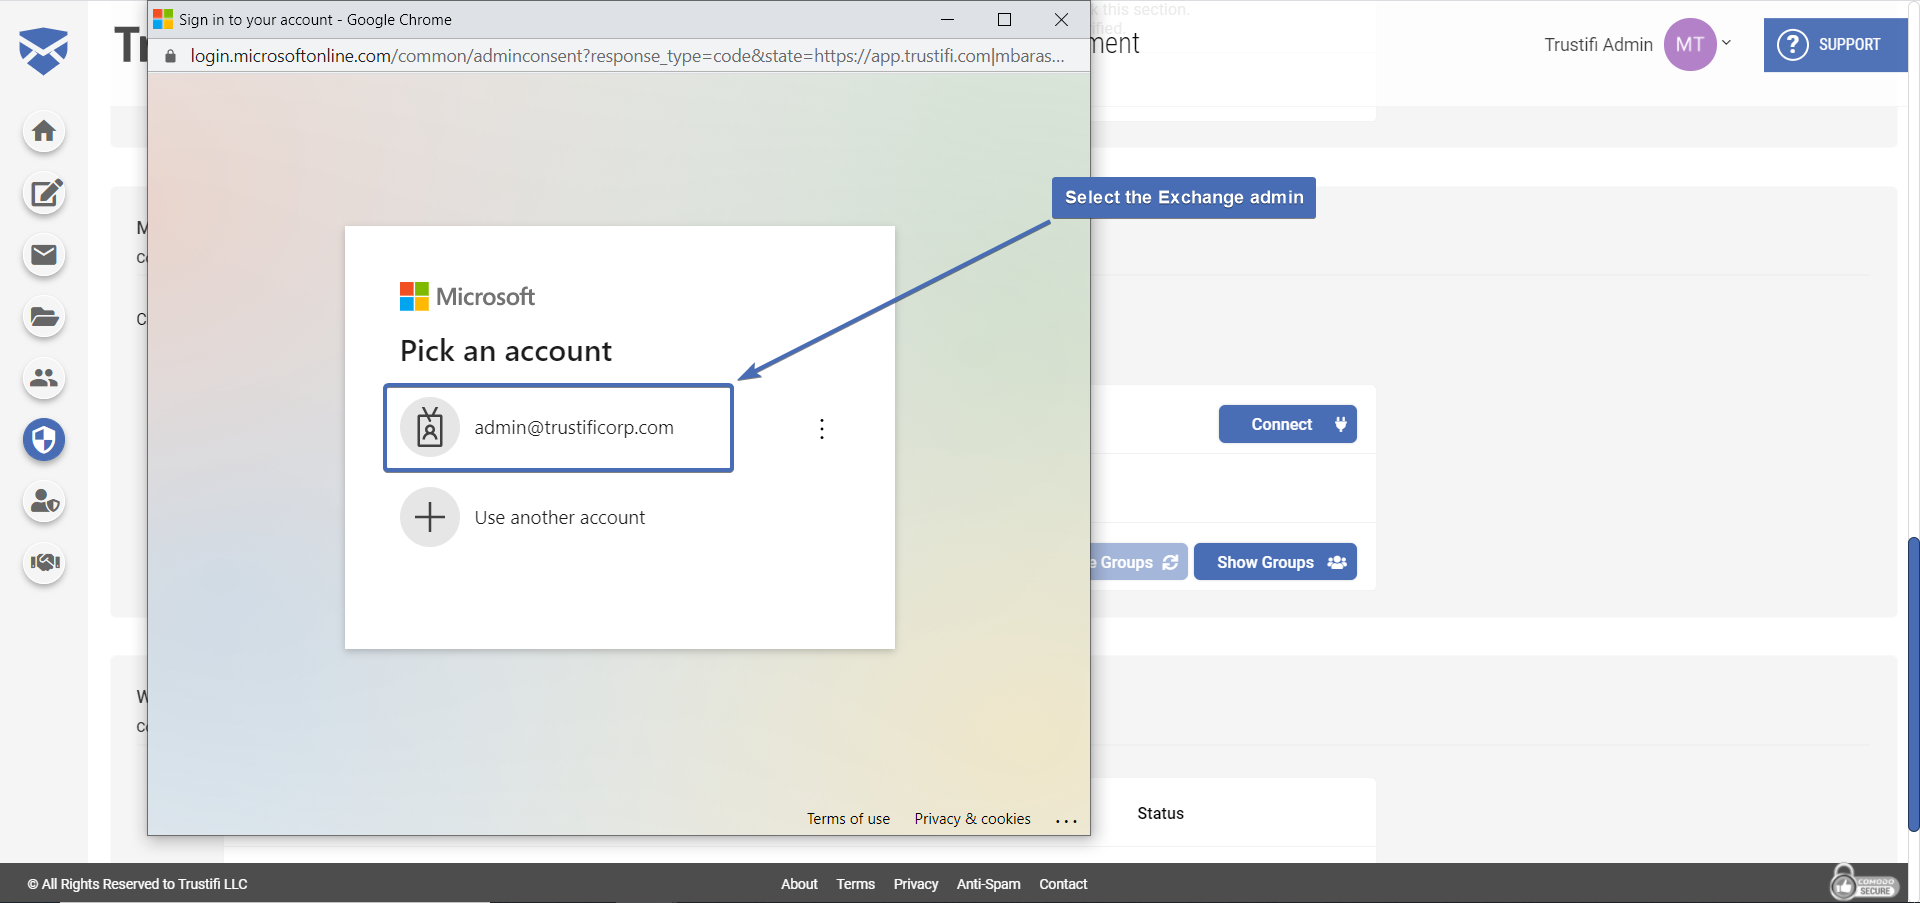
Step 3 – entering admin credentials
After the “Connect” button is clicked, a pop-up window will open where you need to click on “Connect” again. After the “Connect” button is clicked, a pop-up window from Microsoft will open.
In the pop-up window, you will first need to enter your Exchange admin credentials and then approve consent for Trustifi to access and import your groups from Exchange.
Step 4 – updating groups
After the Microsoft pop-up window is closed, the integration status should change to “Connected”.
Now you can click on the “Sync” button to import your groups from Exchange.

Note: Importing your groups can take a few minutes, depending on how many groups you have. We recommended refreshing the page after a few minutes to see updated results.
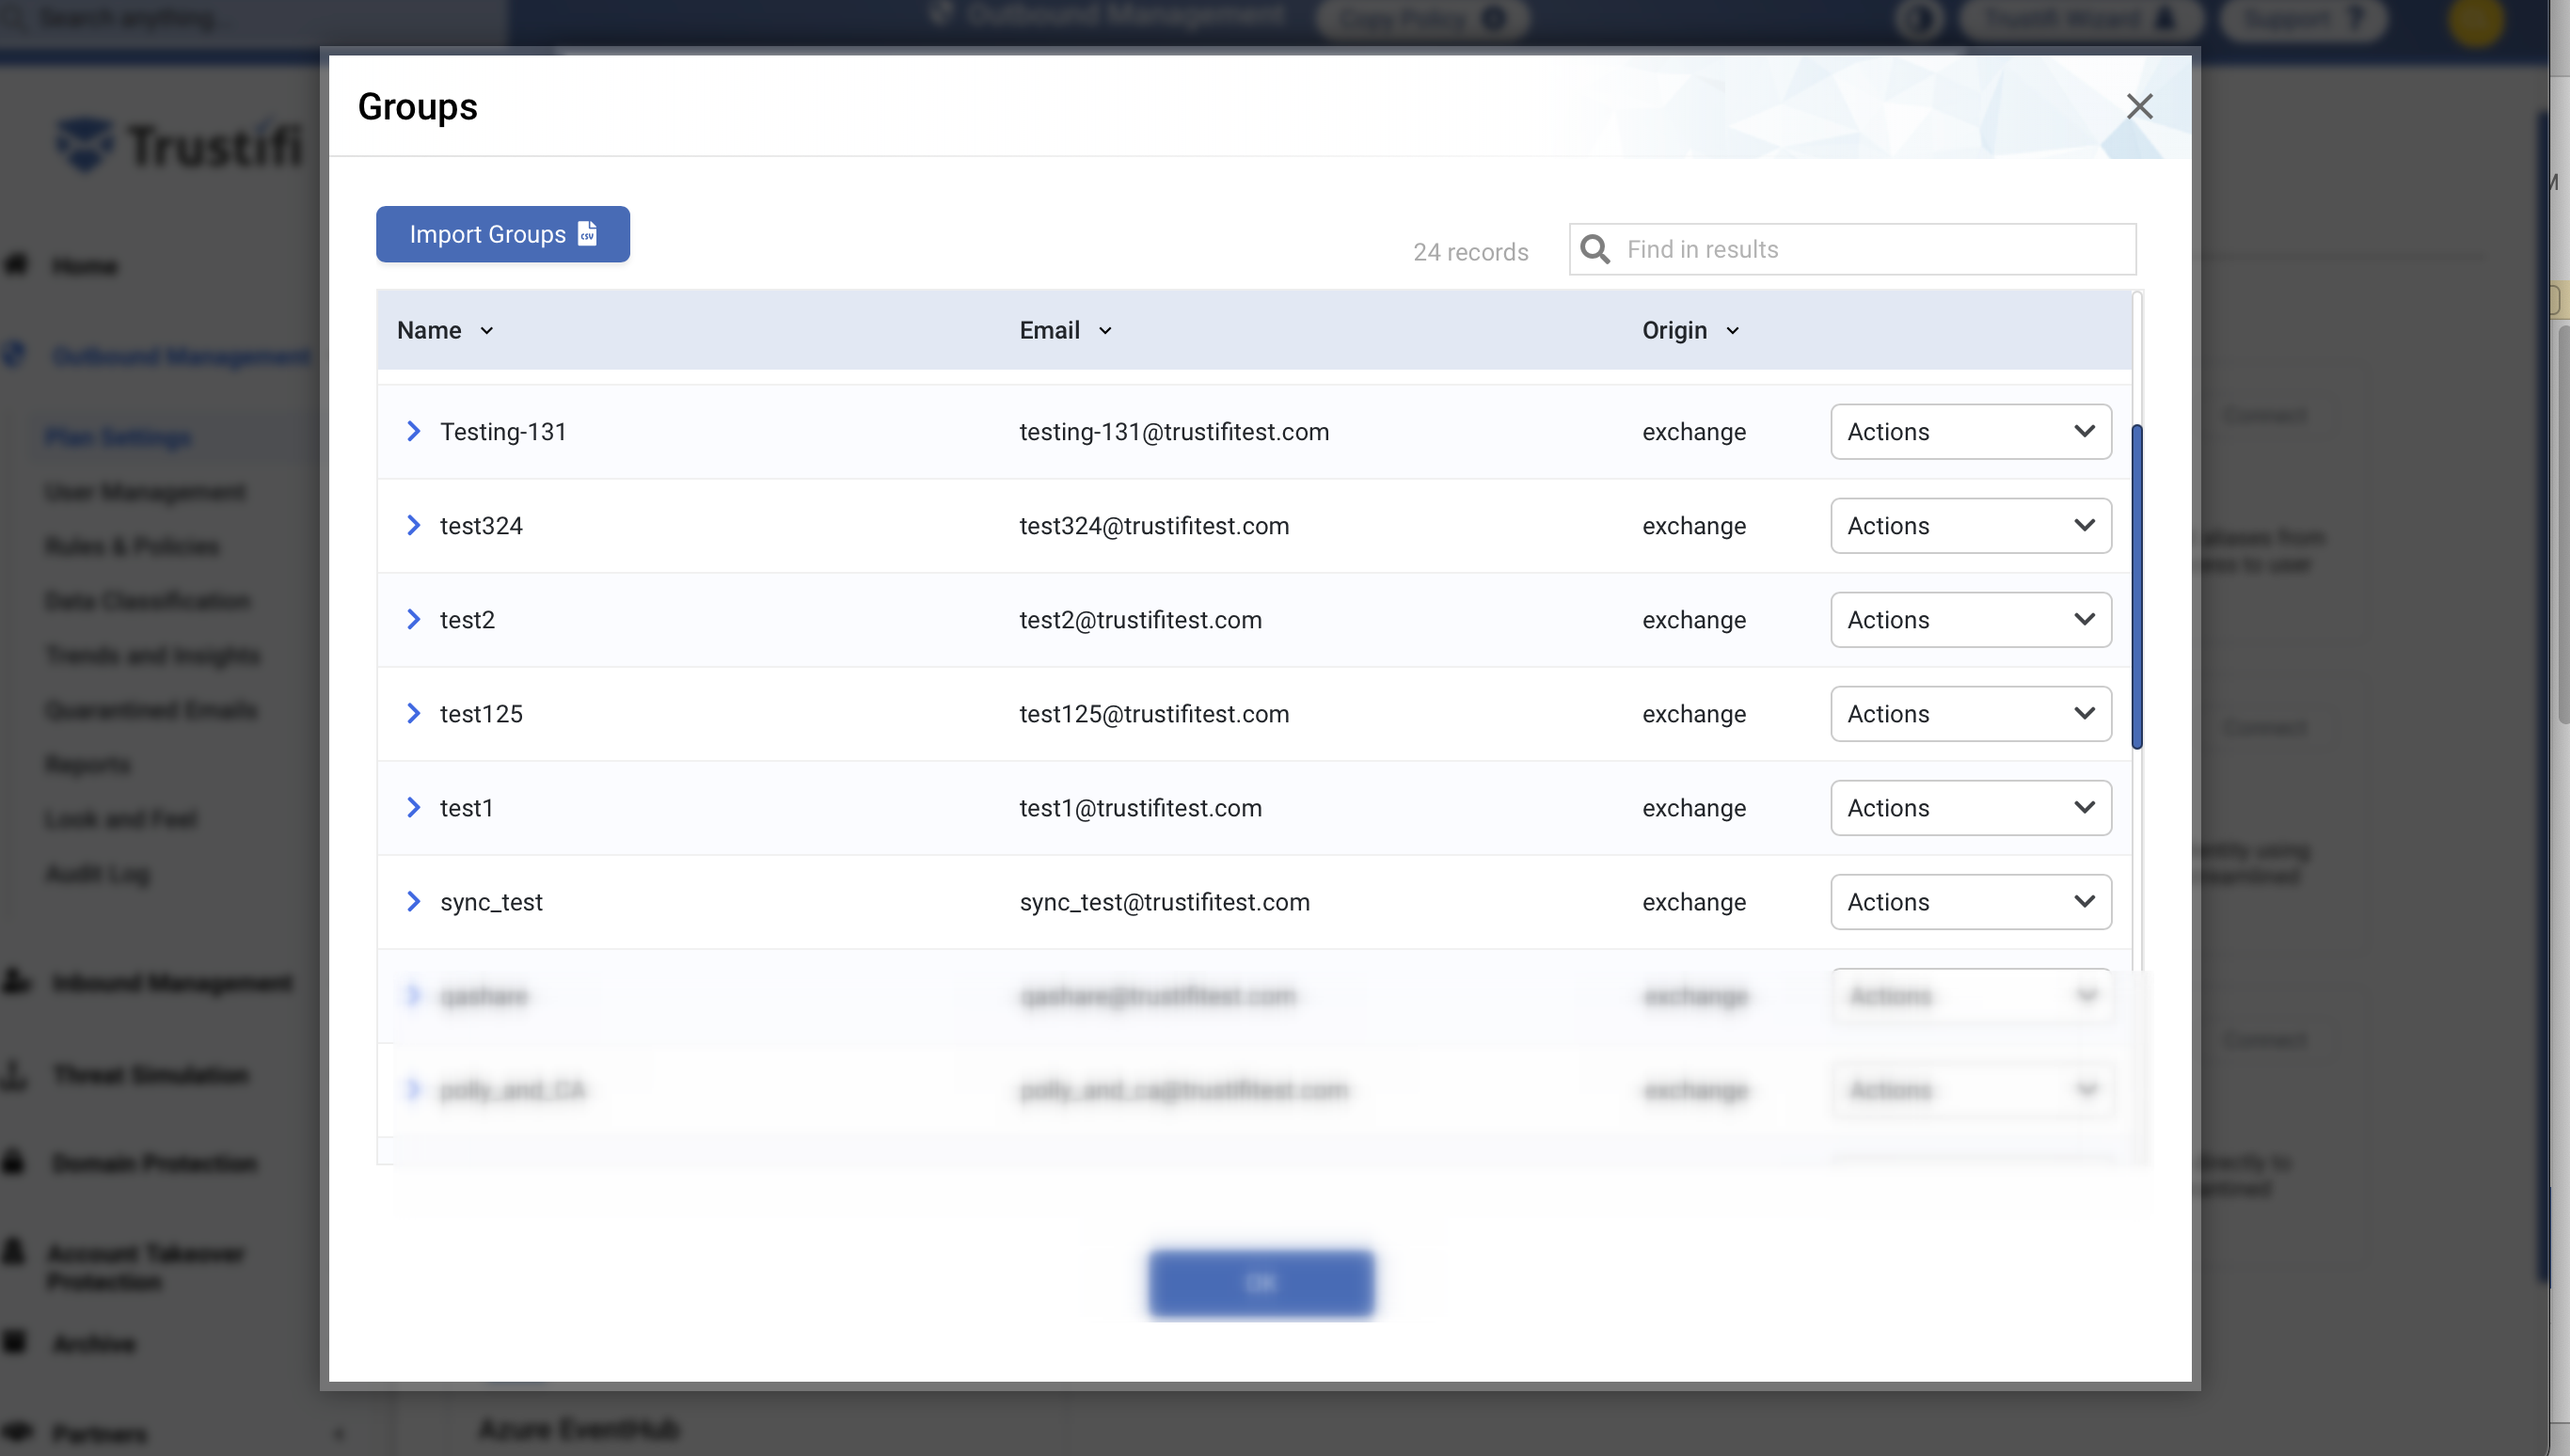
Step 5 – viewing your groups
Once the update process has finished, you can click on “Show Groups” to view all the groups that were imported and the members within these groups.

Step 6 – continuous integration
Once this integration process has been completed, any changes to your Exchange groups will be automatically updated in Trustifi and you will not need to perform the process again.