Overview
The Trustifi Archive allows administrators and authorized users to search, review, manage, and share stored email records in a structured and secure way. Using archive, users can define search parameters, run queries against stored emails, review message content and metadata, and take actions such as restoring, downloading, or deleting archived emails.
The Archive also supports secure case sharing with external reviewers, requiring Multi-Factor Authentication (MFA) before access. This makes the Archive suitable for investigations, compliance reviews, legal inquiries, and security analysis.
This guide explains how to:
Create archive cases
Run and manage cases
Review archived emails and their analysis
Take action on archived messages
Share cases securely with external parties
Additionally, this guide covers how administrators can configure the Archive Retention Period, which determines how long archived email data is stored before automatic deletion.
Creating a New Case
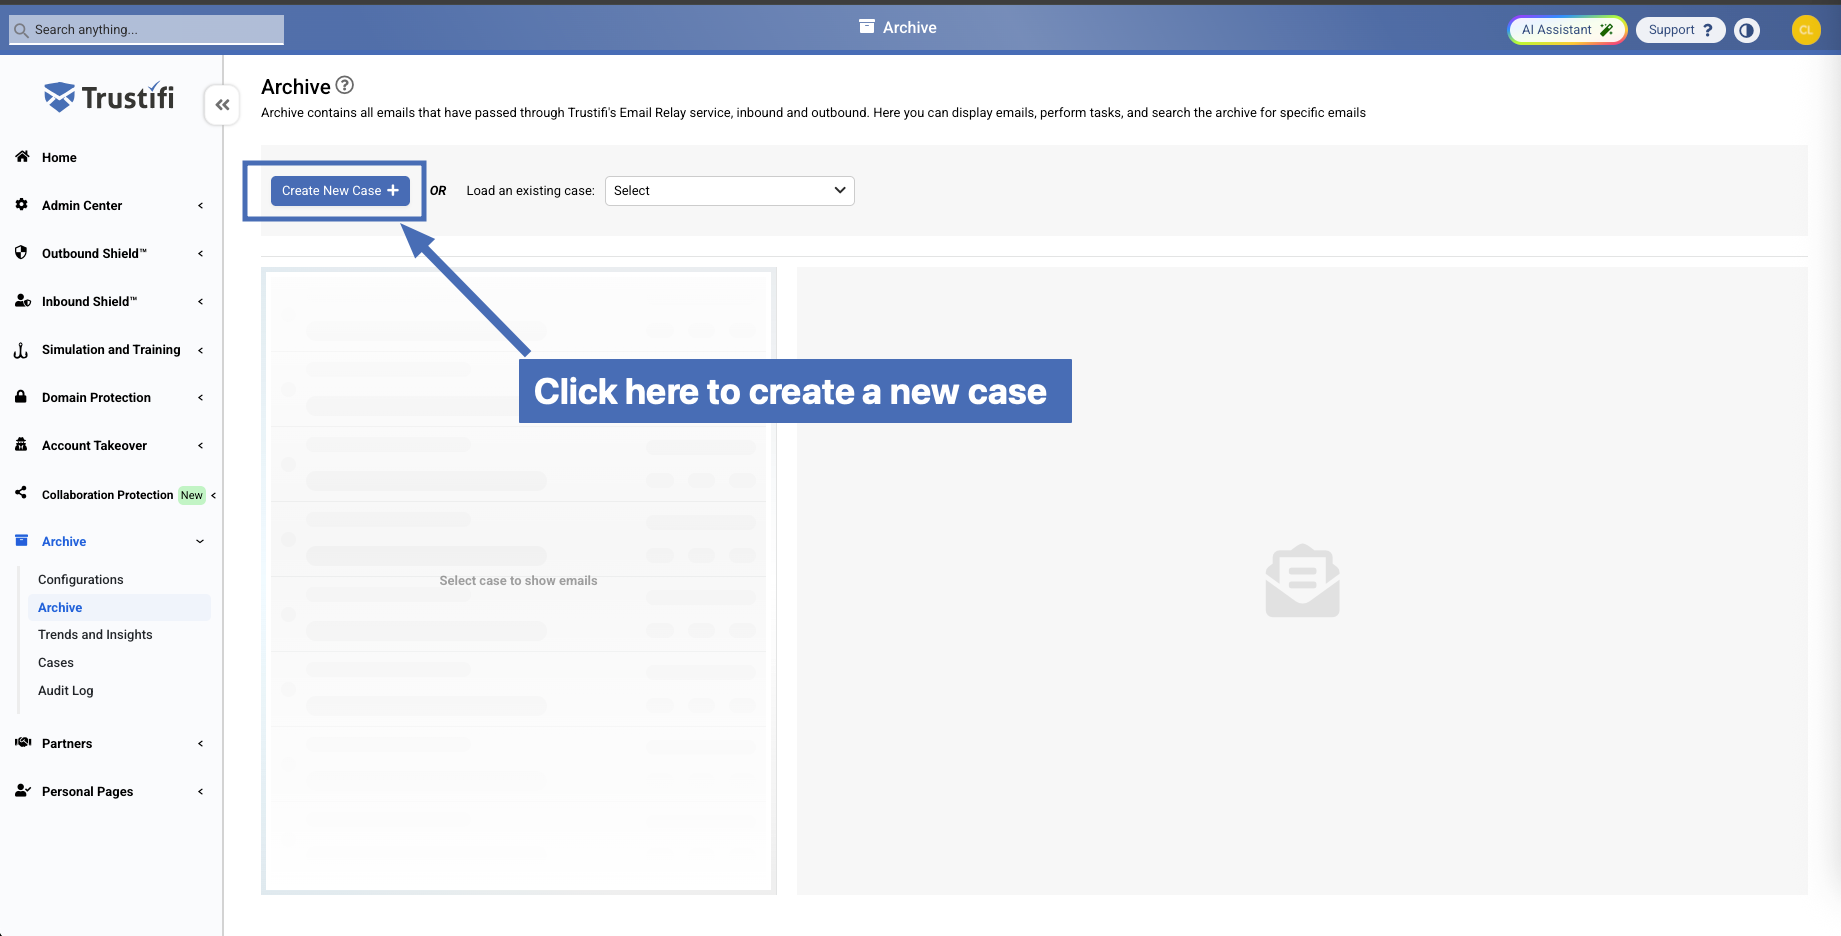
Navigate to the Archive page (Archive > Archive). Then, click on the “Create new case” button.
In the pop-up window, you will need to give the case a name and enter at least one parameter.
Negative Option:
Use the Negative option to exclude specific values from the search parameters.
For example, enabling Negative next to the sender field will search for emails that do not match the specified sender or value.
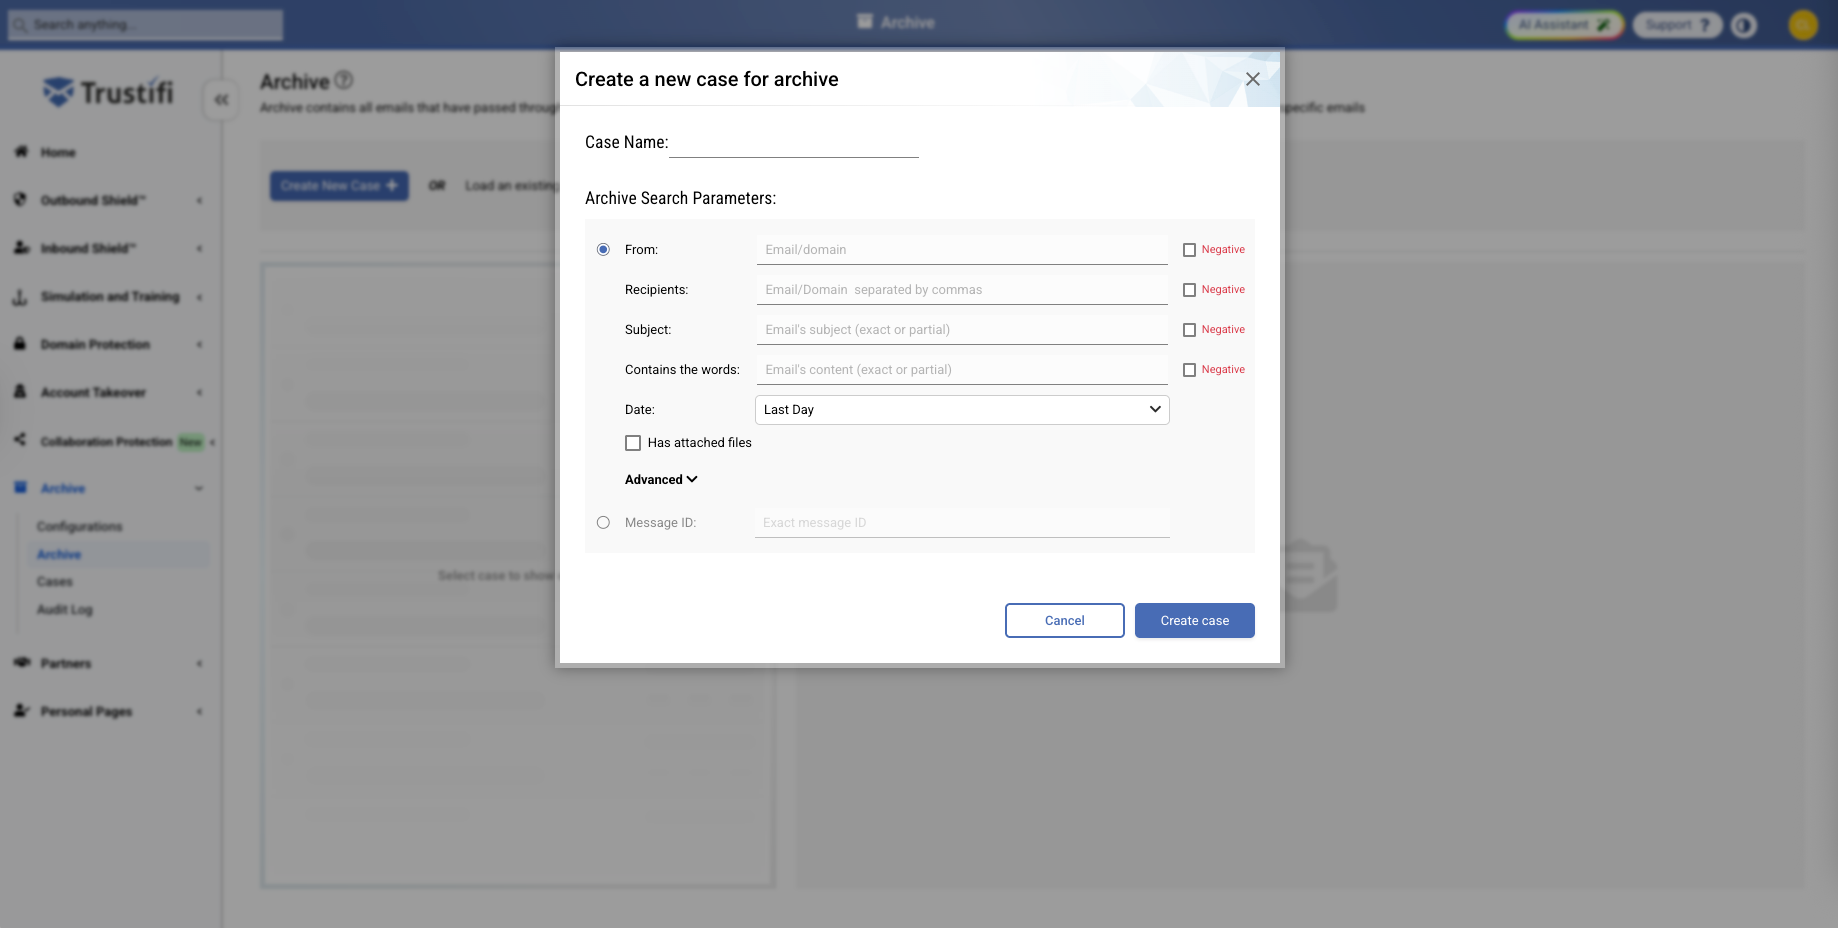
Case Parameters Explained
You may filter archived emails using the following fields:
From: Searches emails by the sender. This parameter accepts either a full (single) email address or a domain.
Recipients: Searches emails by the recipient. This parameter accepts either a single (full) email address or multiple email addresses separated by commas.
Subject: Searches emails by either a full or partial match to the subject line. Accepts any string.
Contains the words: Searches emails by either a full or partial match to the email body. Accepts any string.
Date: Searches emails by the date the email was sent. This drop-down menu allows you to select one of the following:
Last day
Last 3 days
Last week
Last month
Range: requires the user to select a start date and an end date
All: will not filter the search by date
Has attached files: If this box is checked, the archive case will only show emails that have attached files. If the box is unchecked, the case will show emails with or without attached files.
Advanced (Compliance Filters)
Under the “Advanced” section, you can search archived emails according to the compliance policies they may be related to.
Note: Emails can be searched according to compliance only if they are outbound emails sent using Trustifi. You may select one or more of these compliance frameworks:
GDPR - General Data Protection Regulation
FERPA - Family Educational Rights and Privacy Act
HIPAA - Health Insurance Portability and Accountability Act
PCI - Payment Card Industry Data Security Standard
CCPA - California Consumer Privacy Act
POPI - Protection of Personal Information Act
LGPD - Lei Geral de Proteção de Dados (Brazil)
PDPO - Personal Data Protection Ordinance
GLBA - Gramm-Leach-Bliley Act
Message ID: Searches for emails using the exact Message ID
Running Archive Cases
Navigate to the Archive page (Archive > Archive) and click on the drop-down menu next to “Load an existing case”.
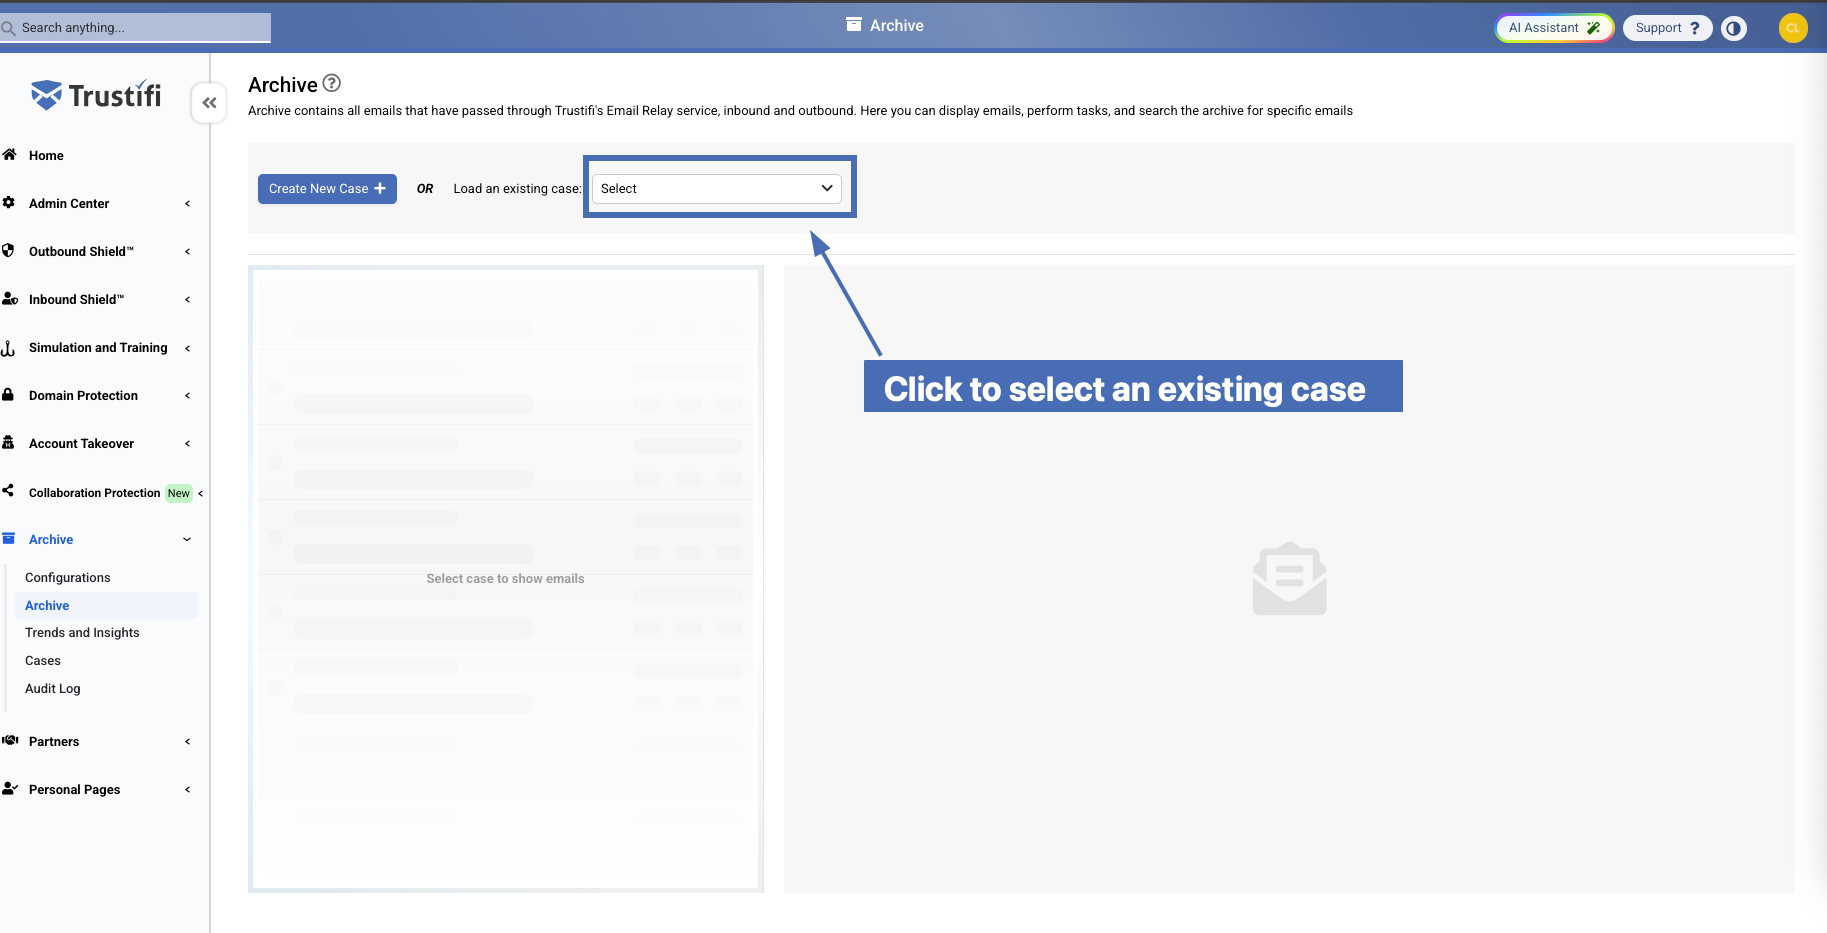
Once you’ve selected a case from the menu, click on the “Apply Case” button to run it.
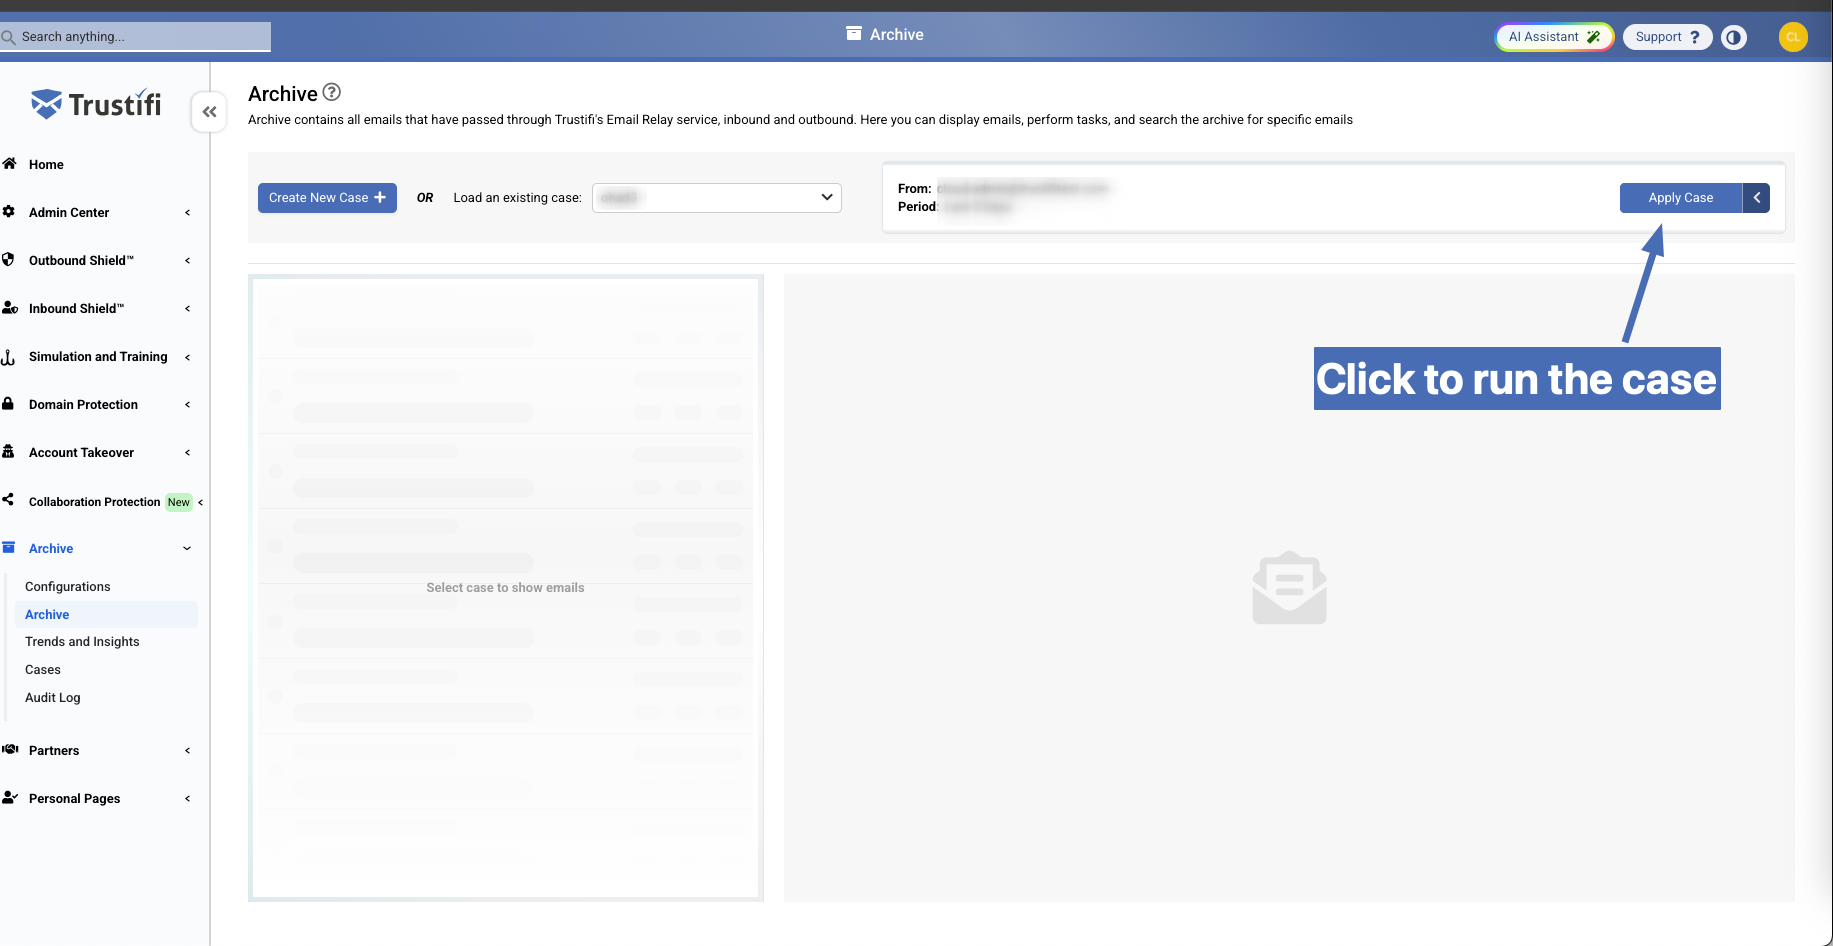
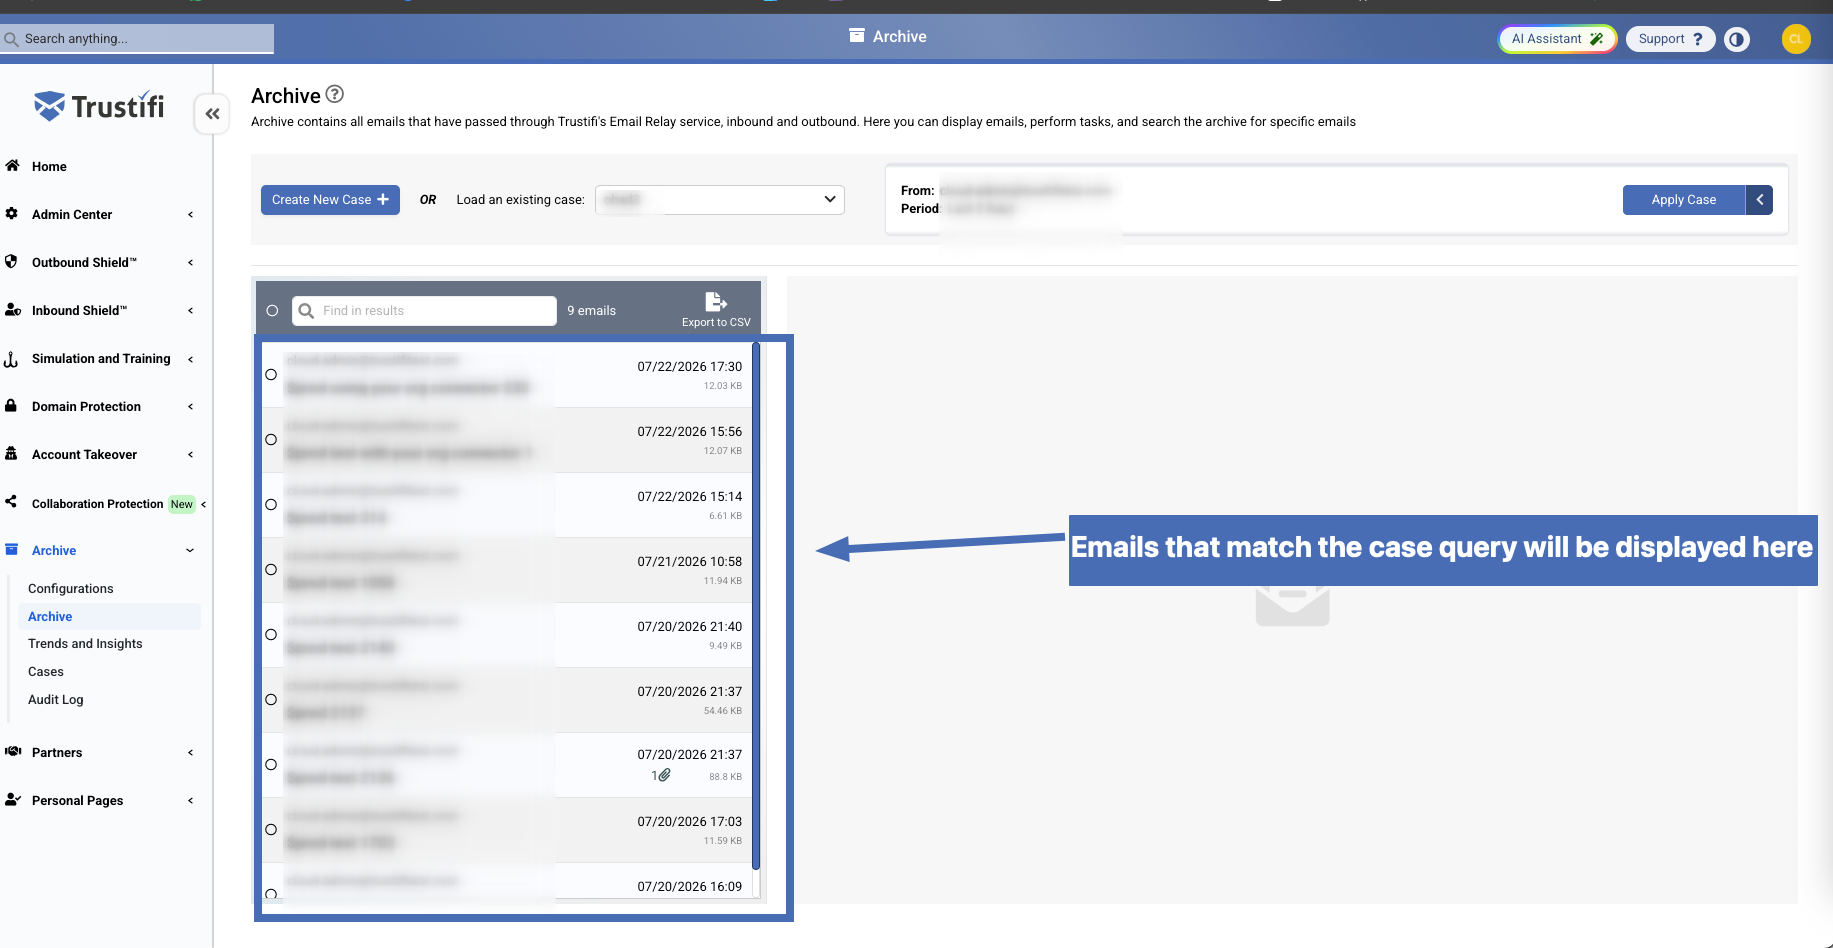
When the case finishes running, all emails that match the case query criteria will be displayed on the left side.
Viewing Email Content
To view the content of an email, run a case and then click on one of the emails displayed in the results. The email content panel will display the sender, recipients, subject, date, and full message body.
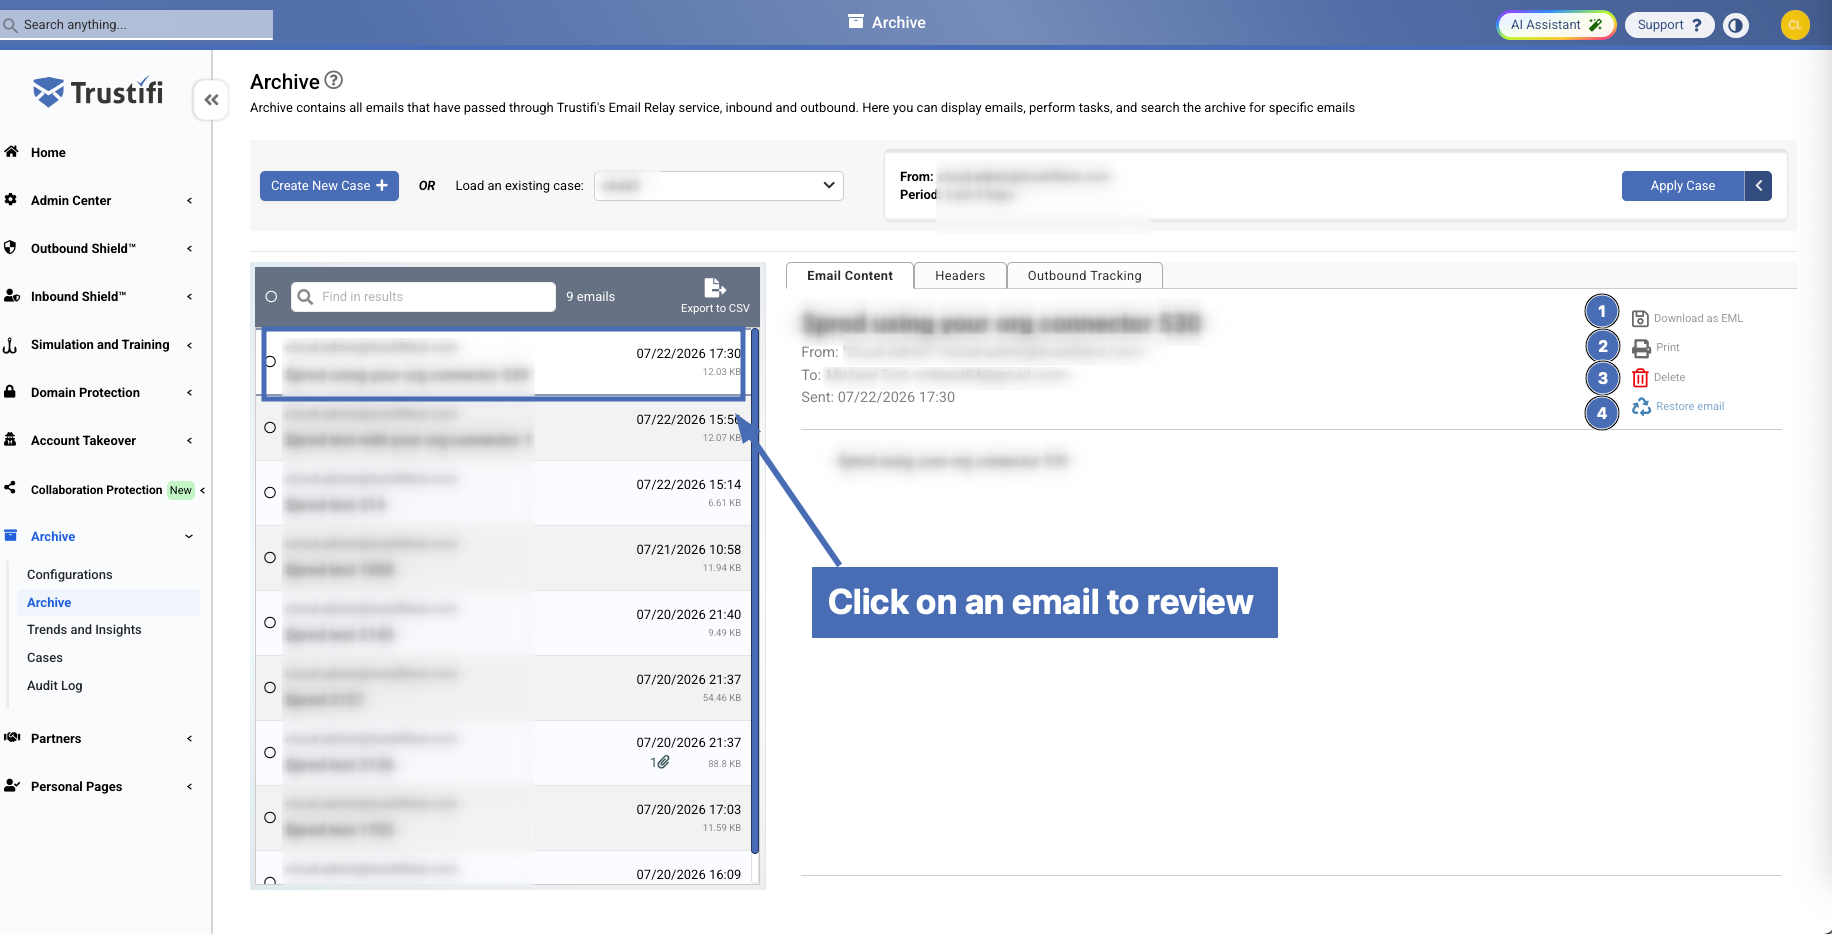
Email Actions
When reviewing the content of an email, you can perform the following actions:
Download as EML – use this action to download this email in its original EML form. This can be useful for backing up emails in a separate storage or for sharing a specific email with another person.
Print – can be used to print out an email from the archive.
Delete – this will delete the email from the Trustifi archive. Note: this will not delete the email from the user’s mailbox.
Restore – this action will restore the email back to the user’s inbox. If the email already exists in the user’s inbox, it will not create a duplicate.
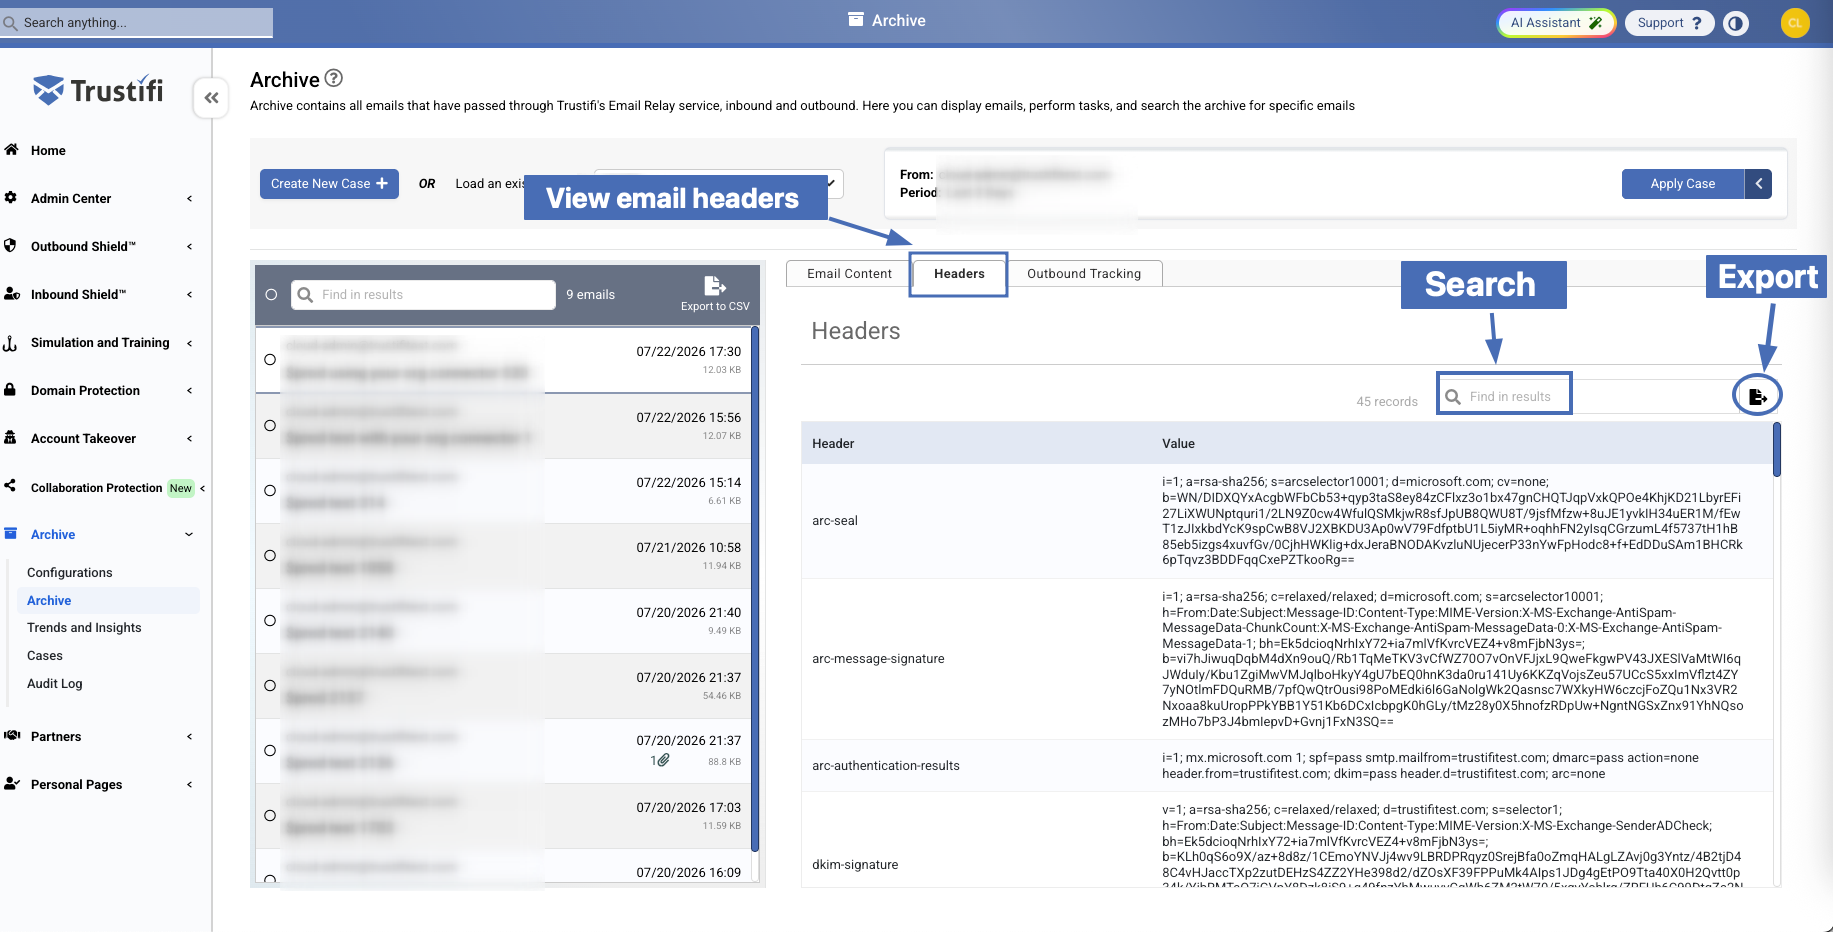
Viewing Email Headers
You may also view the archived email’s headers by clicking on the “Headers” tab.
Within the “Headers” tab you can also search for a specific header/value or export the headers to a CSV file.
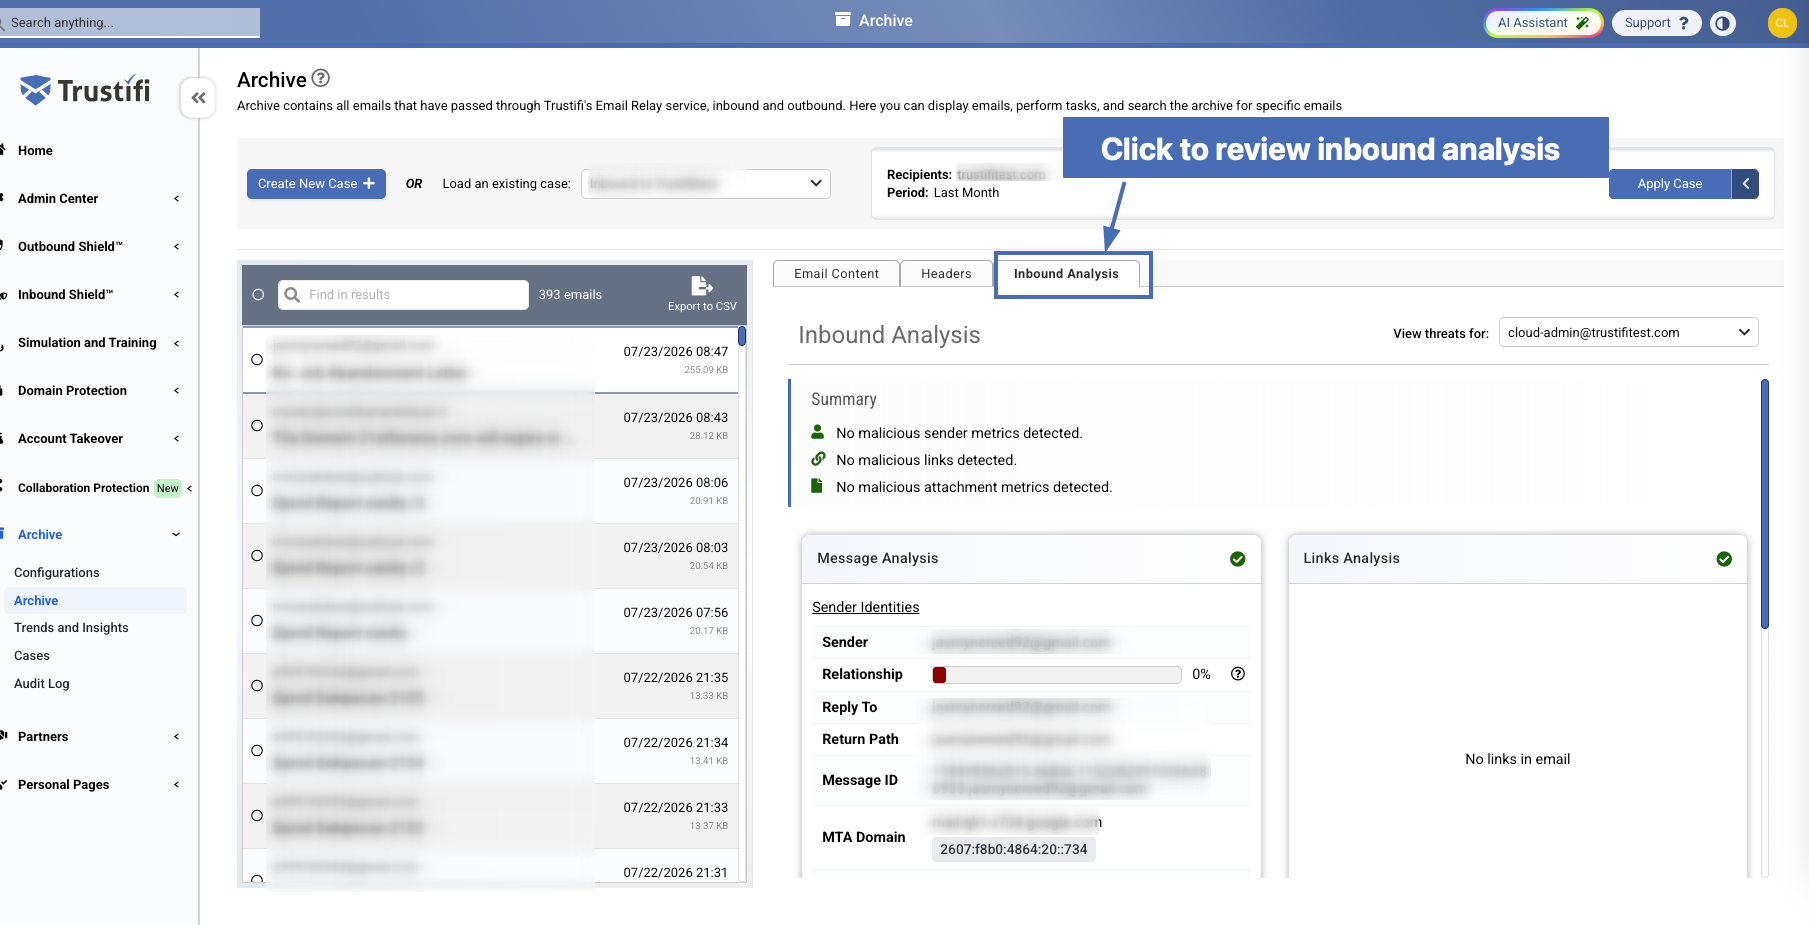
View Email Inbound Analysis
If an archived email was scanned by Inbound Shield, you can review that email's inbound analysis status directly from the archive.
To review, just click on the “Inbound Analysis” tab for the archived email.
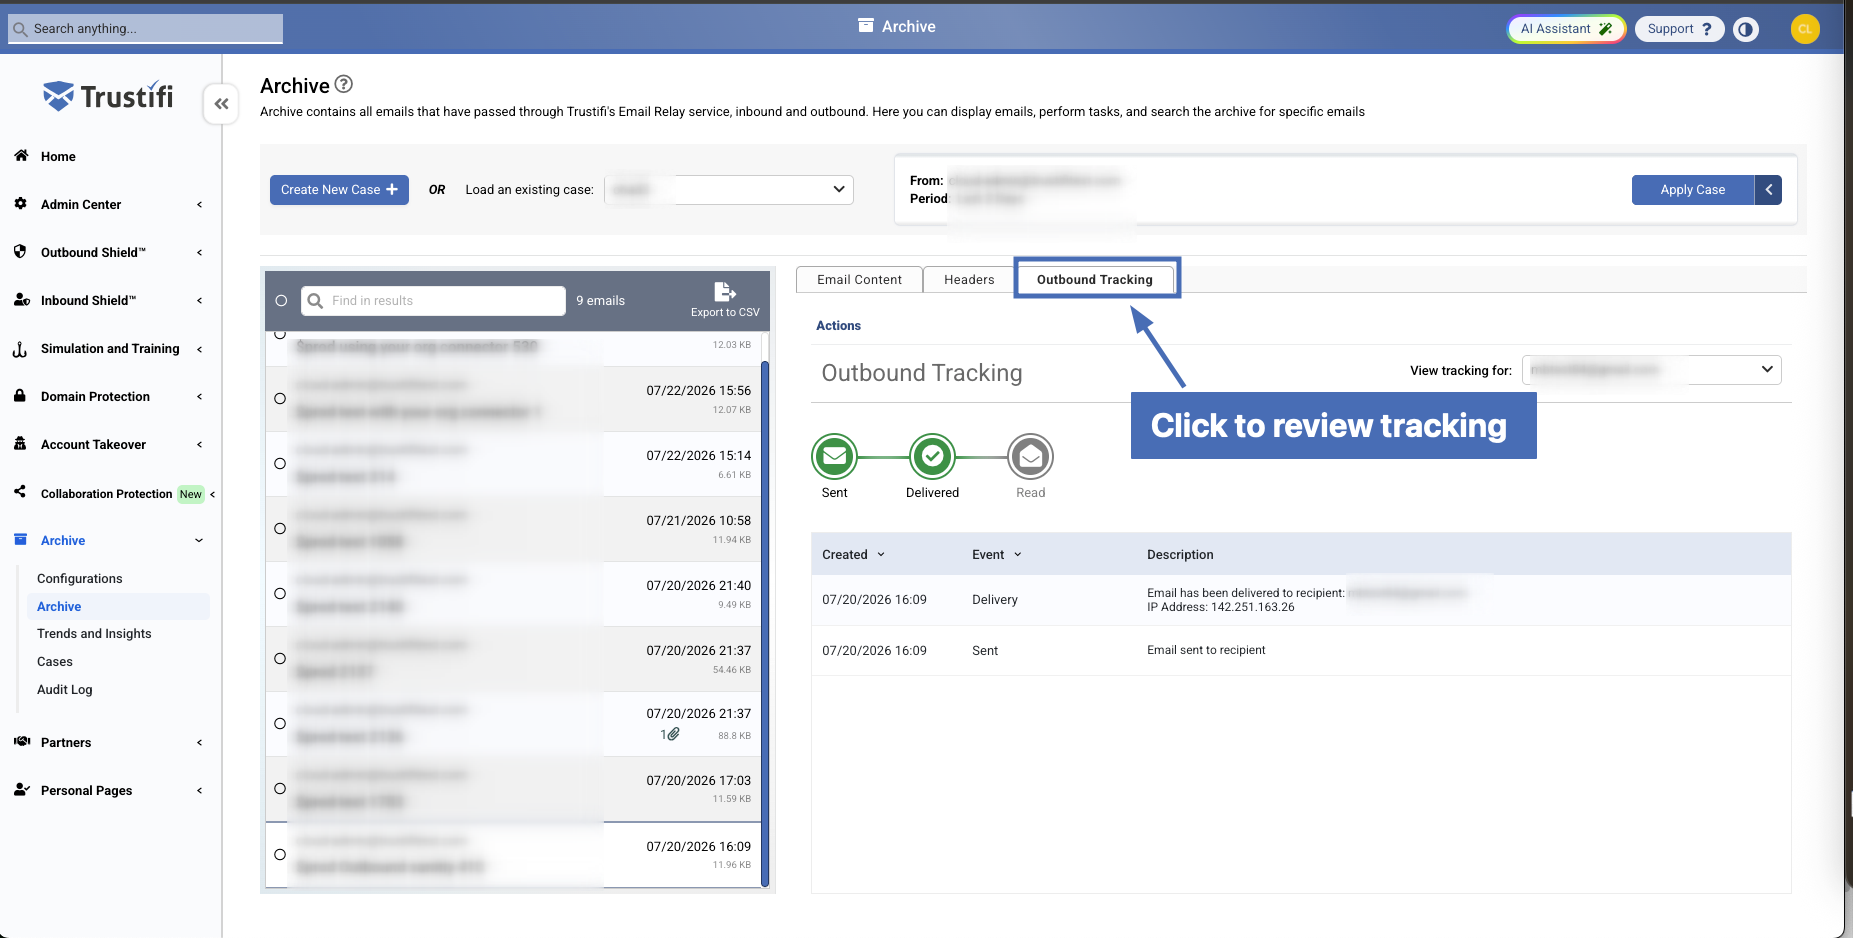
View Email Outbound Tracking
Archived emails that were sent using Trustifi's outbound relay can display outbound tracking events. This allows you to view from within the archive:
When and where the email was opened and read
Whether links in the email were clicked
Other tracking events
To review this, just click on the “Outbound Tracking” tab in the archived email view.
When reviewing tracking events, you can also perform actions like blocking/unblocking specific recipients or all recipients. These actions can be found directly below the “Outbound Tracking” tab.
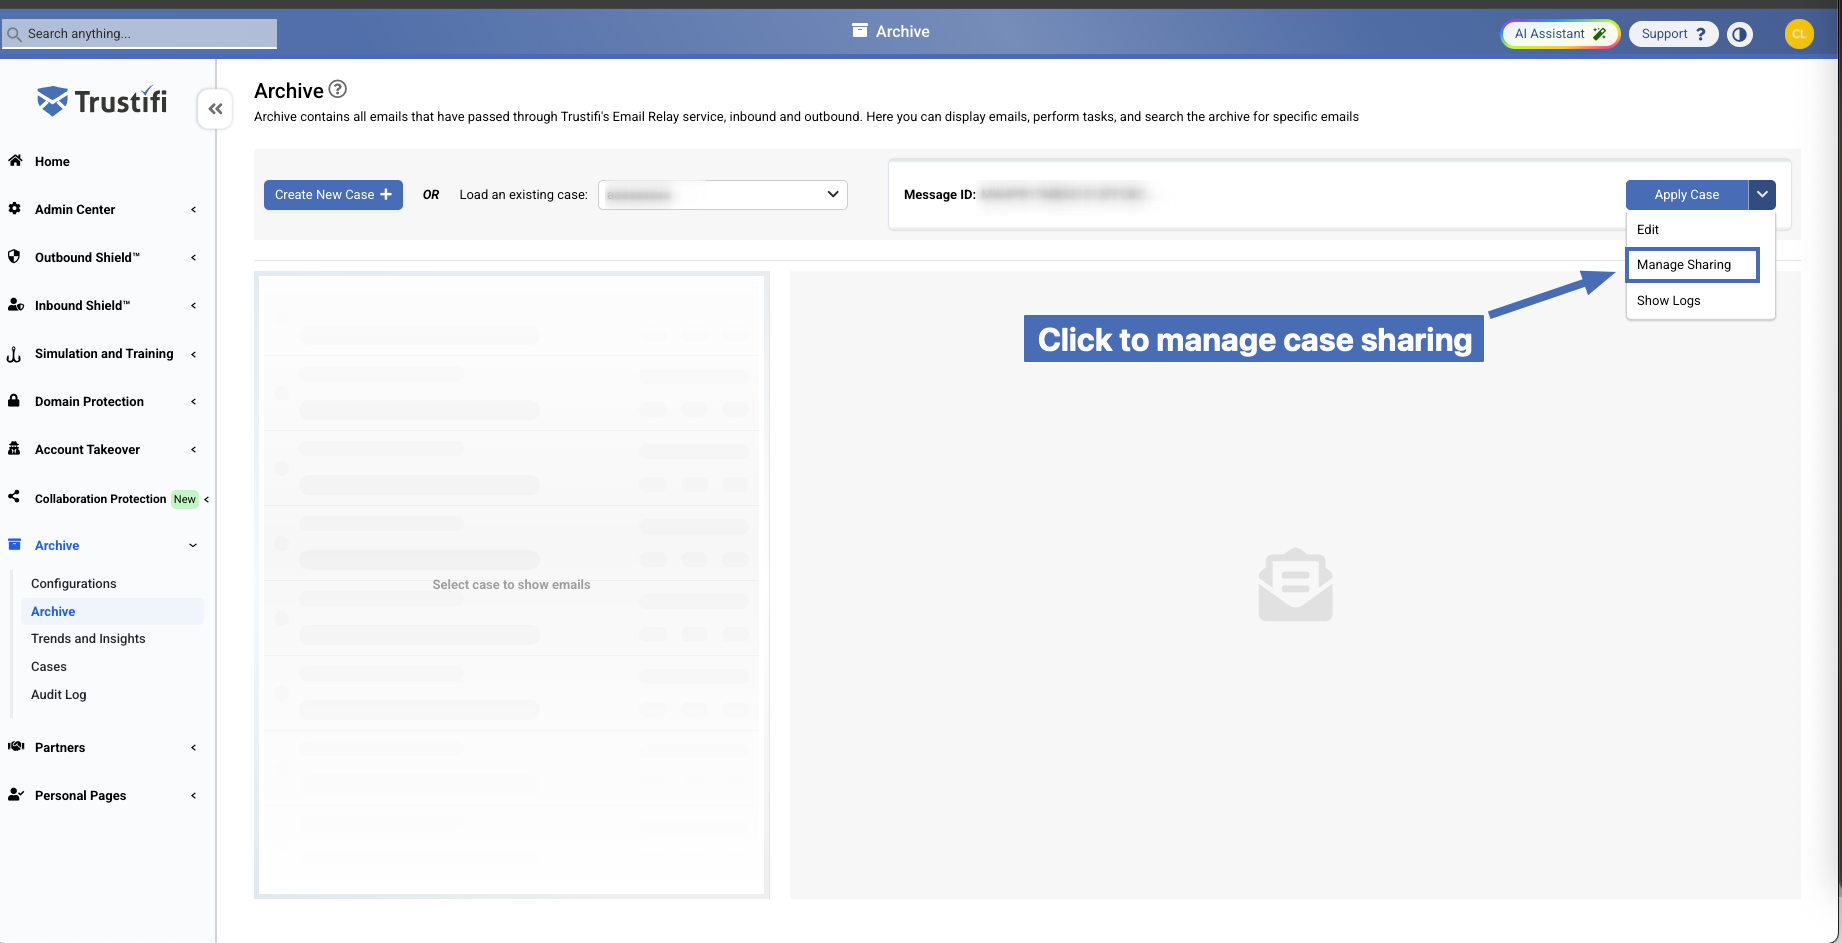
How to Share an Archive Case
Navigate to the Archive page (Archive > Archive)
Select a case from the case list
Click on the arrow next to the “Apply Case” button
Select “Manage Sharing“.
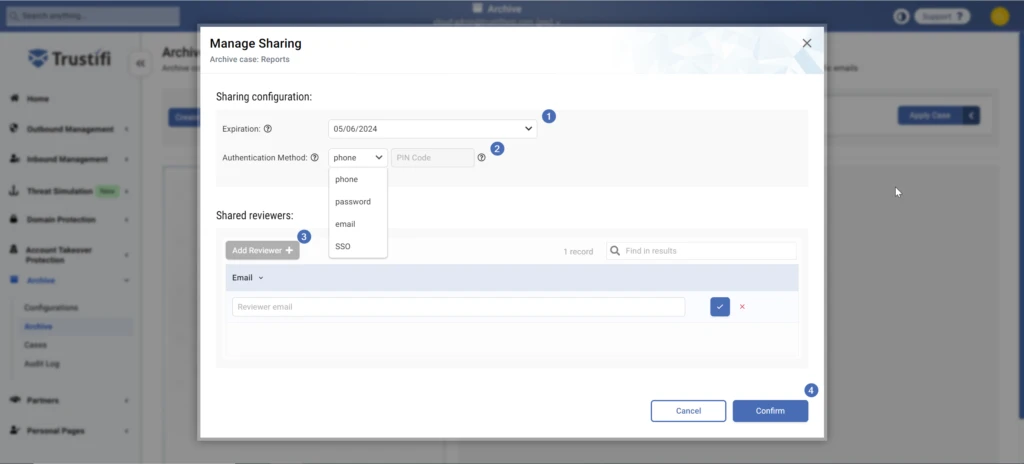
Configure Sharing Settings
In the “Manage Sharing” window, follow these steps to share the case:
Select an expiration date. The shared case will only be available within the expiration range you select here.
Note: after a case has expired, you may edit the case sharing to expand the expiration date.Select an authentication method. The recipient of the shared case will have to undergo MFA (Multi-Factor Authentication) using the selected method. The MFA method can be: phone (SMS with PIN code), pre-set password, email (PIN code), or Single Sign-On (SSO).
Add reviewer(s). Click on the “Add reviewer” button and then enter the reviewer’s email address. This person will receive an email invitation to authenticate and review the shared case.
More than one reviewer can be added.Click “Confirm” to send out the shared case to the selected reviewer(s).
Accessing a Shared Case
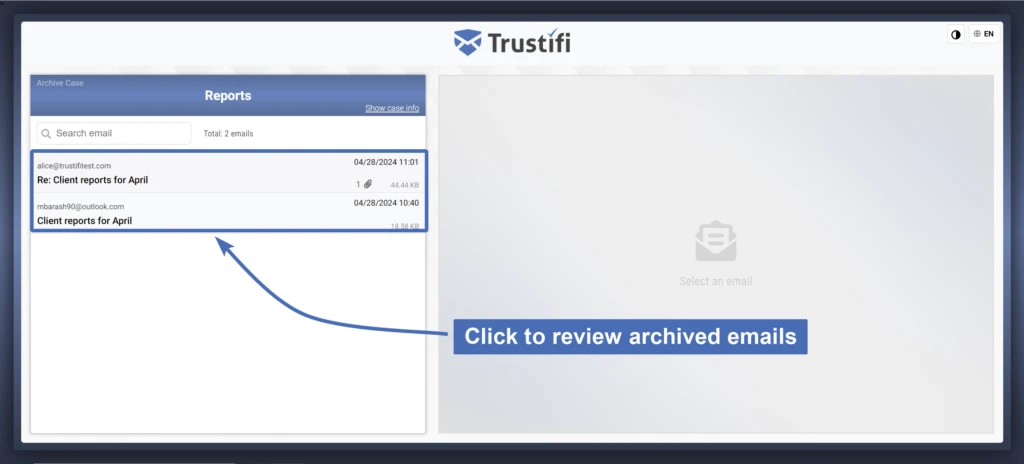
As the recipient of a Trustifi archive shared case, you will receive an email invitation which should look like this:
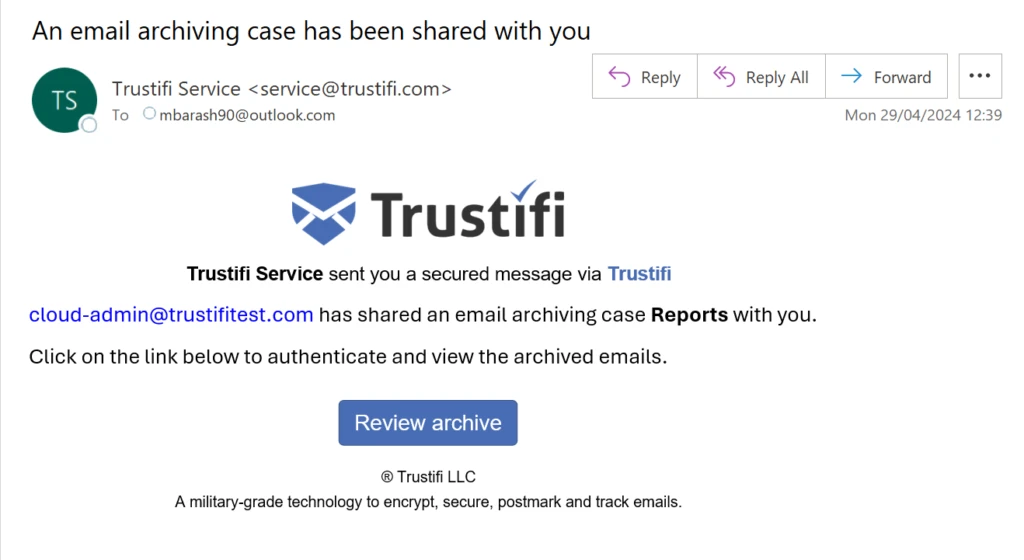
When you click on “Review archive”, a secure browser window will open and you will be asked to authenticate your identity using the MFA method selected for this case.
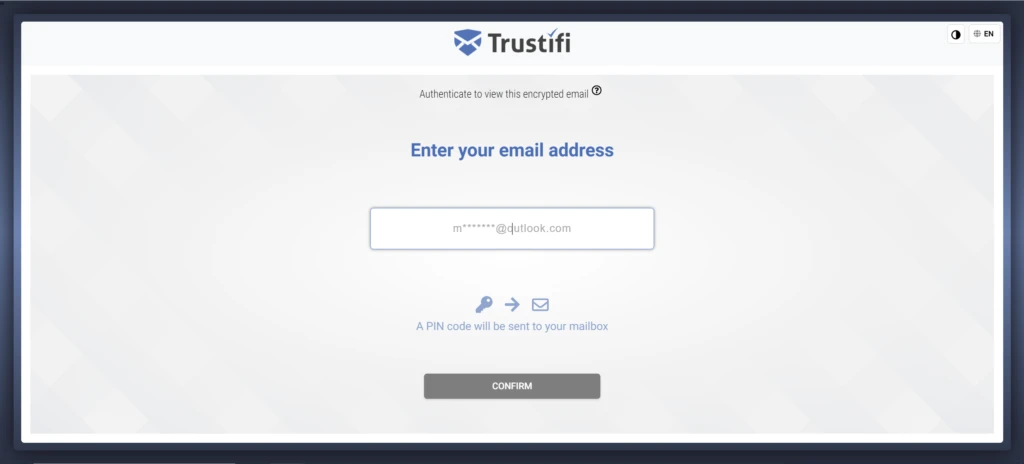
Once successfully authenticated, you will have access to review the emails in this archive case. Simply click on the emails on the left side to view their content.