Creating the connection between Trustifi and CheckPoint’s Harmony endpoint service is very easy and can be done in just a few minutes.
Once the connection is made, no additional configuration is needed. Simply follow the steps below to create the connection.
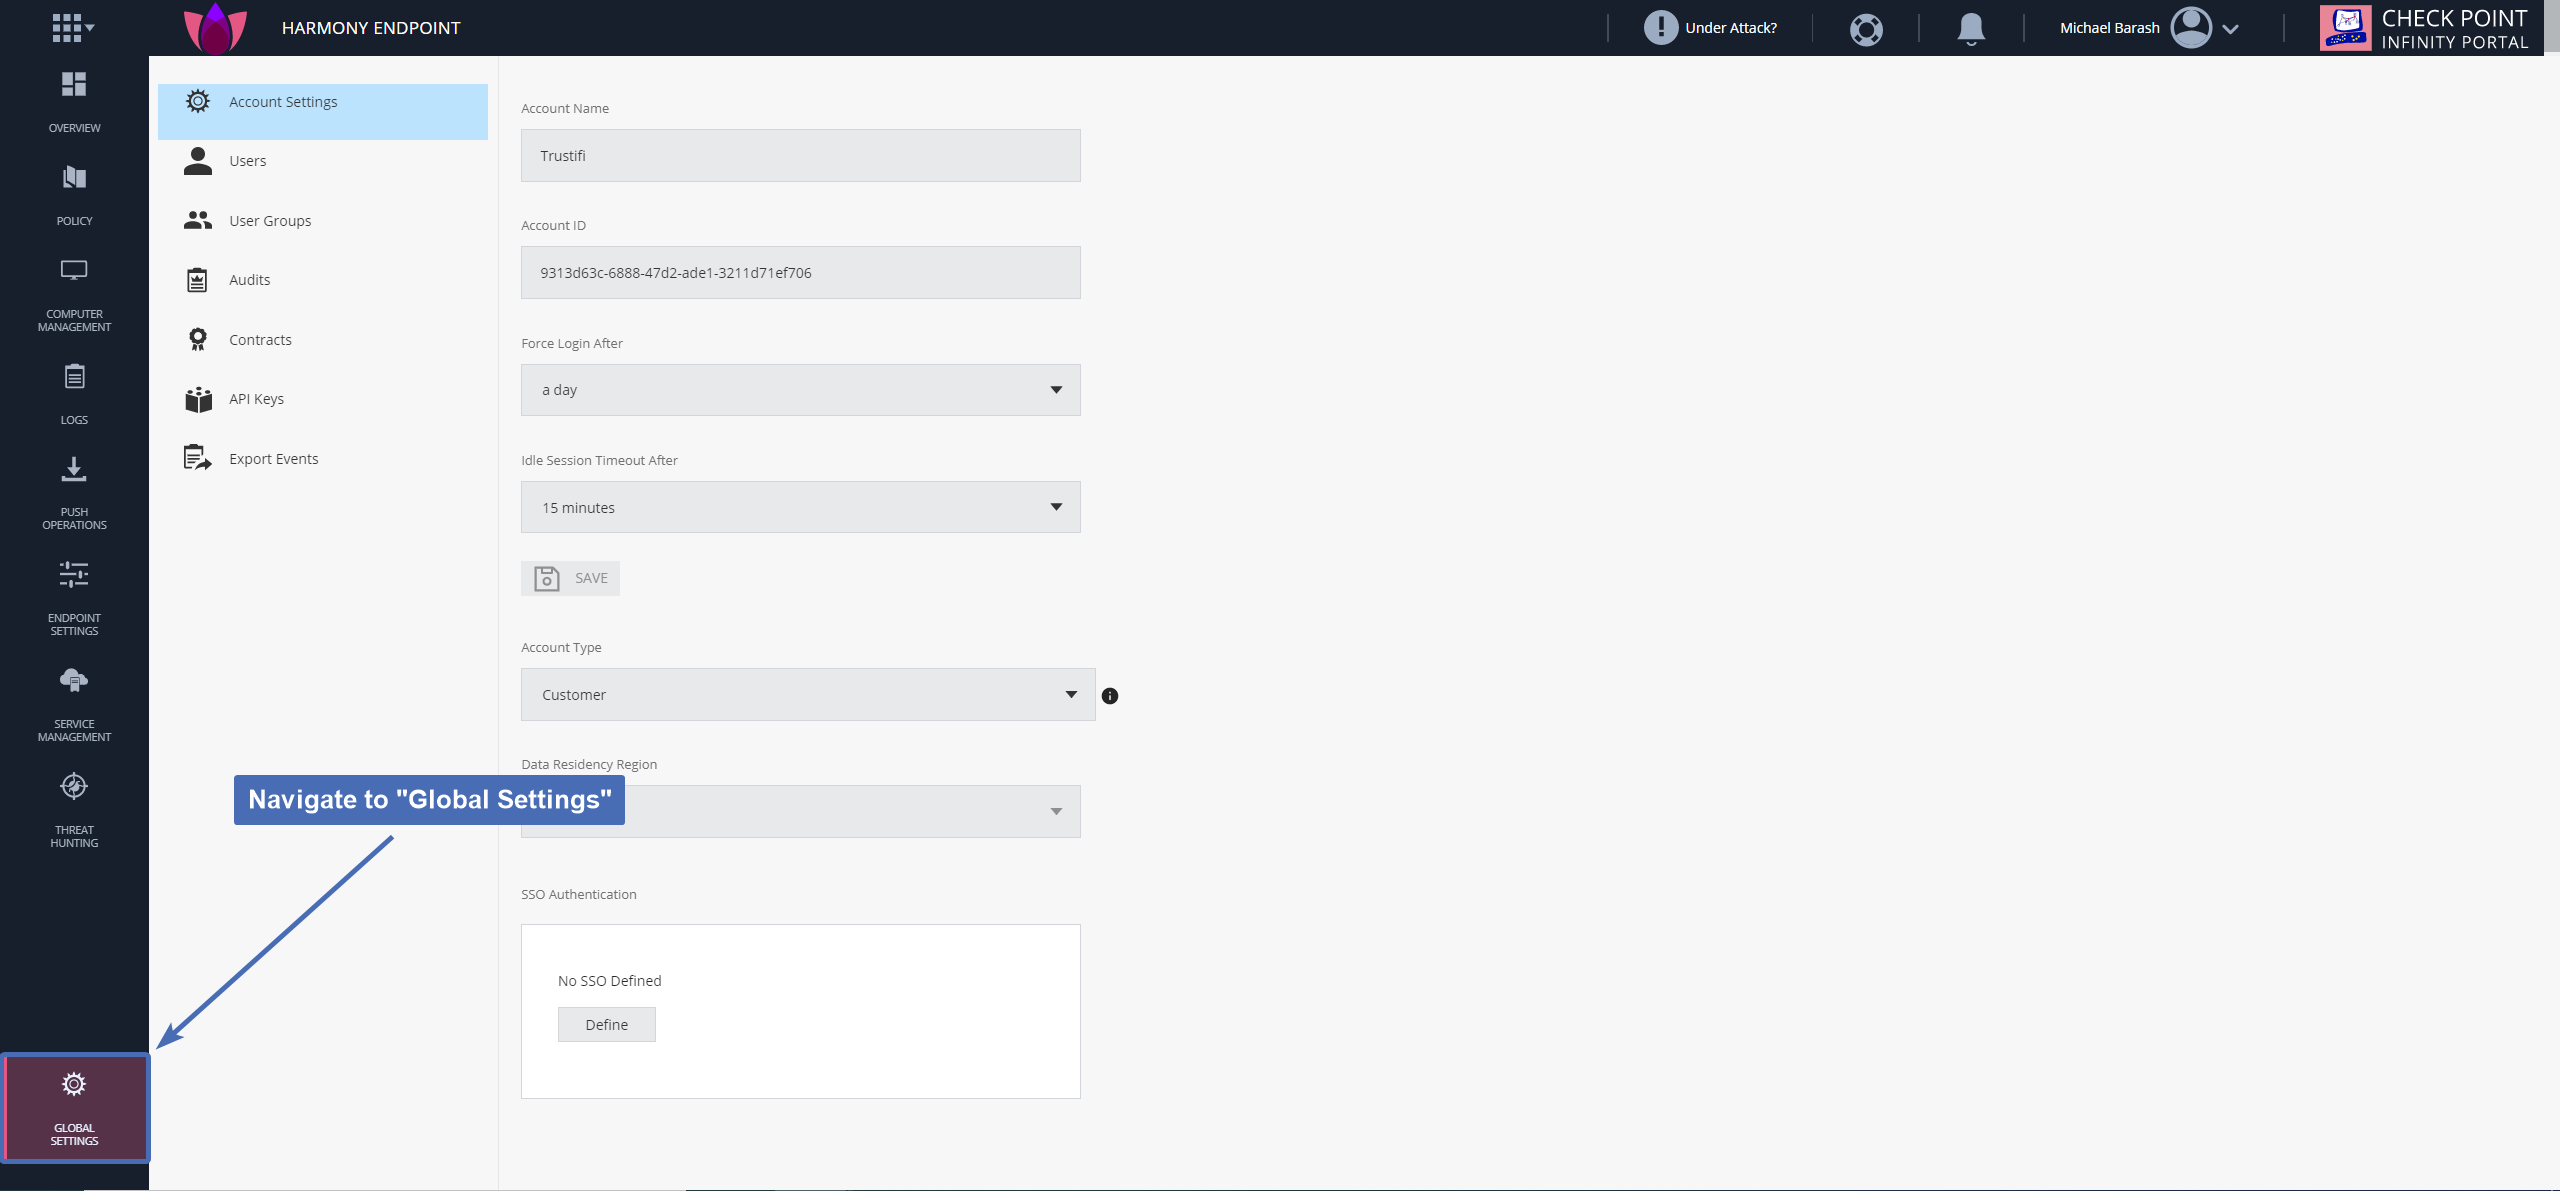
Step 1 – navigating to the CheckPoint portal
Log into the CheckPoint portal and navigate to the endpoint dashboard.
Then, click on “Global Settings” at the bottom left corner.
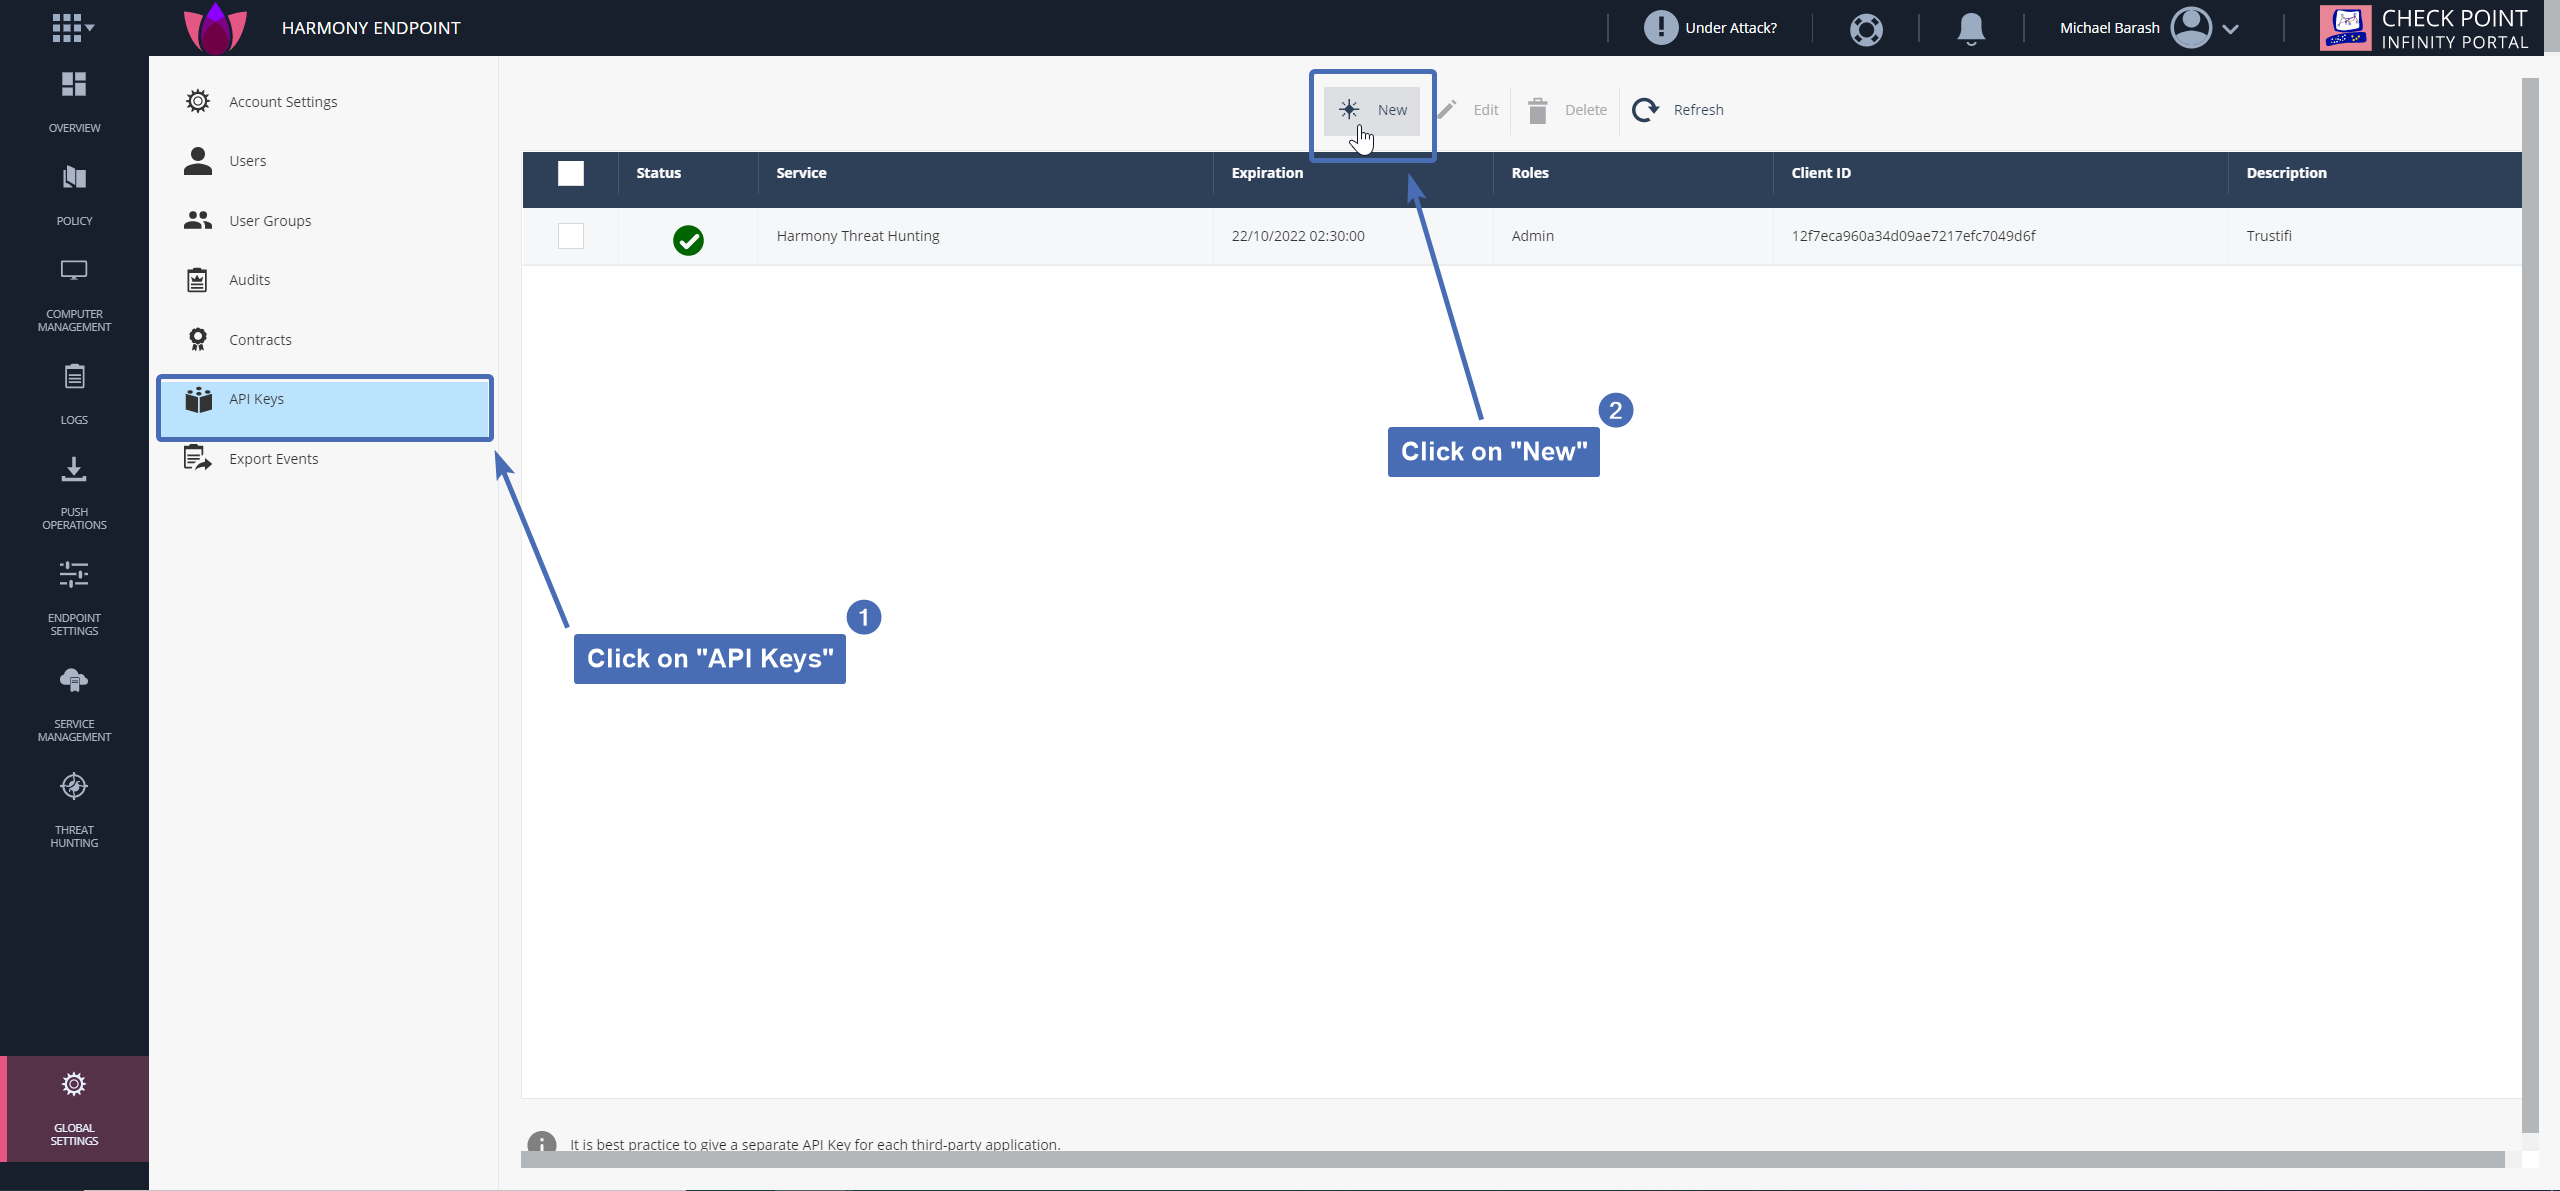
Step 2 – creating a new API client
Click on “API keys” from the menu on the left, then click on “New” at the top to create a new API client.
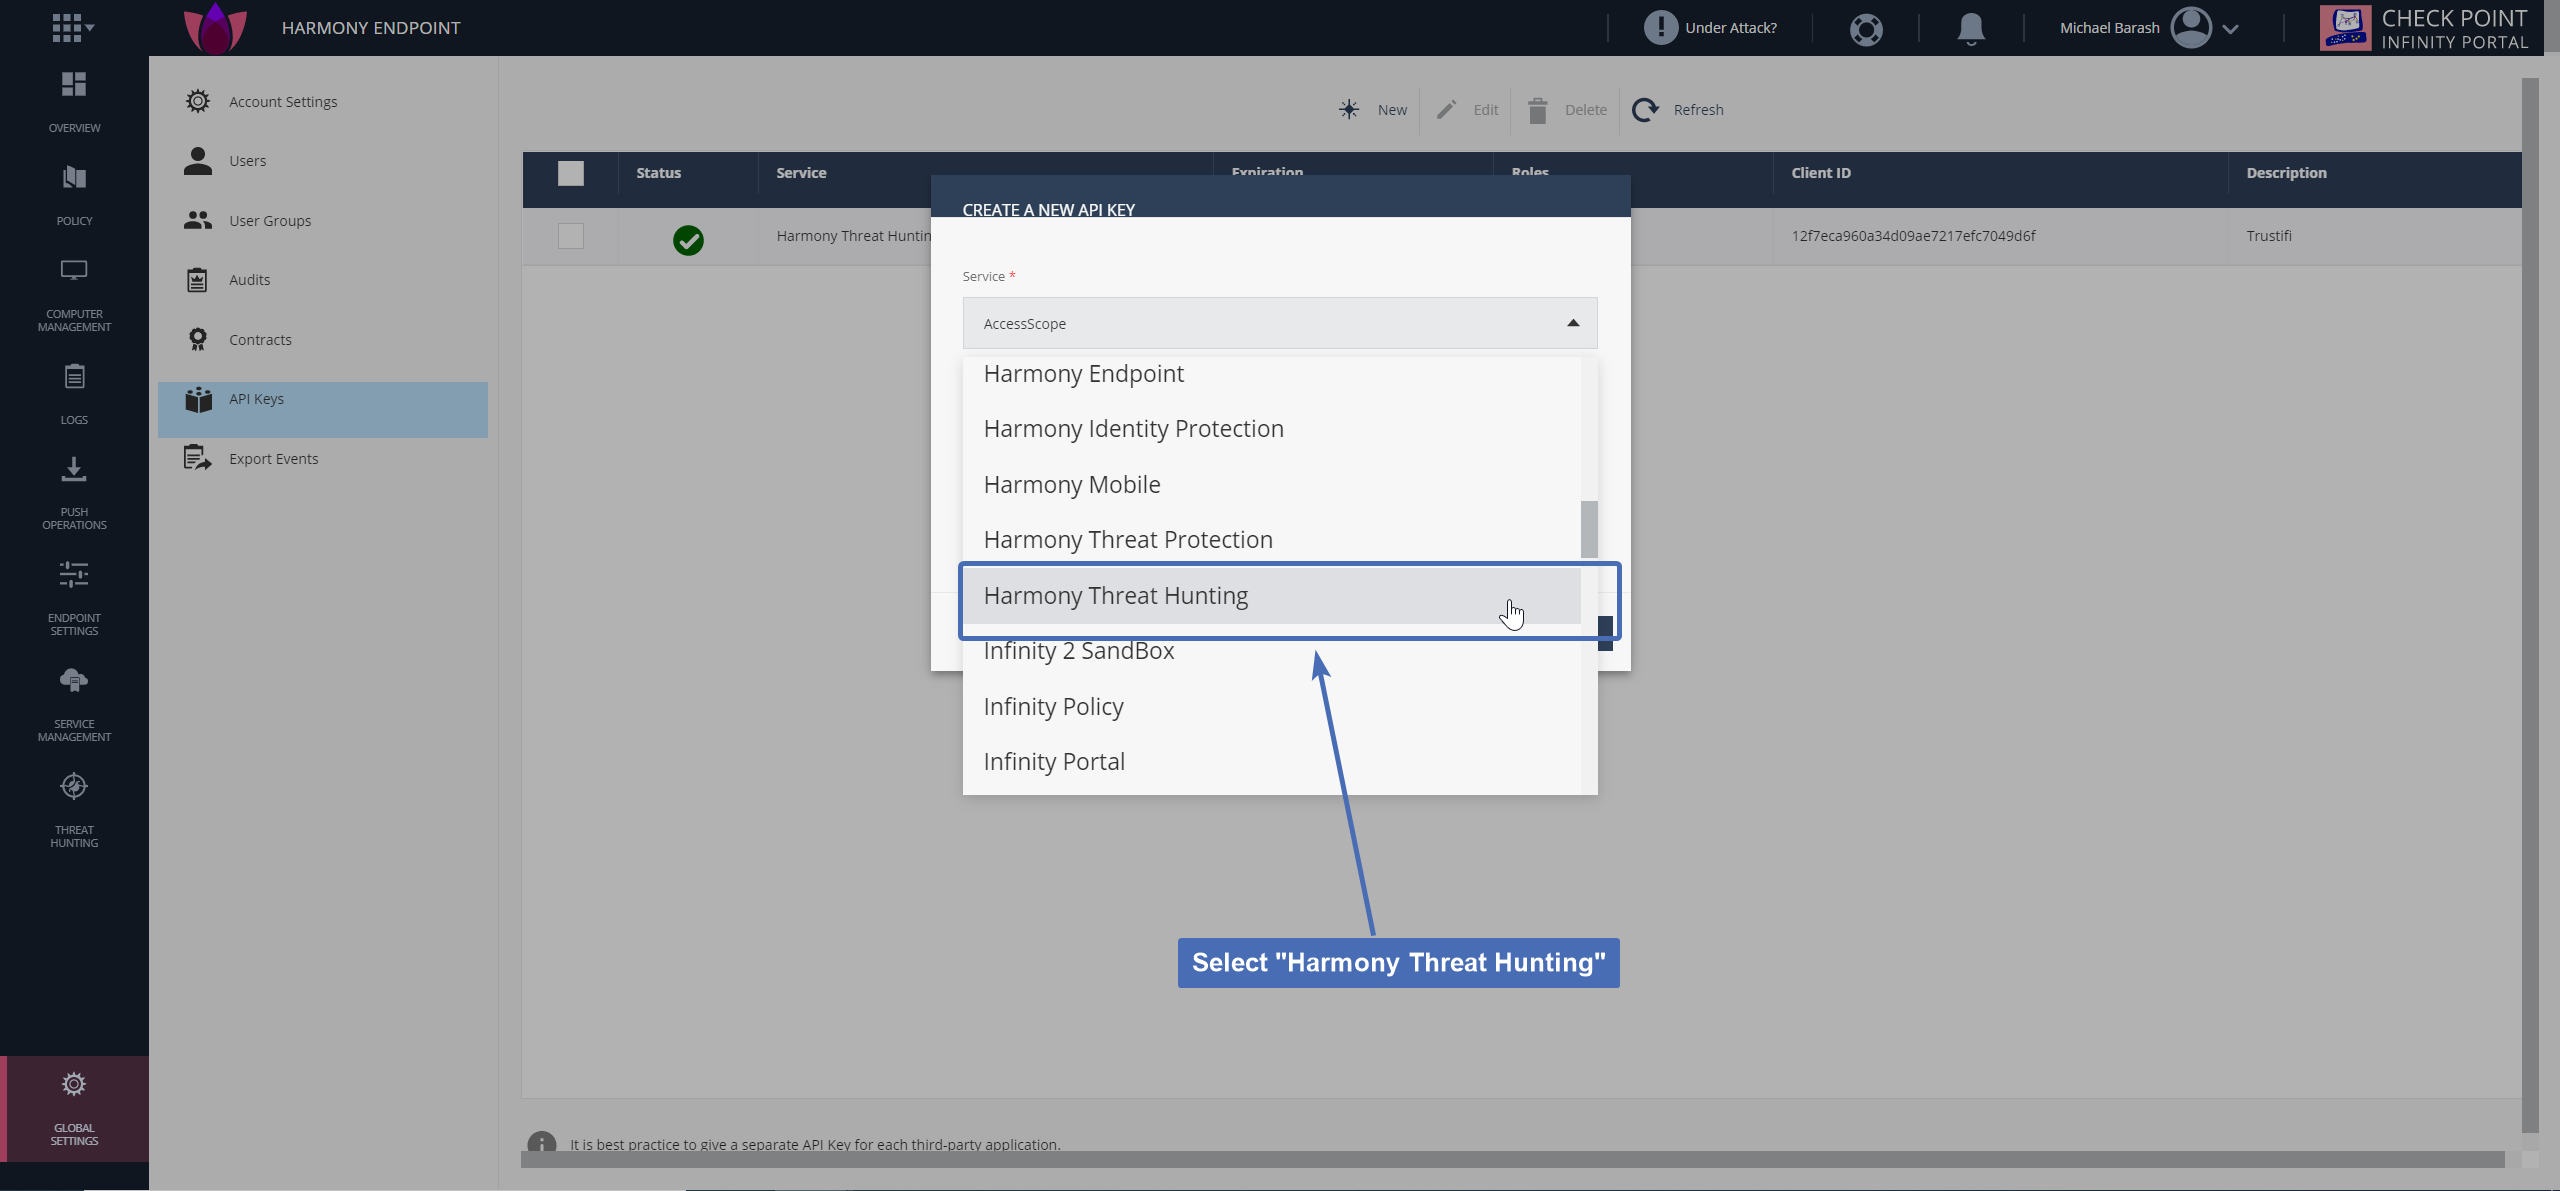
Step 3 – Selecting the Harmony service
In the “Service” menu, select “Harmony Threat Hunting”.
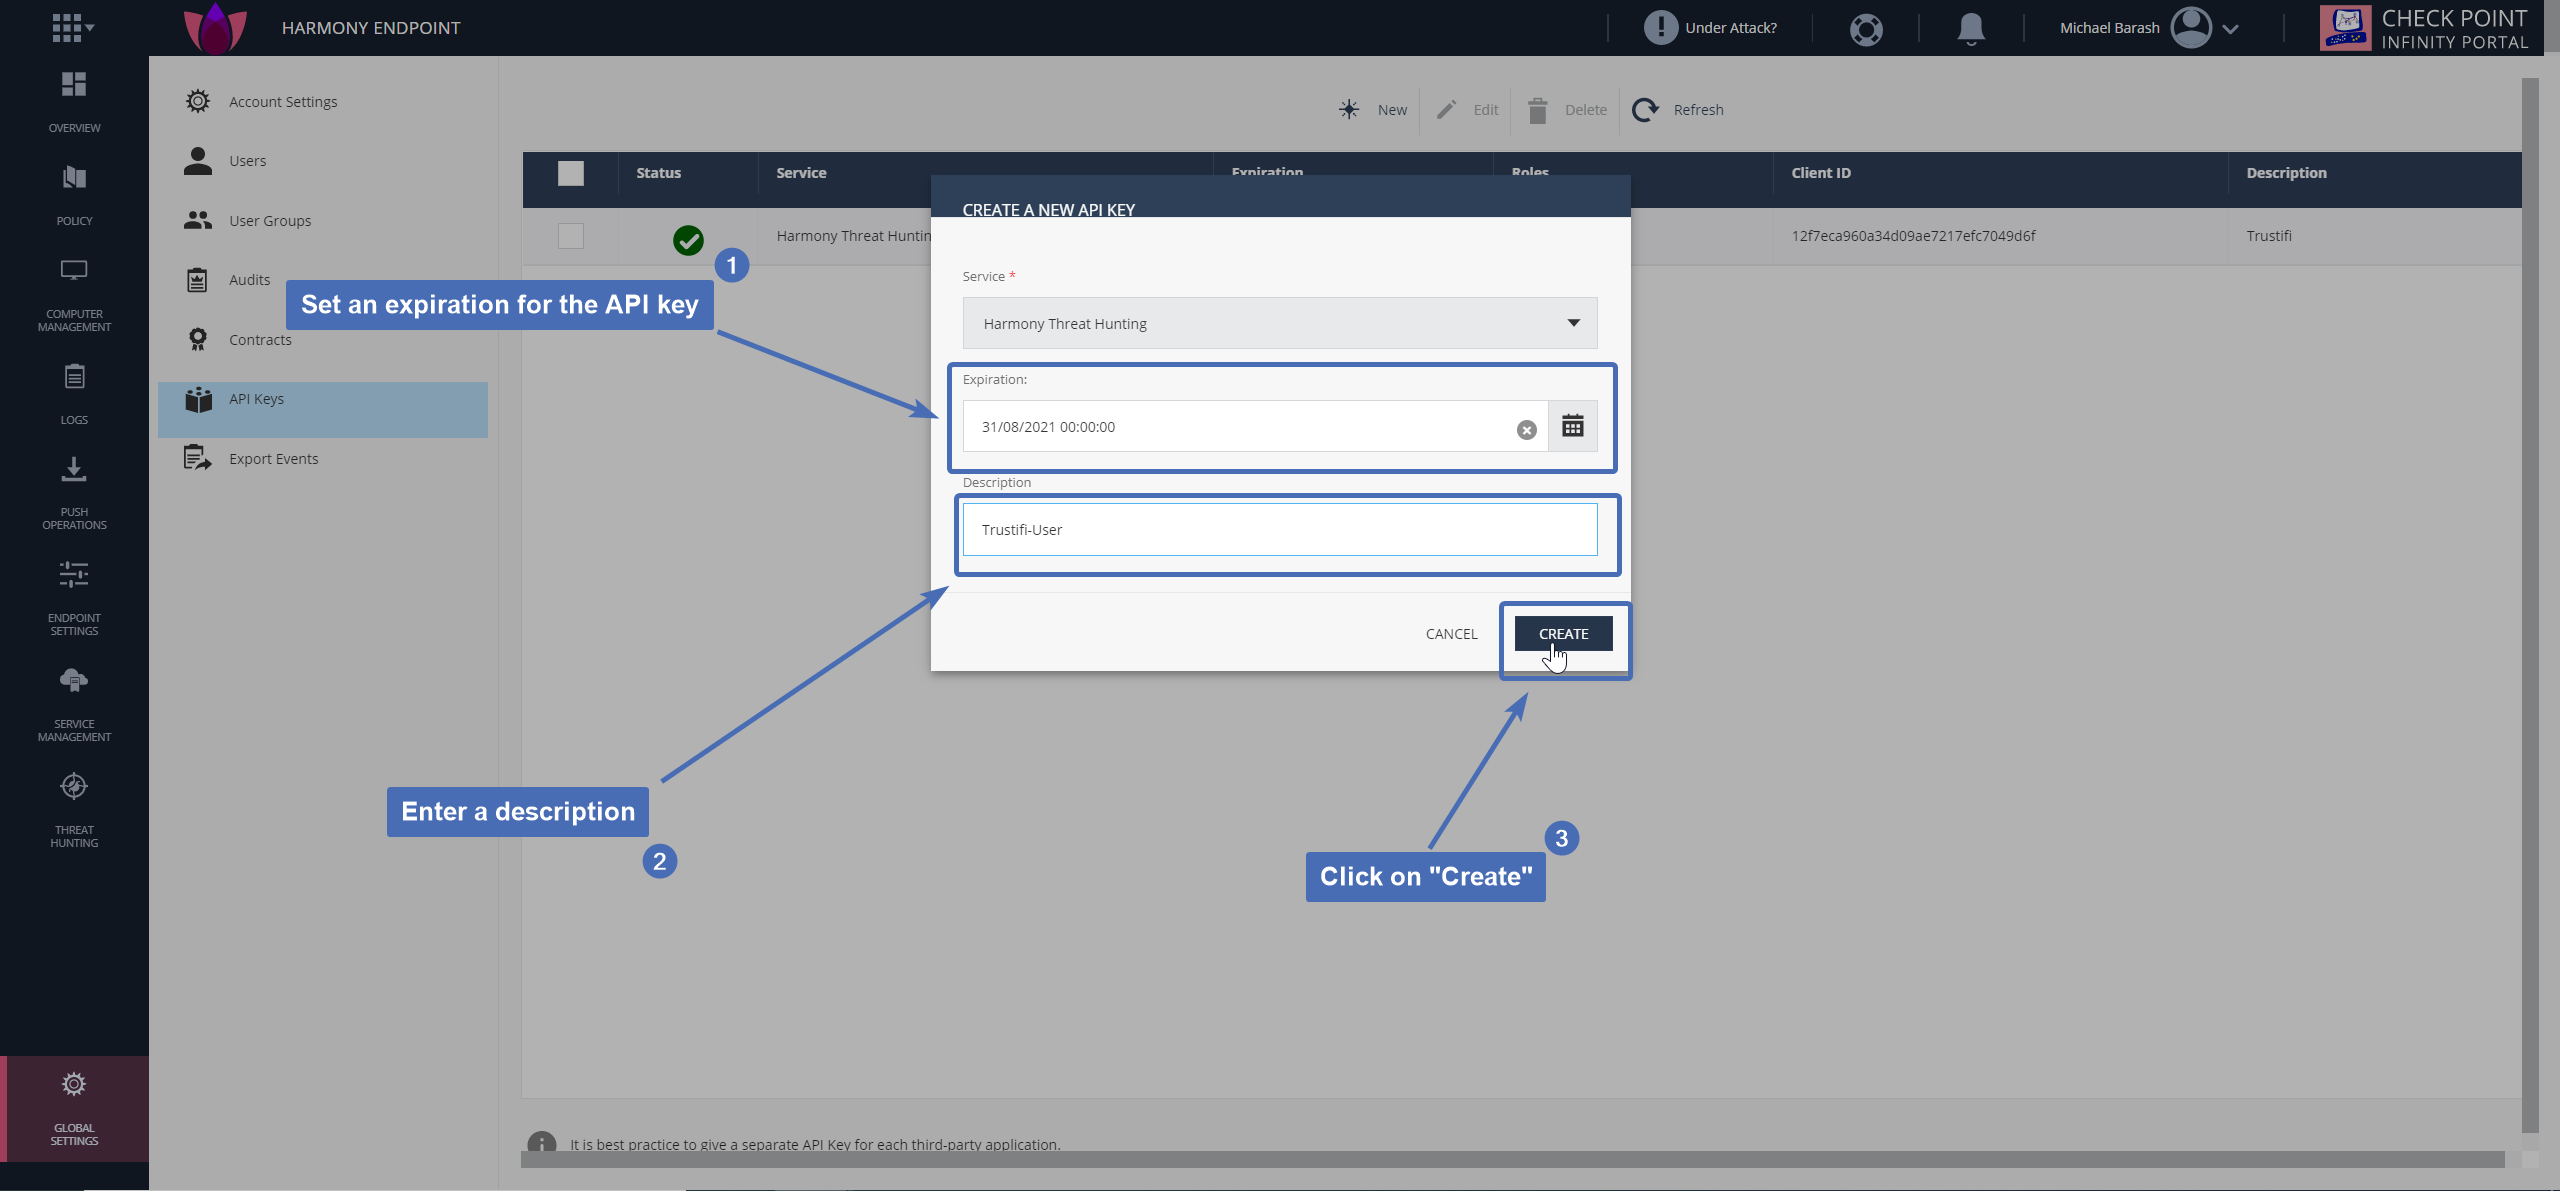
Step 4 – setting expiration and description
Select an expiration date for your API key (shorter expiration = greater security) and enter a short description in the “Description” field.
Then, click on “Create”.
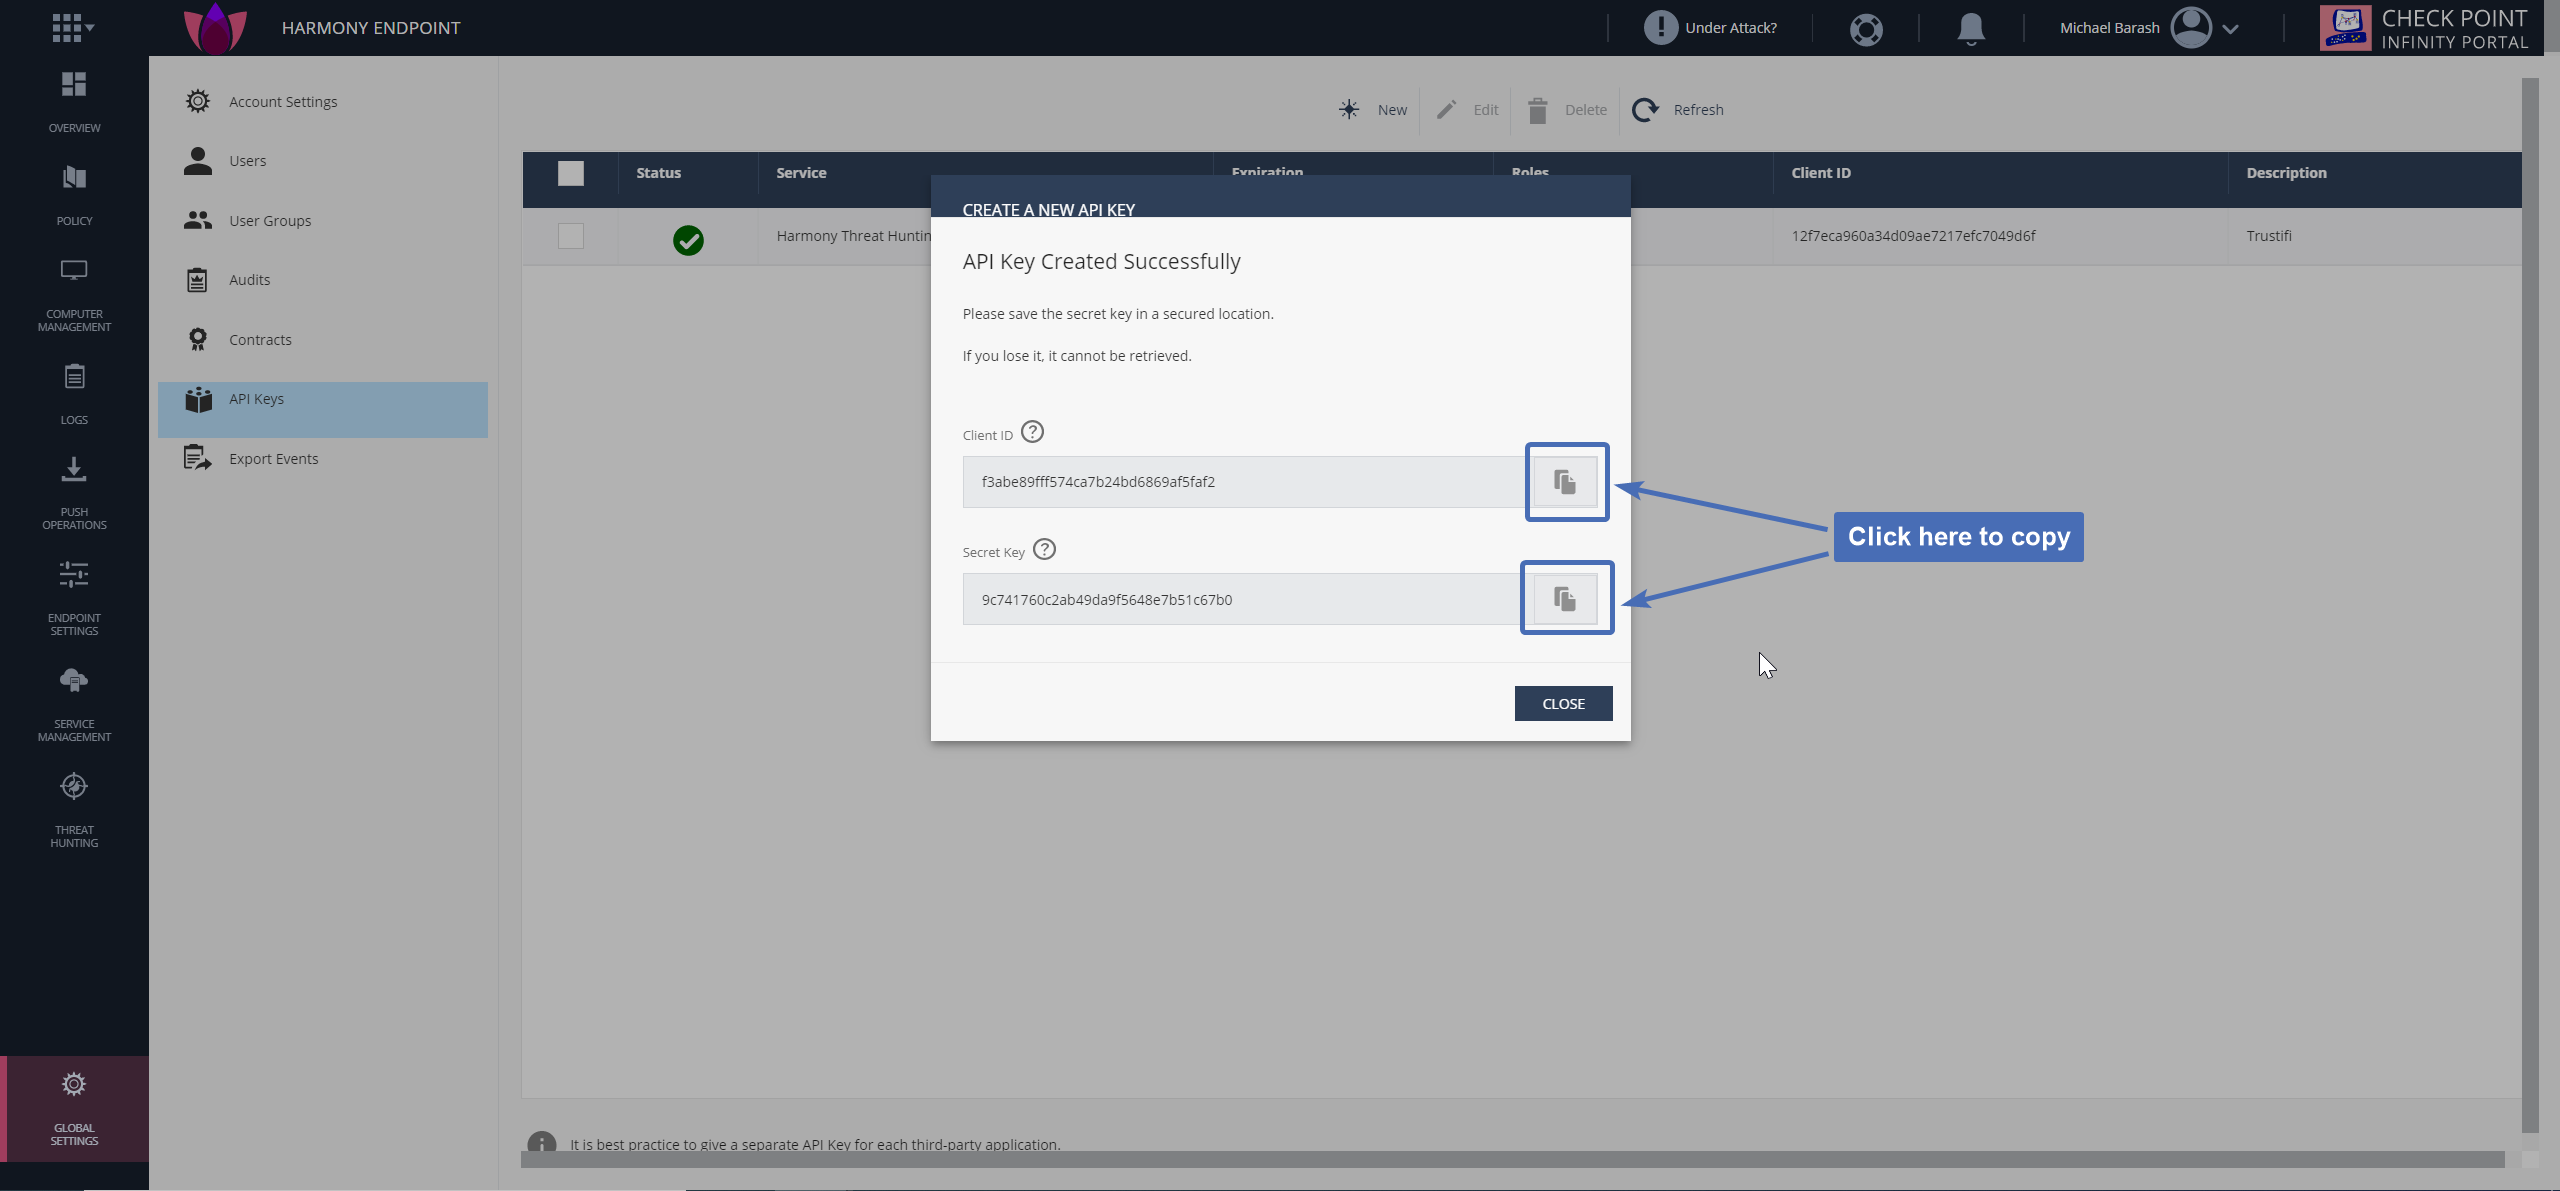
Step 5 – copying the client ID and secret key
Copy the client ID and secret key that were generated and save them in a secure location.
Note: after this window is closed, you will not be able to access the client ID and secret key again.
Step 6 – navigating to the Trustifi portal
Navigate to the Trustifi web portal and log in with your admin credentials.
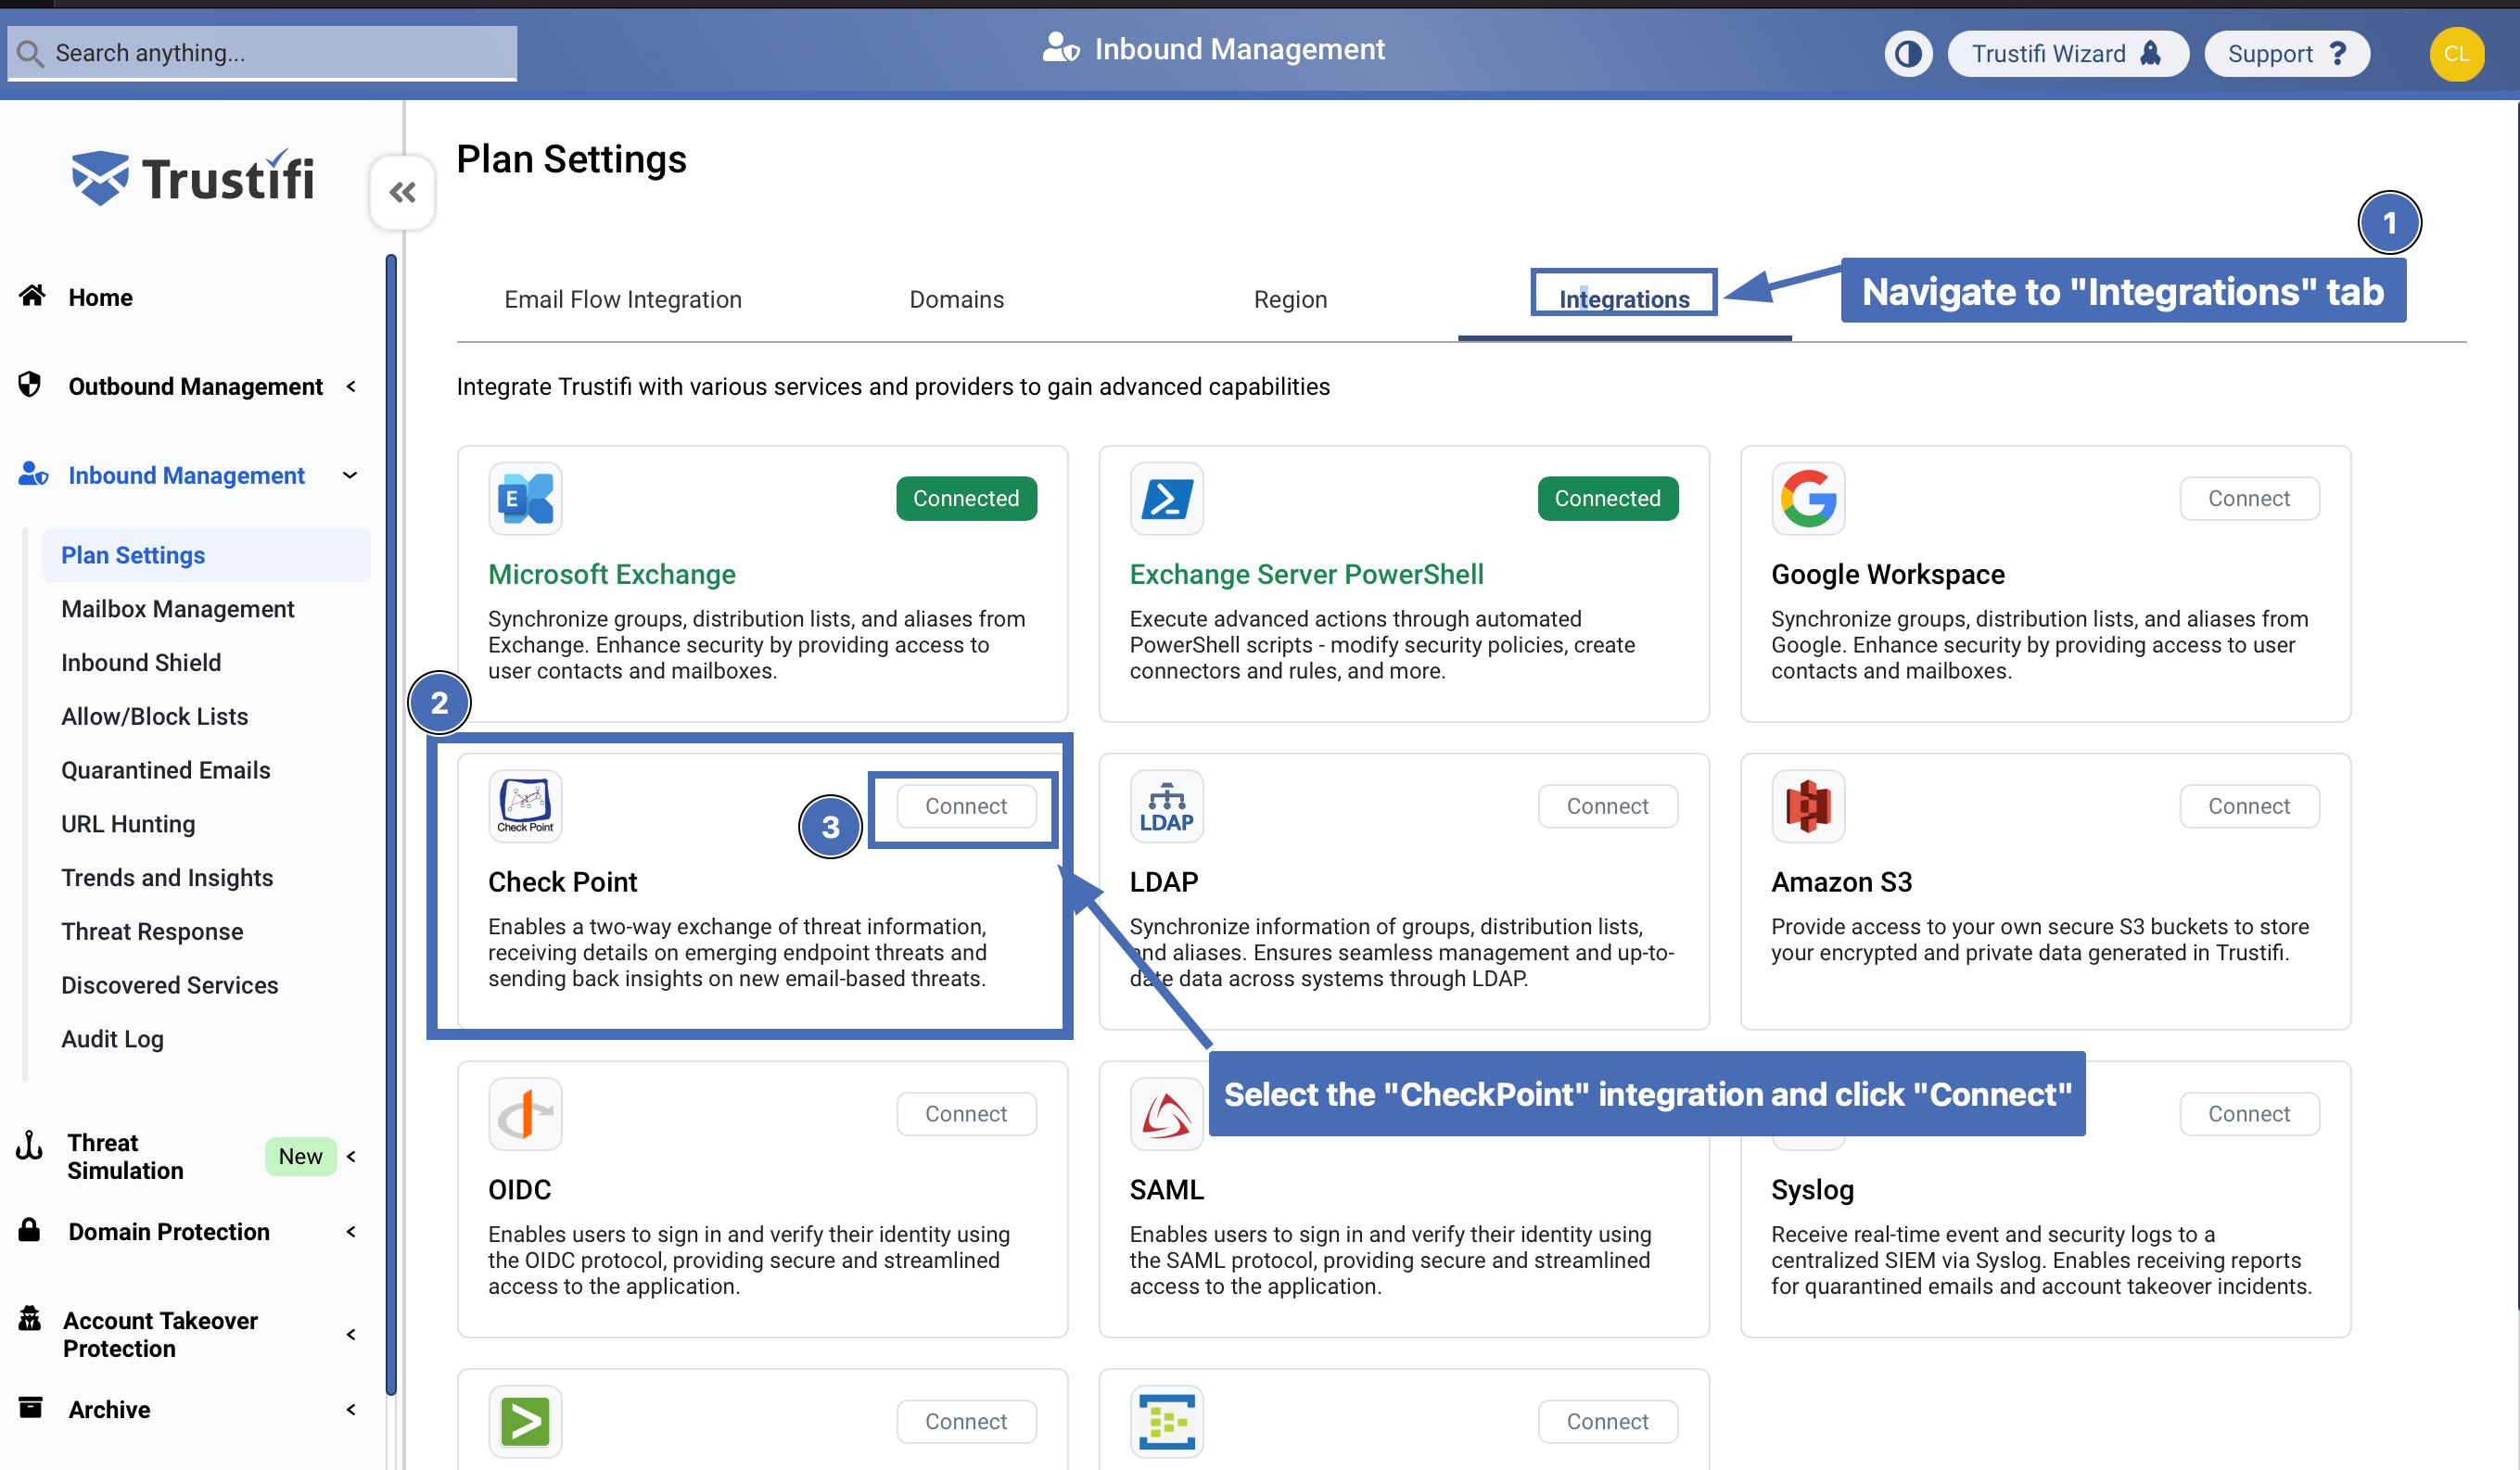
Then, navigate to “Inbound Management” > “Plan Settings” > “Integrations” tab.
Click on “Checkpoint” in the integrations selection menu and then click on “Connect”.
Step 7 – entering the client ID and secret key
In the pop-up window click on “Connect”, enter the client ID and secret key you copied from the CheckPoint portal before, and click on “Connect”.
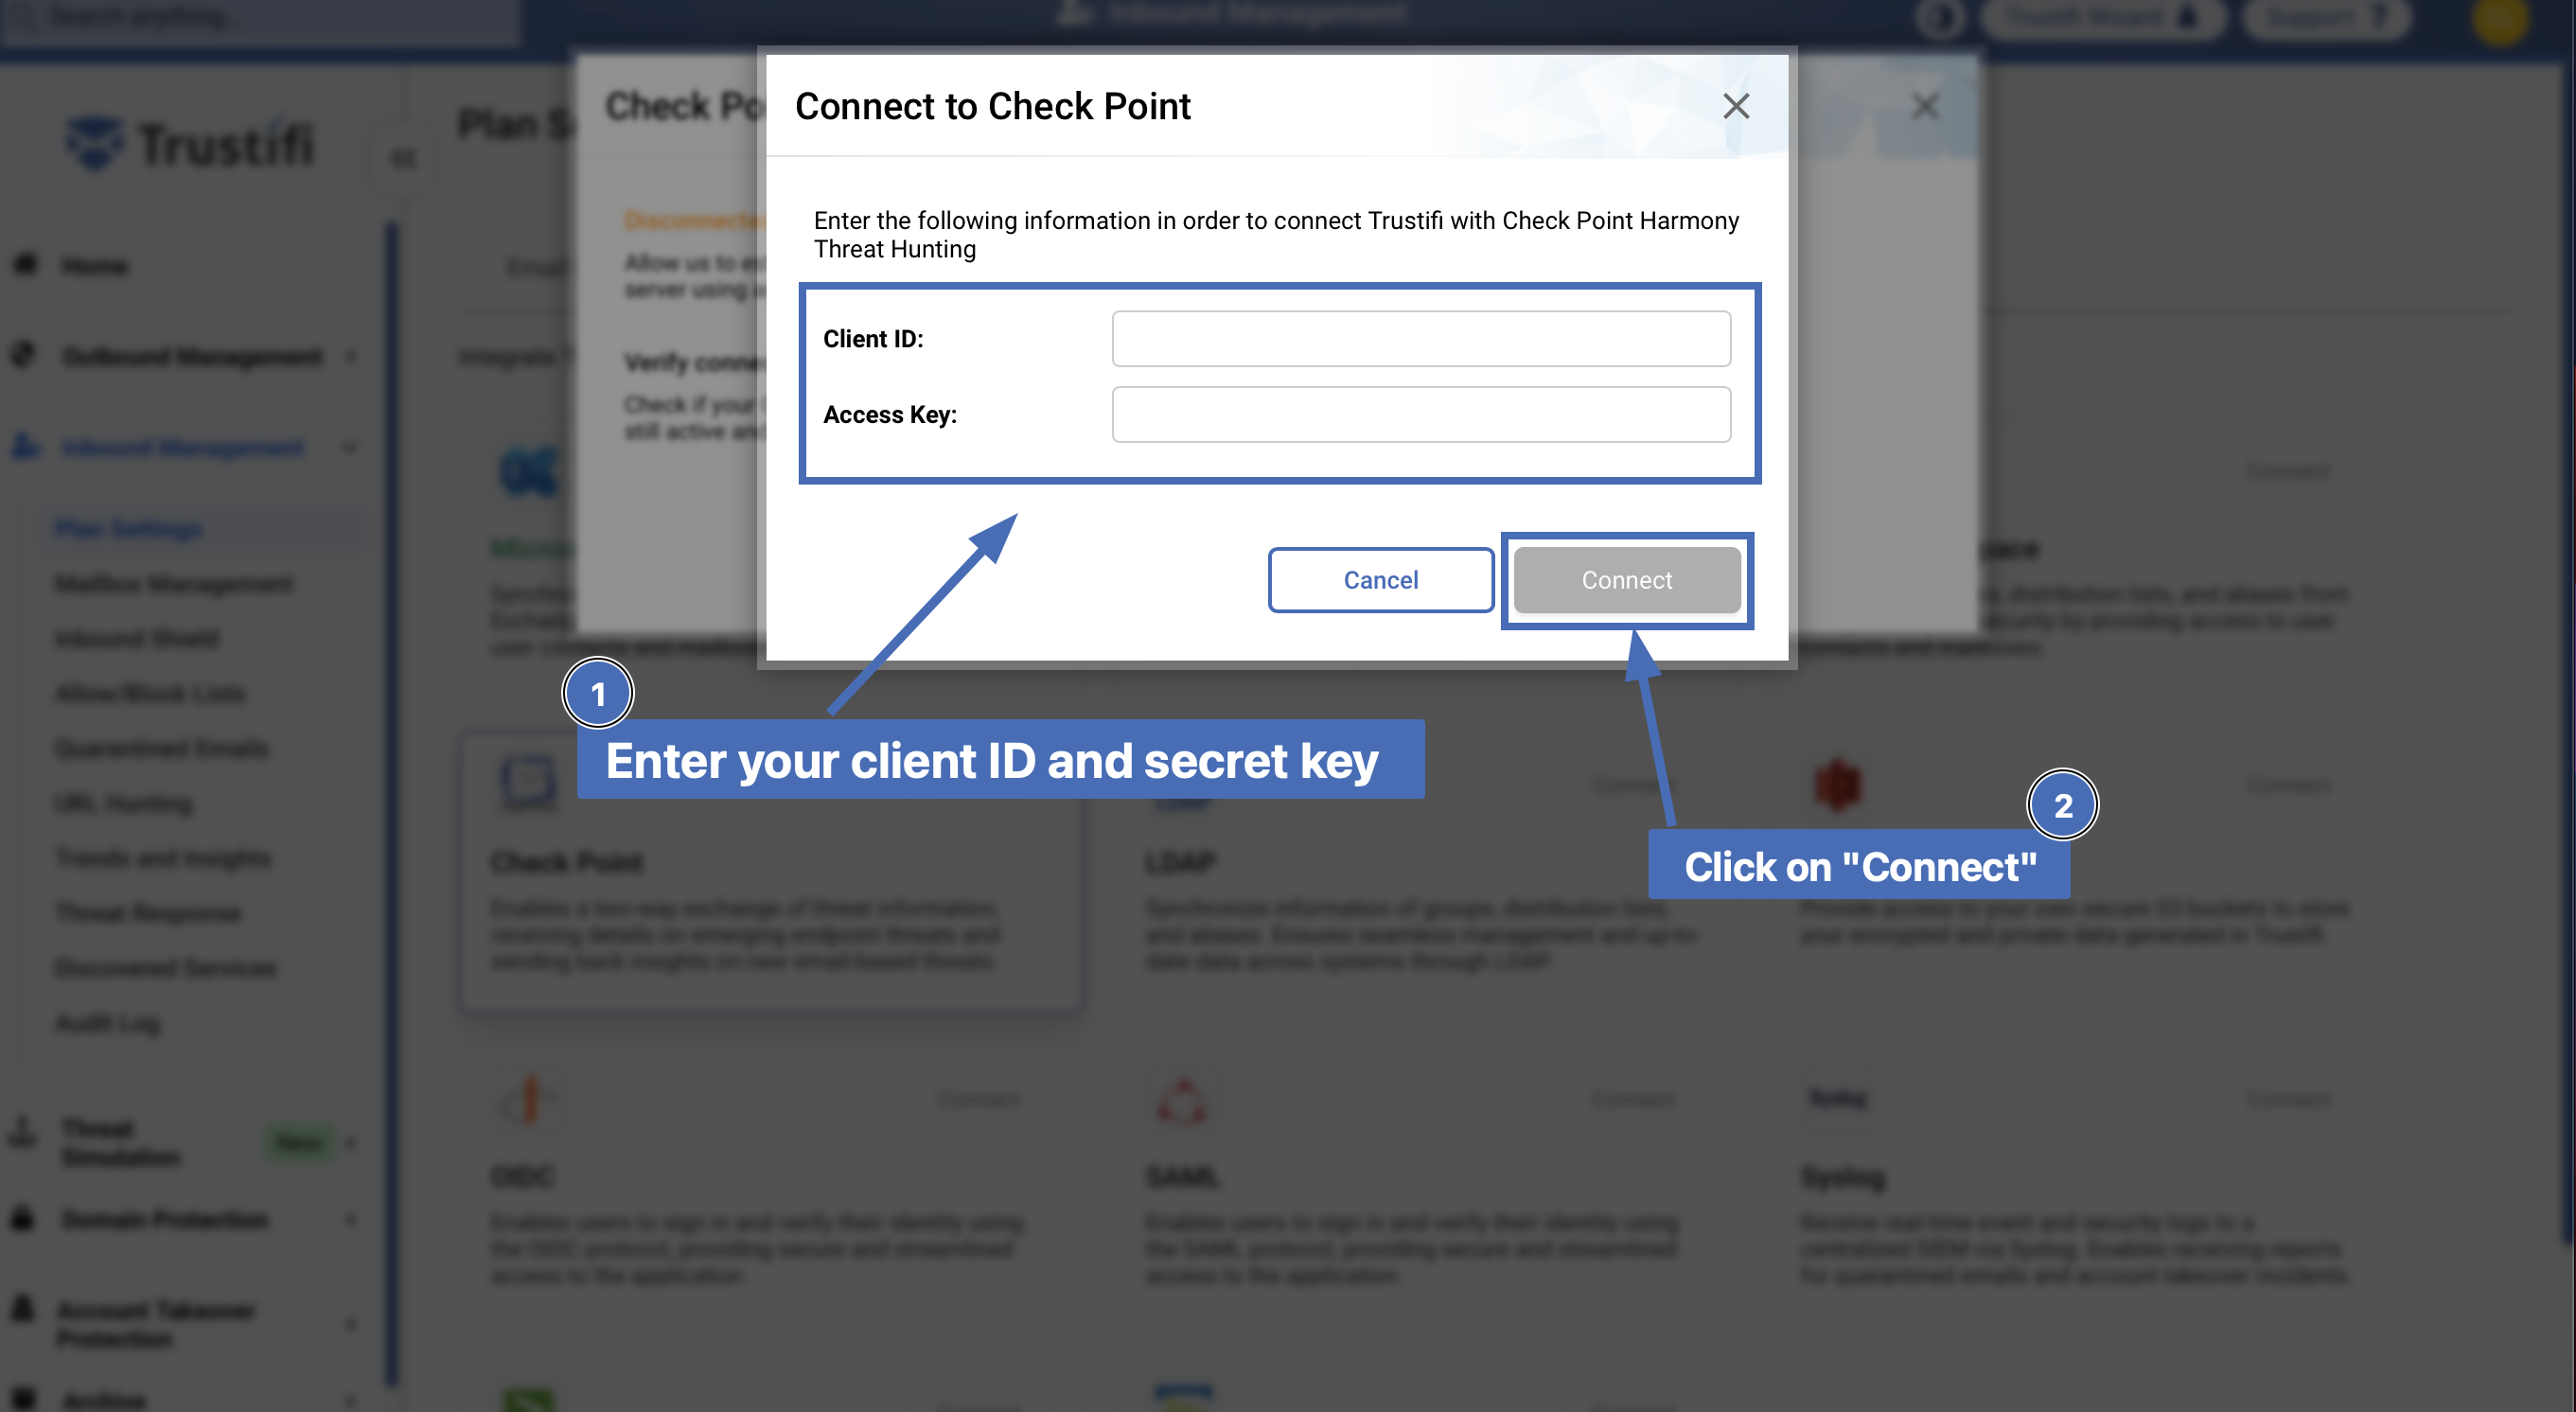
Step 8 – verifying the connection
If the provided ID and key are correct, the connection status should change to “Connected”.