Step 1: Selecting the “Journal” Architecture
After signing into the Trustifi web portal as an admin, navigate to the “Plan Settings” page > "Email Flow Integration" tab under “Outbound Management”.
In the “Email Flow Architecture” section, click on the “Via Journal” setting.
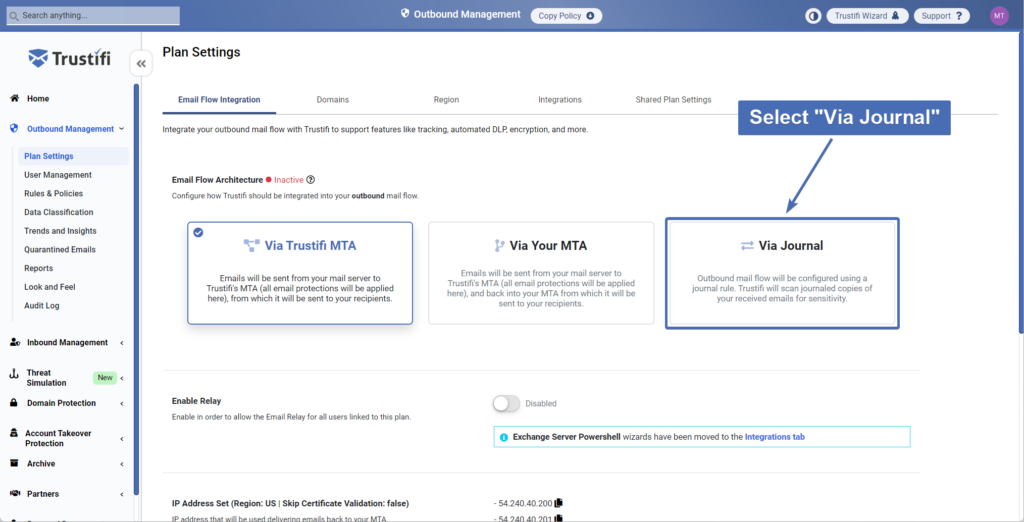
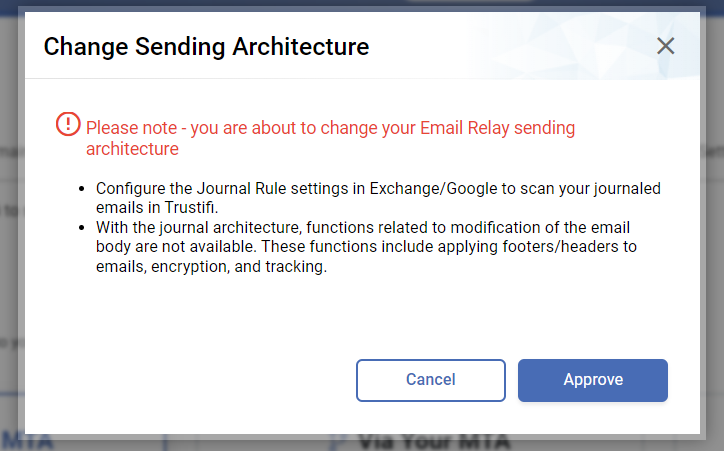
You will also need to confirm this change in a pop-up.
Step 2: Copying the journaling address
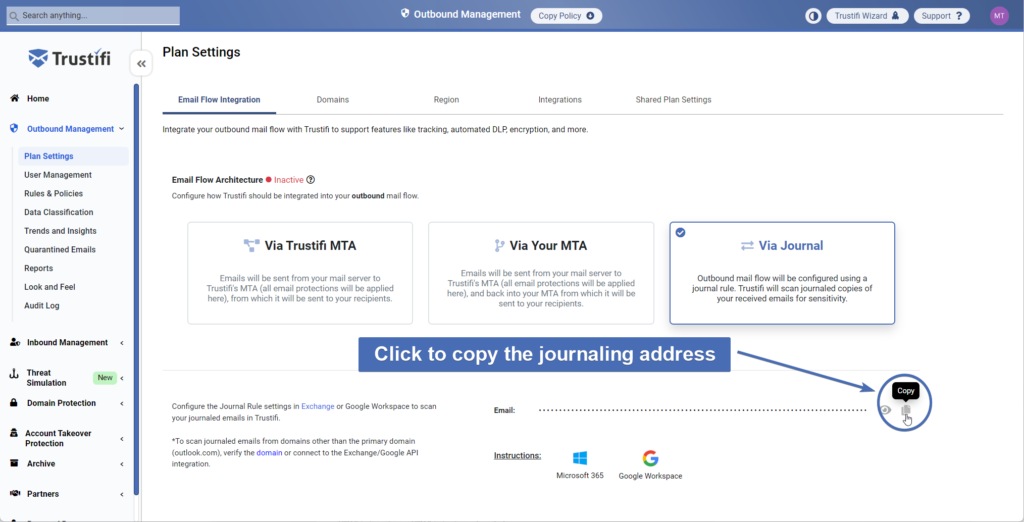
After the architecture change has been confirmed, Trustifi will generate a unique journaling address that will be used to receive the journaled traffic.
Click on the copy icon next to this address to copy it, as you will be using it during the journaling rule configuration in Google Workspace.
Step 3: Creating a content compliance rule in Google Workspaces
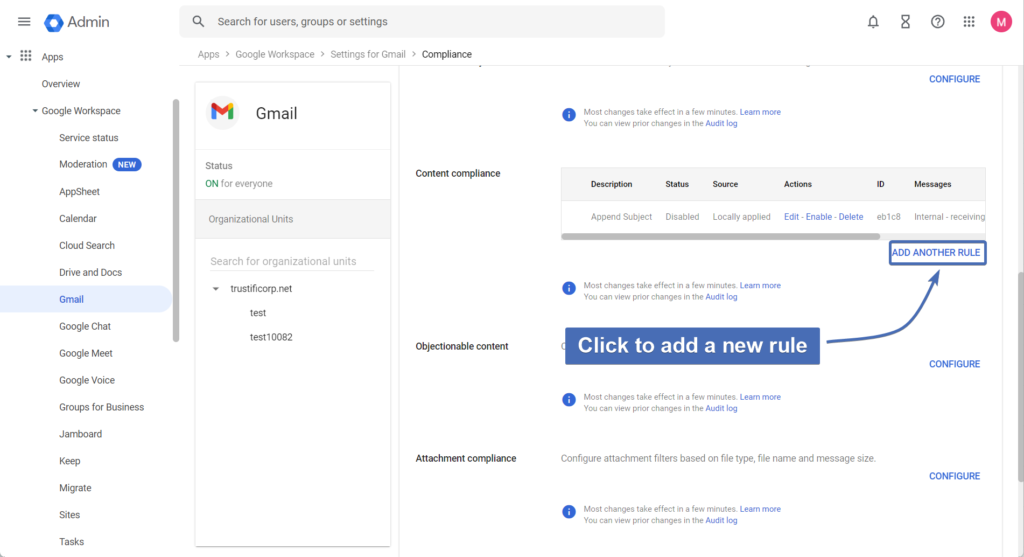
First, sign into the Google Admin Portal with your global admin credentials.
Then, navigate to the “Compliance” page and scroll down to the “Content Compliance” section. There, click “Add another rule” to create a new rule.
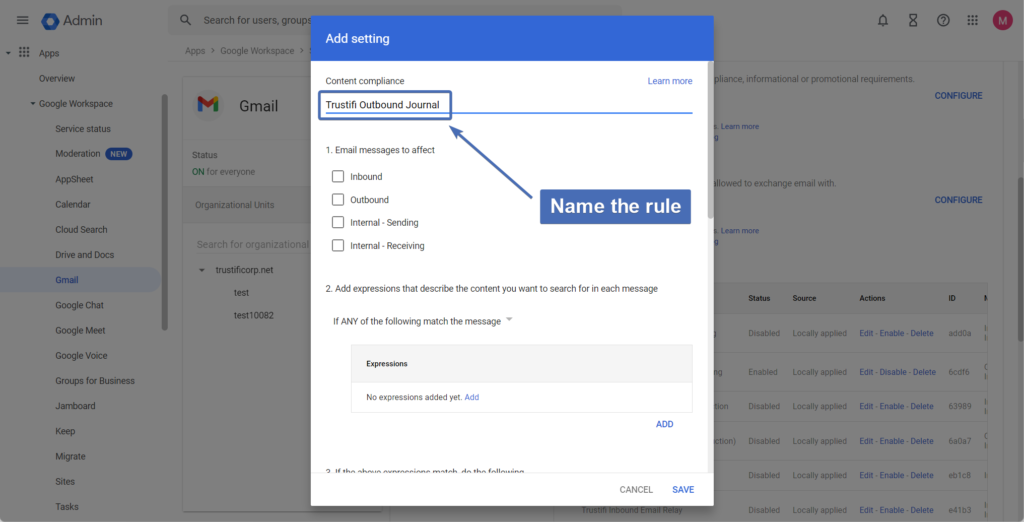
Step 4: Naming the rule
Give your compliance rule a descriptive name that clearly identifies it as a Trustifi journaling rule.
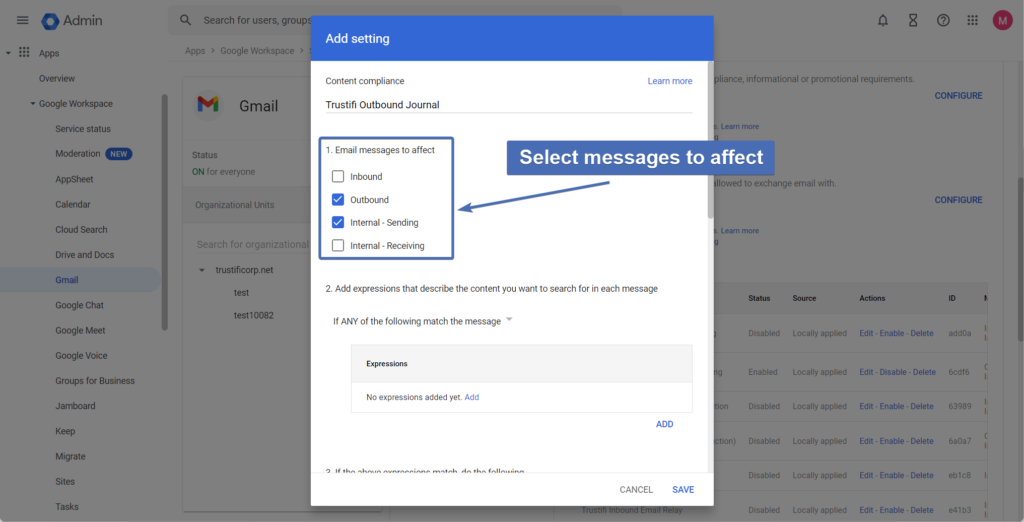
Step 5: Email messages to affect
Select which types of messages should be journaled to Trustifi. You will need to select the “Outbound” checkbox, and you can also choose to journal internal outbound traffic by selecting “Internal - Sending“.
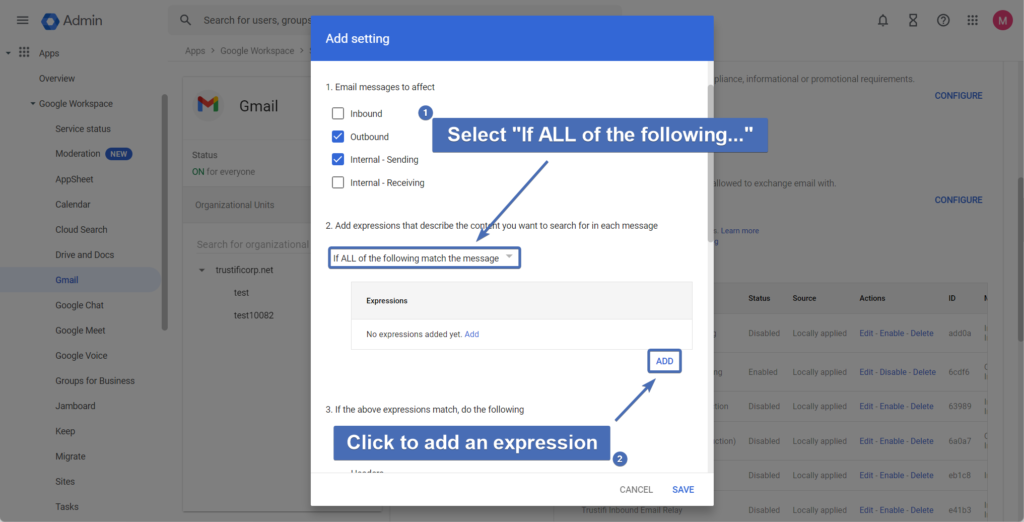
Step 6: Adding an expression
Here you will need to add an expression that, when matched, emails will be journaled to Trustifi. Follow the instructions below.
First, select “If ALL of the following match the message” and click “Add“.
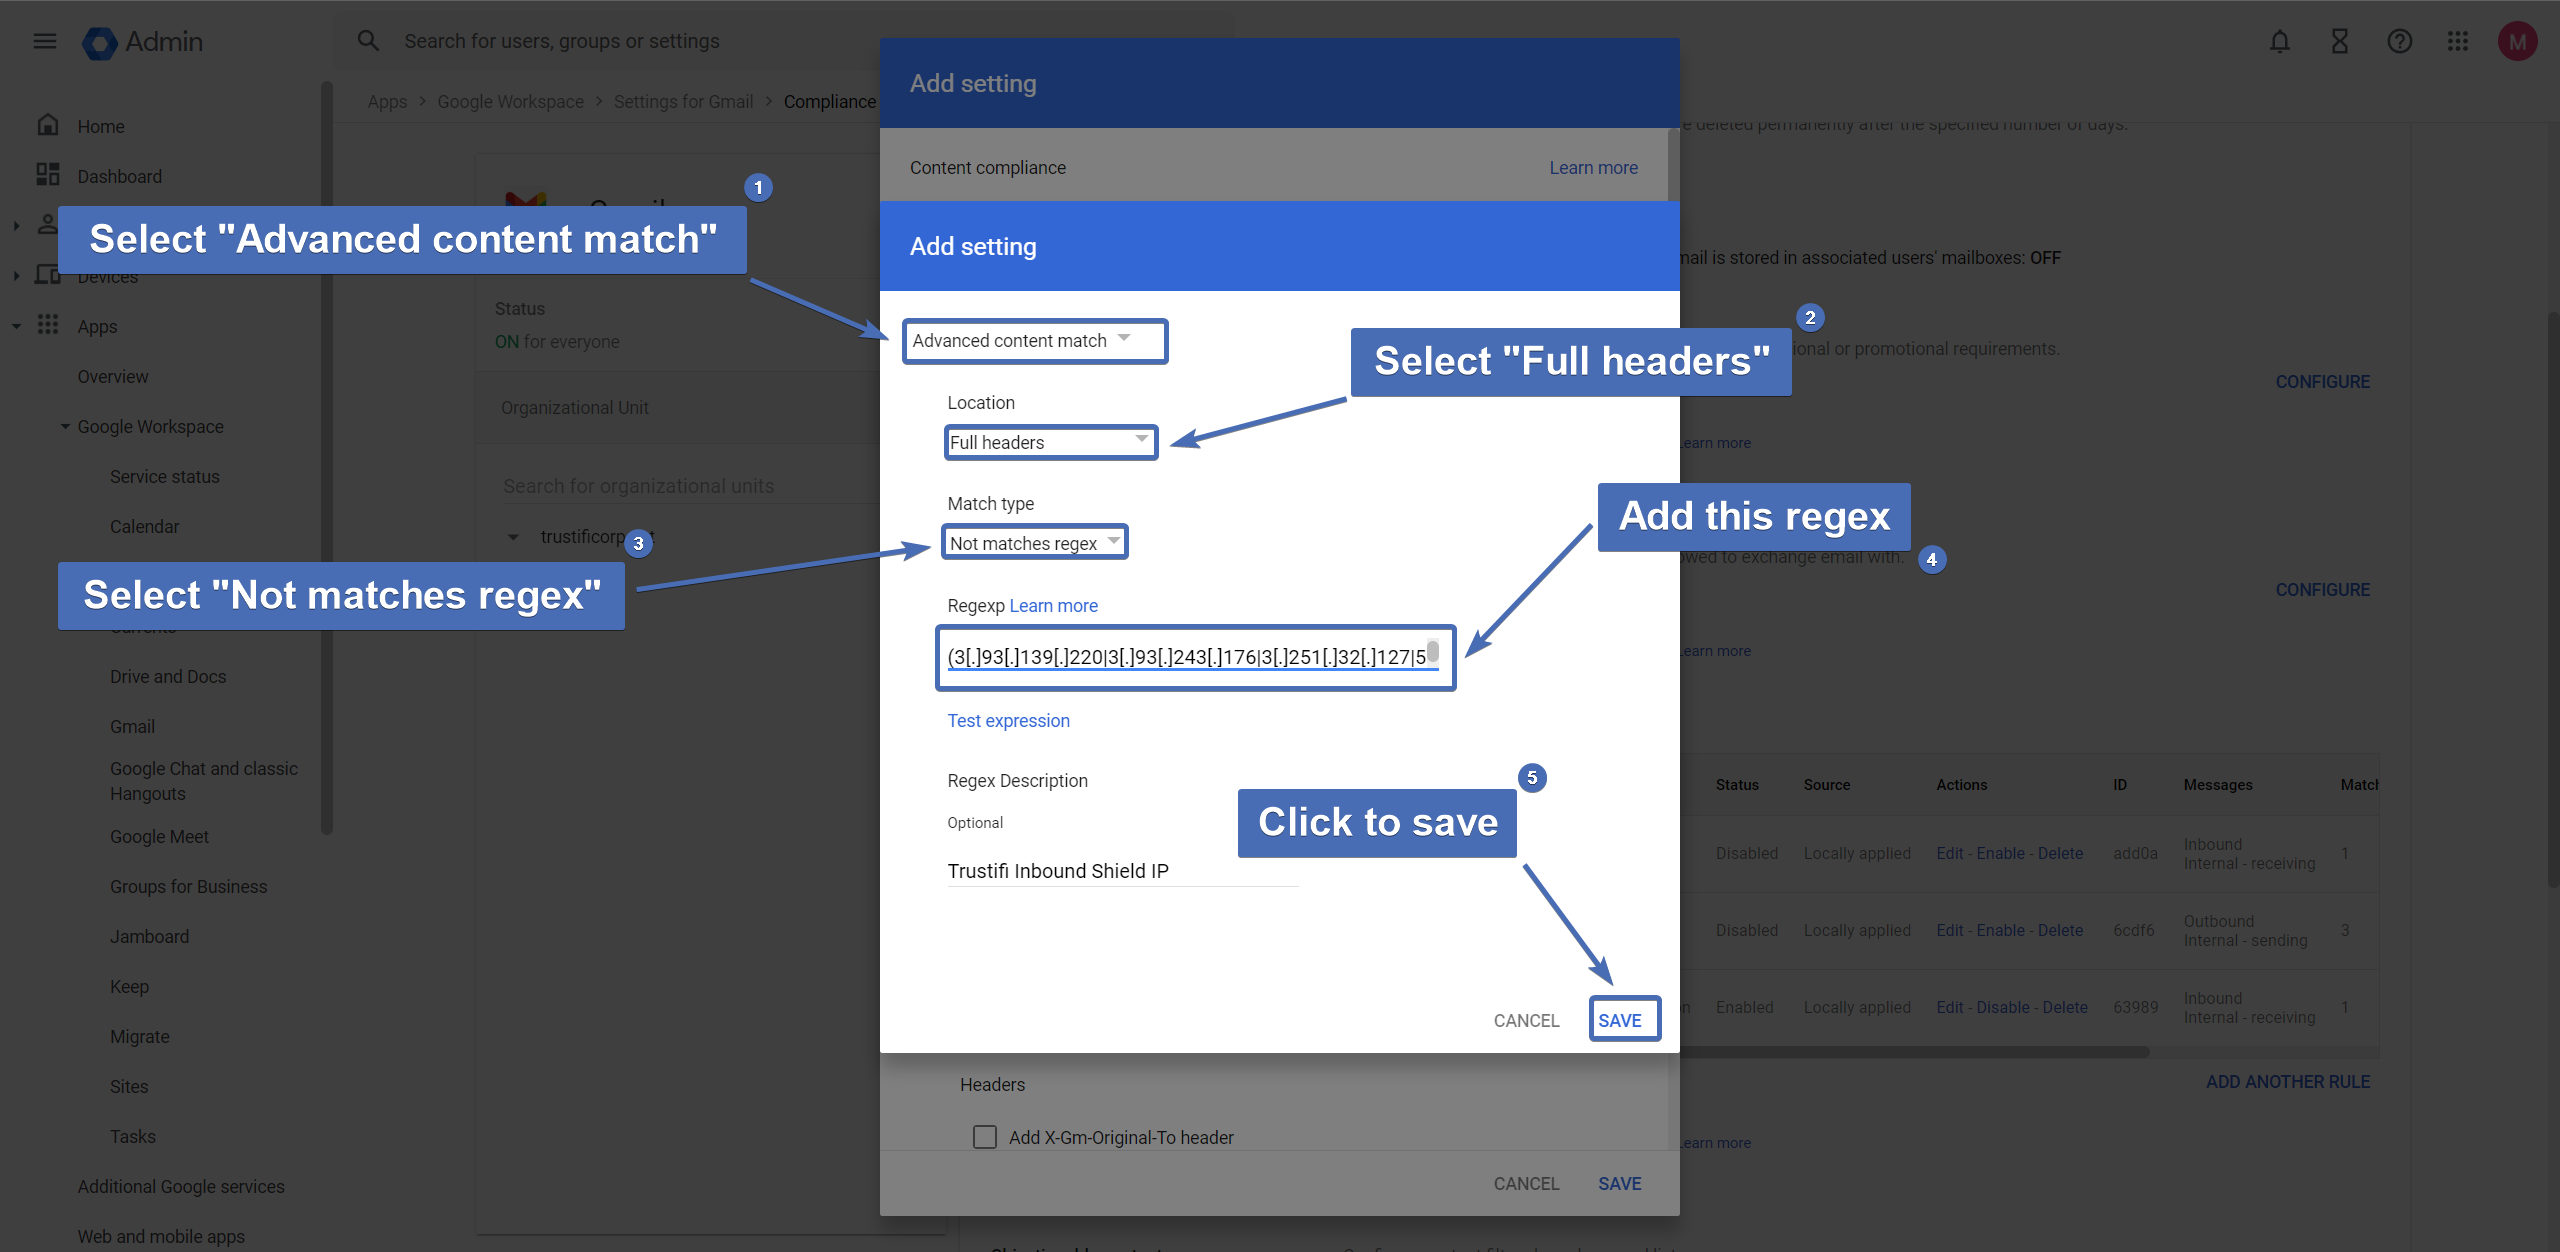
In the pop-up, configure these settings:
1. Select “Advanced content match“
2. Under “Location“, select “Full headers“
3. Under “Match type“, select “Not matches regex“
4. Add this regex:
^Received[:].+(3[.]93[.]139[.]220|3[.]93[.]243[.]176|3[.]251[.]32[.]127|54[.]195[.]145[.]1)
5. Click “Save“
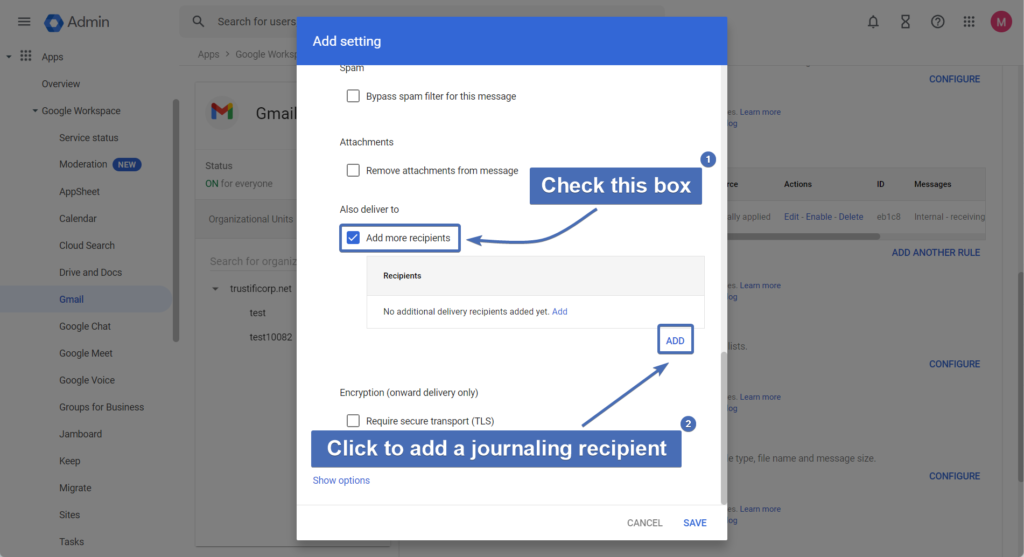
Step 7: Add journaling recipient
Scroll down to the “Also deliver to” section and select the box for “Add more recipients“. Then, click on the “Add” link to add a journaling recipient.
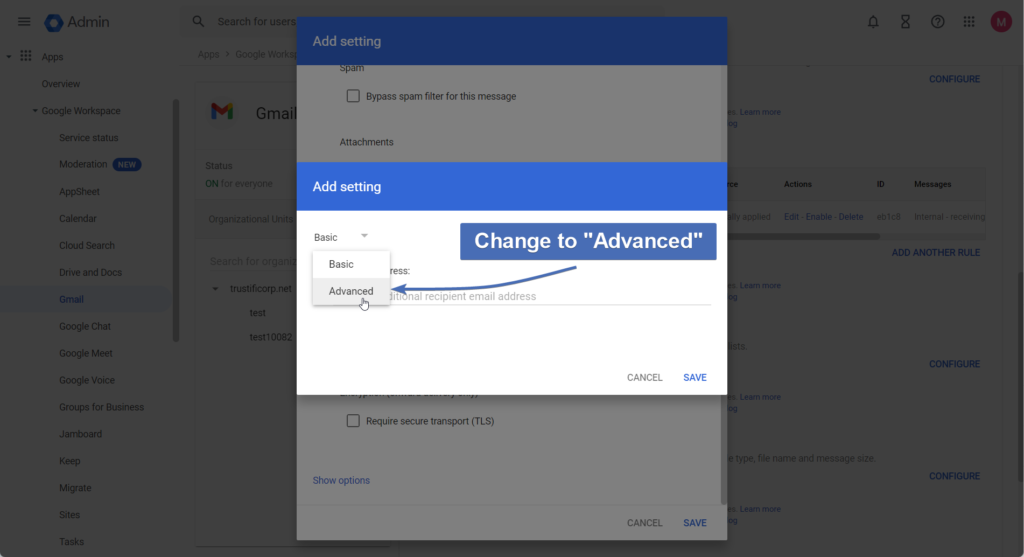
Step 8: Configure journaling recipient
First, change the setting configuration to “Advanced“.
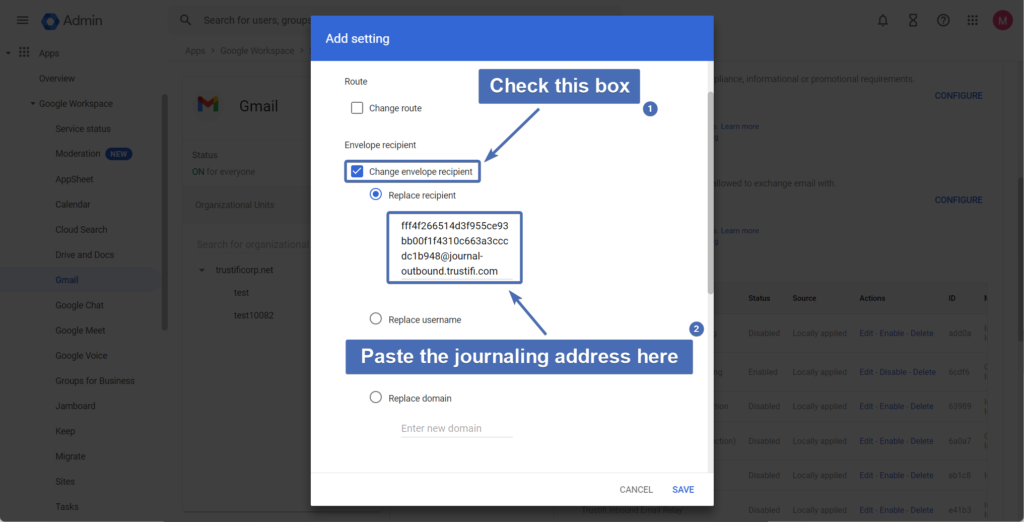
In the "Advanced" section, select the "Change envelope recipient" box and paste the Trustifi journaling address you copied in Step 2 into the "Replace recipient" input field.
Step 9: Saving the compliance rule
Click on “Save” once again at the bottom right to save the compliance rule.
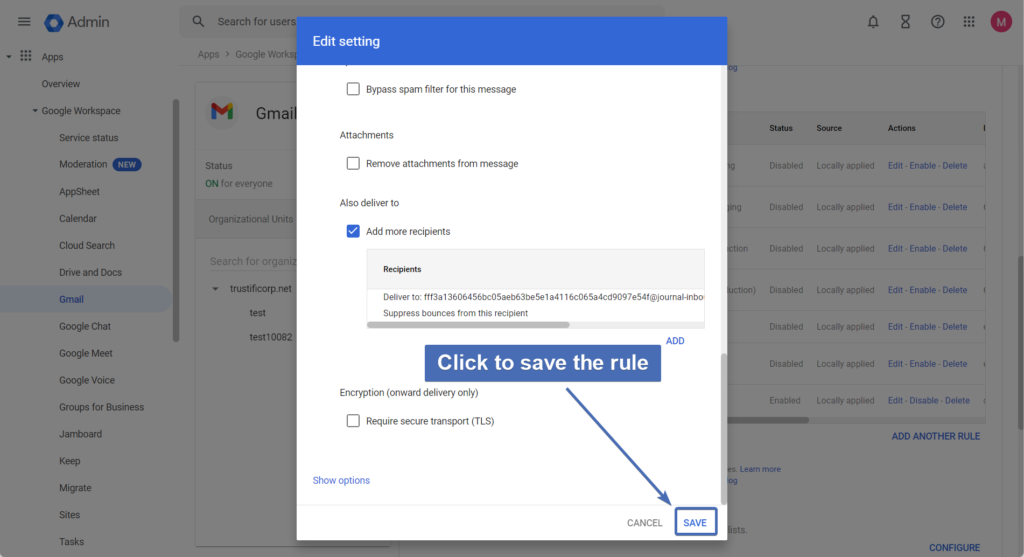
Once the compliance rule is saved and enabled, your outbound traffic should be journaled and scanned in Trustifi.
Sending Domains
If you are planning to use the Trustifi outbound journal only with users from your primary domain (the domain in your admin's email address), you will not need to make any additional configurations.
However, if you will be using this journal with users from other domains as well, you will need to prove ownership of the domain with one of the following options:
Option 1: Domain Verification Go through the domain verification process. You can find full instructions for verifying domains in Trustifi in our official guide here: https://docs.trustifi.com/docs/the-process
Option 2: Connecting to the Google API Connect to the Google API. You can find full instructions for connecting to the Google API in steps 1 through 15 in our official guide here: https://docs.trustifi.com/docs/importing-groups