Warning labels (or banners) can be applied to incoming emails to warn against potentially dangerous emails. These warning labels can also be used to report emails as safe or malicious by users. To learn how to add warning labels to emails and how to use them for reporting, please see below.
Adding warning labels to emails
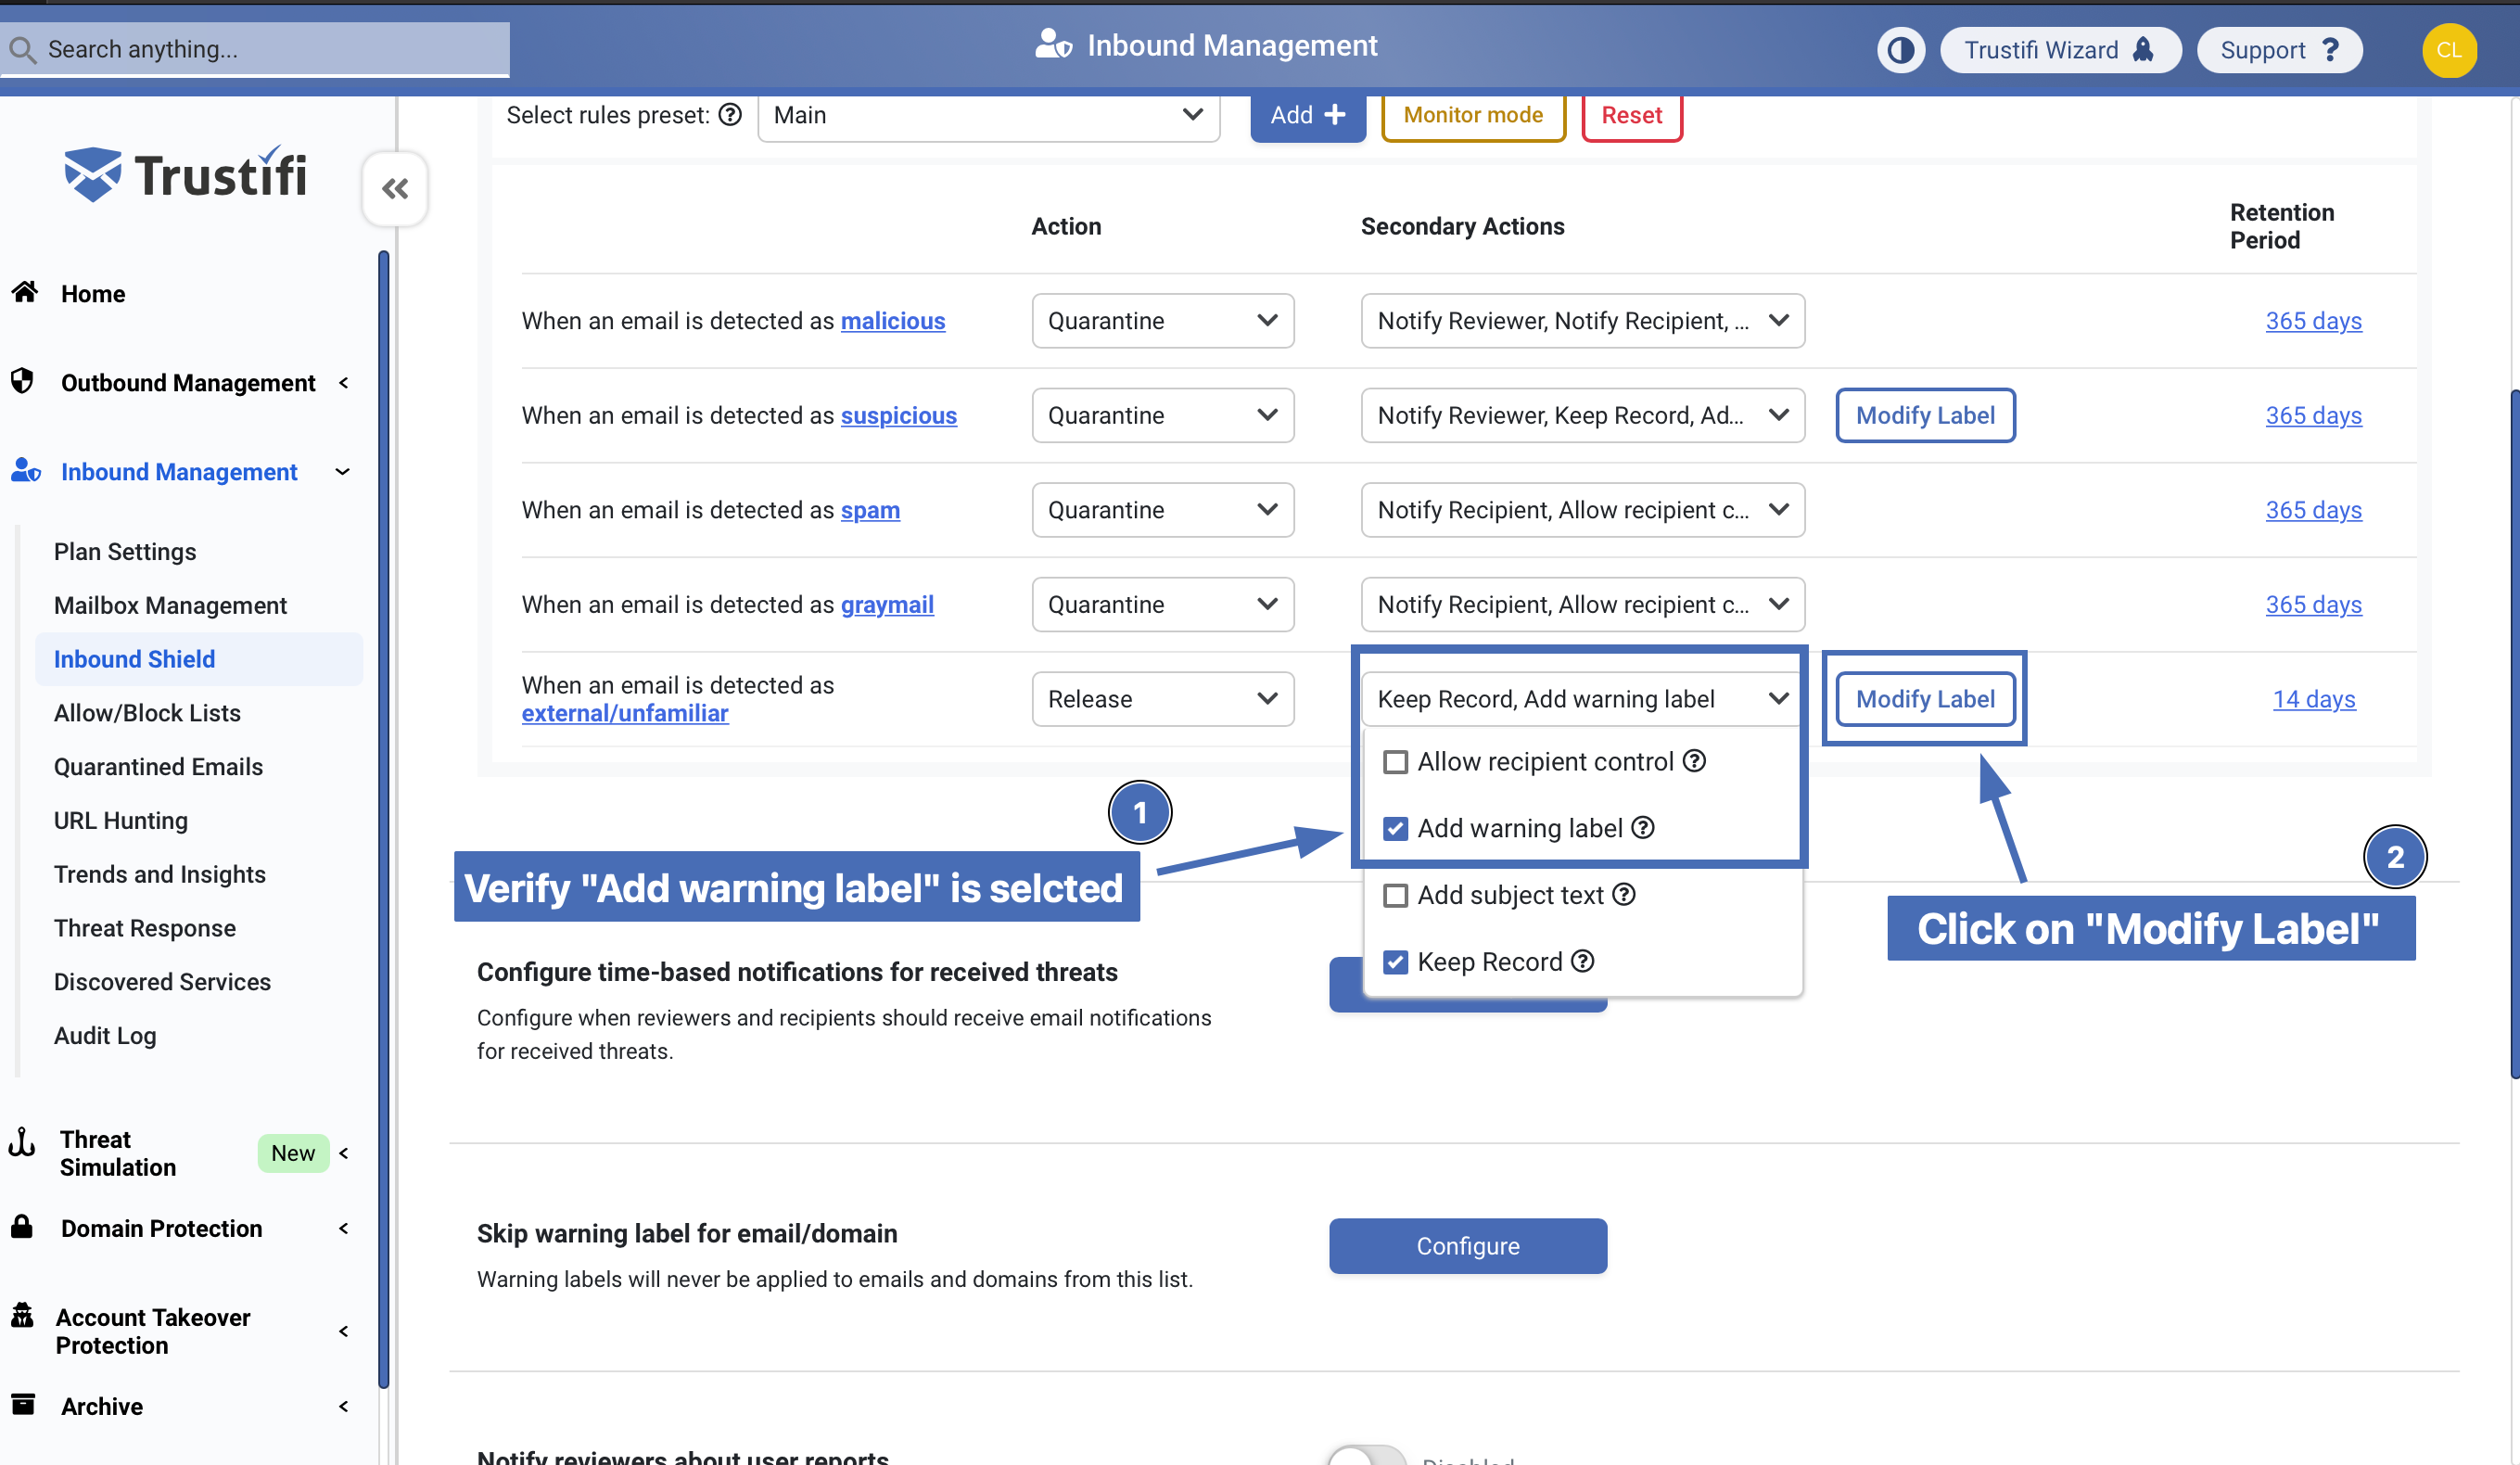
To add warning labels to emails, first you will need to log in as an admin to the Trustifi web portal. You will then need to navigate to the “Inbound Management” and then to the “Inbound Shield” tab where you will find the “Threat Prevention Rules” section.
To add warning labels to a particular type of emails, simply open the drop-down menu on the right of this email type and select “Add warning label” to the list of secondary actions to take for this email type.
To make sure the reporting buttons will be added to the warning label, click on “Modify Label“.
Modifying a warning label
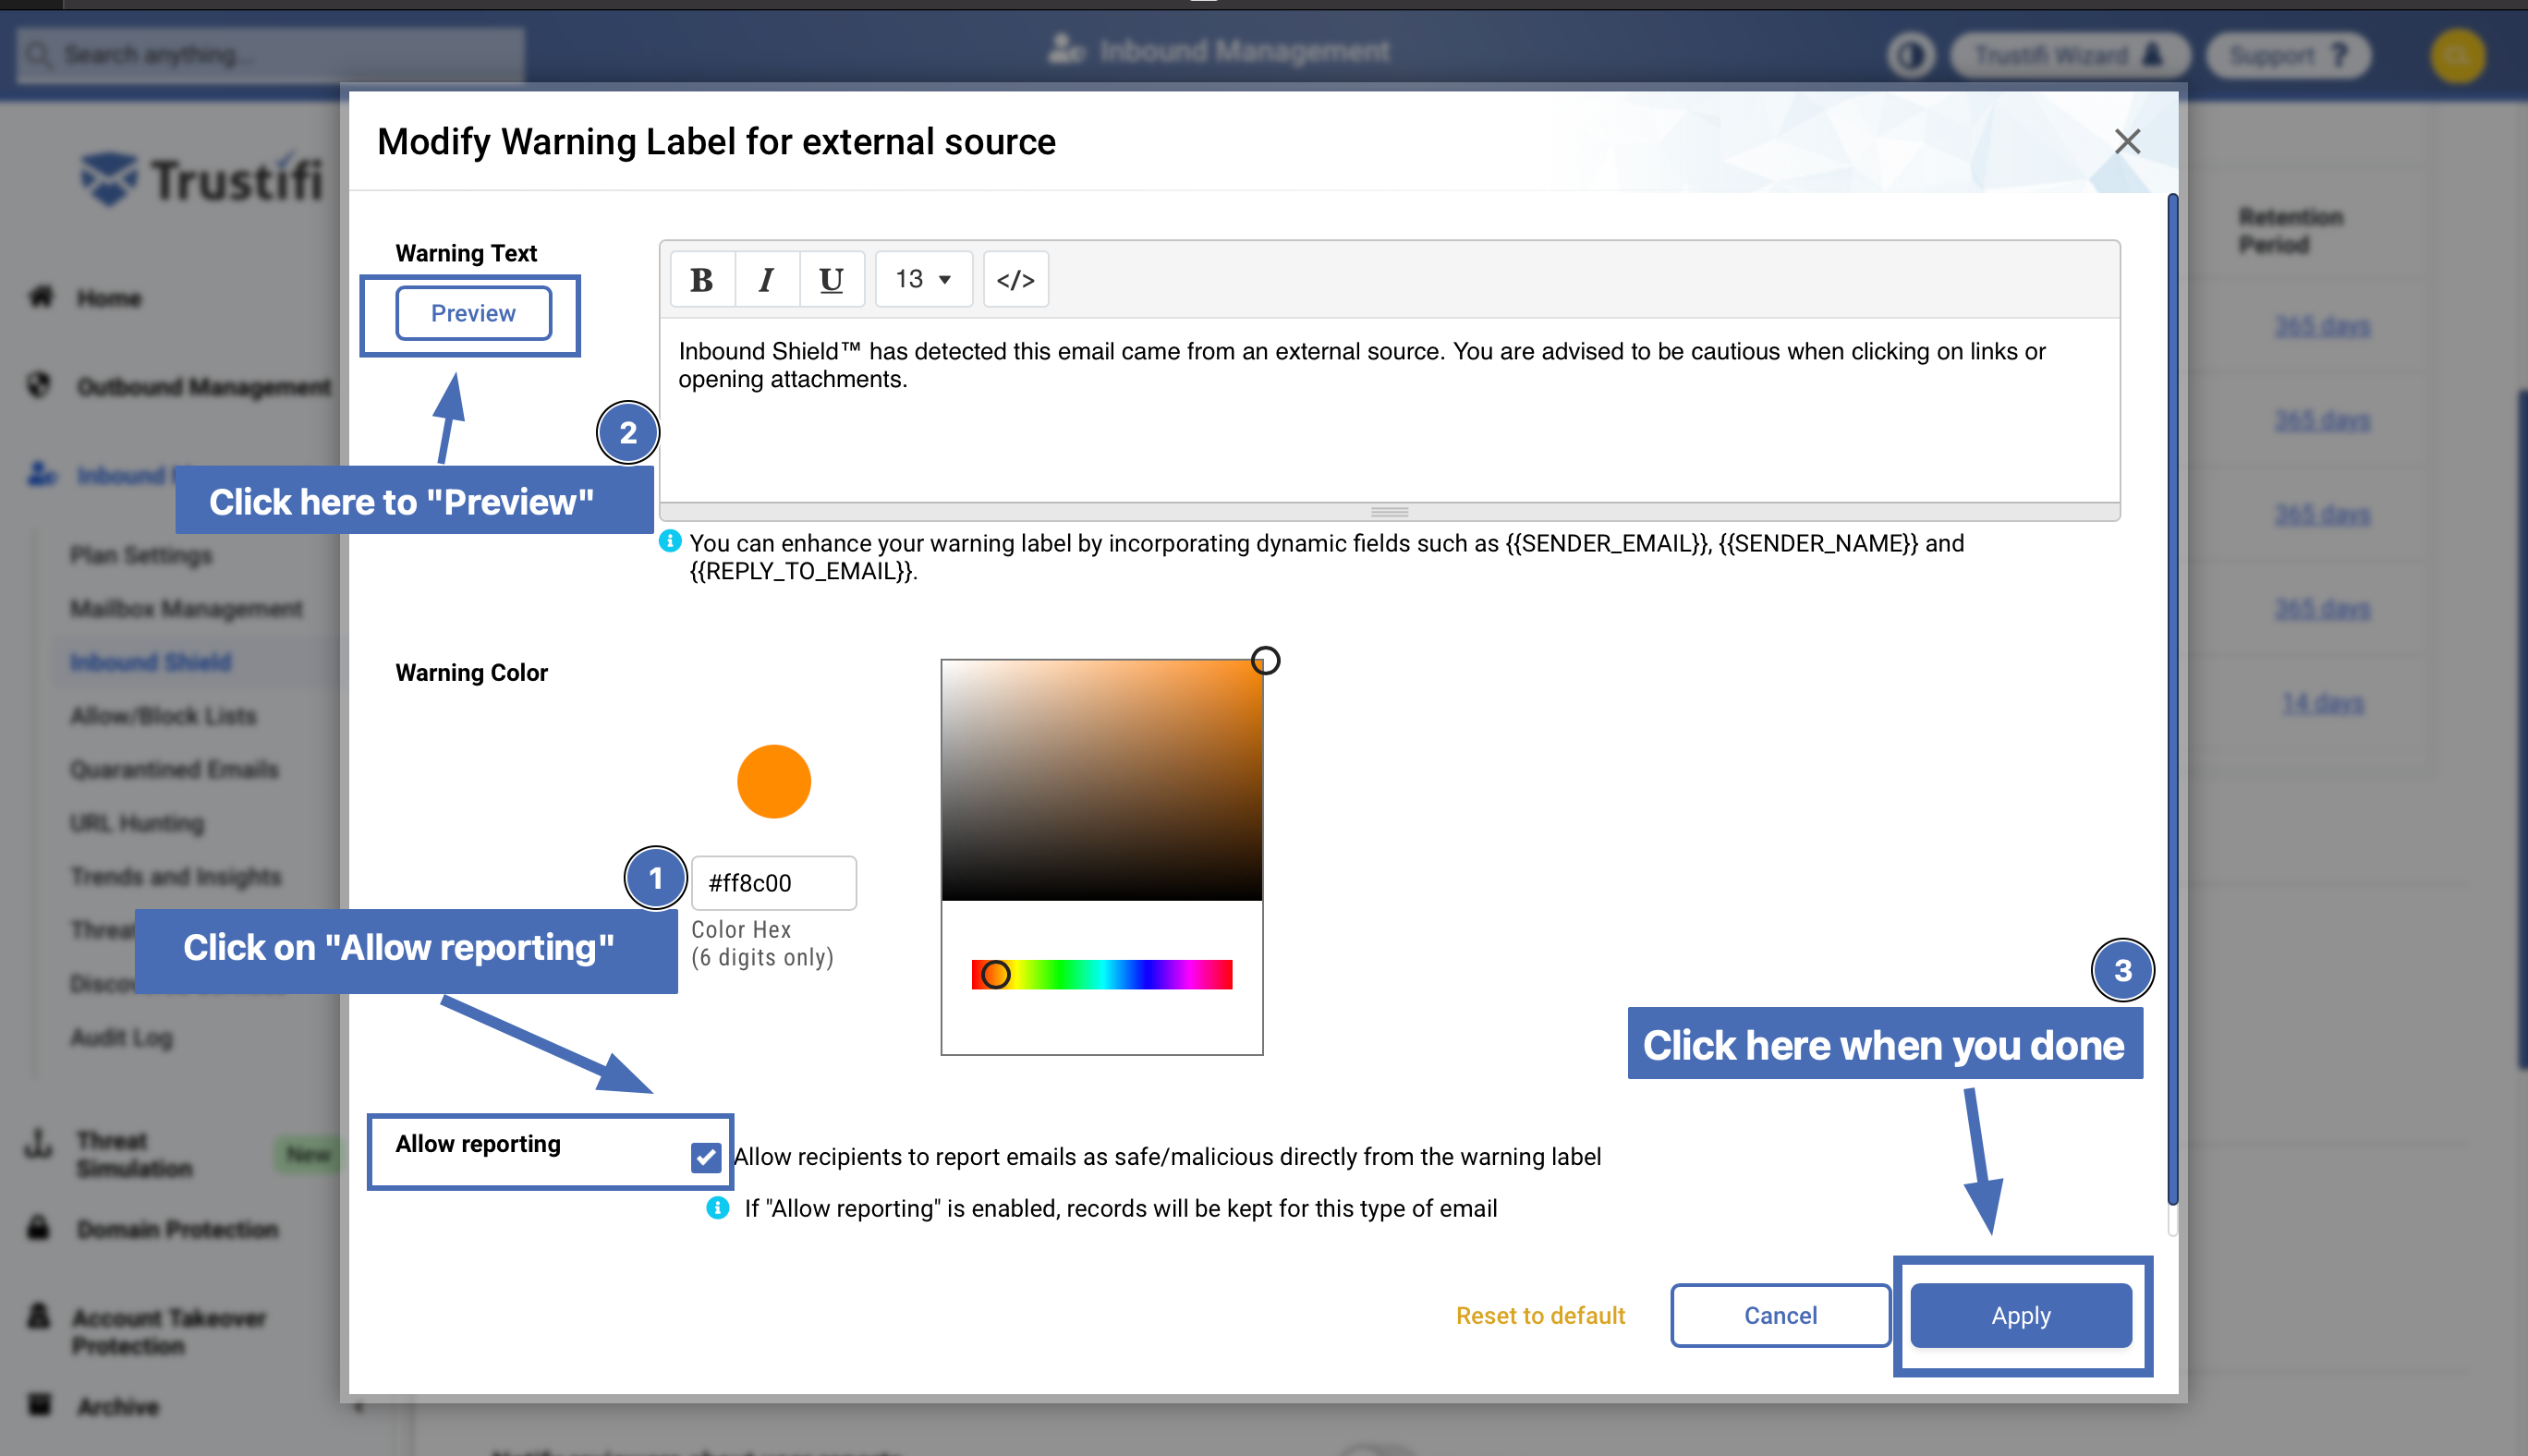
In the “Modify warning label” window, find the “Allow reporting” and click on the checkbox, make sure it is enabled. You can use the “Preview” function to check how the warning label will look like with the added reporting buttons. When you done, click “Apply”.
Selecting “Allow reporting”
Note: the option to enable “Allow reporting” will only be available if you are connected to Trustifi’s outbound email relay.
To report an email as safe/unsafe from the warning label, the user simply needs to click on the relevant reporting button:
Clicking on “I trust this email” will whitelist the sender, as well as any links and files in the email.
Clicking on “Report as malicious” will send a report to the Trustifi security team who will investigate the email and make the necessary adjustments to the Inbound Shield system, to make sure similar emails are blocked in the future.

Reporting an email from the warning label
When a user clicks on one of the reporting buttons, a browser window will open to confirm the report was successfully sent.
