This short guide will explain how to create an SSO (Single Sign-On) integration for Trustifi with Microsoft Azure using Open ID Connect. Creating this integration will allow your users to log into Trustifi using their Microsoft accounts.
Step 1 – Registering a new app
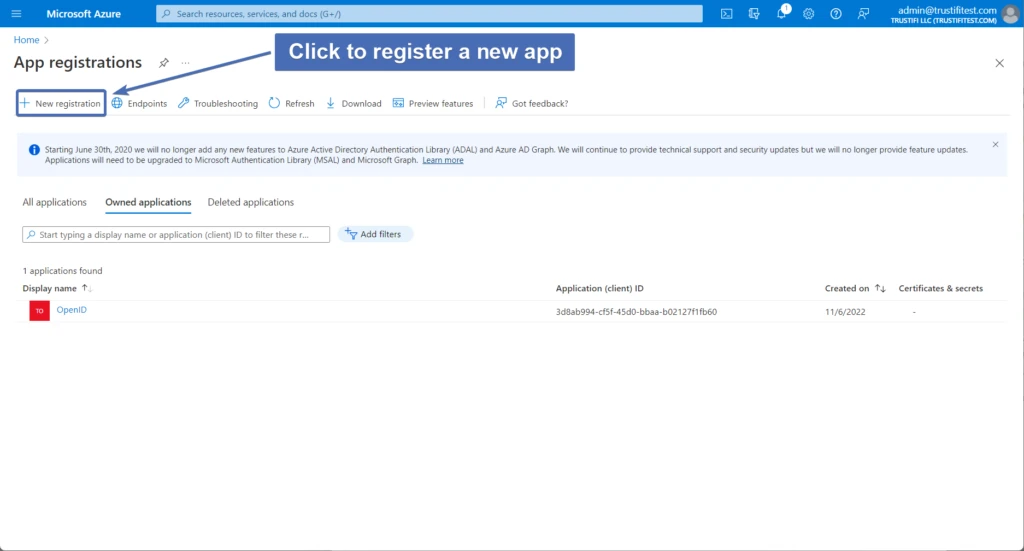
In your Azure admin portal, navigate to the App Registrations page. There, click on “New Registration” to register a new app.
Step 2 – General settings
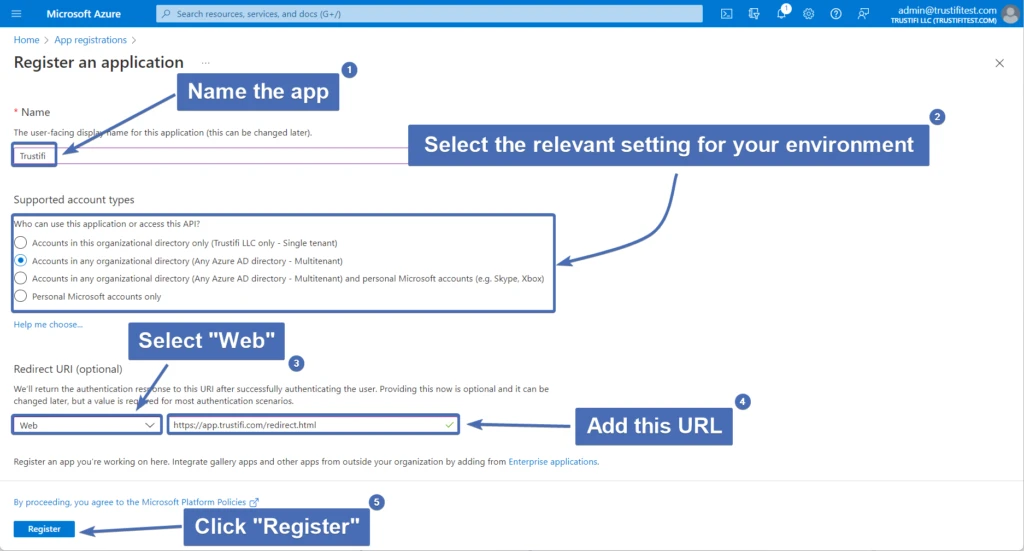
In the registration window, perform the following actions:
Give the app a name
Under “Supported Account Types”, select the setting most relevant to your environment
Under “Redirect URI” select “Web” and enter this URL: https://app.trustifi.com/redirect.html
Click “Register”
Step 3 – Authentication settings
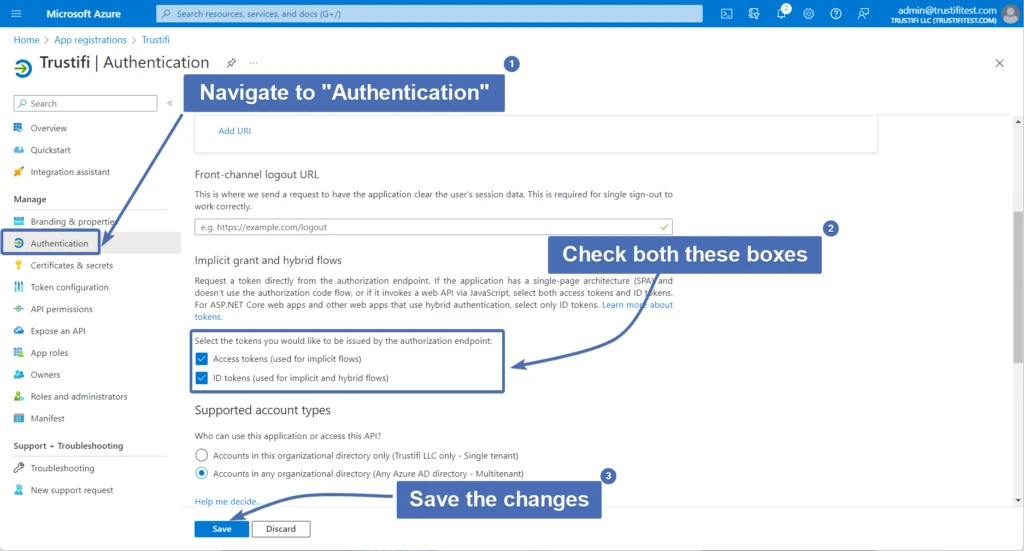
After the app is registered, navigate to the “Authentication” tab on the right.
Under “Implicit grant and hybrid flows” check both boxes:
Access Tokens
ID Tokens
Then, click “Save” at the bottom to save the changes.
Step 4 – App integration general settings
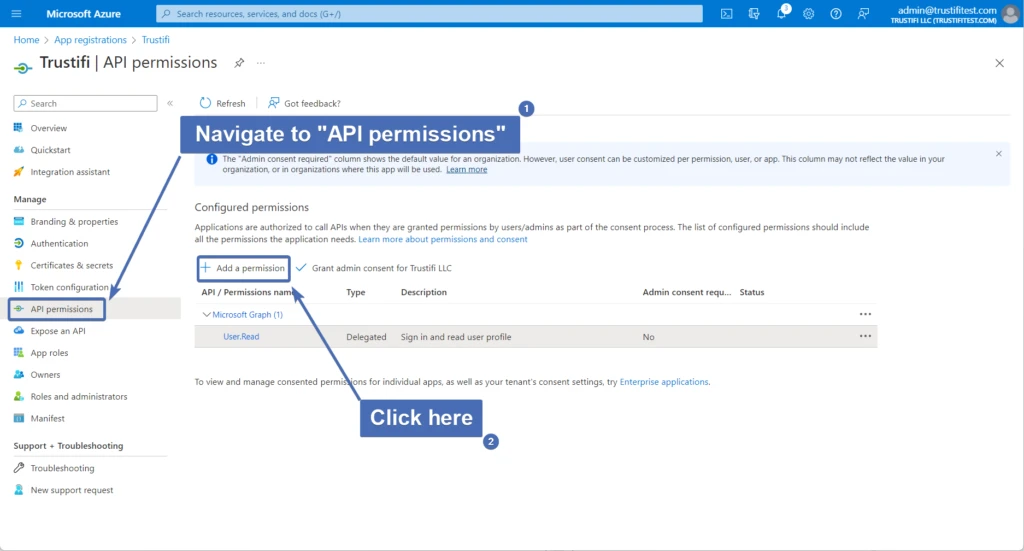
Click on the “API Permissions” tab on the right. Then, click on “Add a permission”.
A new window will open up, click on the large icon for “Microsoft Graph”.
In the next screen, click on “Delegated permissions”.
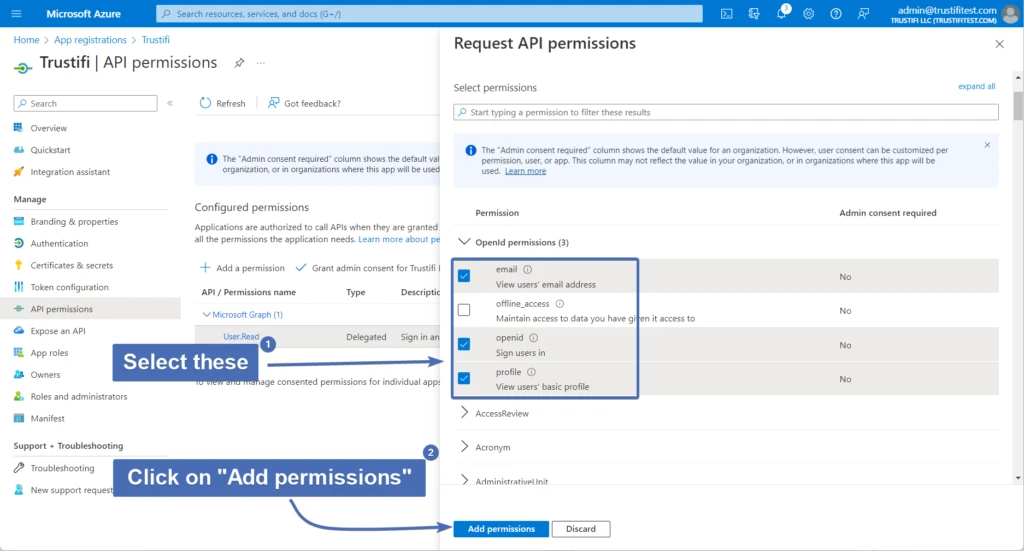
Then select the following under “OpenID permissions”:
email
openid
profile
Click on “Add permissions”.
Enabling the integration in Trustifi
Step 5 – Opening the connection window
In the Trustifi admin portal, navigate to either “Outbound Management” or “Inbound Management“ => “Plan Settings” section, and click on the “Integrations” tab.
There you will find the OIDC icon, click on it or on the “Connect” button.
.png)
Step 6 – Adding the necessary information
After you’ve clicked on the “Connect” button a pop-up window will open, inside the pop-up click again on the “Connect” button.
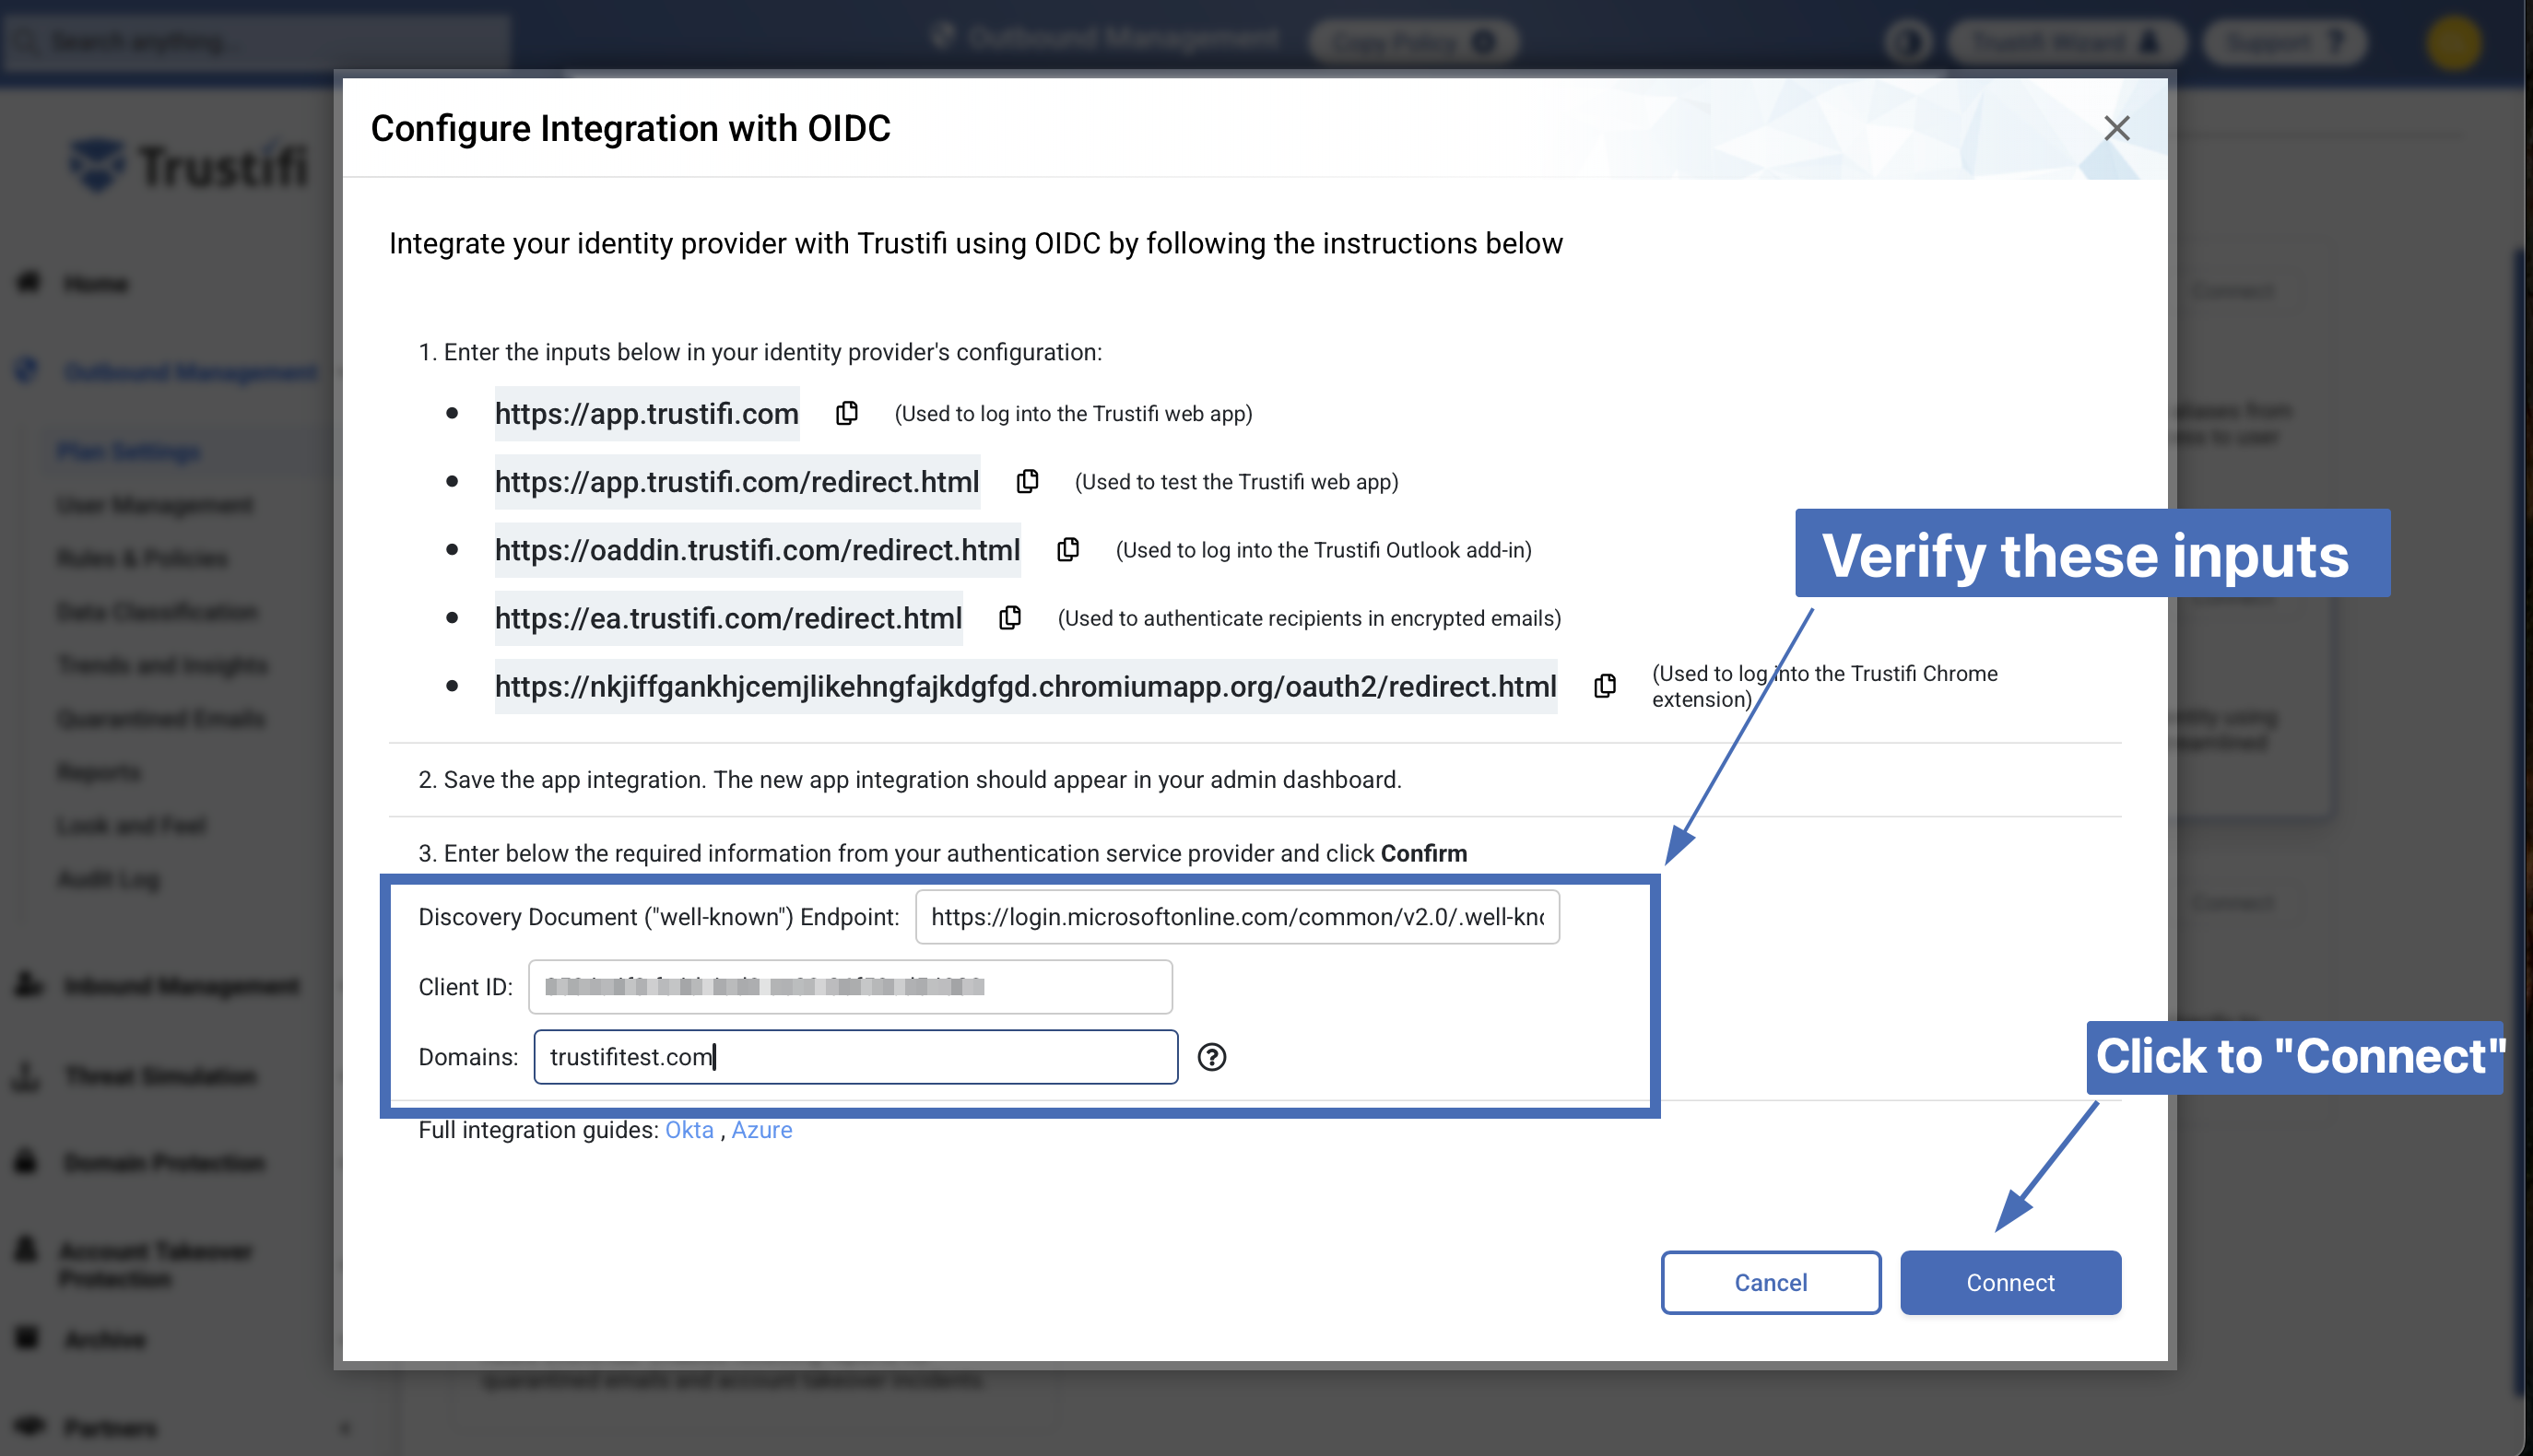
The connection window will display instructions on how to create the OIDC integration. To create the integration in Trustifi, you will need to input some information from your Azure admin portal.
Discovery Document (“well-known”) Endpoint: Add the following URL:https://login.microsoftonline.com/common/v2.0/.well-known/openid-configuration
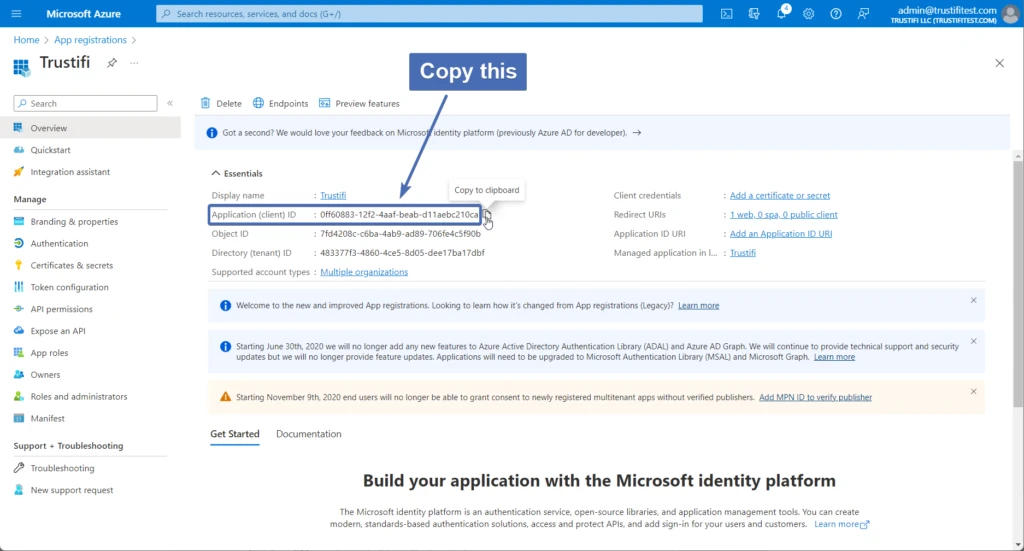
Client ID: To find this, open the “Overview” page of the app integration and find the “Application (client) ID” field.
Domains: Here you simply need to list the domains that will be used in this integration. If there is more than one domain, separate them with a comma.
Step 7 – Confirming and verifying
Confirm all the necessary information has been added and is correct, and click on “Connect” at the bottom right to continue.
After clicking on “Connect“, you will need to sign in with your Microsoft admin credentials to verify the connection.
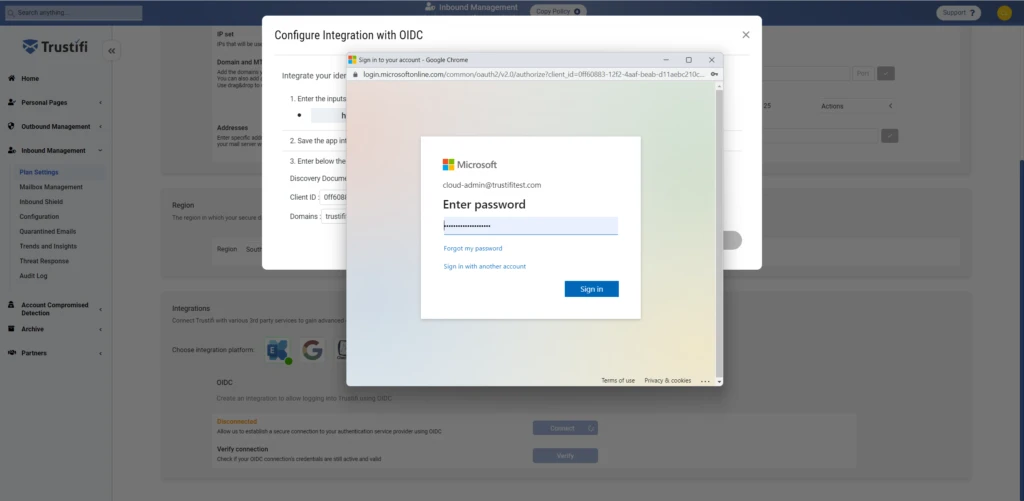
After you’ve successfully logged in, the OIDC integration should be displayed as “Connected“.