Information! The instructions below apply specifically to the new Office365 admin center. In older versions, some steps may be different.
Step 1
Go to https://admin.microsoft.com and log in with admin credentials.
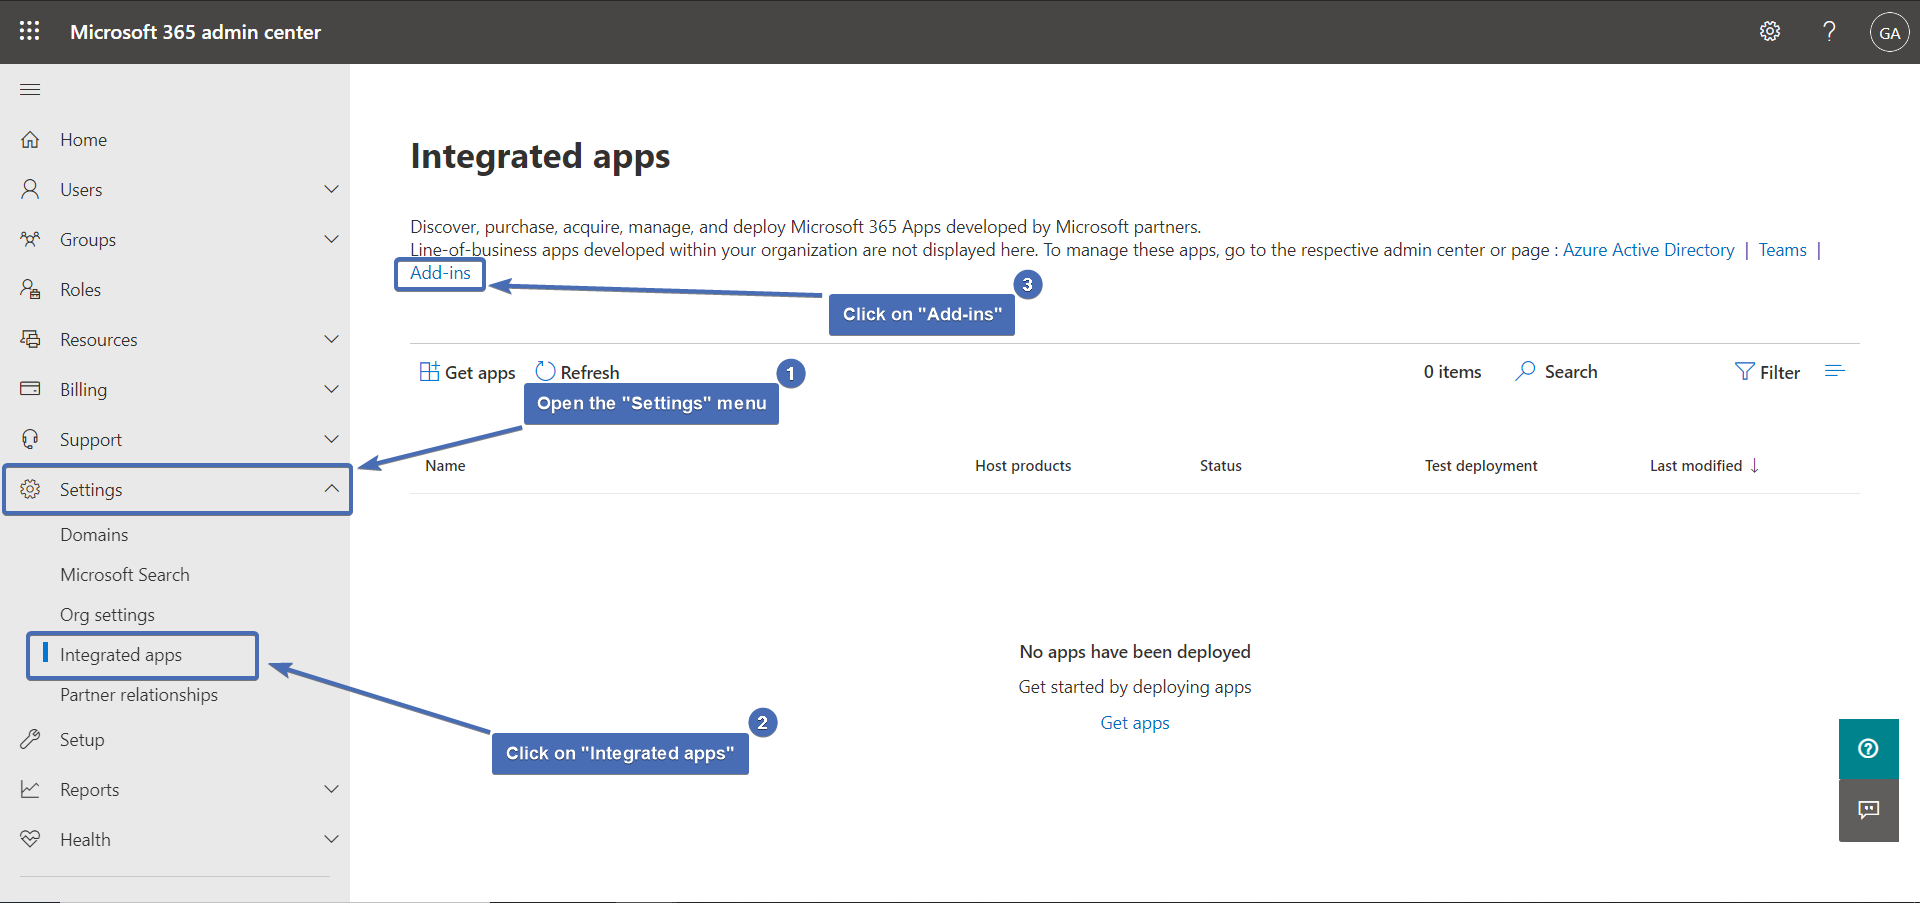
Then, click on “Settings” > “Integrated Apps” and click on the “Add-ins” link at the top of the page.
Step 2
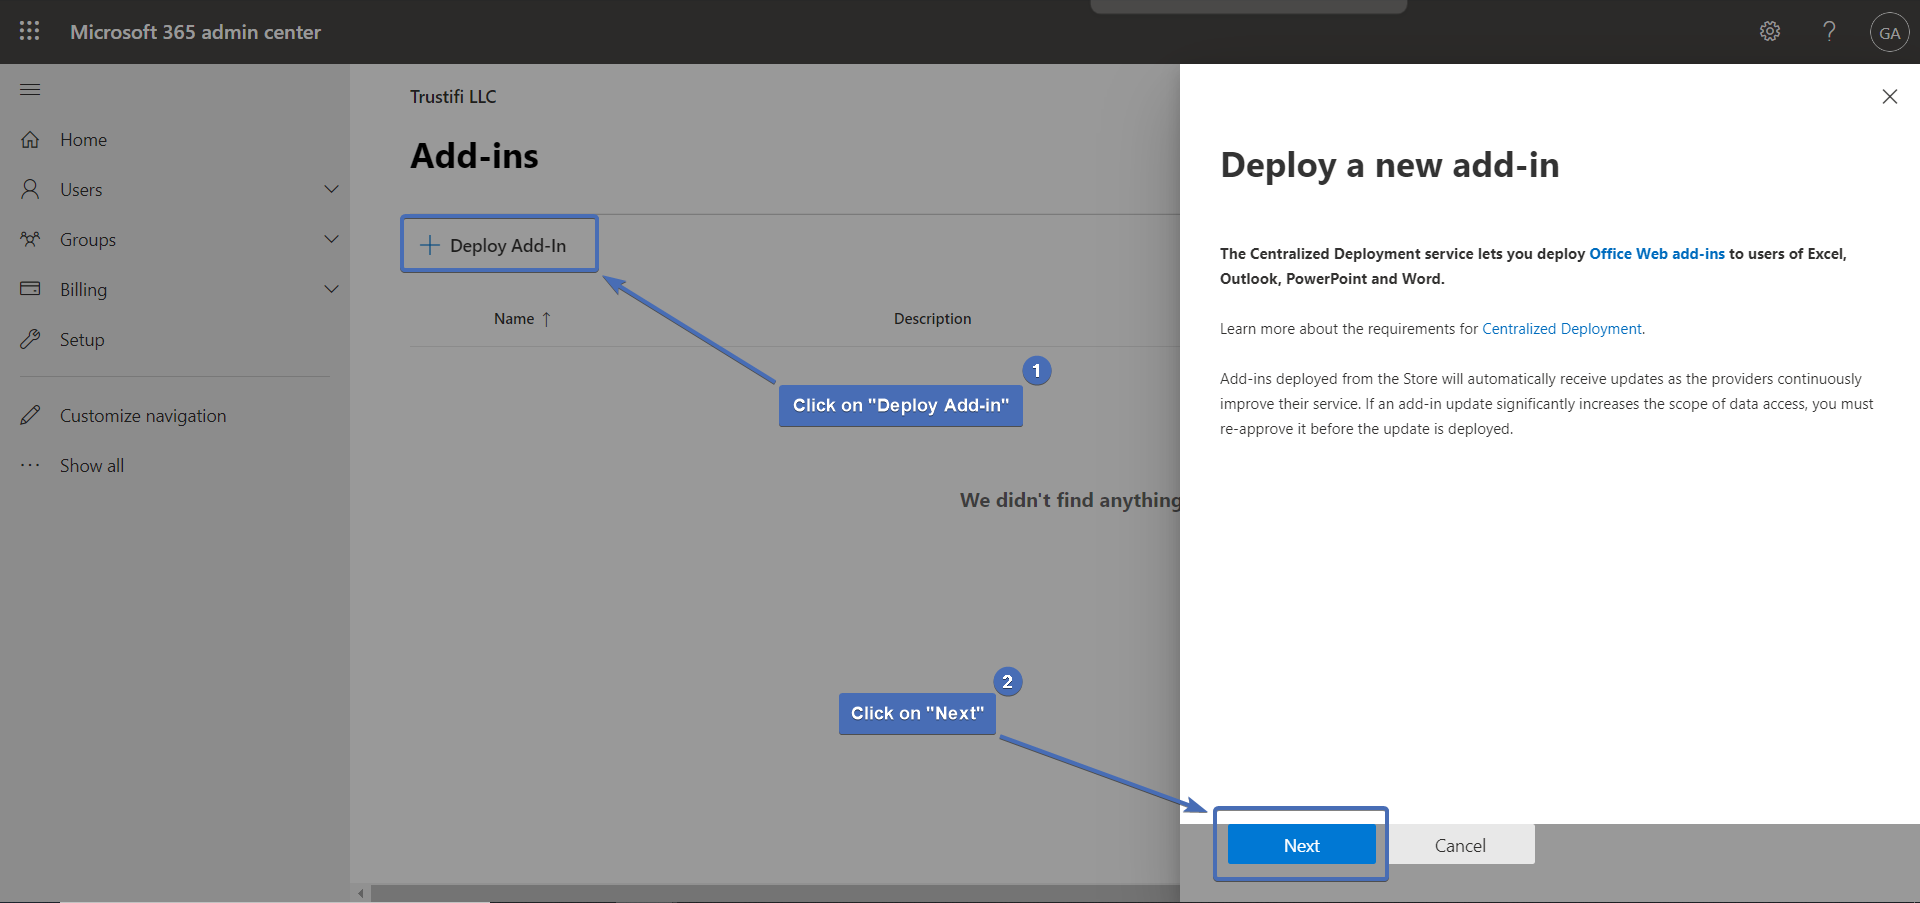
In the “Add-ins” section, click on “Deploy Add-in” to open the deployment wizard and click on “Next”.
Step 3
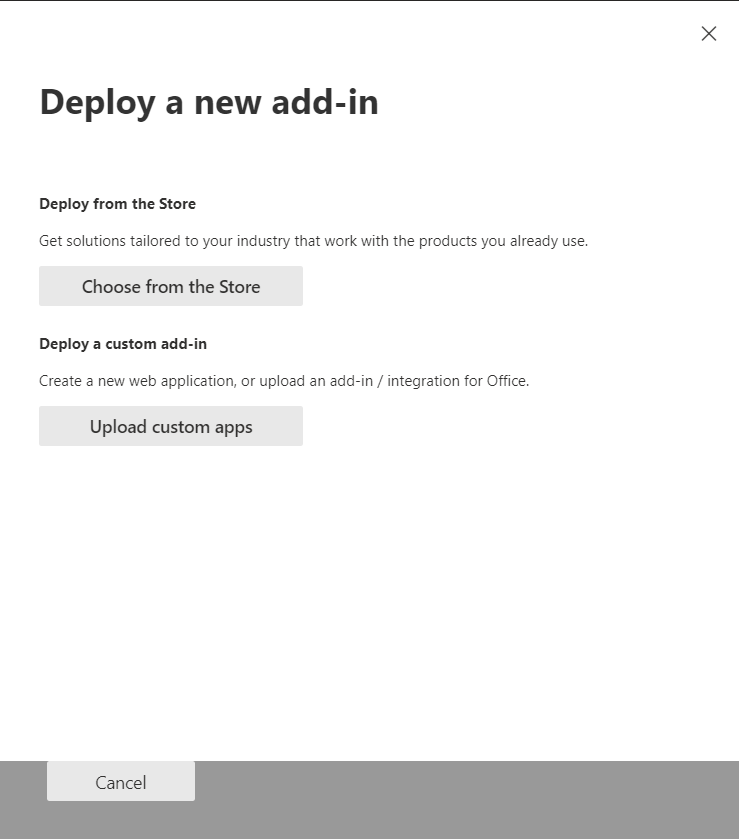
In the “Deploy a new add-in” window, choose from the following options:
“Choose from the store” if you want to install the add-in from the Microsoft add-in store. ”Upload custom apps” if you want to install the add-in from a URL or manifest file.
Step 4
If you selected the option to add an add-in from the store, search for “Trustifi” in the store’s built-in search bar and click to add.
Step 5
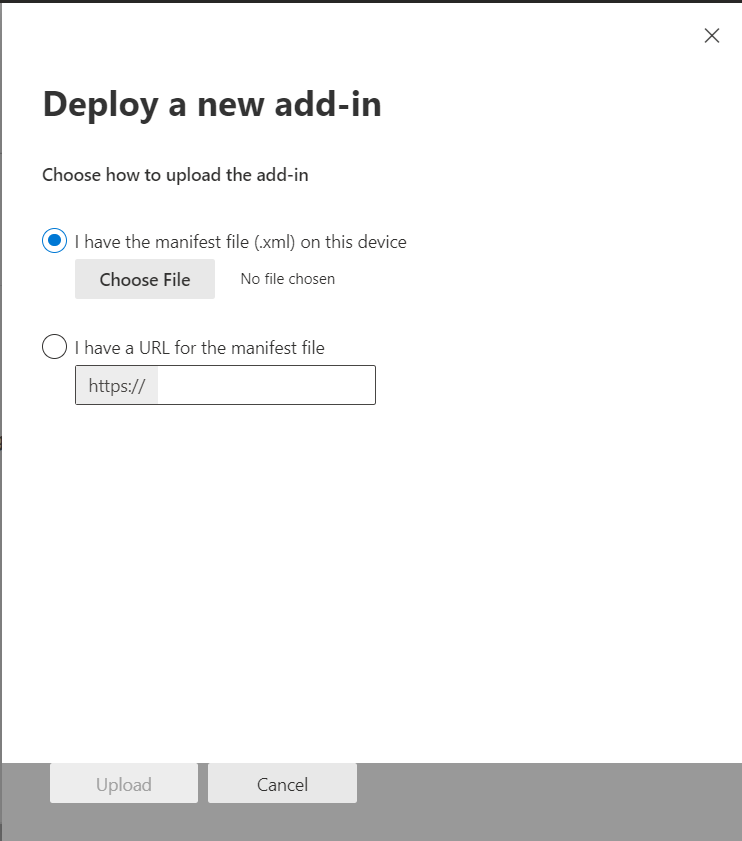
If you choose to upload a custom app, you can choose between installing the add-in from a manifest file or from a URL.
To use a manifest file, download this file right click, and “Save link as”.
To use a URL, enter this URL – https://oaddin.trustifi.com/manifest.xml.
Step 6
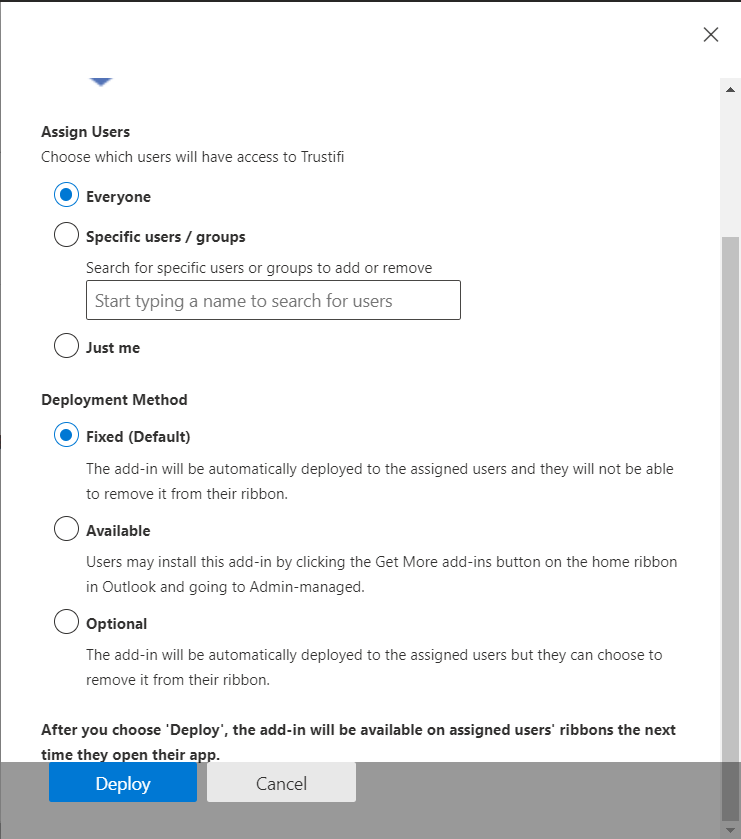
Once the add-in has been installed, you will need to select how to deploy it to your users.
Under “Assign users”, you can select to deploy the add-in to “Everyone”, to “Specific users/groups” or “Just me”.
Under “Deployment method” you can choose between the following:
“Fixed (Default)” – The add-in will be automatically deployed to the assigned users and they will not be able to remove it from their ribbon.
“Available” – The add-in will not be deployed, but users may install it manually from the add-in store.
“Optional” – The add-in will be automatically deployed to the assigned users but they can choose to remove it from their ribbon.
