Step 1: Selecting the “Journal” Architecture
Log in to the Trustifi web portal as an admin and navigate to the Email Flow Integrations page. (Inbound Management > Plan Settings > Email Flow Integrations).
In the “Email Flow Architecture” tab, click on the “Via Journal” setting.
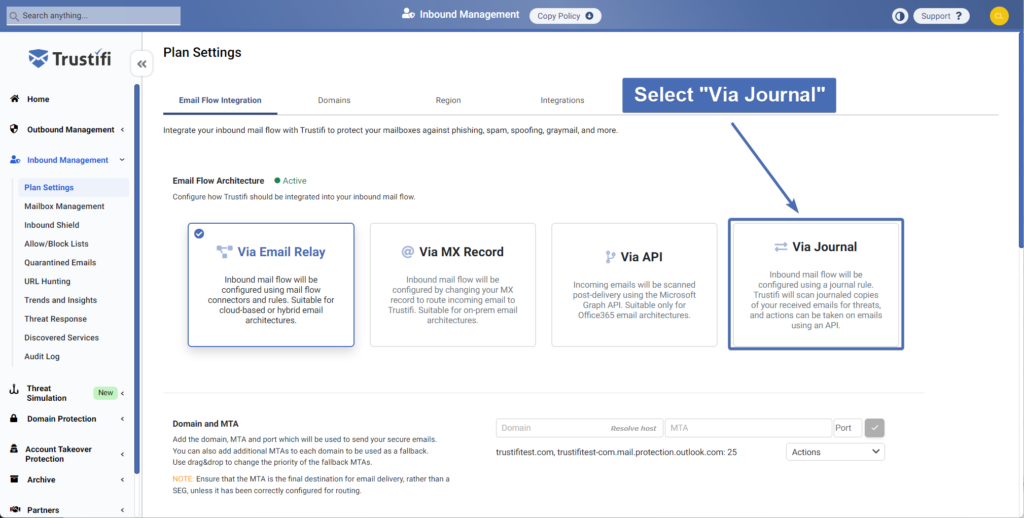
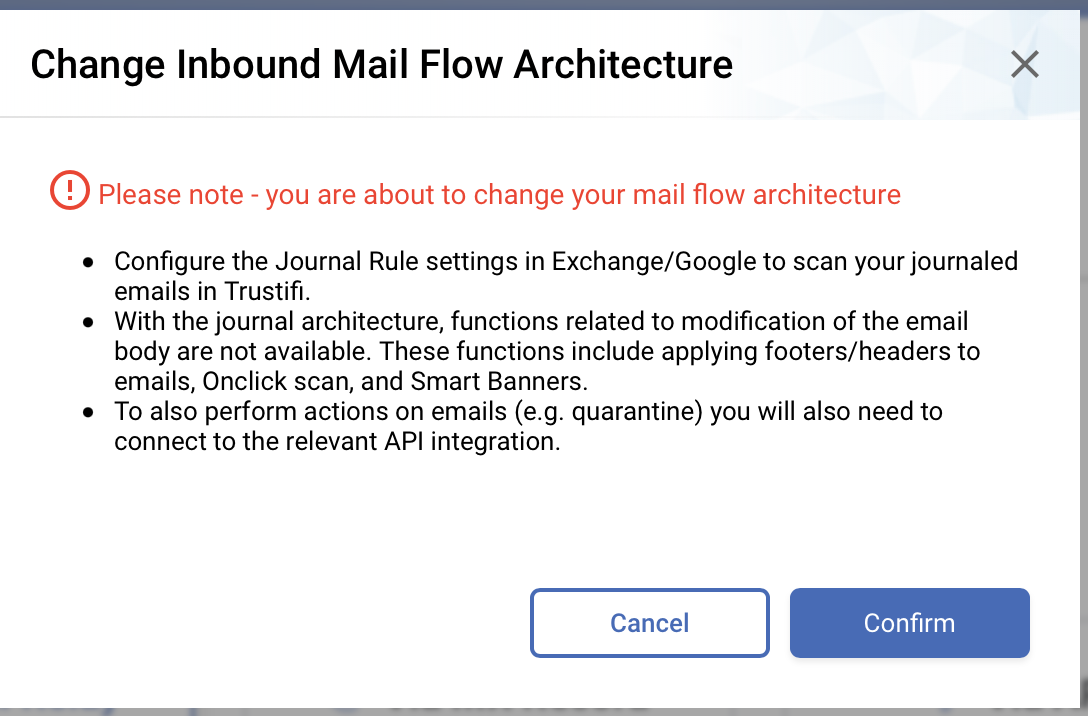
You will also need to confirm this change in a pop-up.
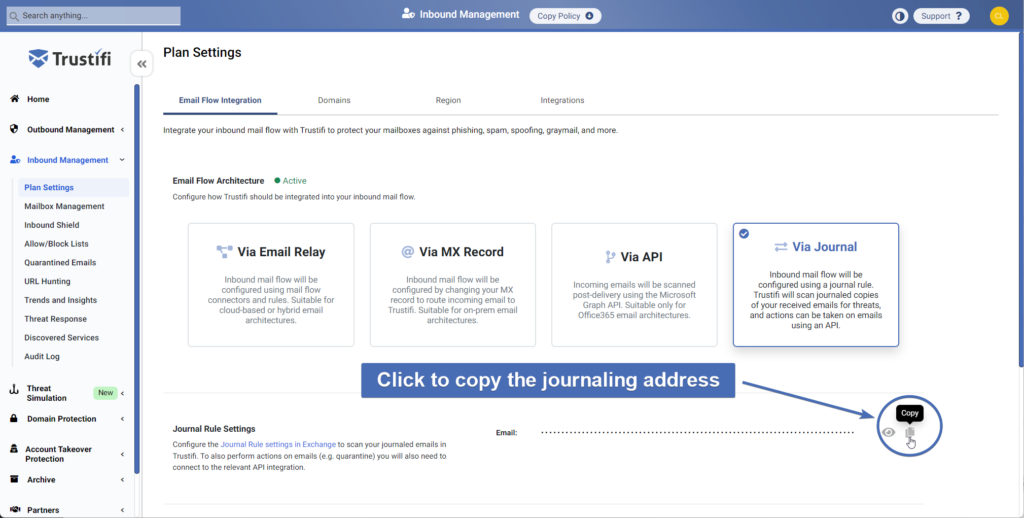
Step 2: Copying the journaling address
After the architecture change has been confirmed, Trustifi will generate a unique journaling address that will be used to receive the journaled traffic.
Click on the copy icon next to this address to copy it, as you will be using it during the journaling rule configuration in O365.
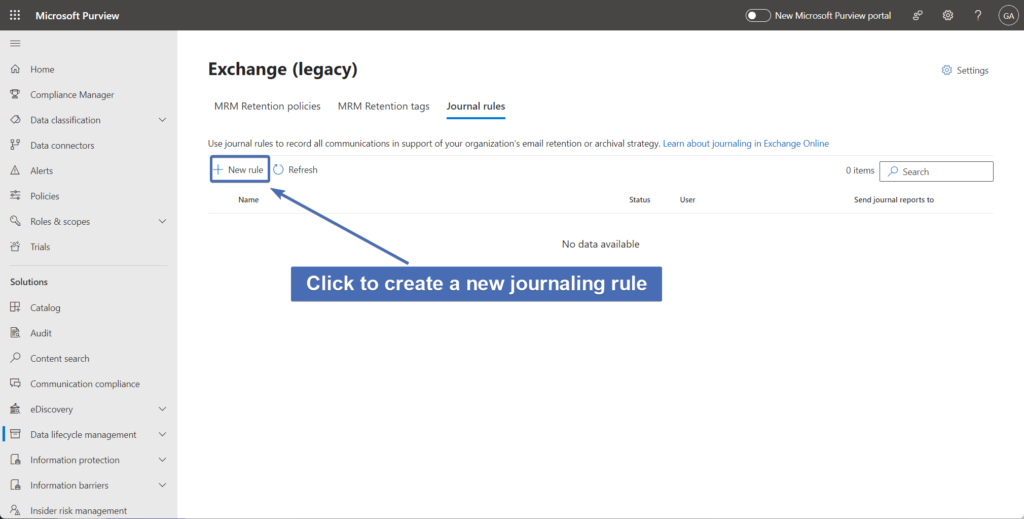
Step 3: Creating a new journaling rule
Navigate to the journaling rules section in the Office365 admin portal.
Then, click on the “New rule” button to create a new journaling rule.
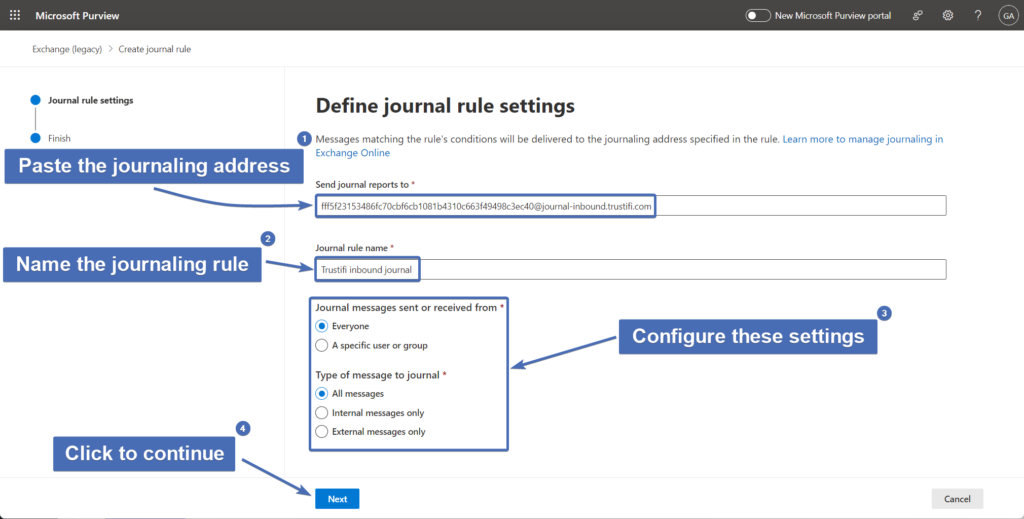
Step 4: Configuring the journaling rule
In the “Define journal rule settings” window, configure the following:
In the “Send journal reports to” field, paste the journaling address you’ve previously copied from the Trustifi portal.
In the “Journal rule name” field, give the rule a descriptive name (e.g., “Trustifi Inbound Journal”).
In the remaining fields, you can determine the following:
Under “Journal messages sent or received from“, select if you’d like Trustifi to journal all traffic, or just traffic sent to specific users or groups.
Under “Type of messages to journal“, select if Trustifi should journal all messages or only internal/external messages.
Click on “Next” to continue
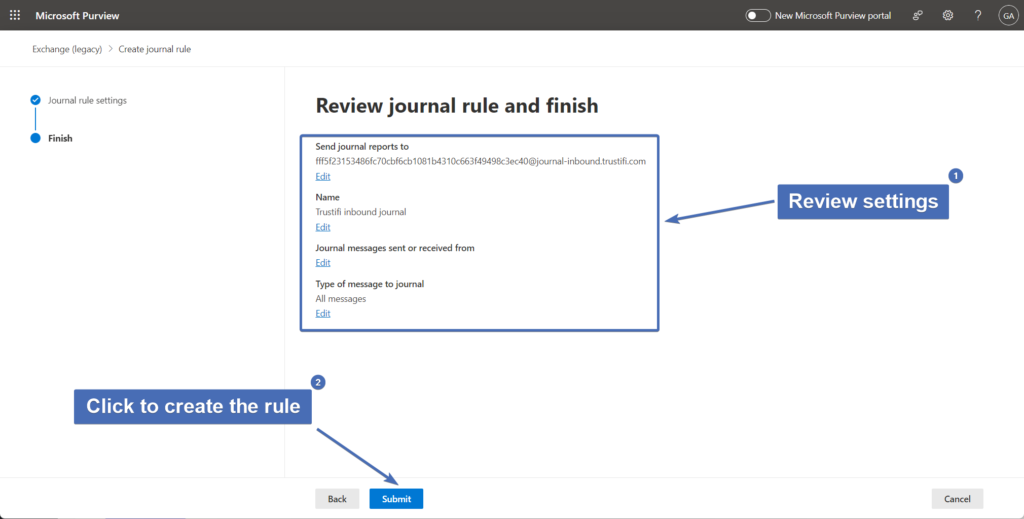
Step 5: Reviewing and creating the journaling rule
In the next screen, review the journal rule configurations to make sure they are accurate.
Once ready, click on the “Submit” button to create the journal rule.
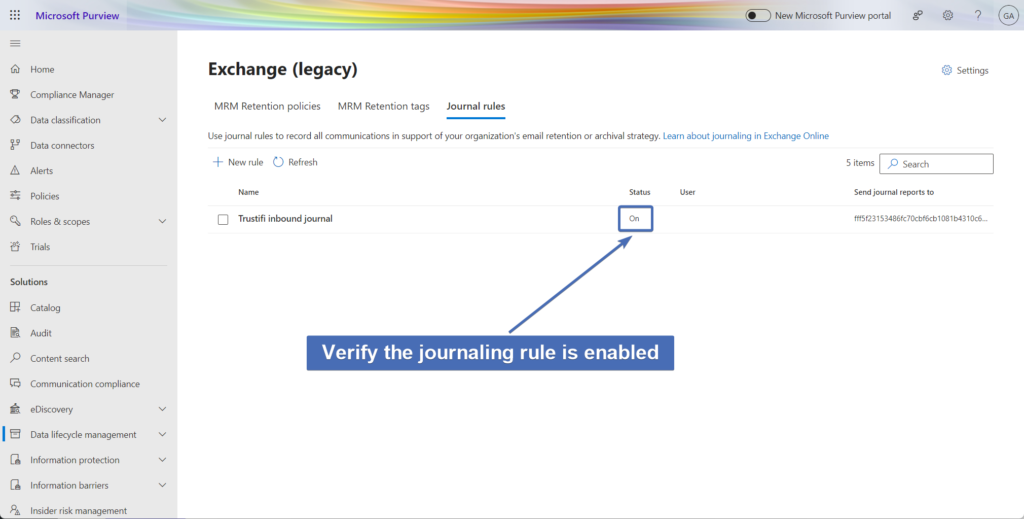
Step 6: Enabling the journaling rule
After the journaling rule has been created, make sure the “Status” of the rule is “On“.
If the rule is not on, you can click on the “Enable” button to turn it on.
Enabling the Office365 API integration
To perform additional security actions, like sending emails to quarantine and releasing them back to user mailboxes, you will need to also enable the Office365 API integration from Trustifi.
Follow the steps below to enable this API integration.
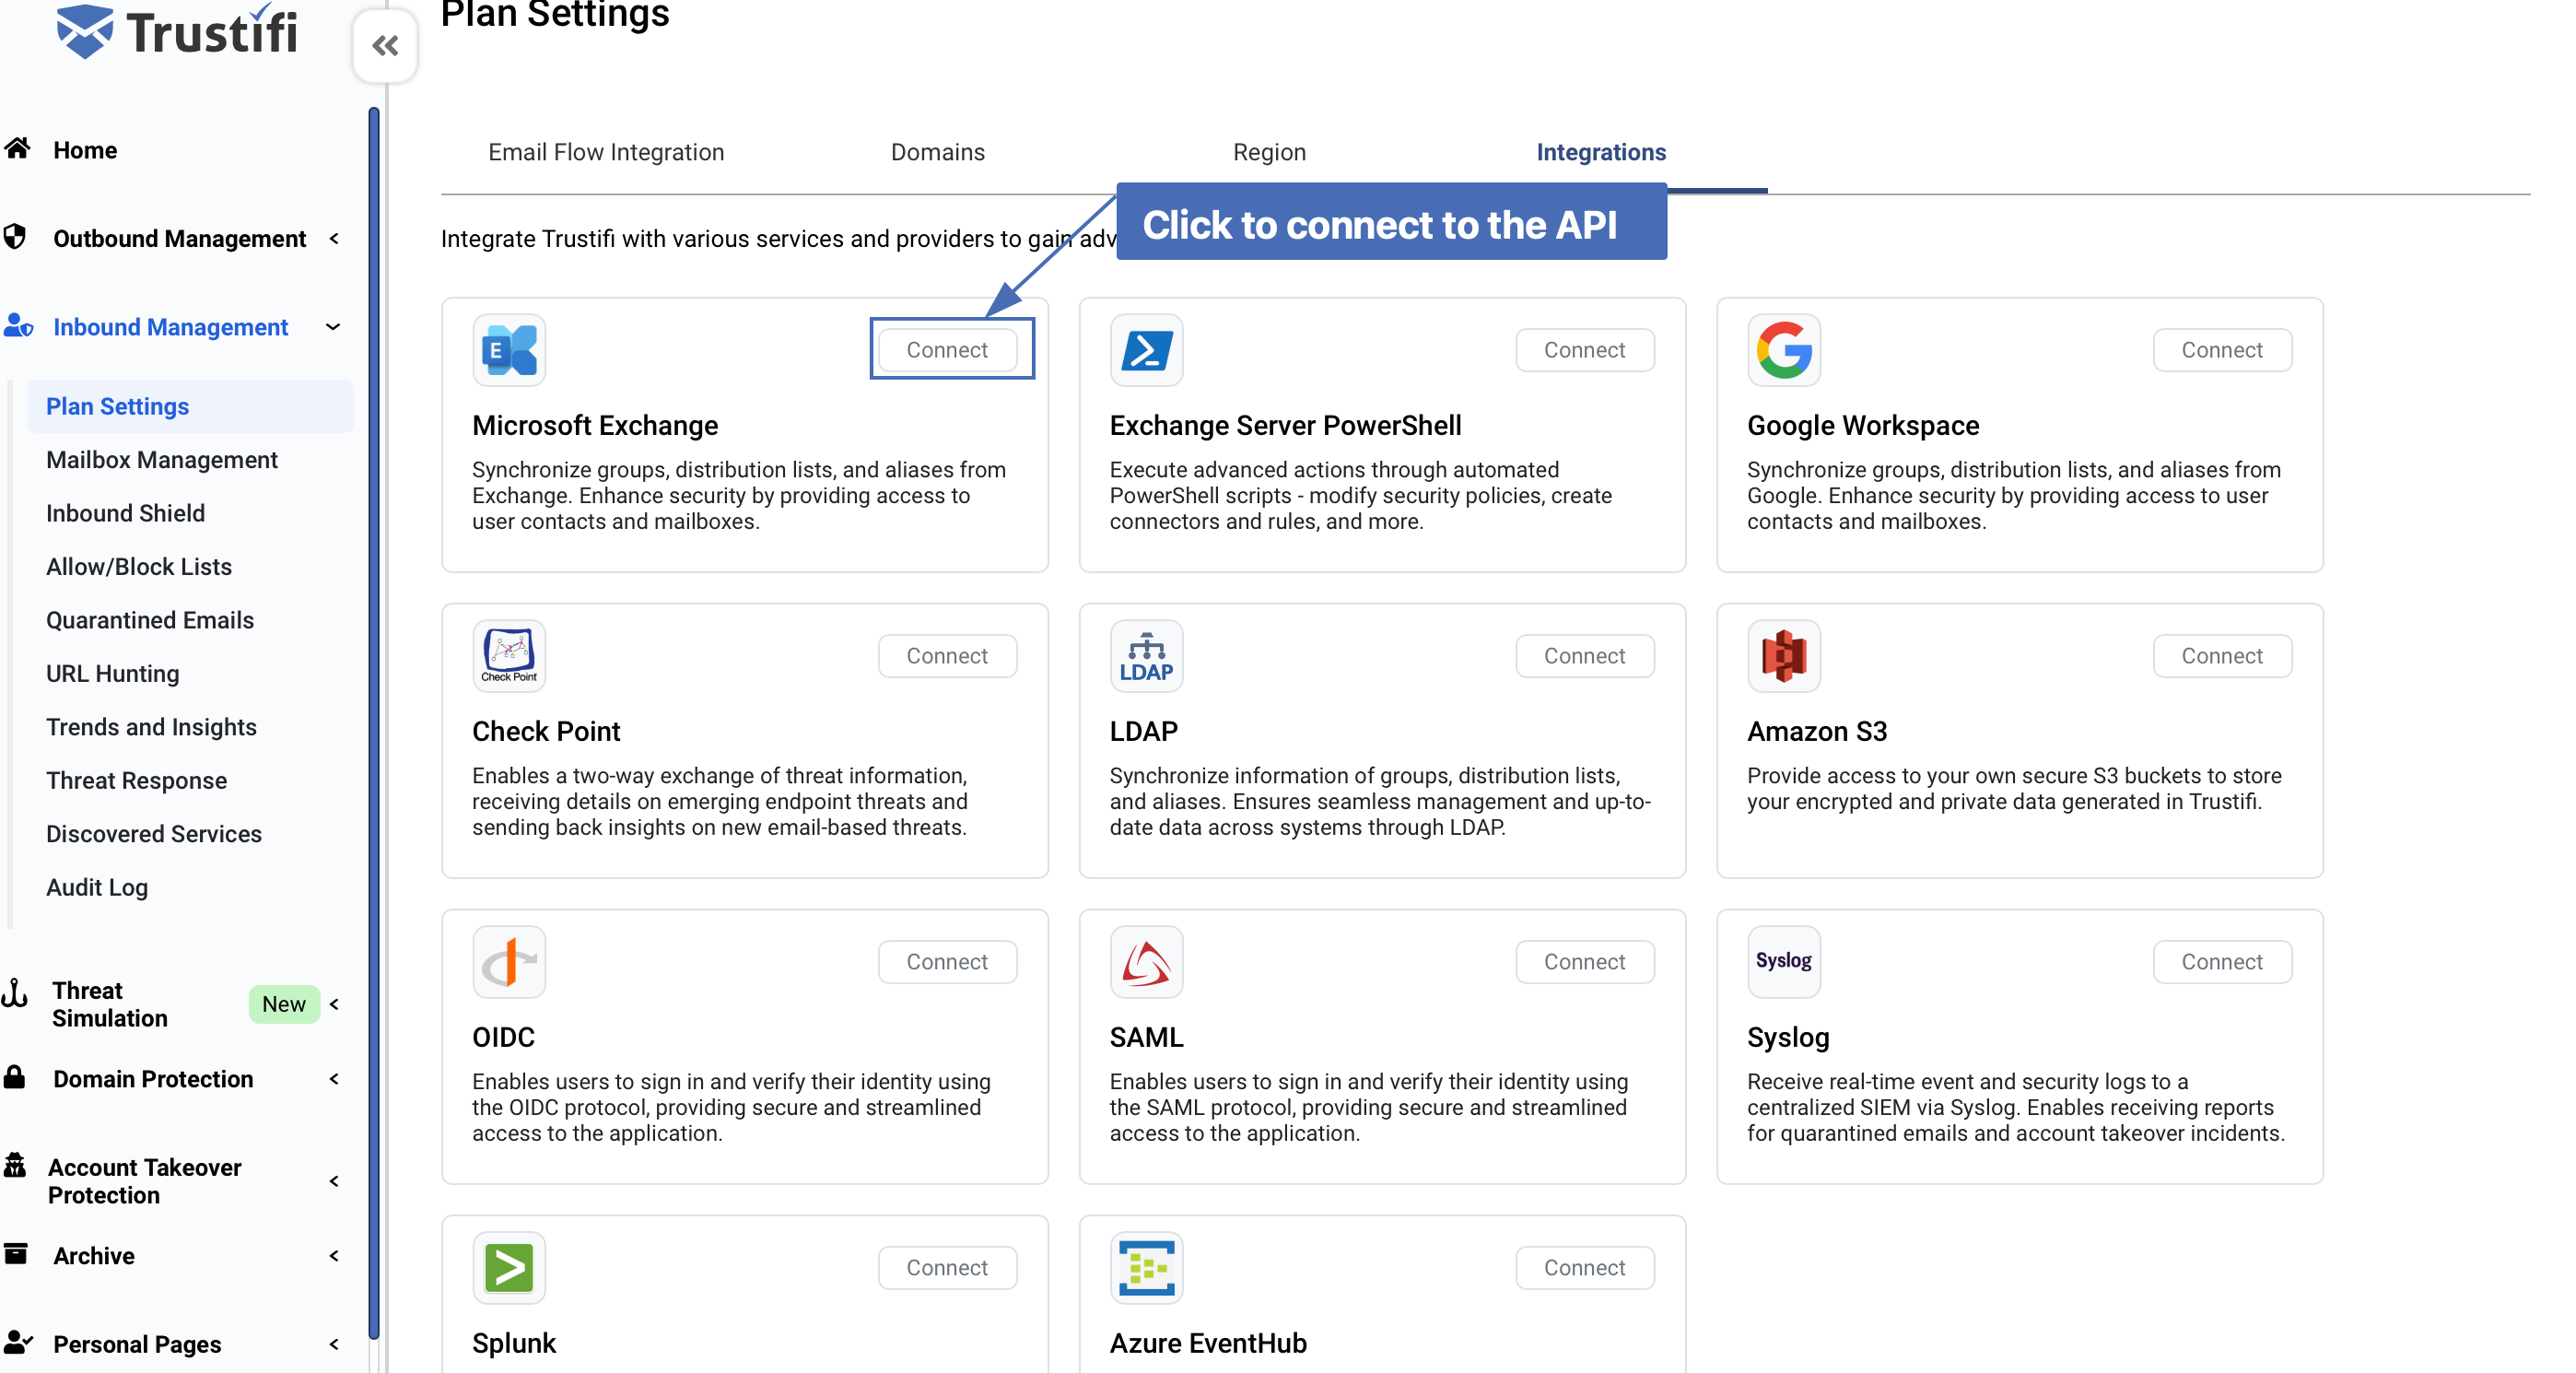
Step 7: Navigating to the integrations page
Navigate to the Integrations page.
Or, you can find the integration status in the “Exchange/Google API Integrations” section, and click on the Exchange/Office365 icon.
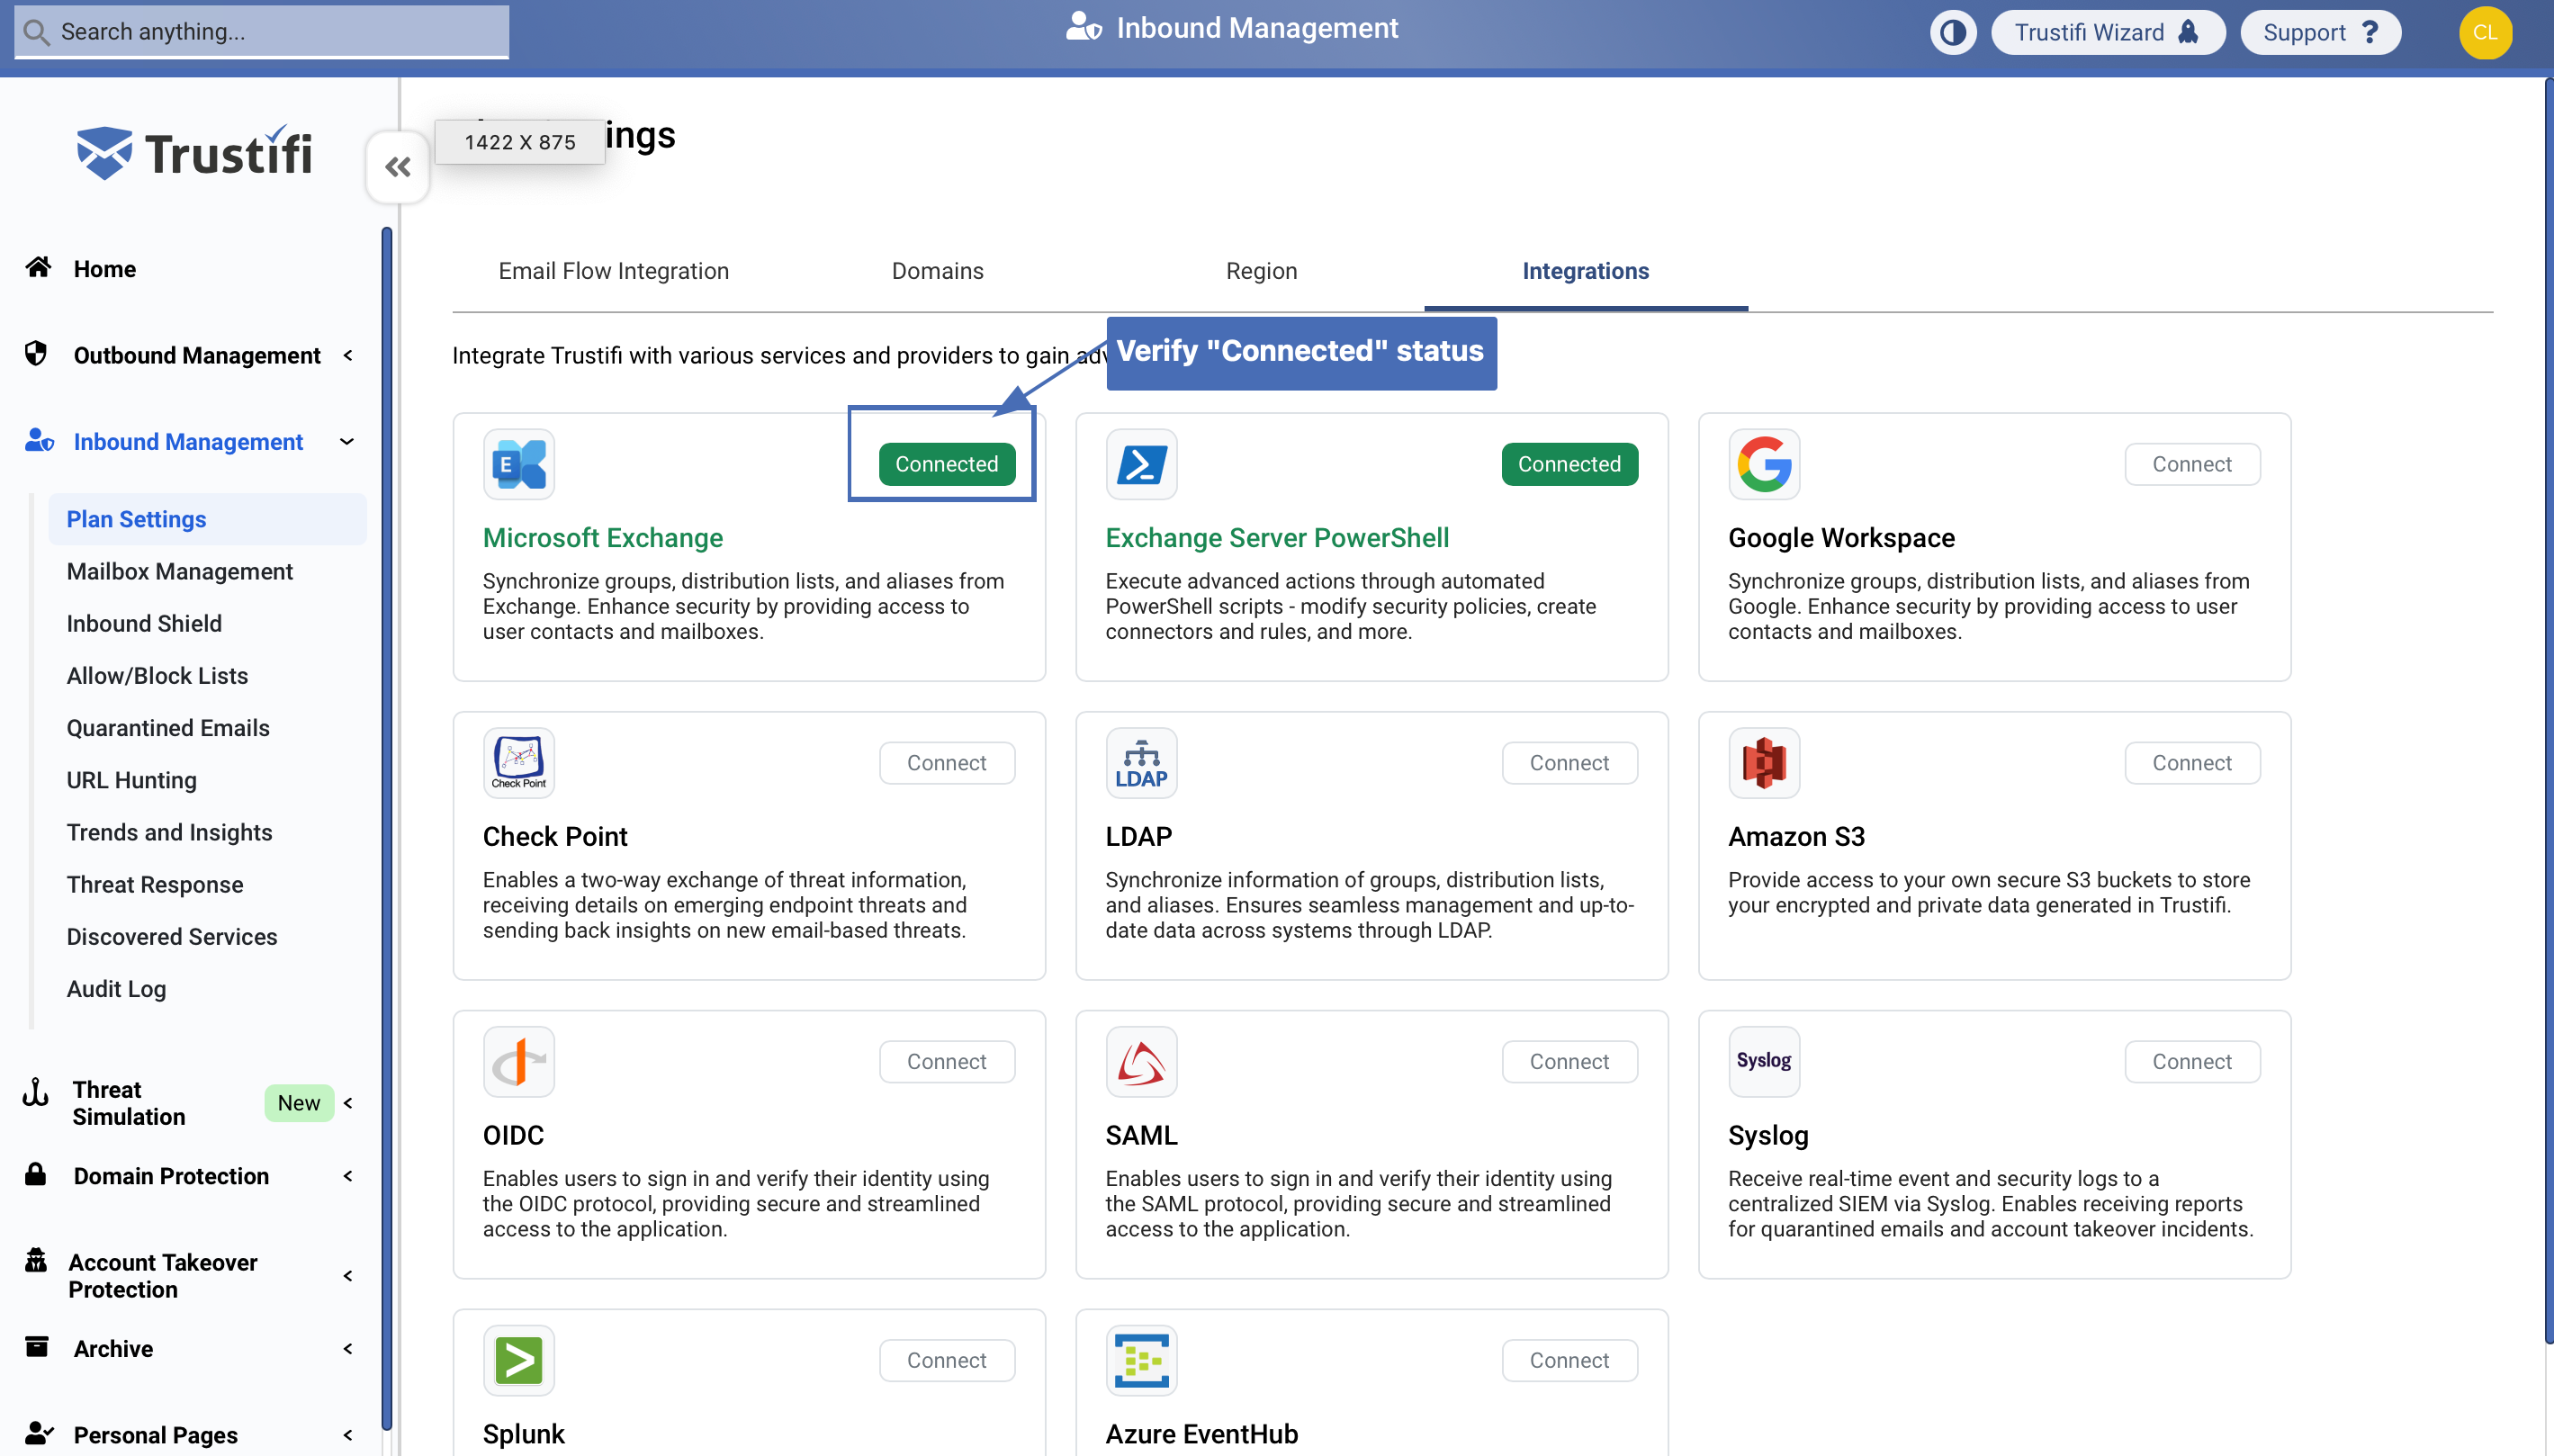
Step 8: Connecting the Office365 API
Once you are in the correct section of the “Integrations” page, you can click on the “Connect” button to open the Office365 API connection interface. you will need to click on the “Connect” button again in the pop-up that opens.
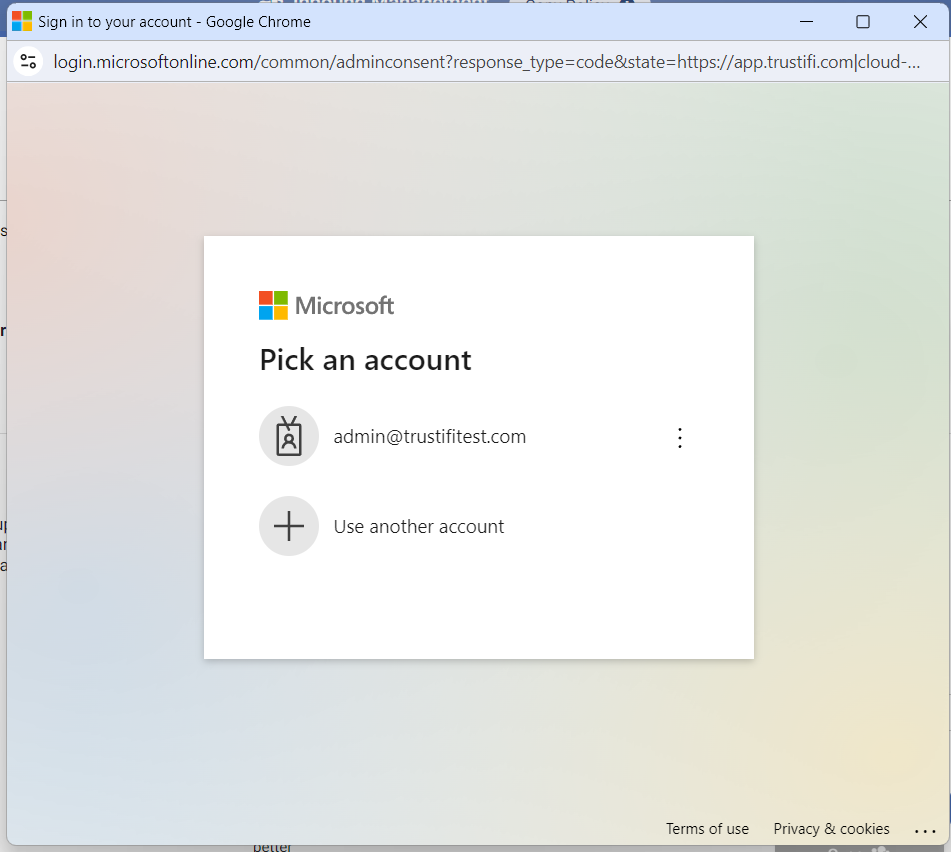
In the pop-up, first select your Office365 global admin account.
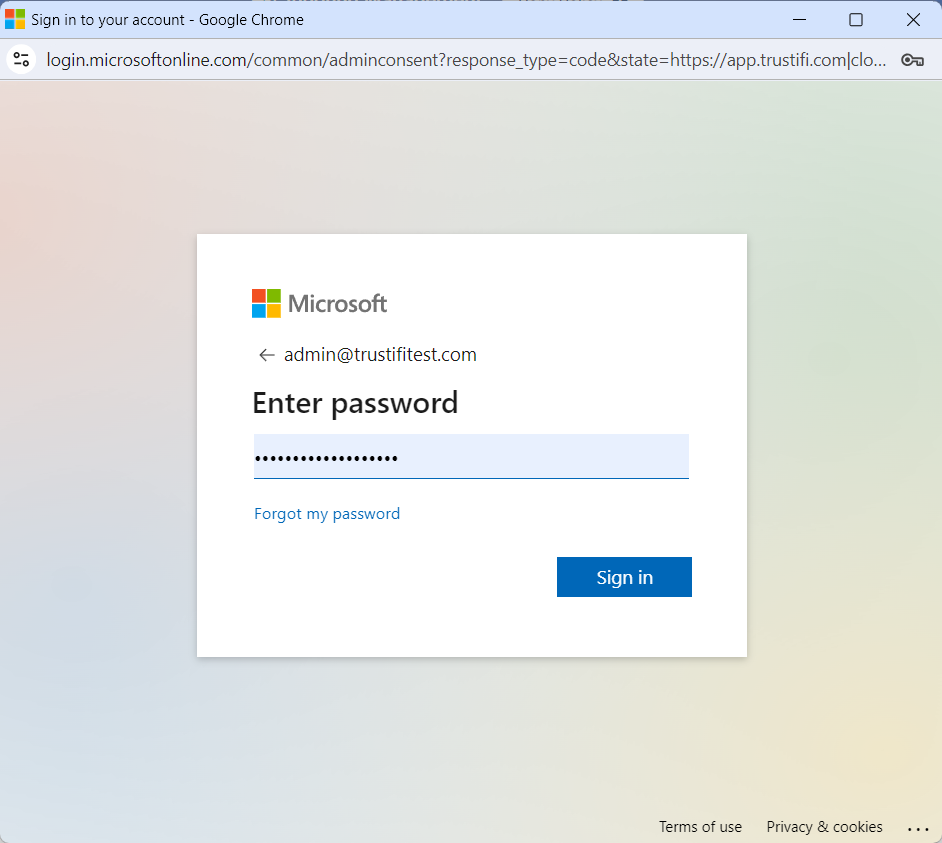
Now, enter the password to your global admin account if you are not yet signed in.
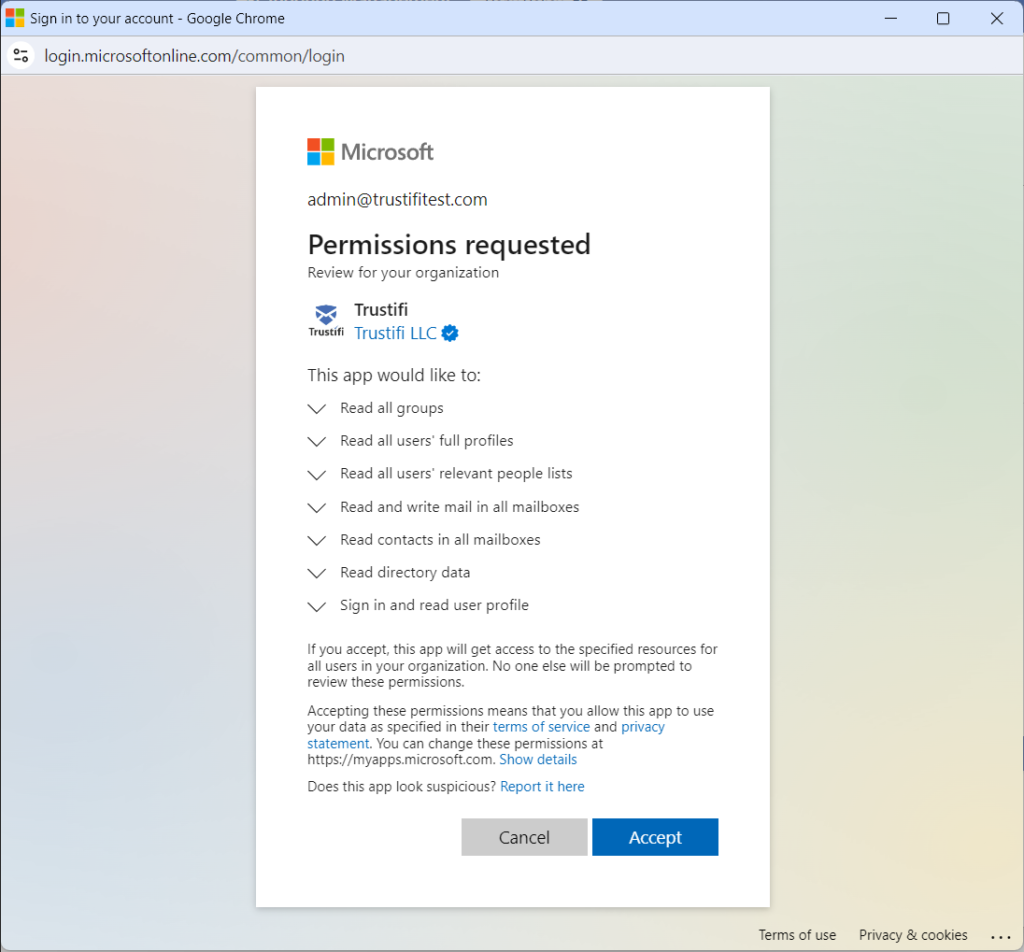
Finally, click “Accept” to provide the necessary permissions to Trustifi. Then, wait for the connection process to finalize.
When the API connection process has finished, you should see the status as “Connected“.
.png)
Receiving Domains
If you are planning to use the Trustifi inbound journal only with users from your primary domain (i.e. – the domain in your admin’s email address), you will not need to make any additional configurations.
However, if you will be using this journal with users from other domains as well, you will need to prove ownership of the domain with one of the following:
Going through the domain verification process
Connecting to the Exchange/Office 365 API (instructions in the steps above)
For domain verification, please see the instructions below.
Domain verification
You can find full instructions for verifying domains in Trustifi in our official Domain Verification guide.