Step 1 – Navigating to “Email Flow Integration”
First, you will need to log into the Trustifi web portal using your admin credentials. Once logged in, click on “Inbound Management” on the left side navigation bar and then click on the “Plan Settings” page, And click on the “Email Flow Integration” tab
Make sure the selected architecture is “via Email Relay“. If you want to create the inbound mail flow integration using an MX record, please see our MX integration guide.
.png)
Step 2 – Adding your domain, MTA, and port
Under the “Domain and MTA” section you will need to enter your domain, Mail Transfer Agent (MTA), and port. If you are not sure what your MTA is, you can click “resolve host” to auto-fill the “MTA” field. The port number will usually be 25.
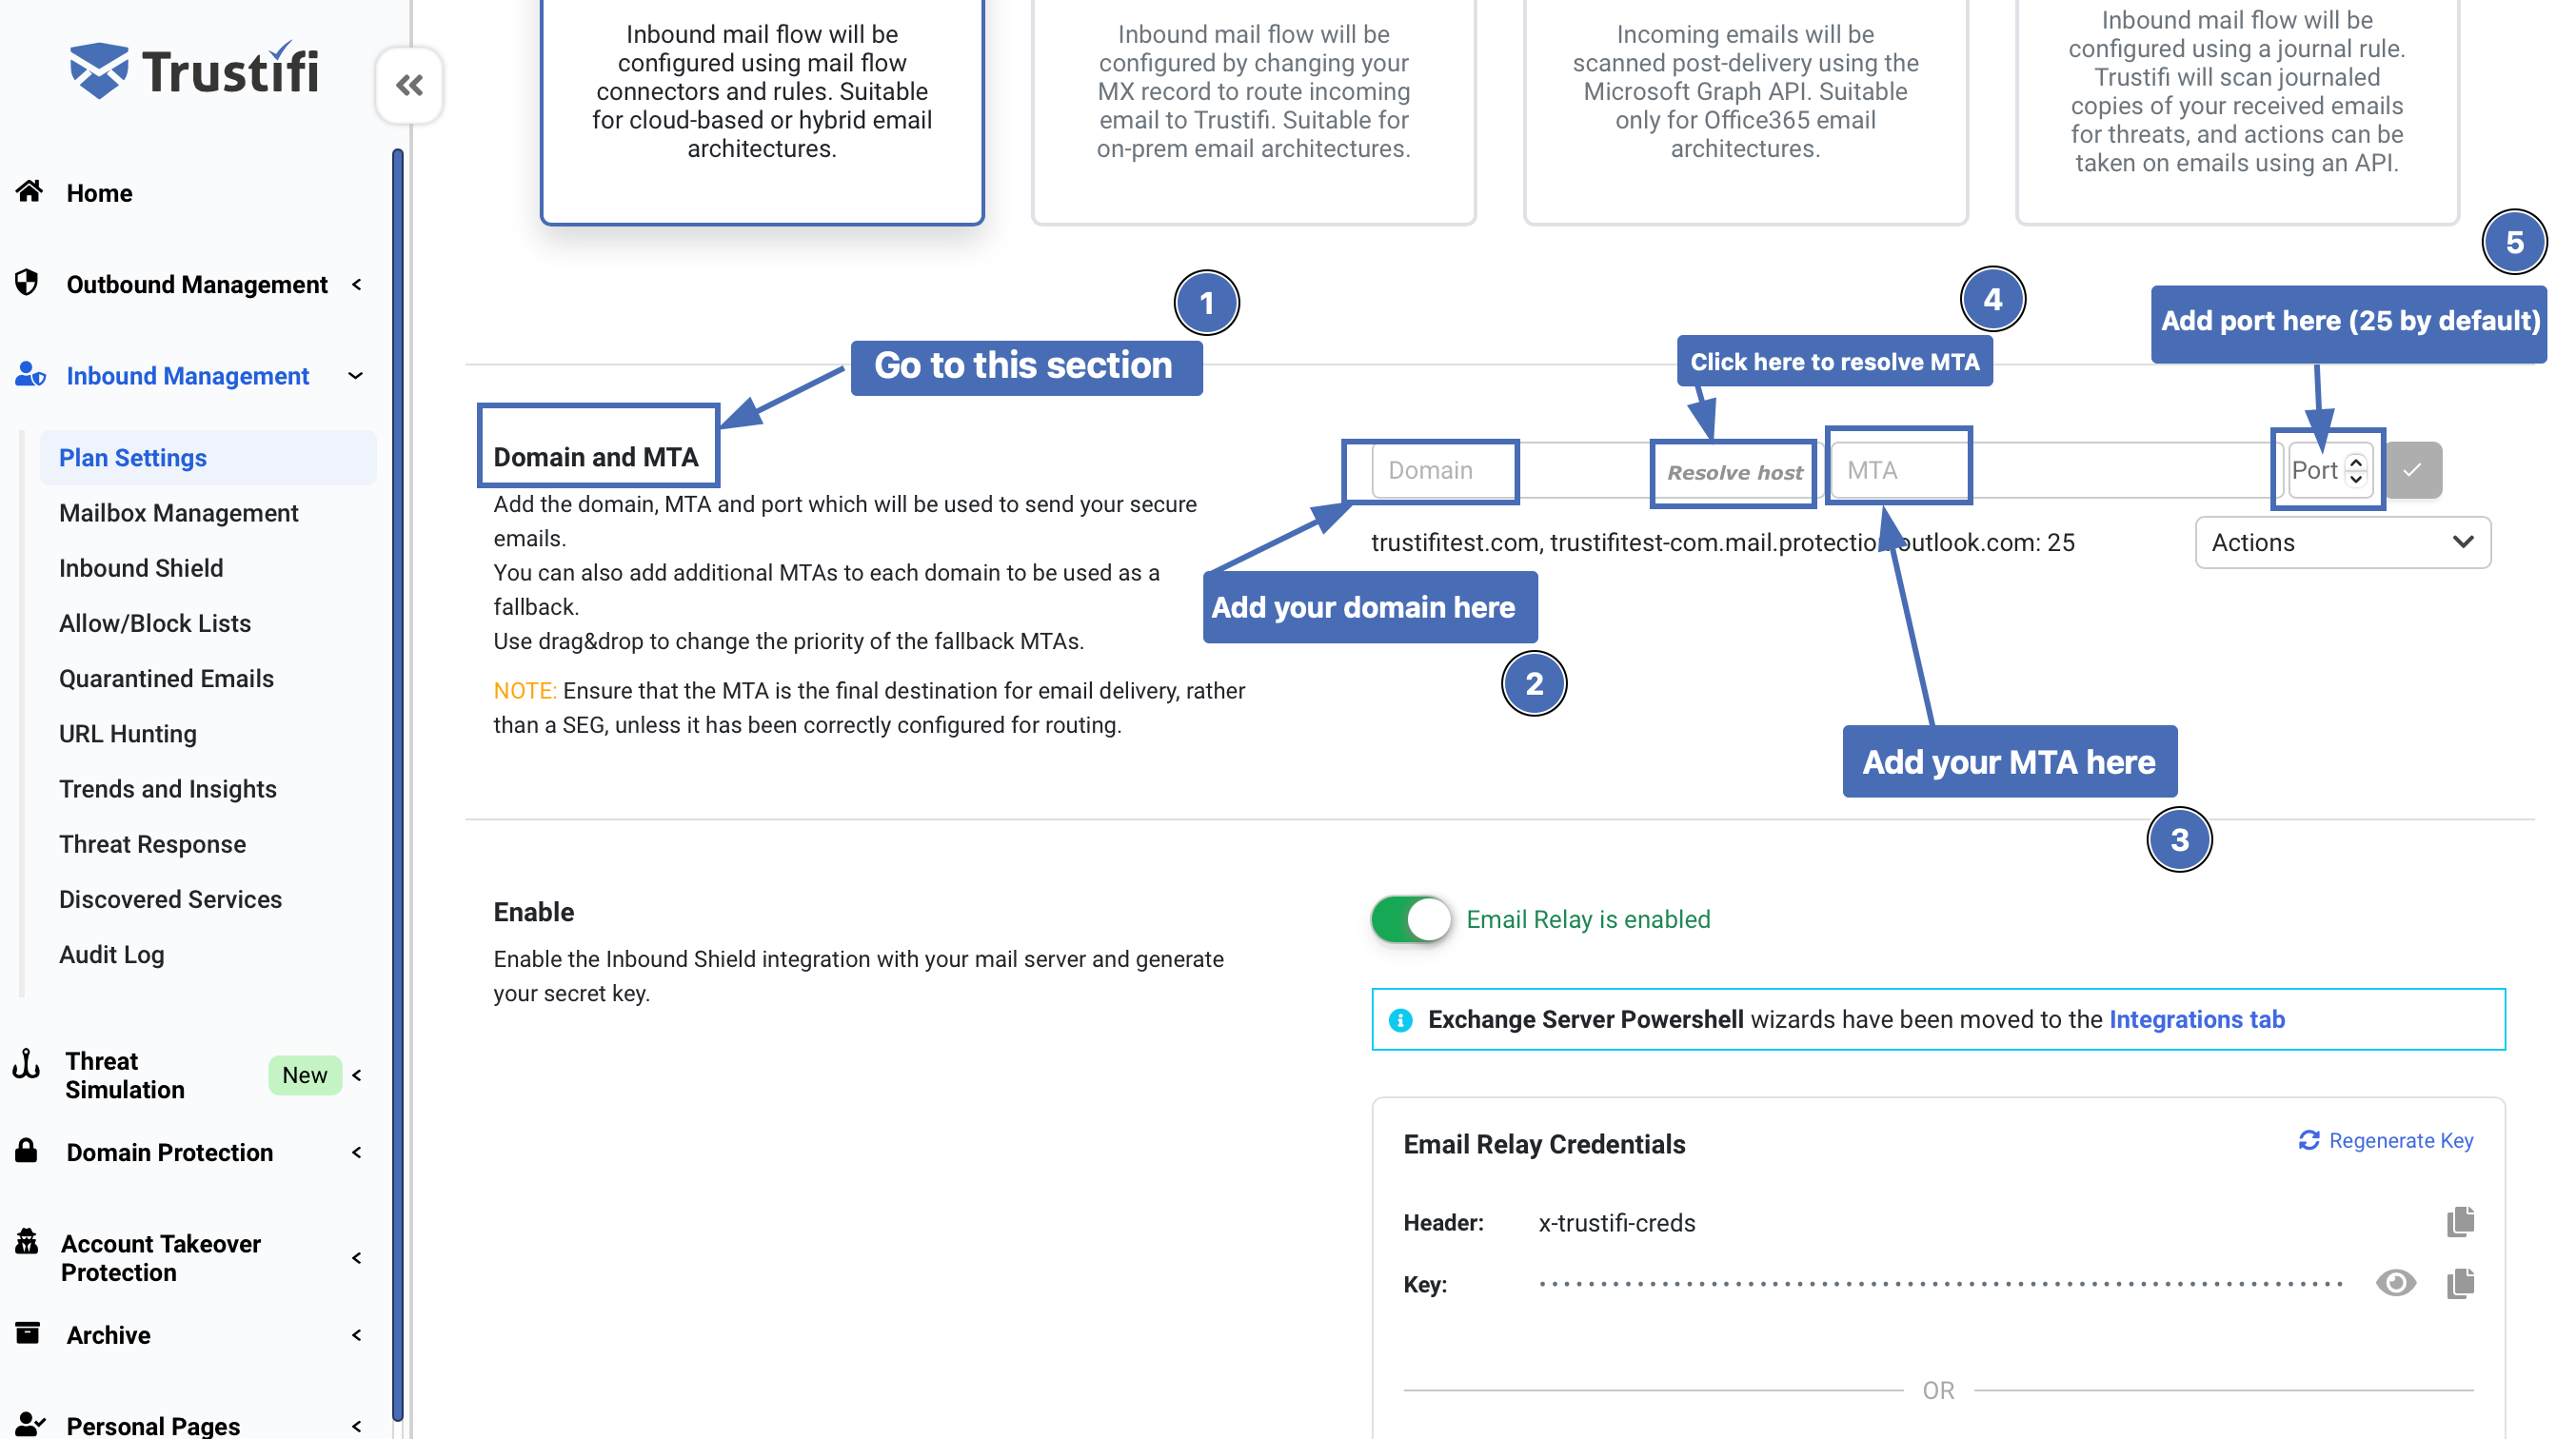
Note: If you have several domains which should be protected you can add multiple domains with their corresponding MTAs. For each domain, up to 3 MTAs can be added – the first MTA will be used by default and the other 2 will be used as a fallback in case the first MTA fails.
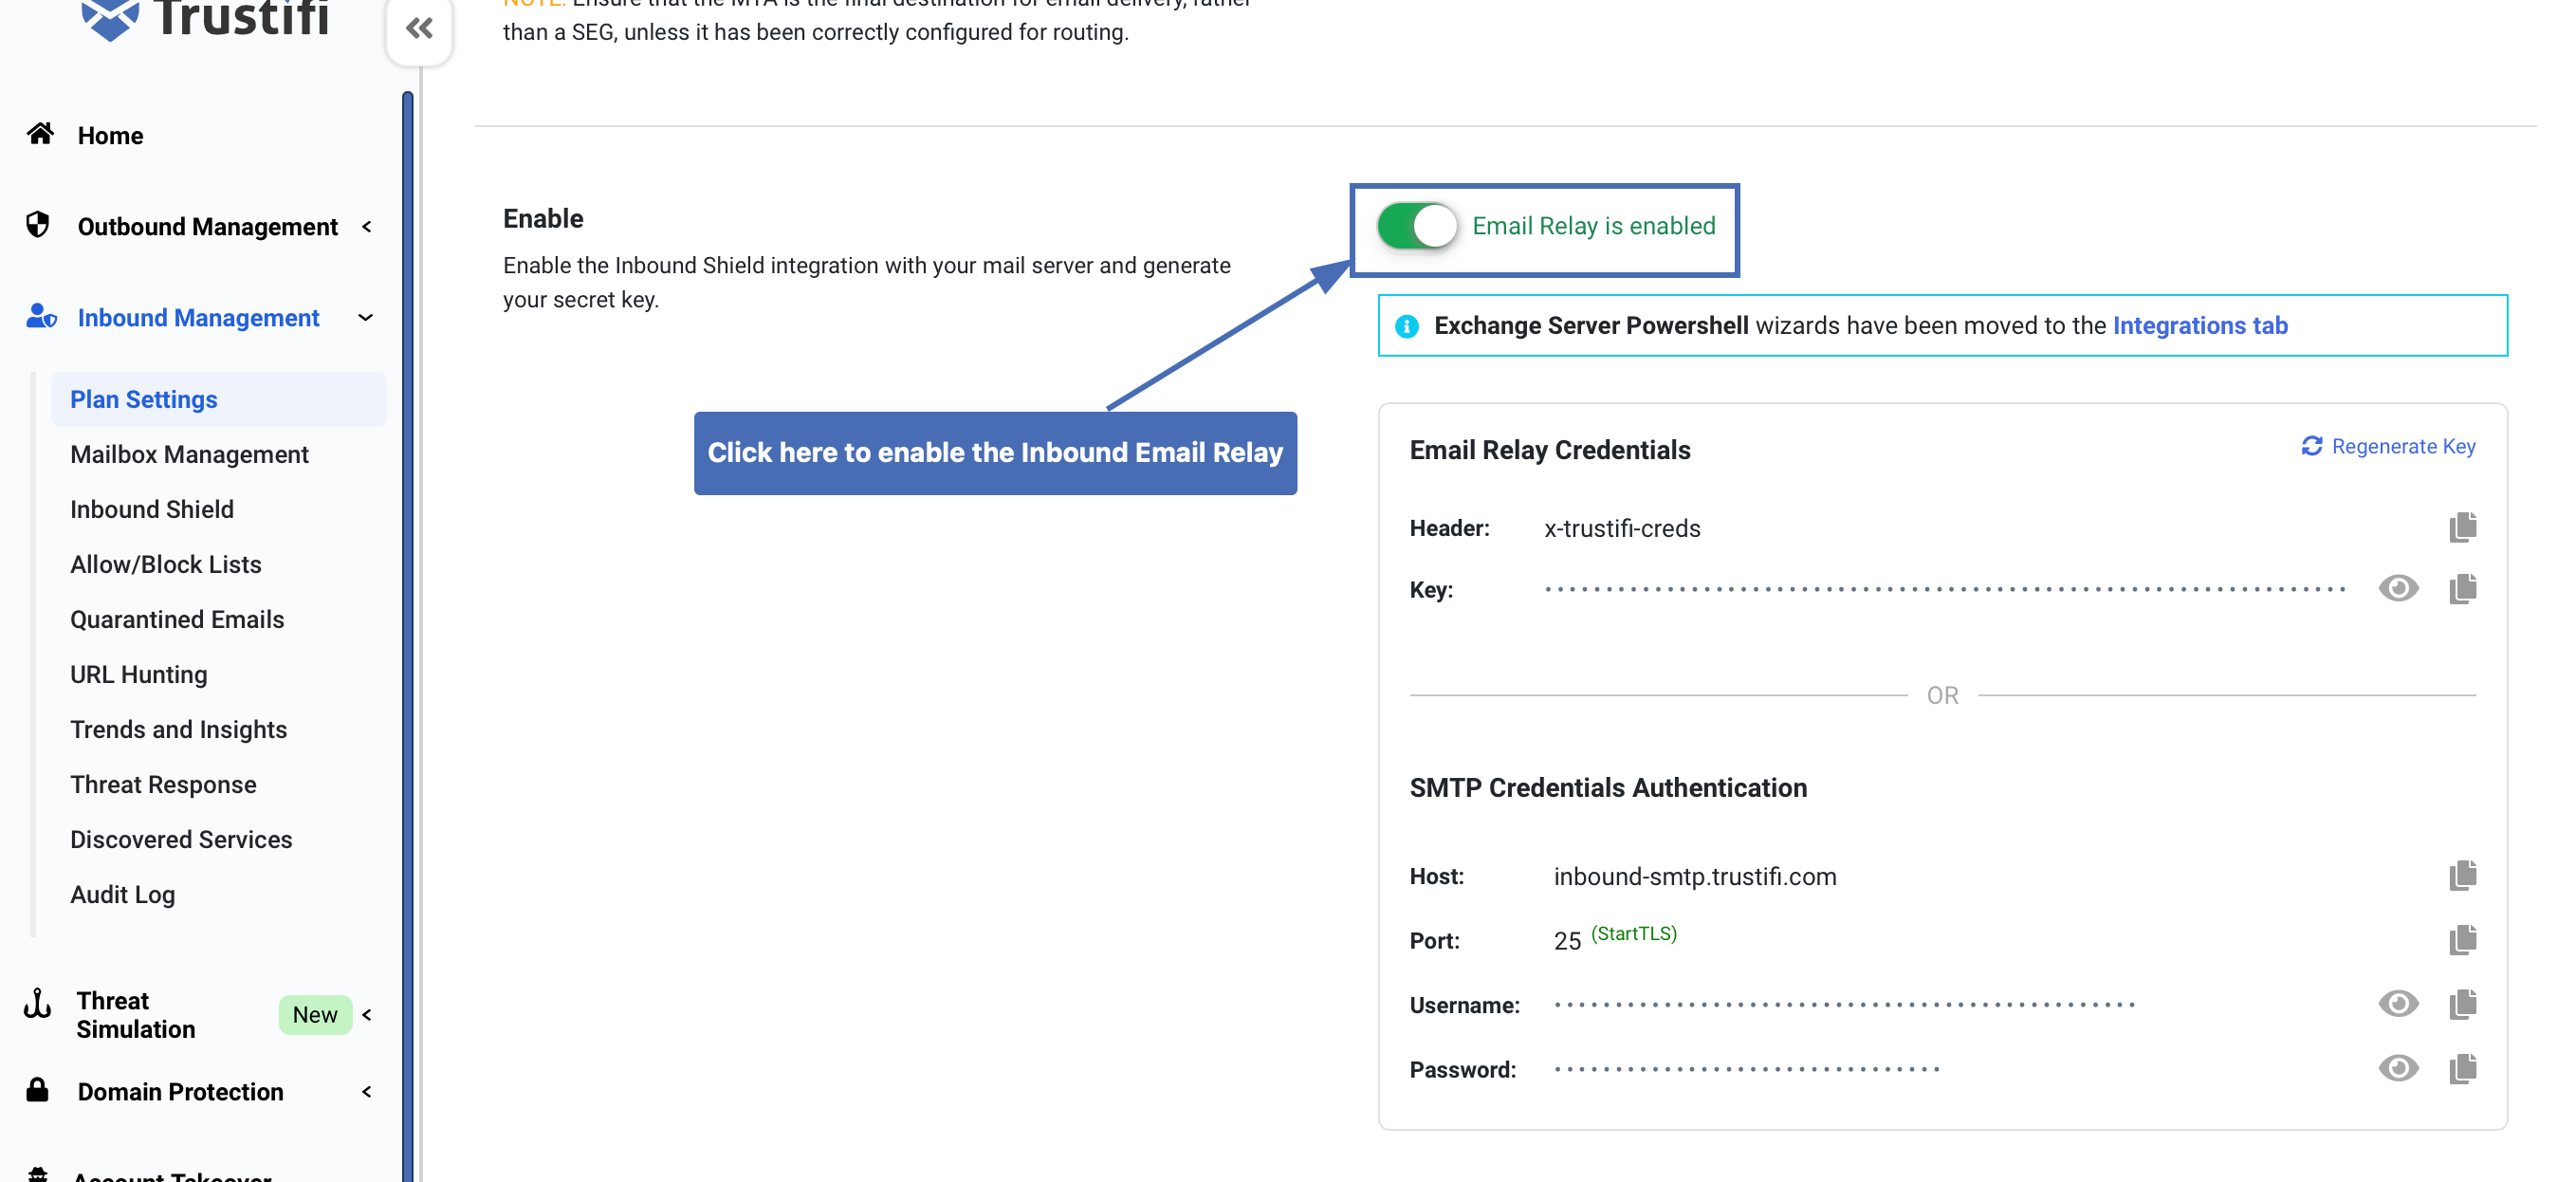
Step 3 – Enabling the Inbound Email Relay
After your domain, MTA, and port have been added, simply click the “Enable” toggle and confirm in the pop-up window
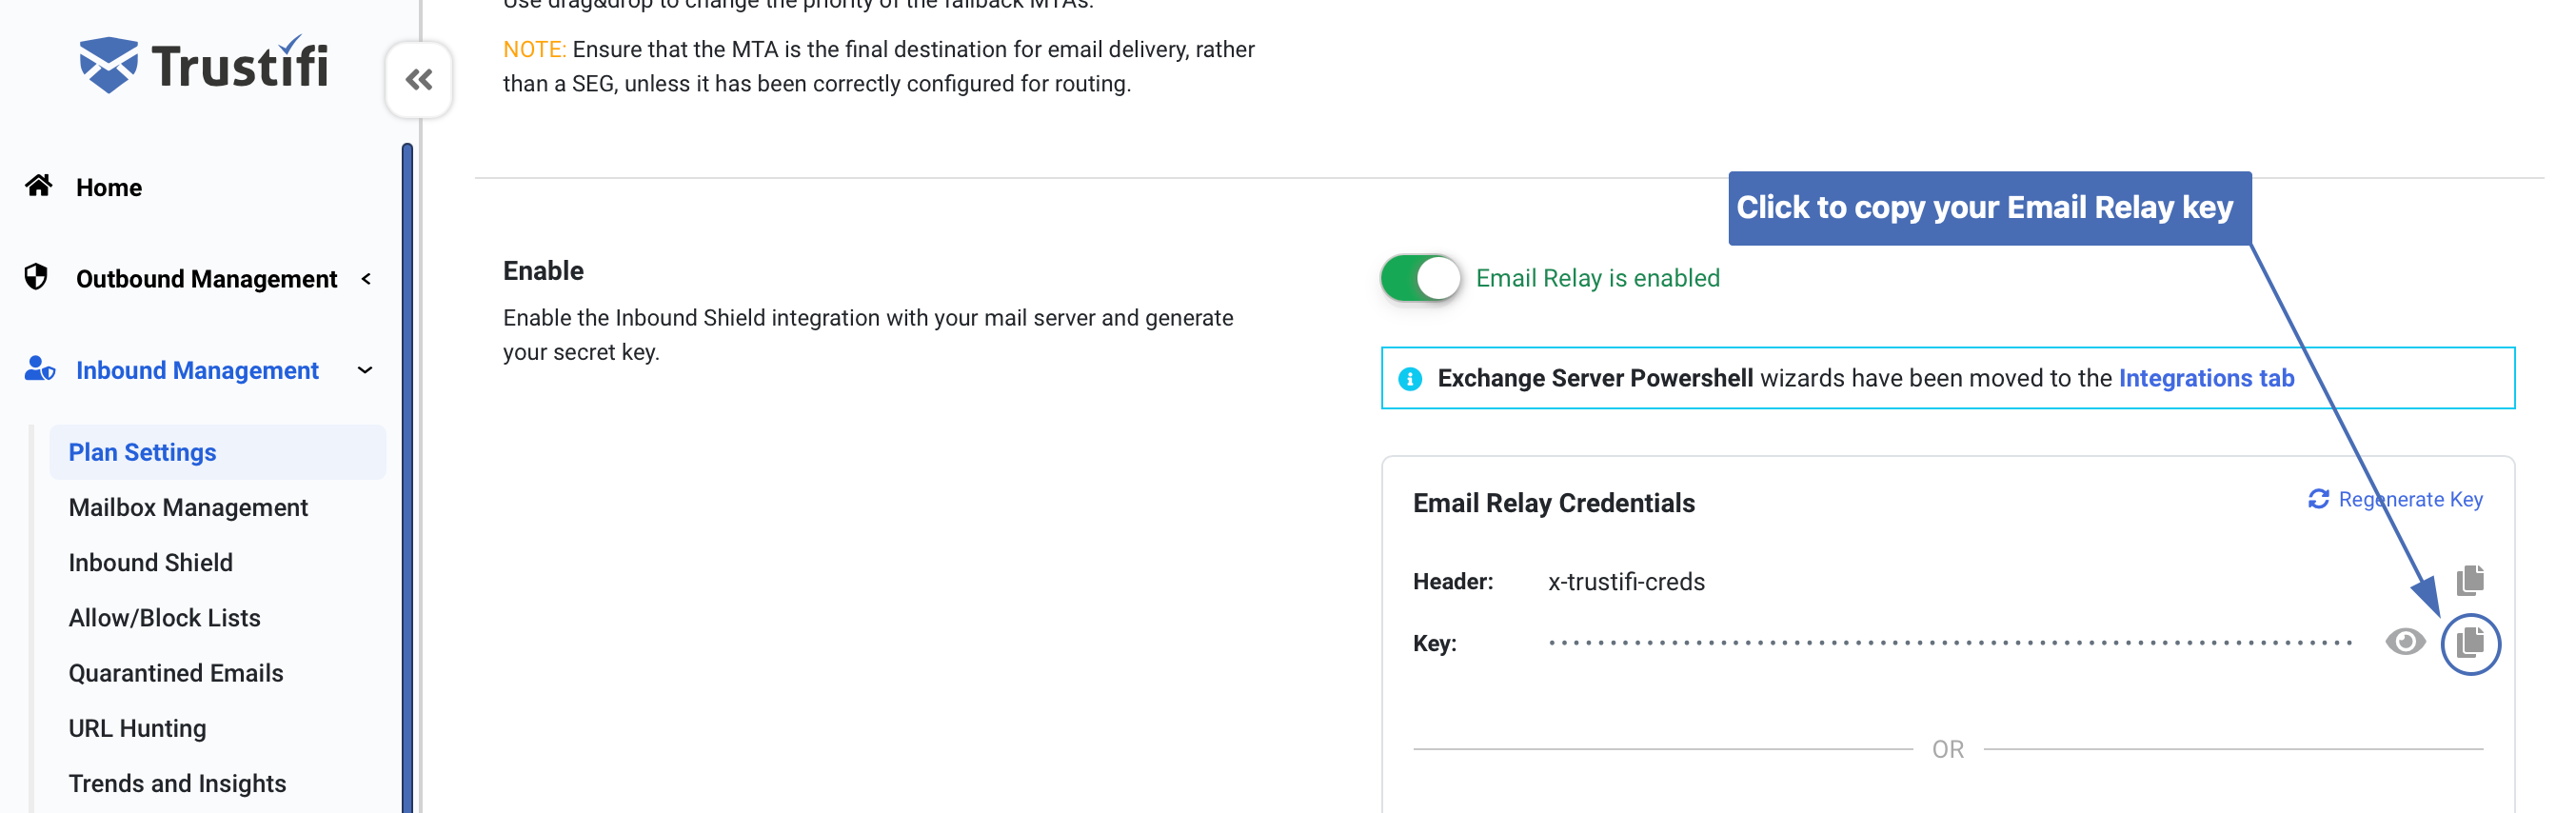
After the Inbound Email Relay has been enabled, your Email Relay key will be generated. You can copy this key now to use it later in the configuration.
Note: This action will not yet change anything in your server’s inbound mail flow. Mail traffic will only be routed through Trustifi after the mail-flow rule and connectors have been set up.
Google Admin Center
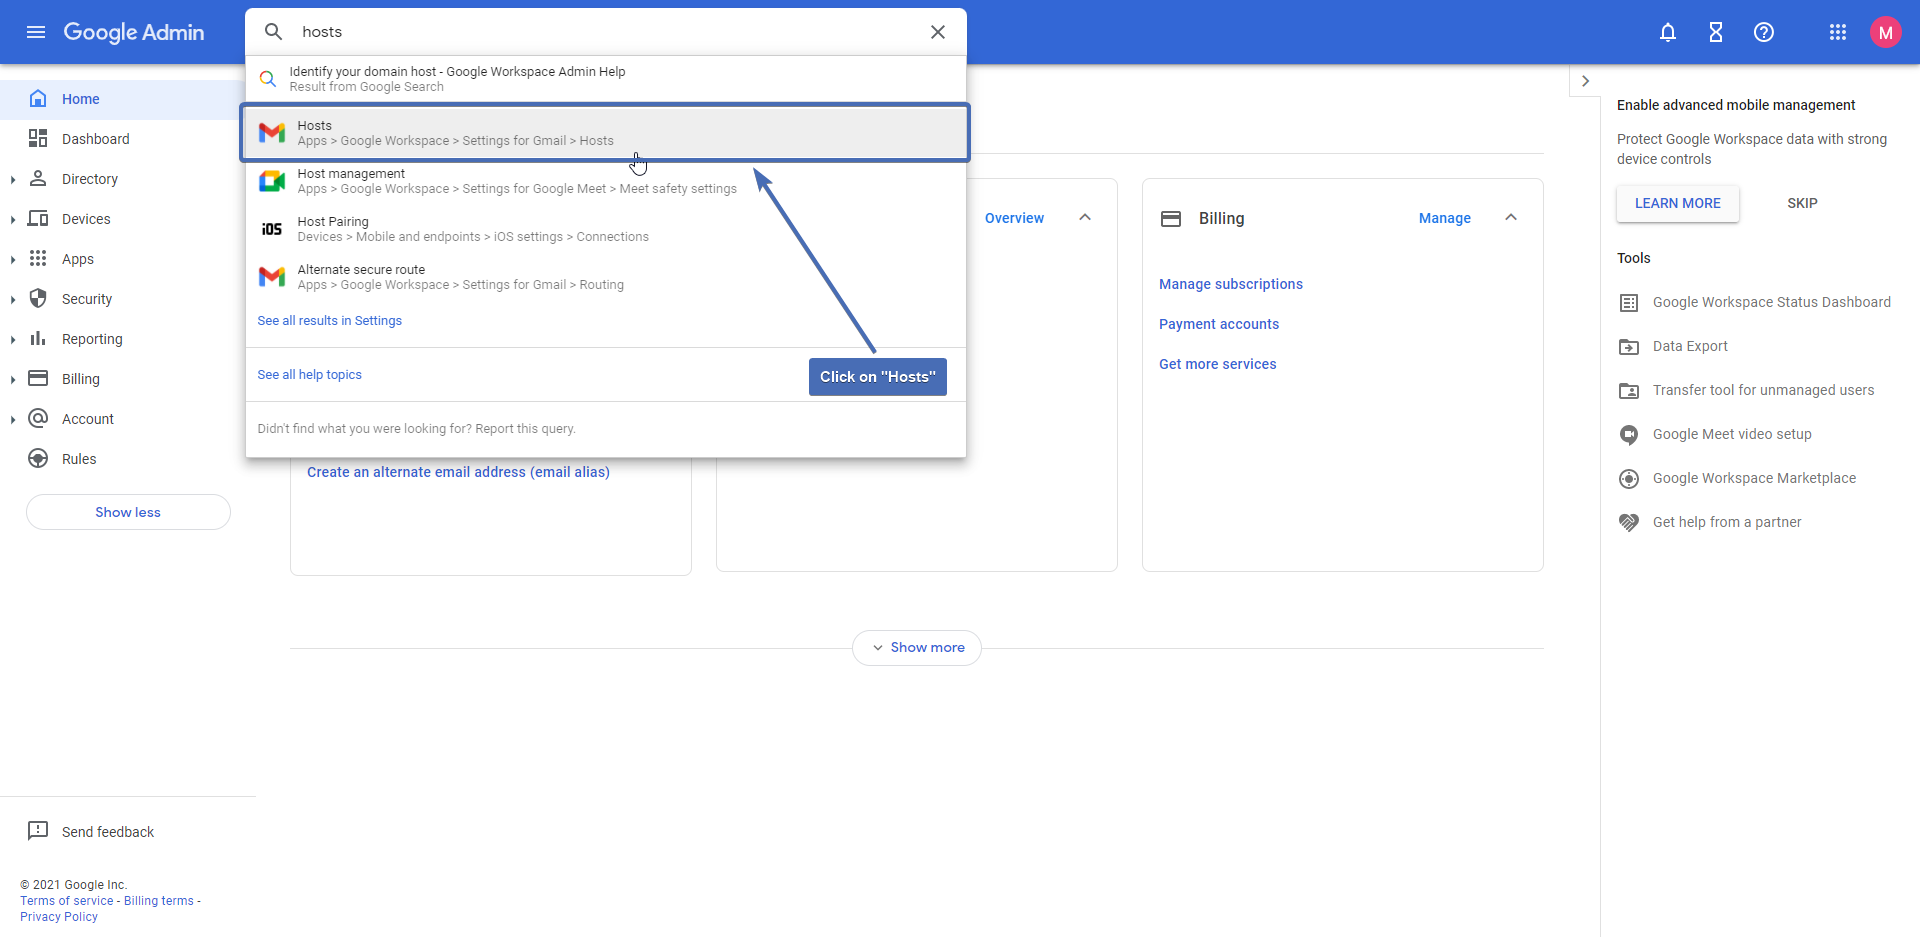
Step 4 – Navigating to the Google Admin Center – Mail flow
Navigate to the “Google Admin Center” via the following link –https://admin.google.com/
After you have logged in, input “hosts” in the search bar and select the first option.
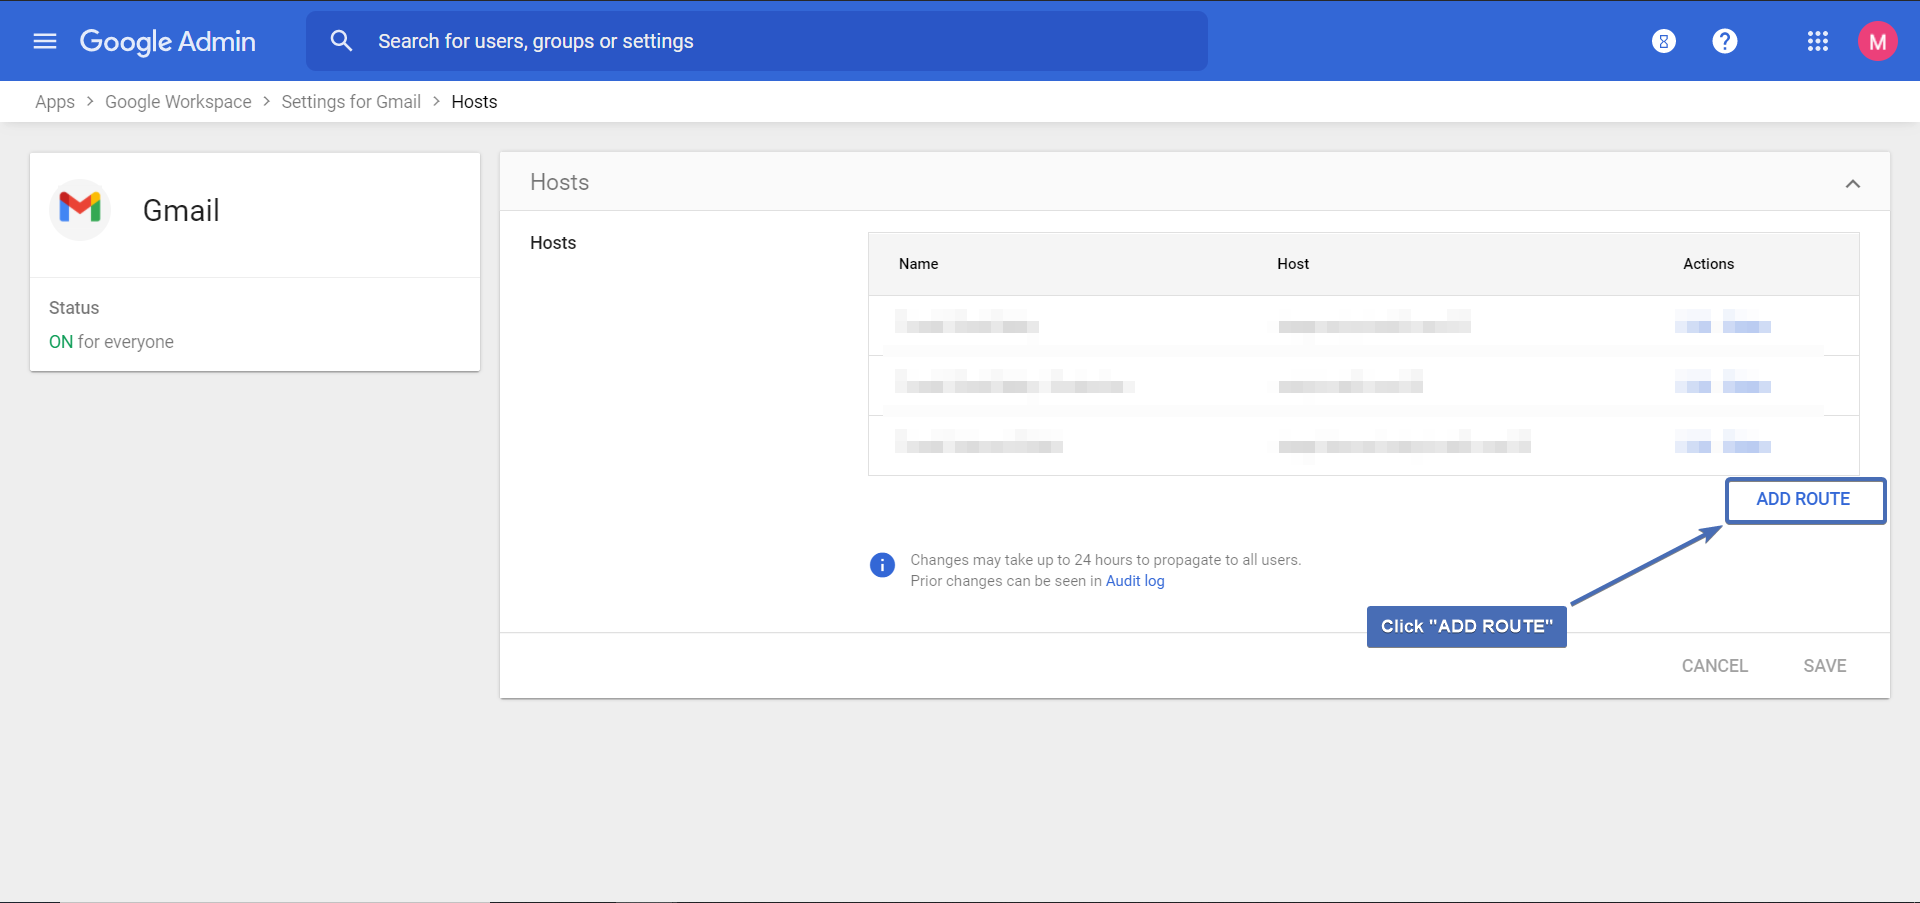
Step 5 – Adding a new route
Click on “ADD ROUTE” under “Hosts“.
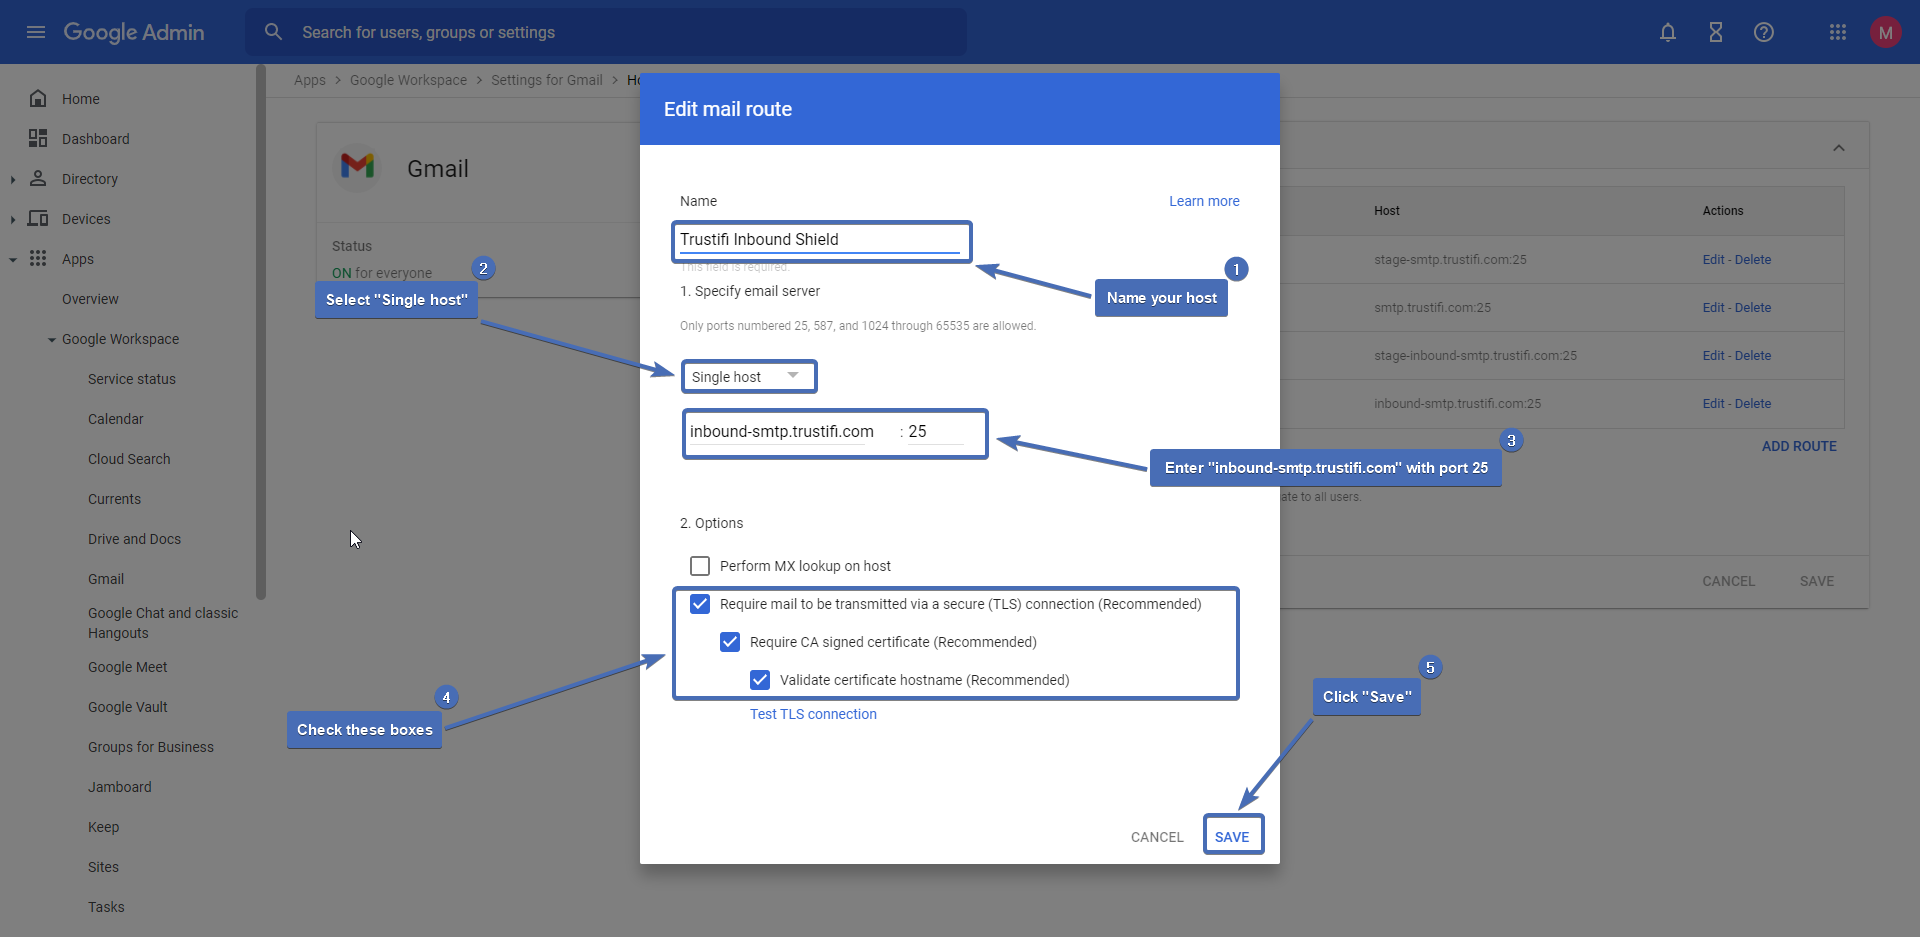
Step 6 – Creating the host
Configure the following:
Name your host
Select “Single host“
In the “Host name” field enter “inbound-smtp.trustifi.com” (without the quotes) with port 25.
Check these boxes: “Require mail to be transmitted via a secure (TLS) connection“, “Require CA signed certificate” , “Validate certificate hostname“
Click “Save“
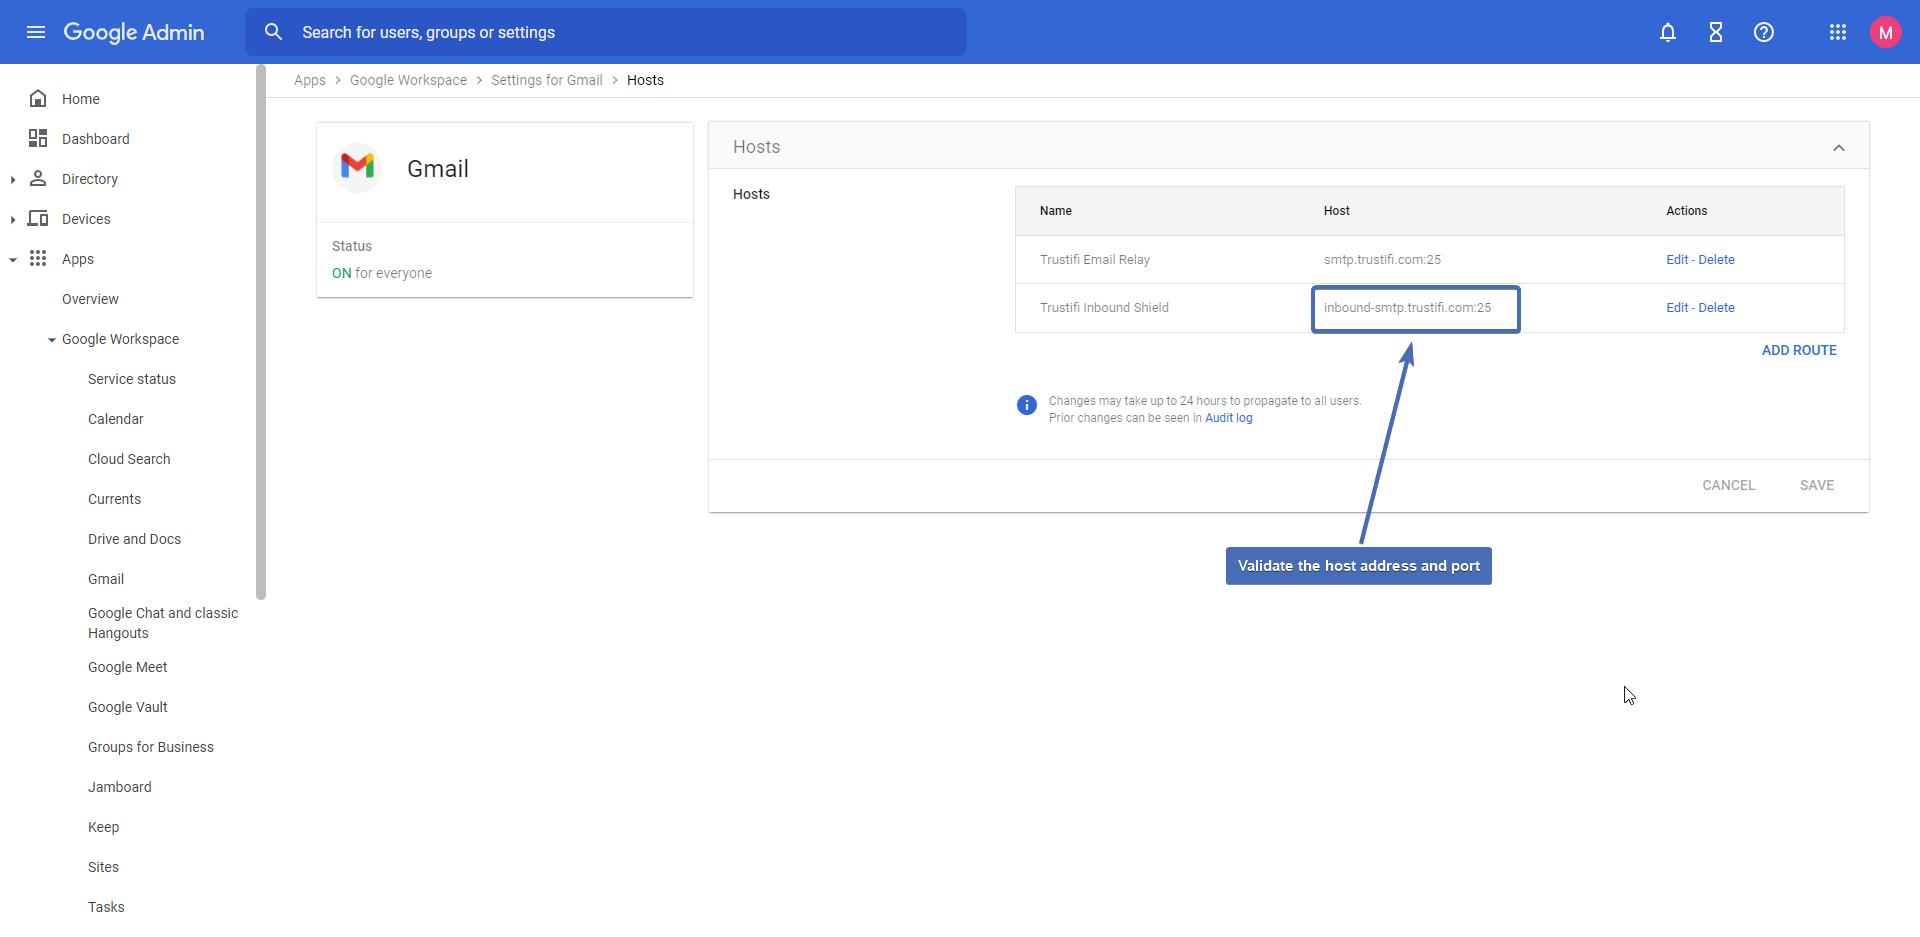
Step 7 – Validate the host
Make sure your host’s address and port are correct.
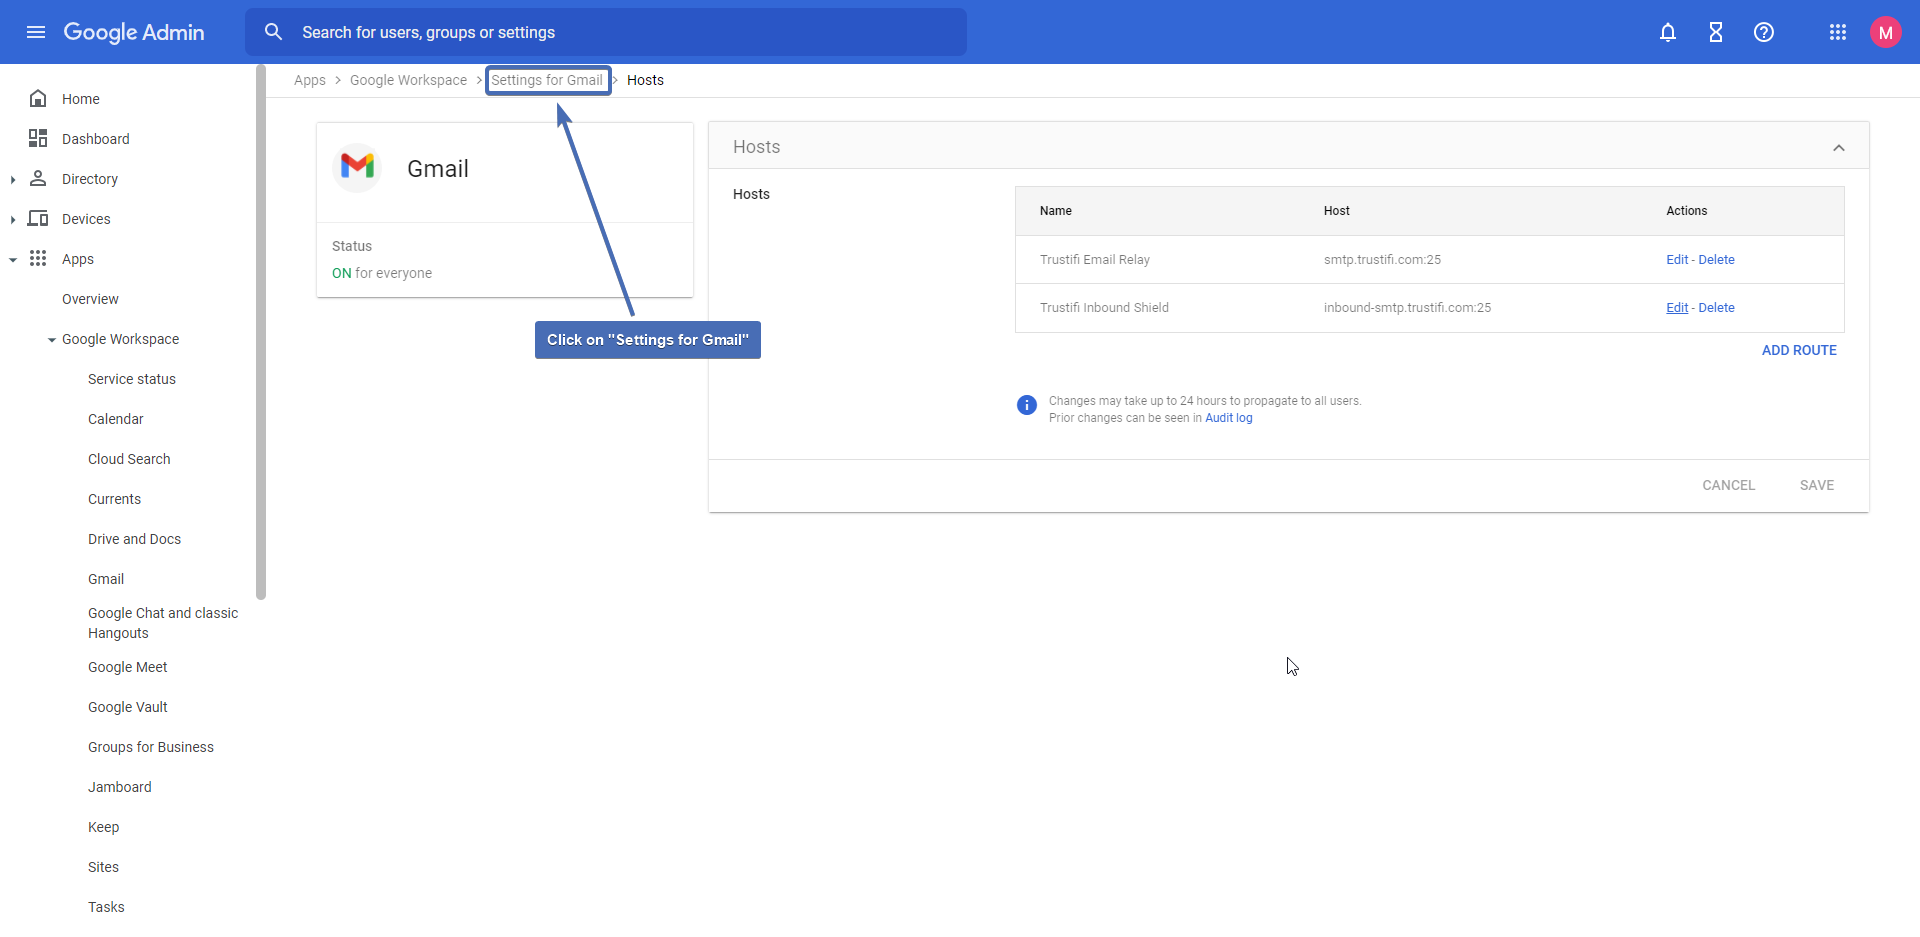
Step 8 – Navigating to “Settings for Gmail”
In the navigation bar at the top of the screen, click on “Settings for Gmail“.
Step 9 – Navigating to “Compliance”
Scroll down to the bottom of the page and click on “Compliance“.

Step 10 – Adding a new route
Now we will need to configure a set of rules to guide mail flow to our new host.
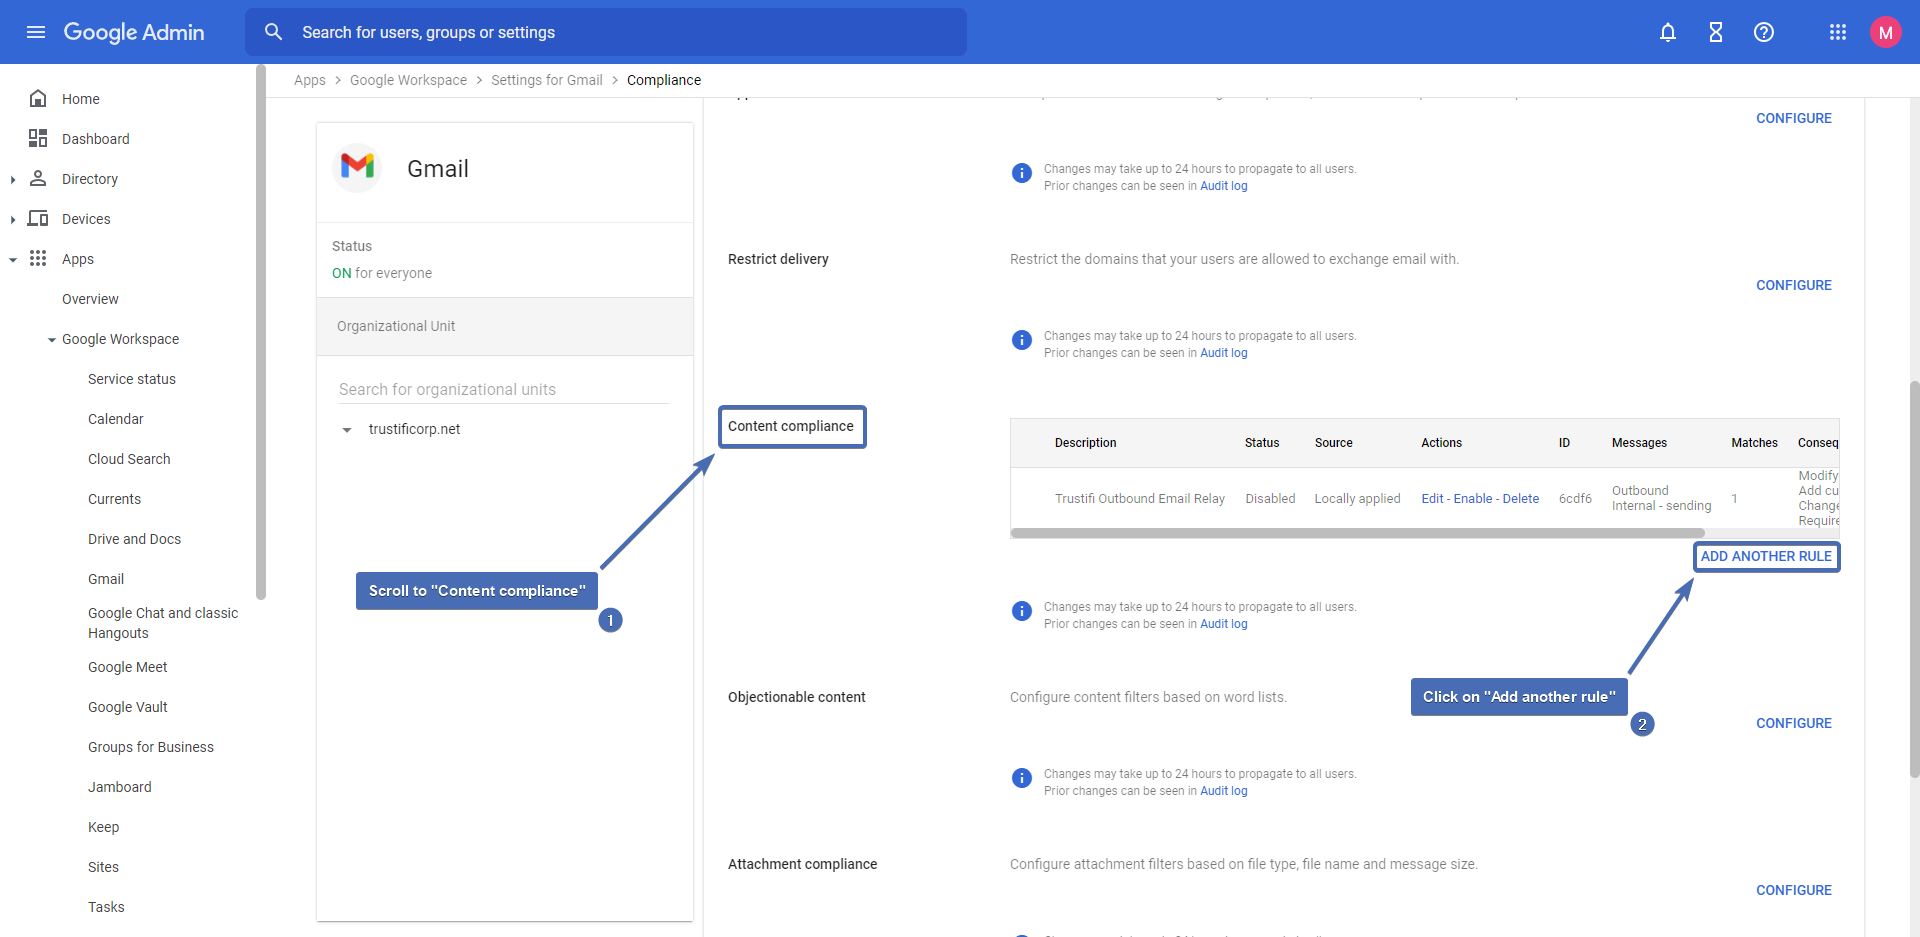
In the “Compliance” page, scroll down to the “Content compliance” section and click on “Add another rule“.
Note: if there are no existing rules under “Content compliance“, you will need to click on “Configure“.
Step 11 – Configuring the route
Name your routing rule, check the “Inbound” and “Internal – receiving” boxes.

Step 12 – Adding a routing condition
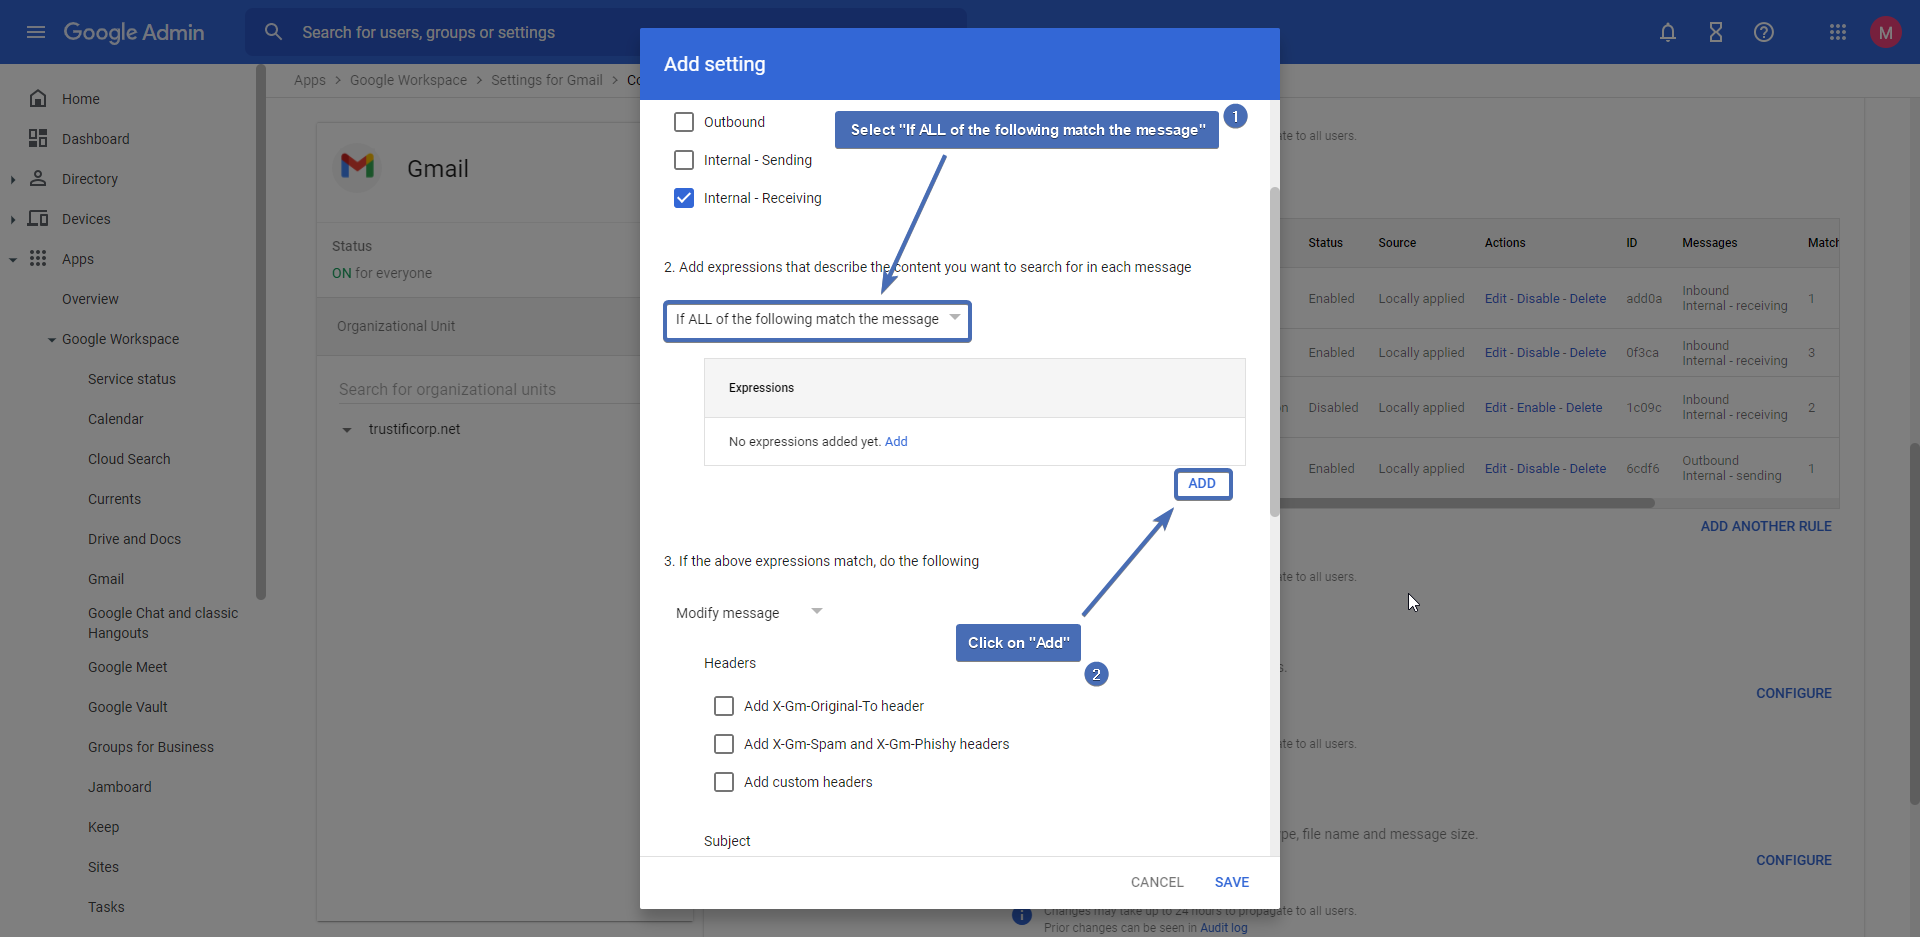
In section 2, select “If ALL of the following match the message” and click “Add“.
Step 13 – Configuring the IP routing condition
This condition is made to skip emails that have already been sent by Trustifi’s inbound IPs, which can result in email loops.
Set the following configurations:
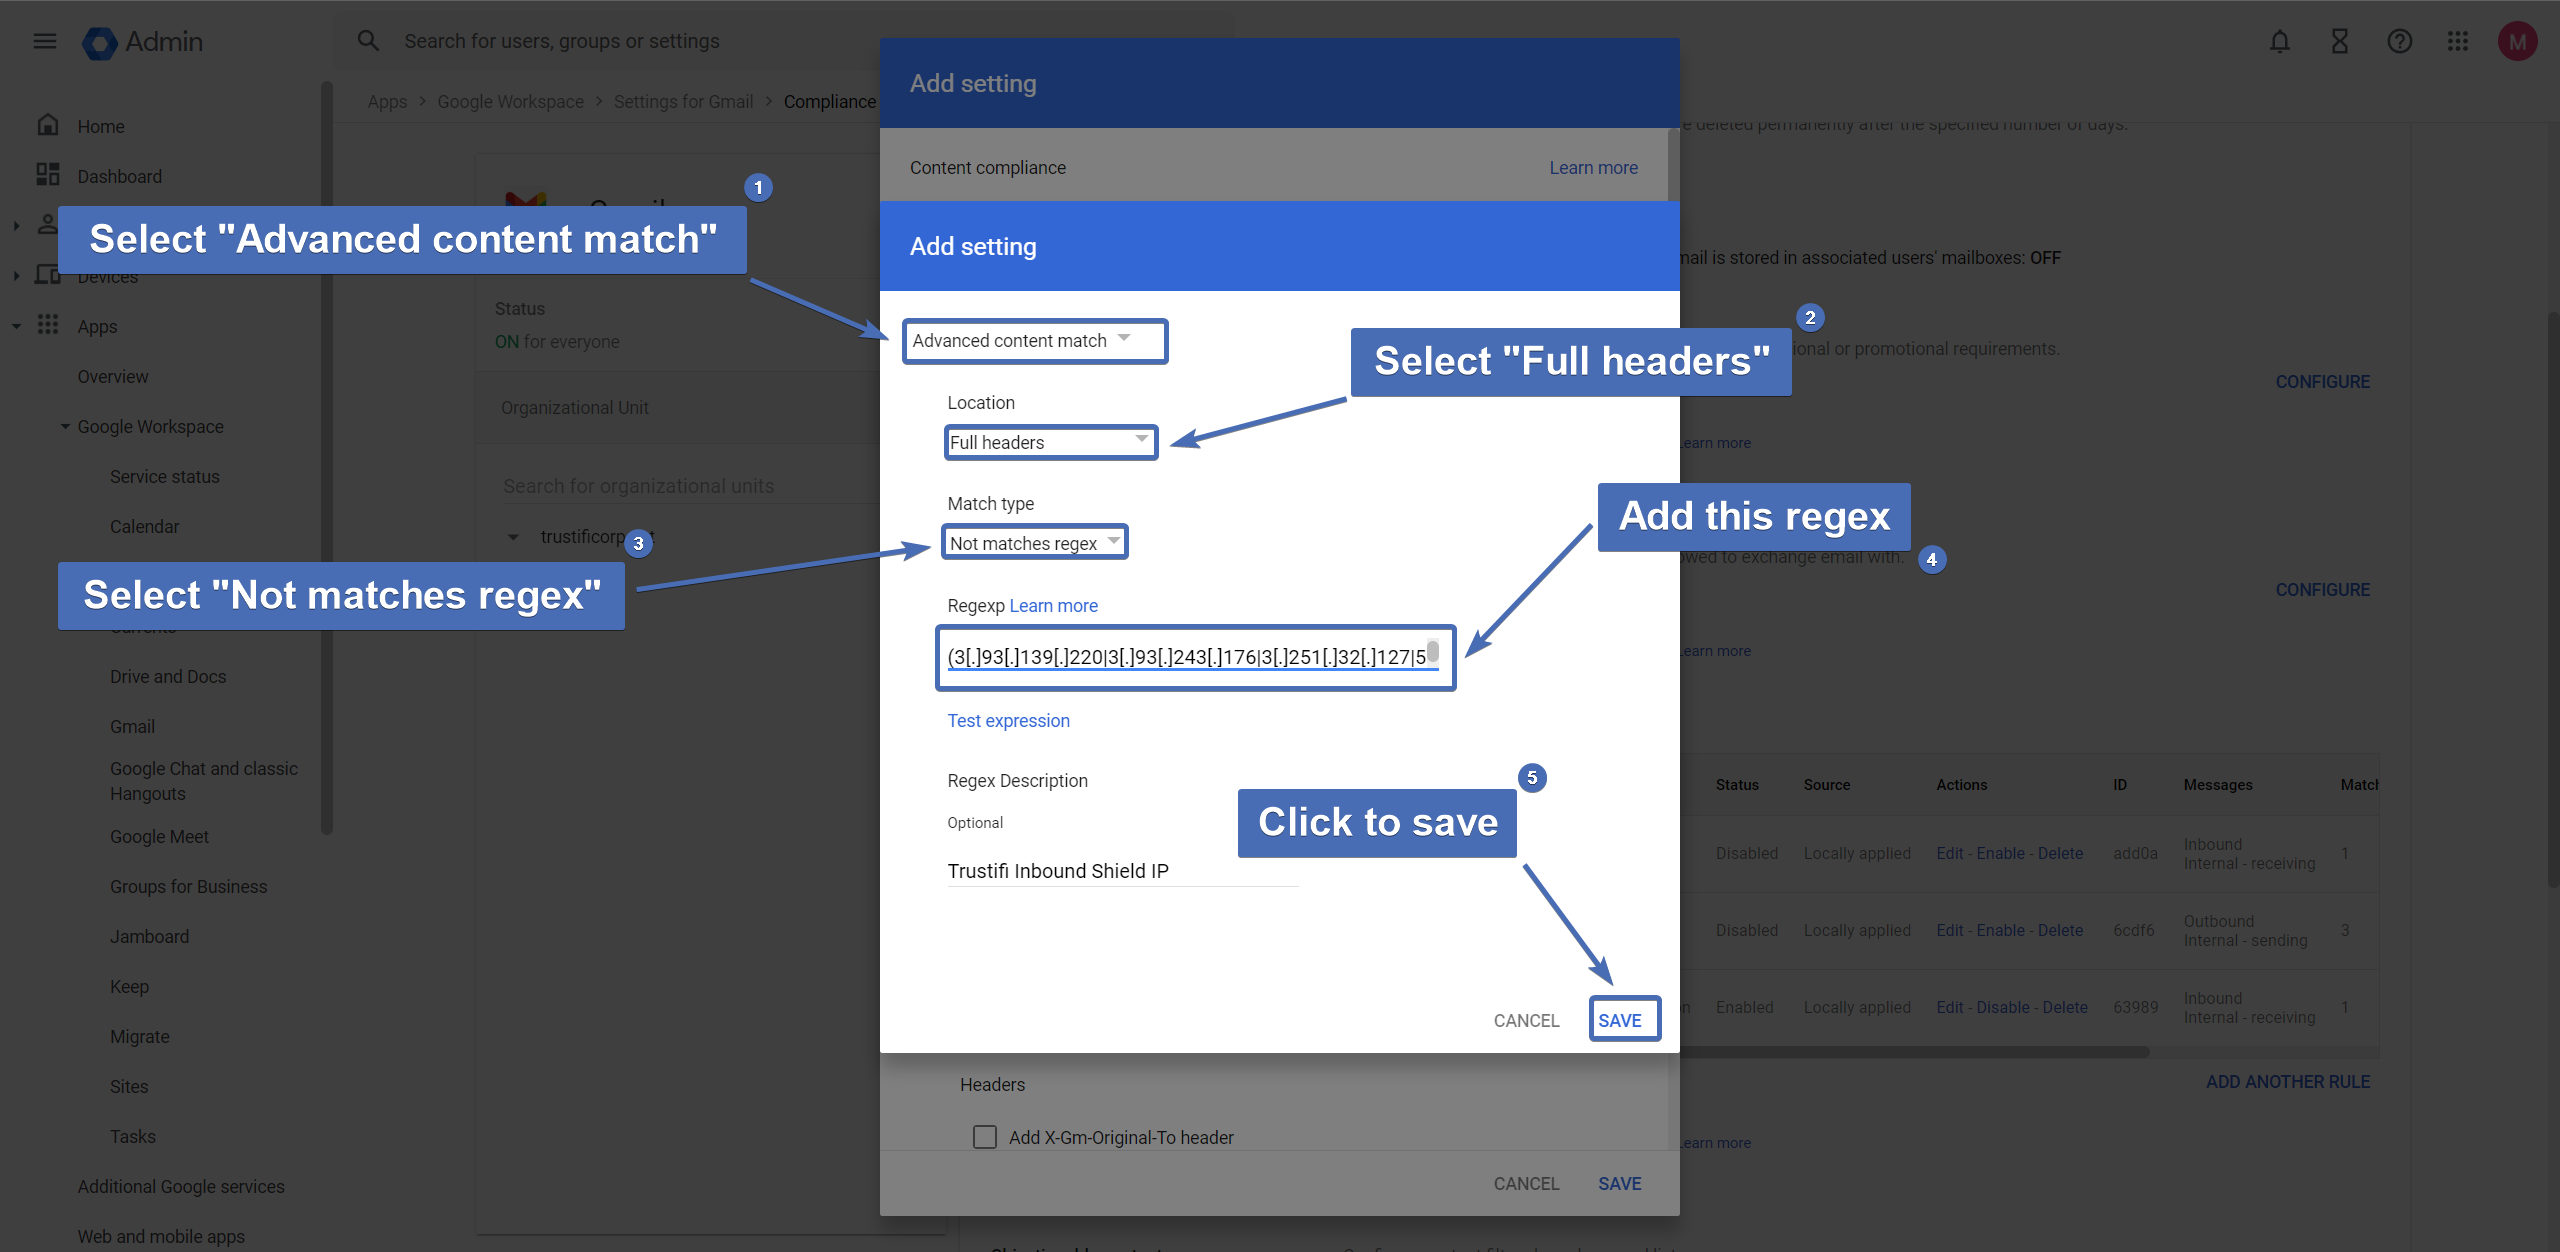
Select “Advanced content match“
Under “Location“, select “Full headers“
Under “Match type“, select “Not matches regex“
Add this regex (without the quote marks) –
“^Received[:].+(3[.]93[.]139[.]220|3[.]93[.]243[.]176|3[.]251[.]32[.]127|54[.]195[.]145[.]1|52[.]89[.]220[.]23|52[.]37[.]228[.]167|52[.]54[.]159[.]237|52[.]73[.]143[.]252)”Click “Save“
Step 14 – Modifying the message
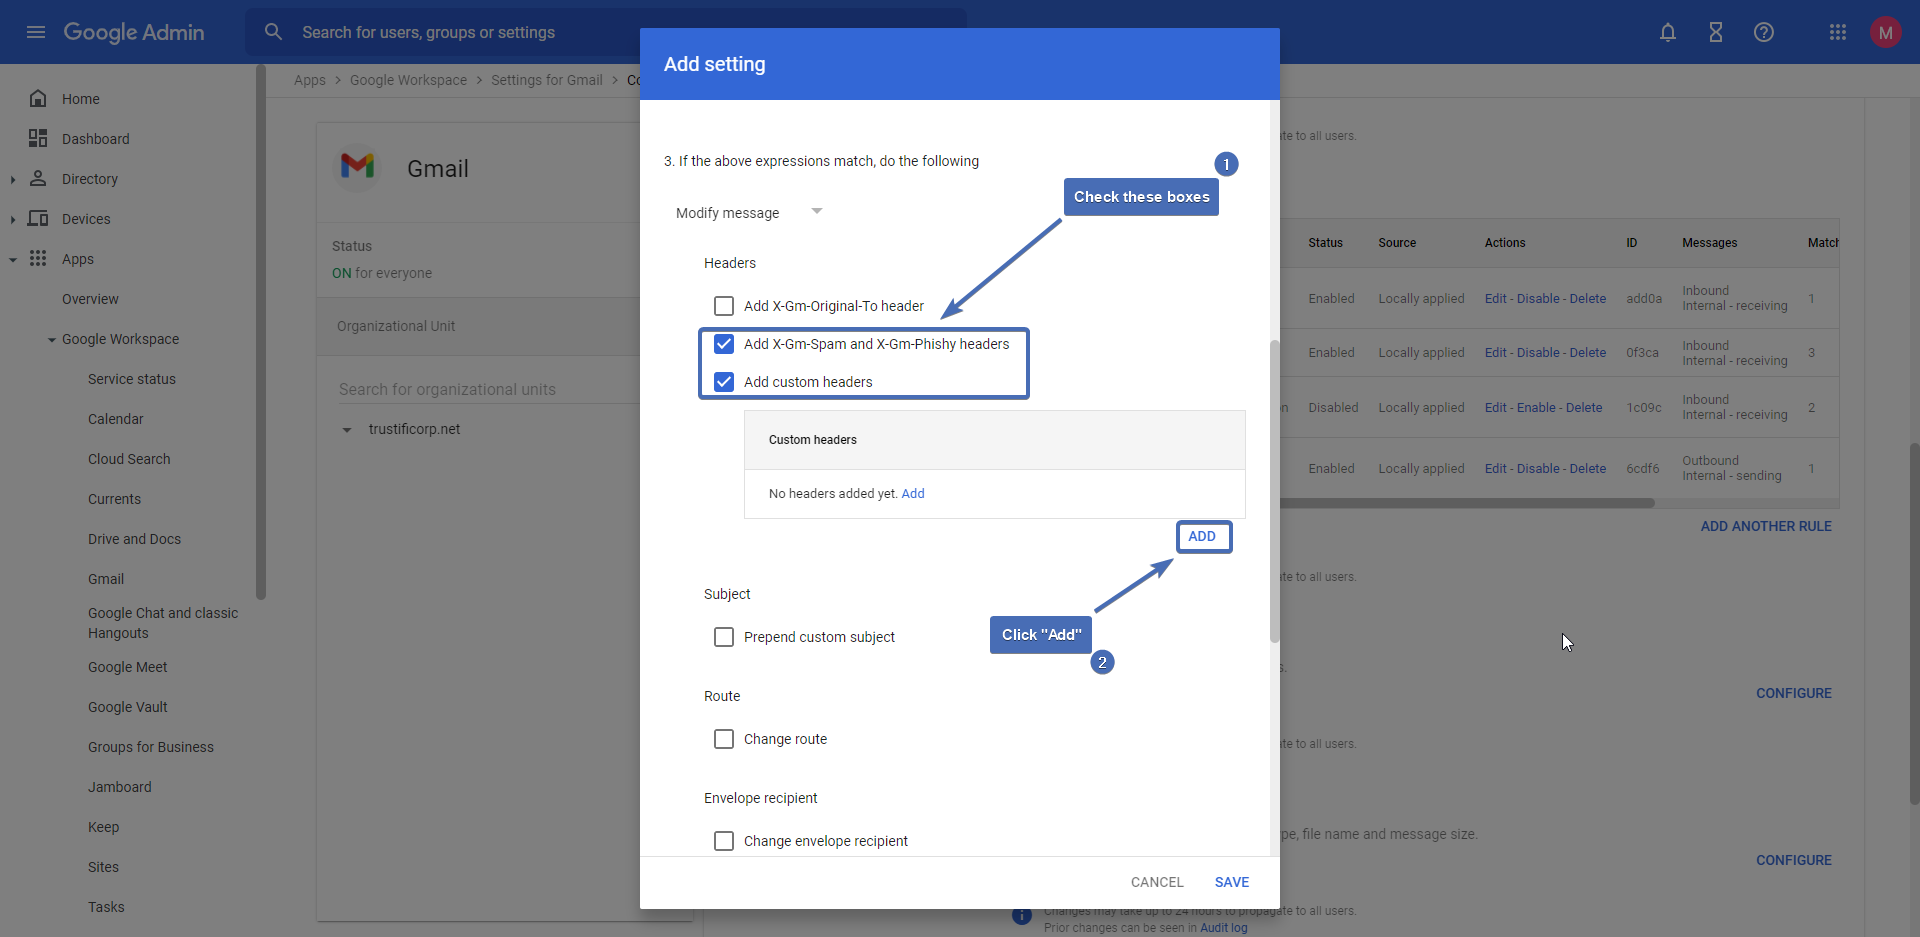
In section 3, check the boxes for “Add X-Gm-Spam and X-Gm-Phishy headers” and “Add custom headers“.
Then, click on “Add” to add the custom header.
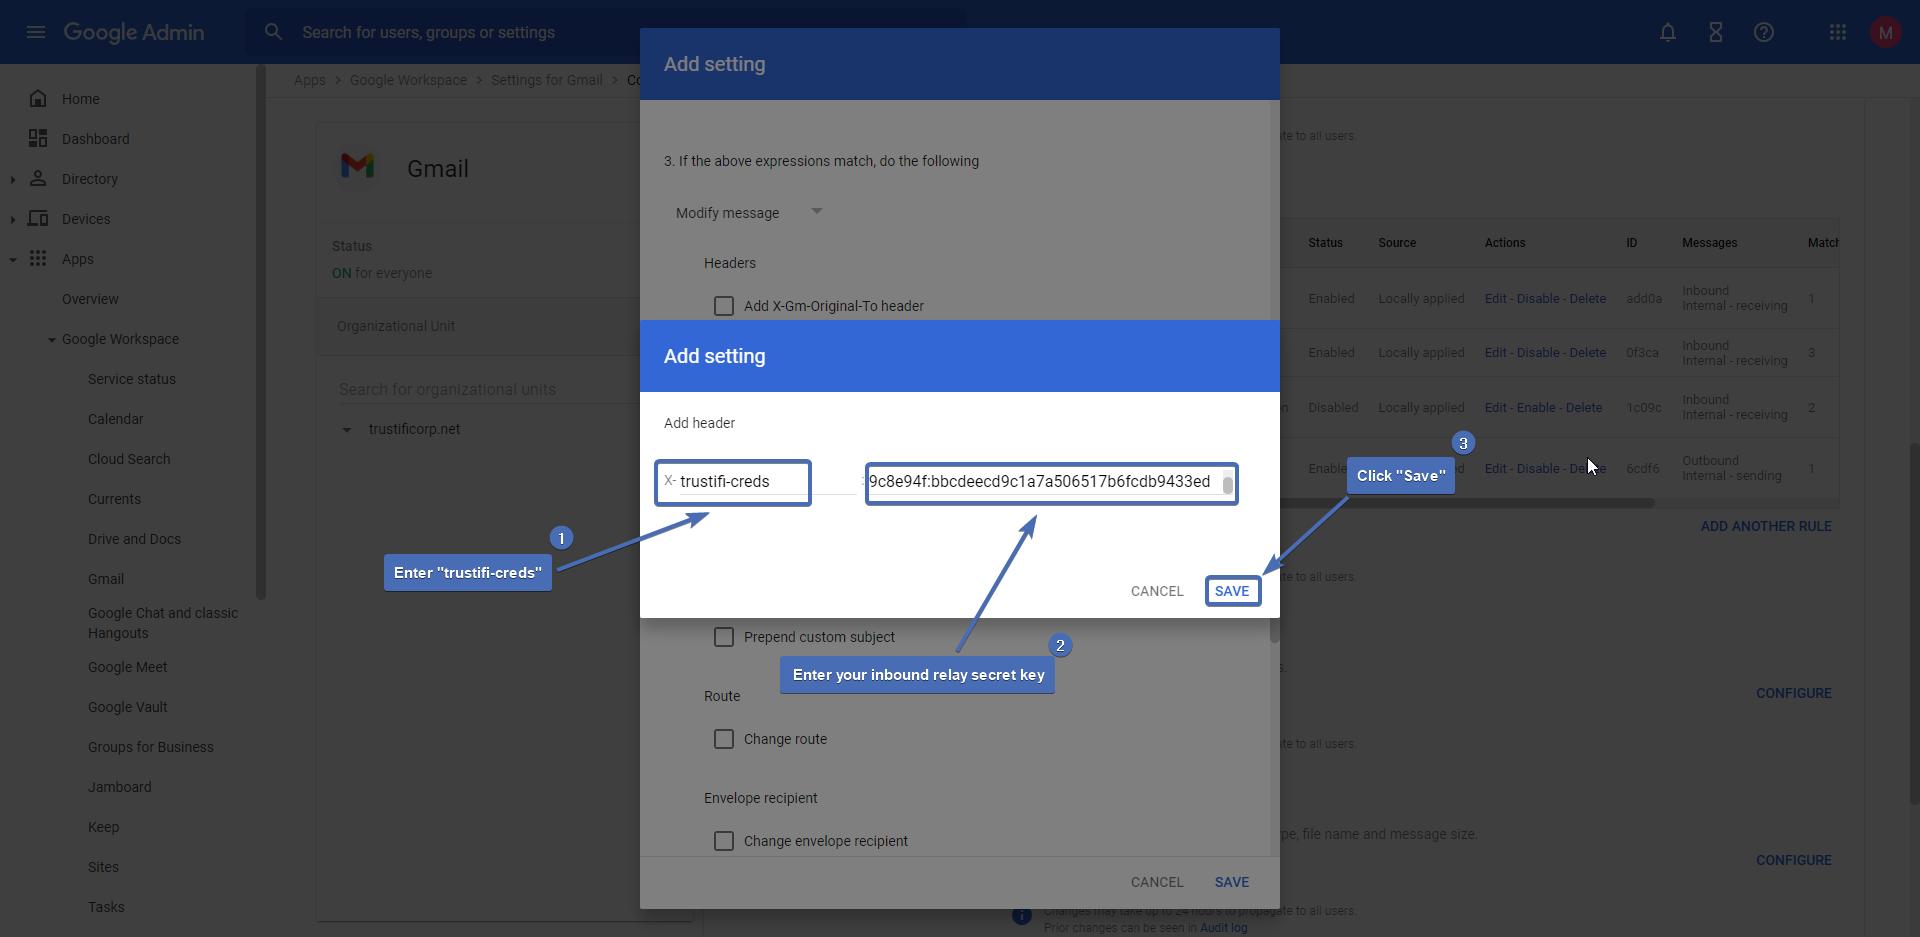
Step 15 – Setting the custom header
For the header key, enter “trustifi-creds“.
Note: the full header value is “x-trustifi-creds”. However, since Google add the initial “X” by default, it’s important to only add the value “trustifi-creds” here to avoid a malformed header.
For the header value, use the Inbound Relay secret key you copied from the Trustifi portal under “Inbound Management” > “Plan Settings” > “Email Relay Integration“.
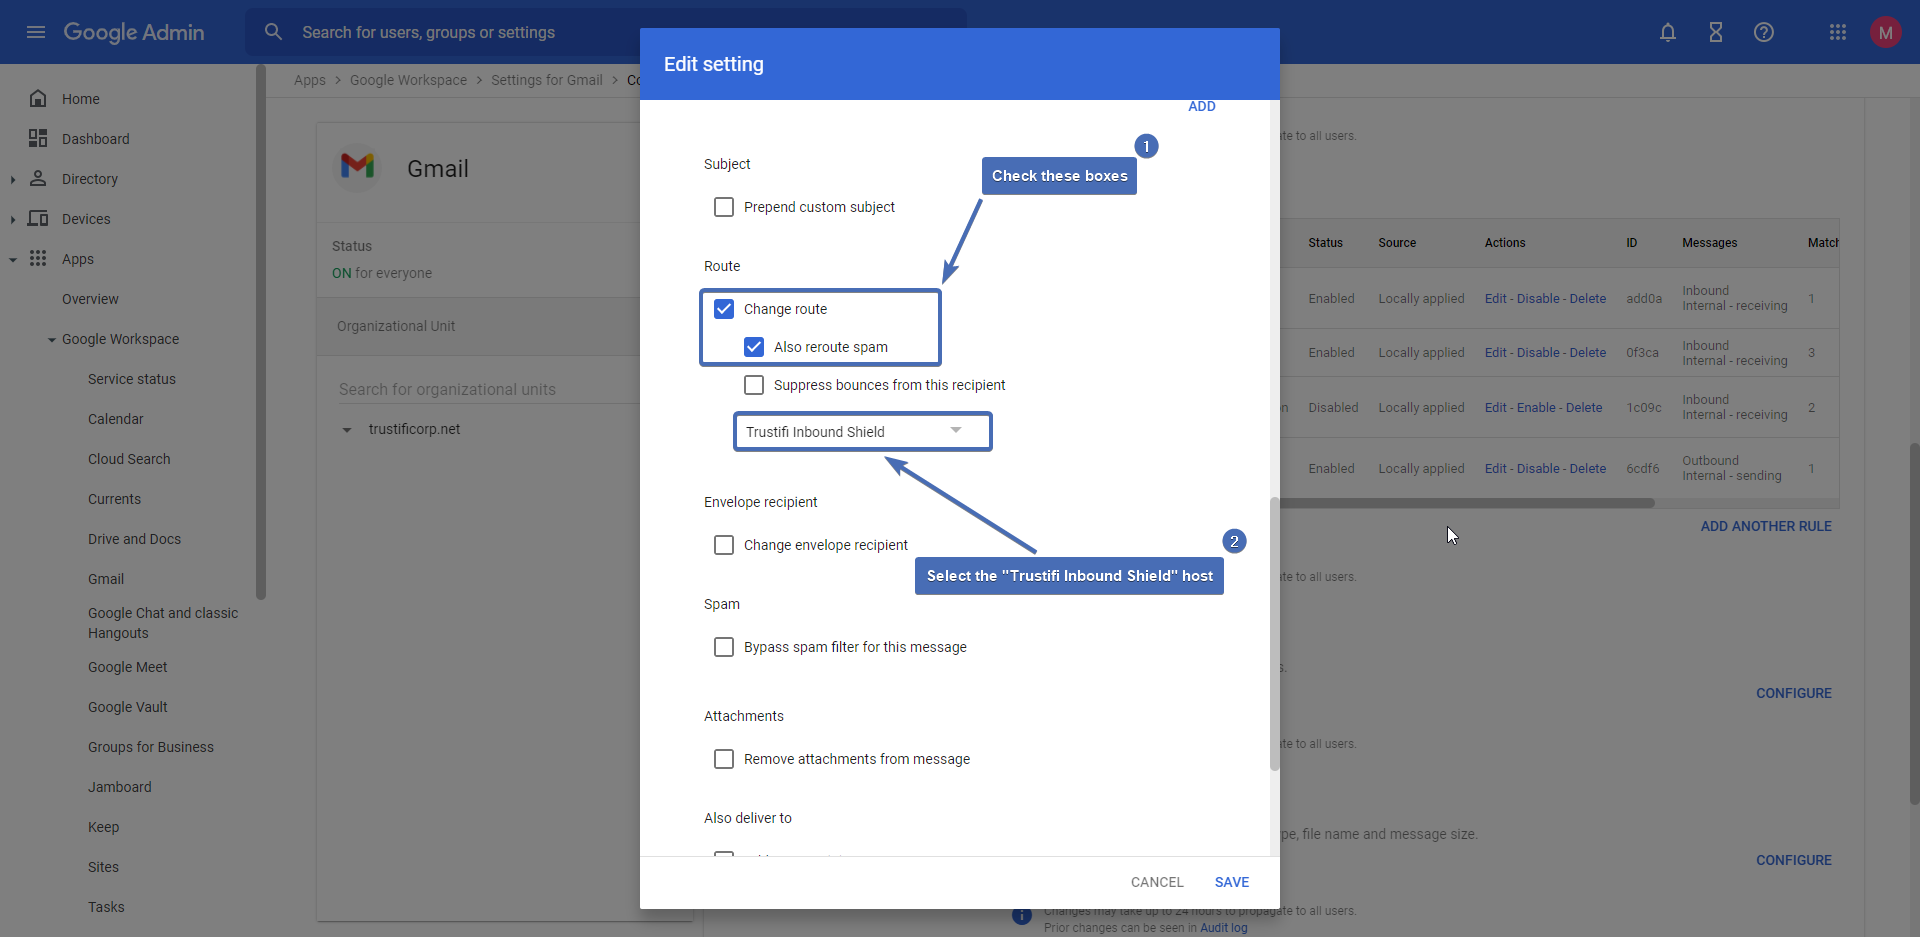
Step 16 – Setting the route
Under “Route“, check the boxes for “Change route” and “Also reroute spam“.
Set the routing host to “Trustifi Inbound Shield” (which was created earlier).
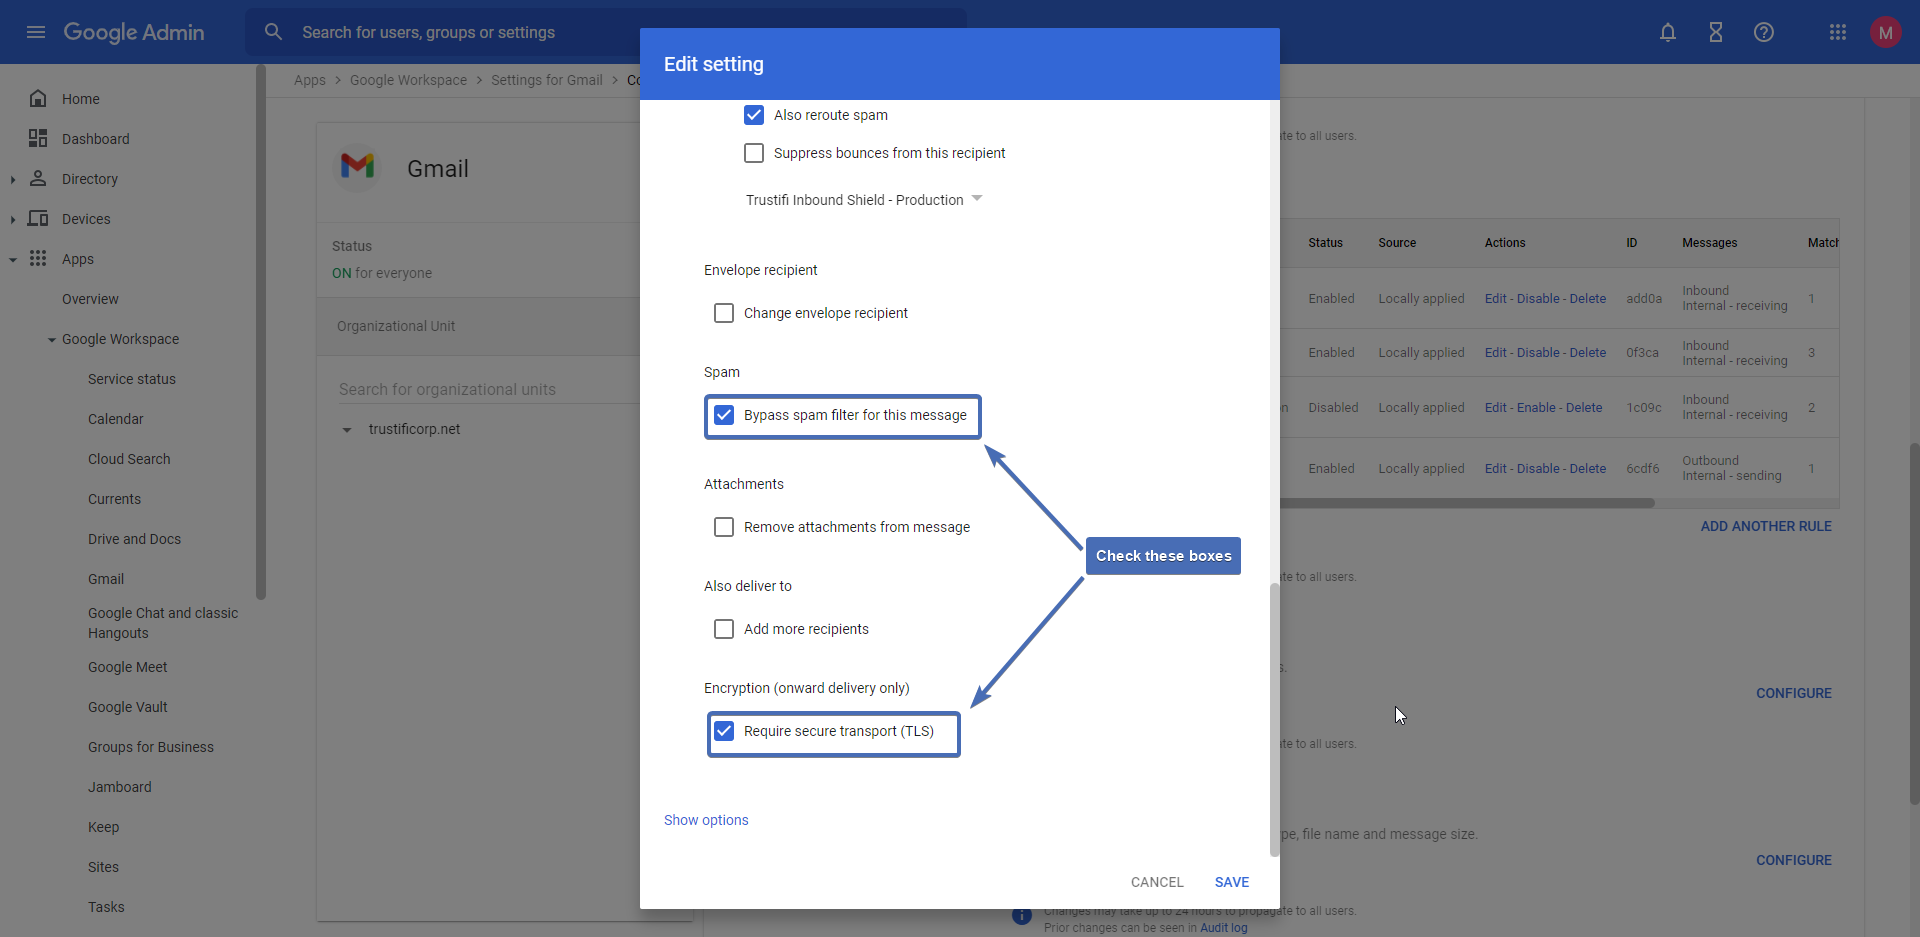
Step 17 – Bypass spam and require TLS
Check the boxes for “Bypass spam filter for this message” and “Require secure transport (TLS)“.
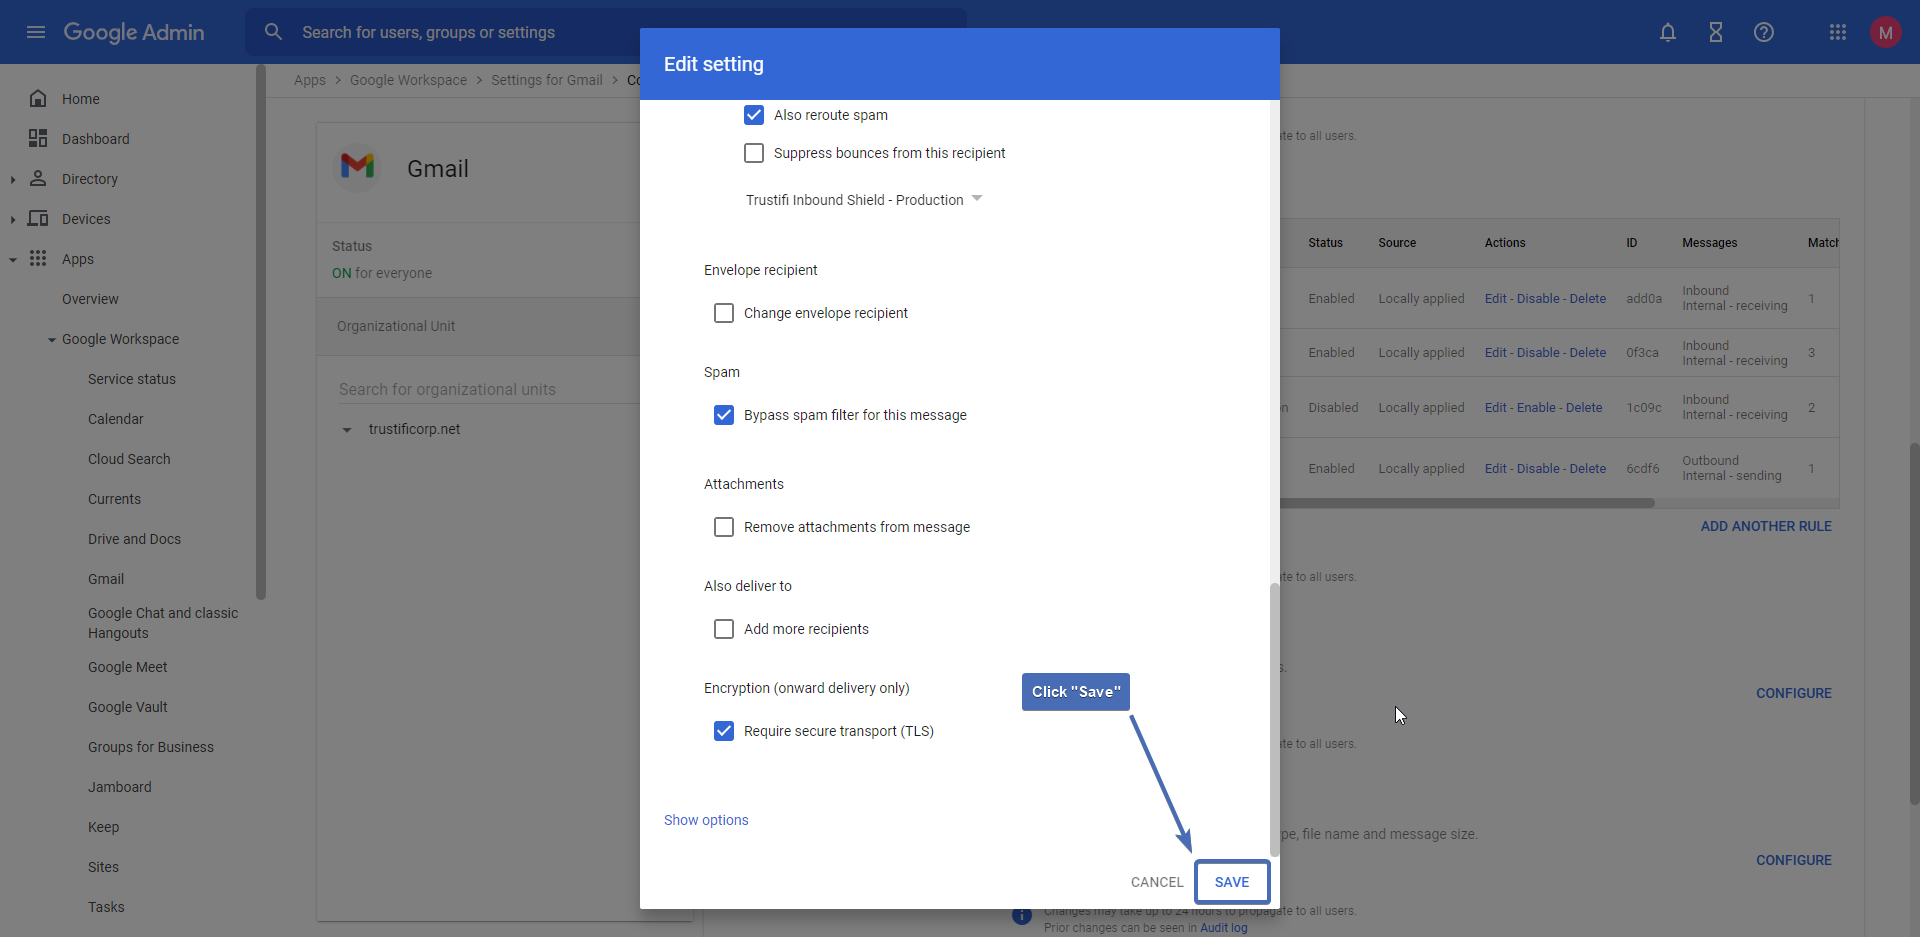
Step 18 – Saving the routing rule
Click on “Save” at the bottom right corner to save the routing rule.
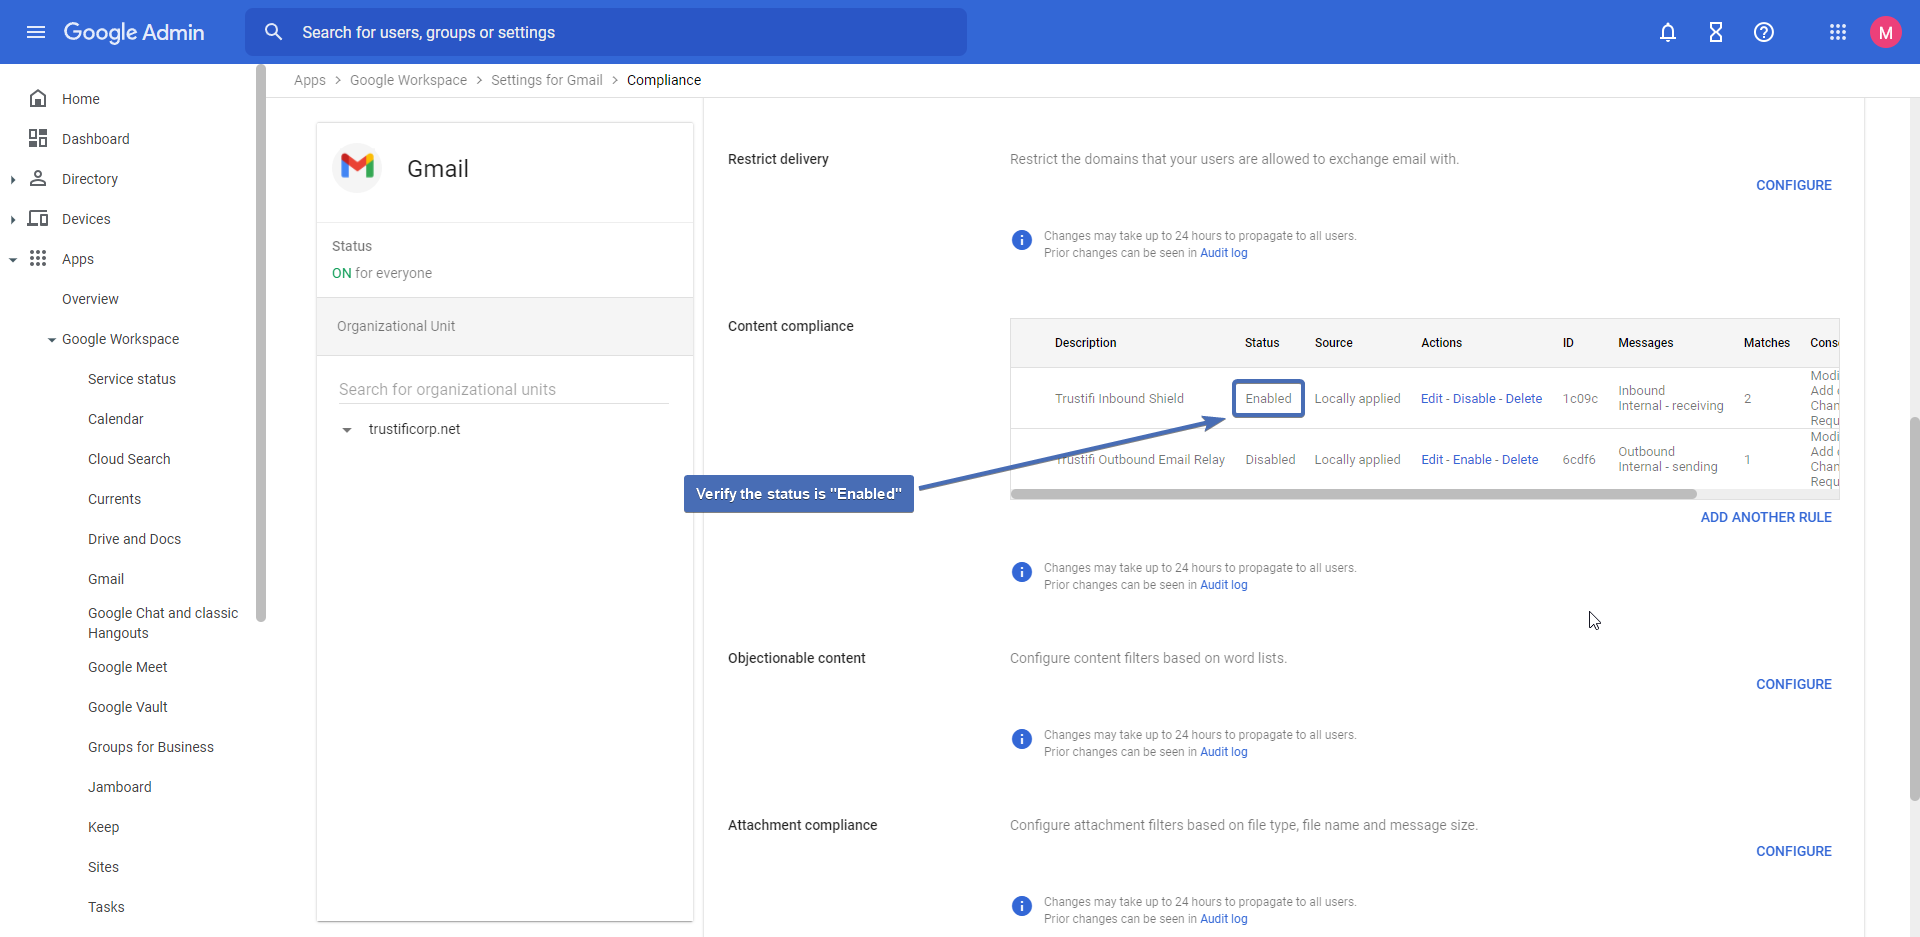
Step 19 – Verifying the routing rule
After the routing rule is saved, verify it was saved correctly and that the status is showing “Enabled“.
Step 20 – Adding the Trustifi IP set to your SPF record
To make sure incoming emails will not be tagged as spam/phishing by Google after being routed through the Trustifi relay, it is highly recommended to add the following IPs to your domain’s SPF record:
3.93.243.176
3.93.139.220
3.251.32.127
54.195.145.1
52.37.228.167
52.89.220.23
52.73.143.252
52.54.159.237
Note: This step is not strictly mandatory, but we recommend it to avoid disruption of mail flow.
Step 21 – Bypassing default Google protections
After finishing the deployment of Trustifi’s inbound relay in Google, we highly recommend disabling or modifying some of Google’s default protection policies.
To bypass these settings and policies, view our guide here: