After connecting to Trustifi’s inbound relay, you may choose to disable and/or bypass Microsoft Defender’s default protection settings. This would typically be for 2 main reasons:
To avoid having emails quarantined in Microsoft after already being released from Trustifi
To maintain one, centralized quarantine management platform in Trustifi instead of having to also monitor the Microsoft quarantine
We offer the following combined approach for this solution.
Disabling Microsoft Defender protections
Trustifi has developed an automated wizard to help disable the default Microsoft Defender protections. To perform this process, follow these steps:
In the Trustifi admin portal, navigate to “Inbound Management” > “Plan Settings” > “Integrations“ tab.
And click on “Connect” button in the “Exchange Server PowerShell” section.
.png)
After the “Connect” button is clicked, A popup will be opened, click on the “Connect” button inside the popup
In the next step, you will need to select how you want to connect between your Exchange server and Trustifi.
Via Graph API (this connection is recommended), or via PowerShell script.
After you select a connection, click on “Next” button.
.png)
After the “Next” button is clicked you will be prompted by Microsoft to enter your Exchange admin credentials.
You may be asked if you want to allow Trustifi access to Exchange, to continue the process you will need to allow these permissions
.png)
After you click on “Accept” button, the integration process will begin
Note: This process may take a while, don't close the pop-up.
.png)
When the process has finished successfully, you will see a green confirmation text on the screen.
If you see an error instead, check the error description to understand what went wrong. Common reasons for failure are: (1) the selected admin account has insufficient permissions, or (2) API access is disabled in Exchange.
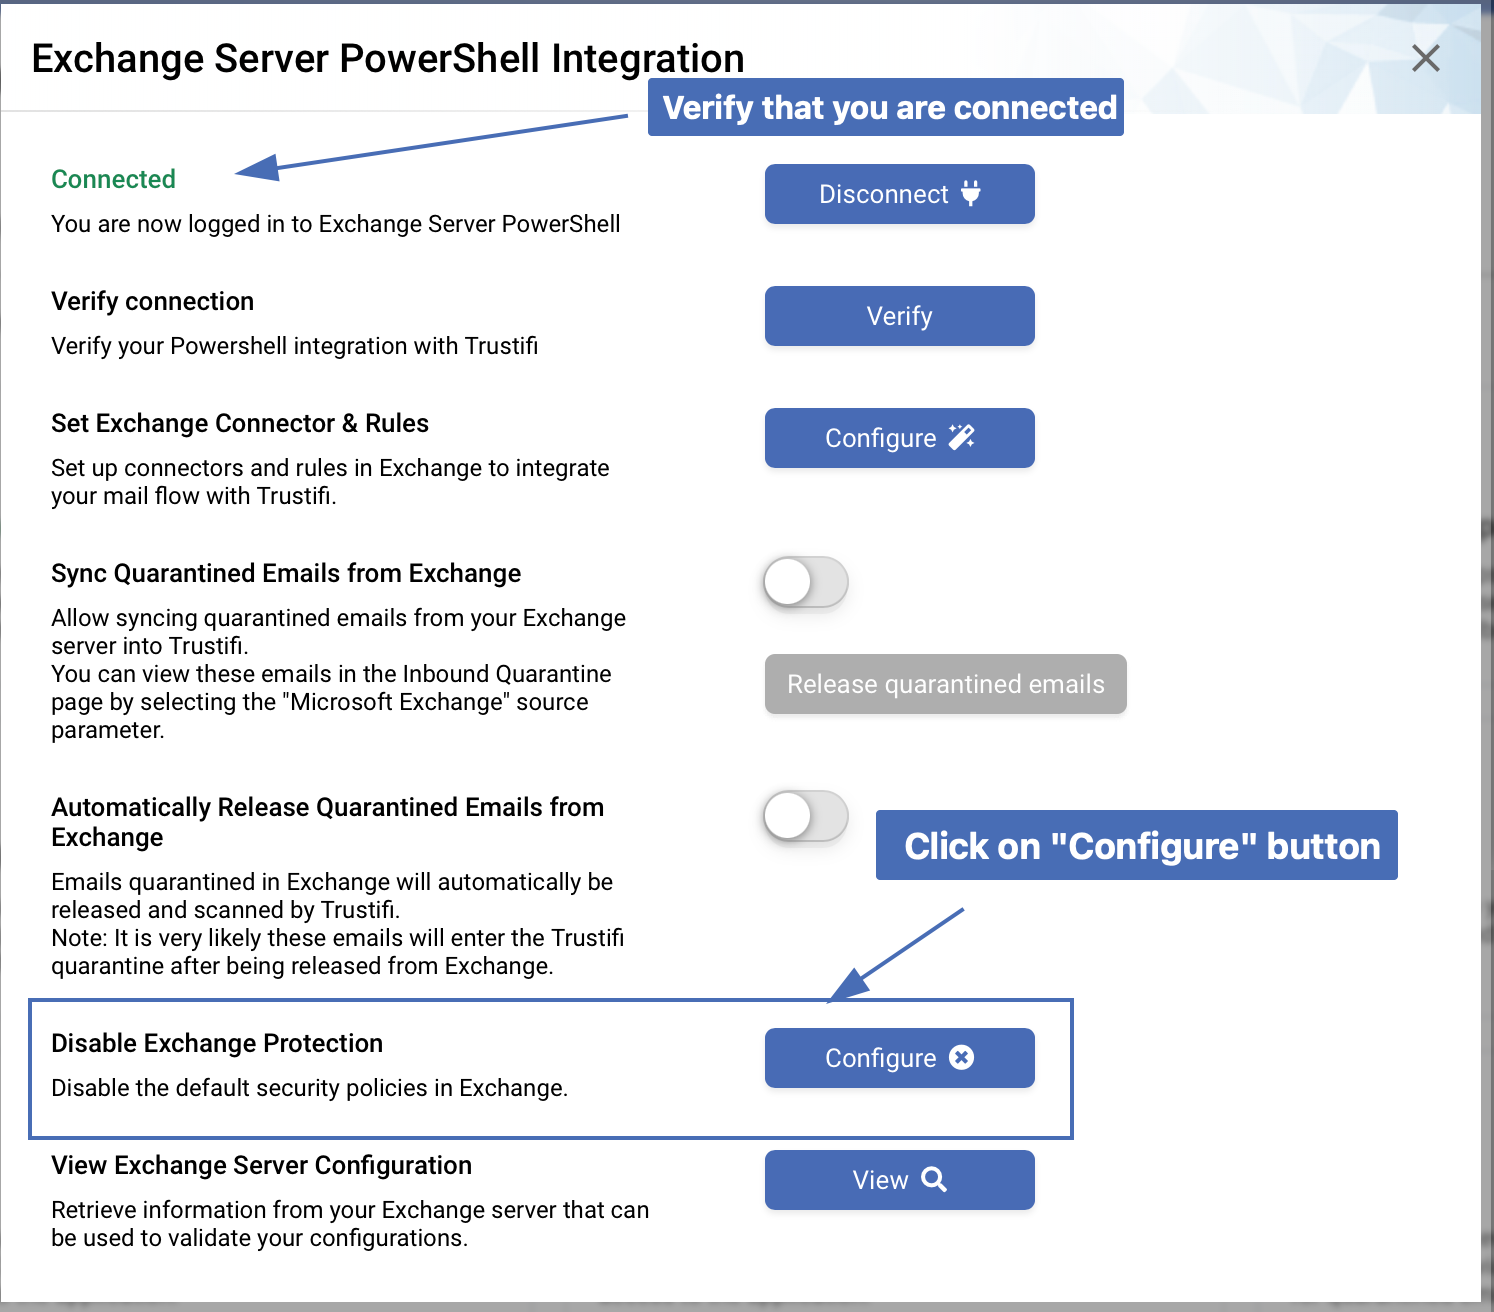
After you click “OK”, verify the status changed to “Connected” in the pop-up.
In the pop-up, you will have multiple actions that you can apply in Microsoft with explanations next to each action.
In the “Disable Exchange Protection” section Click on “Configure” button.
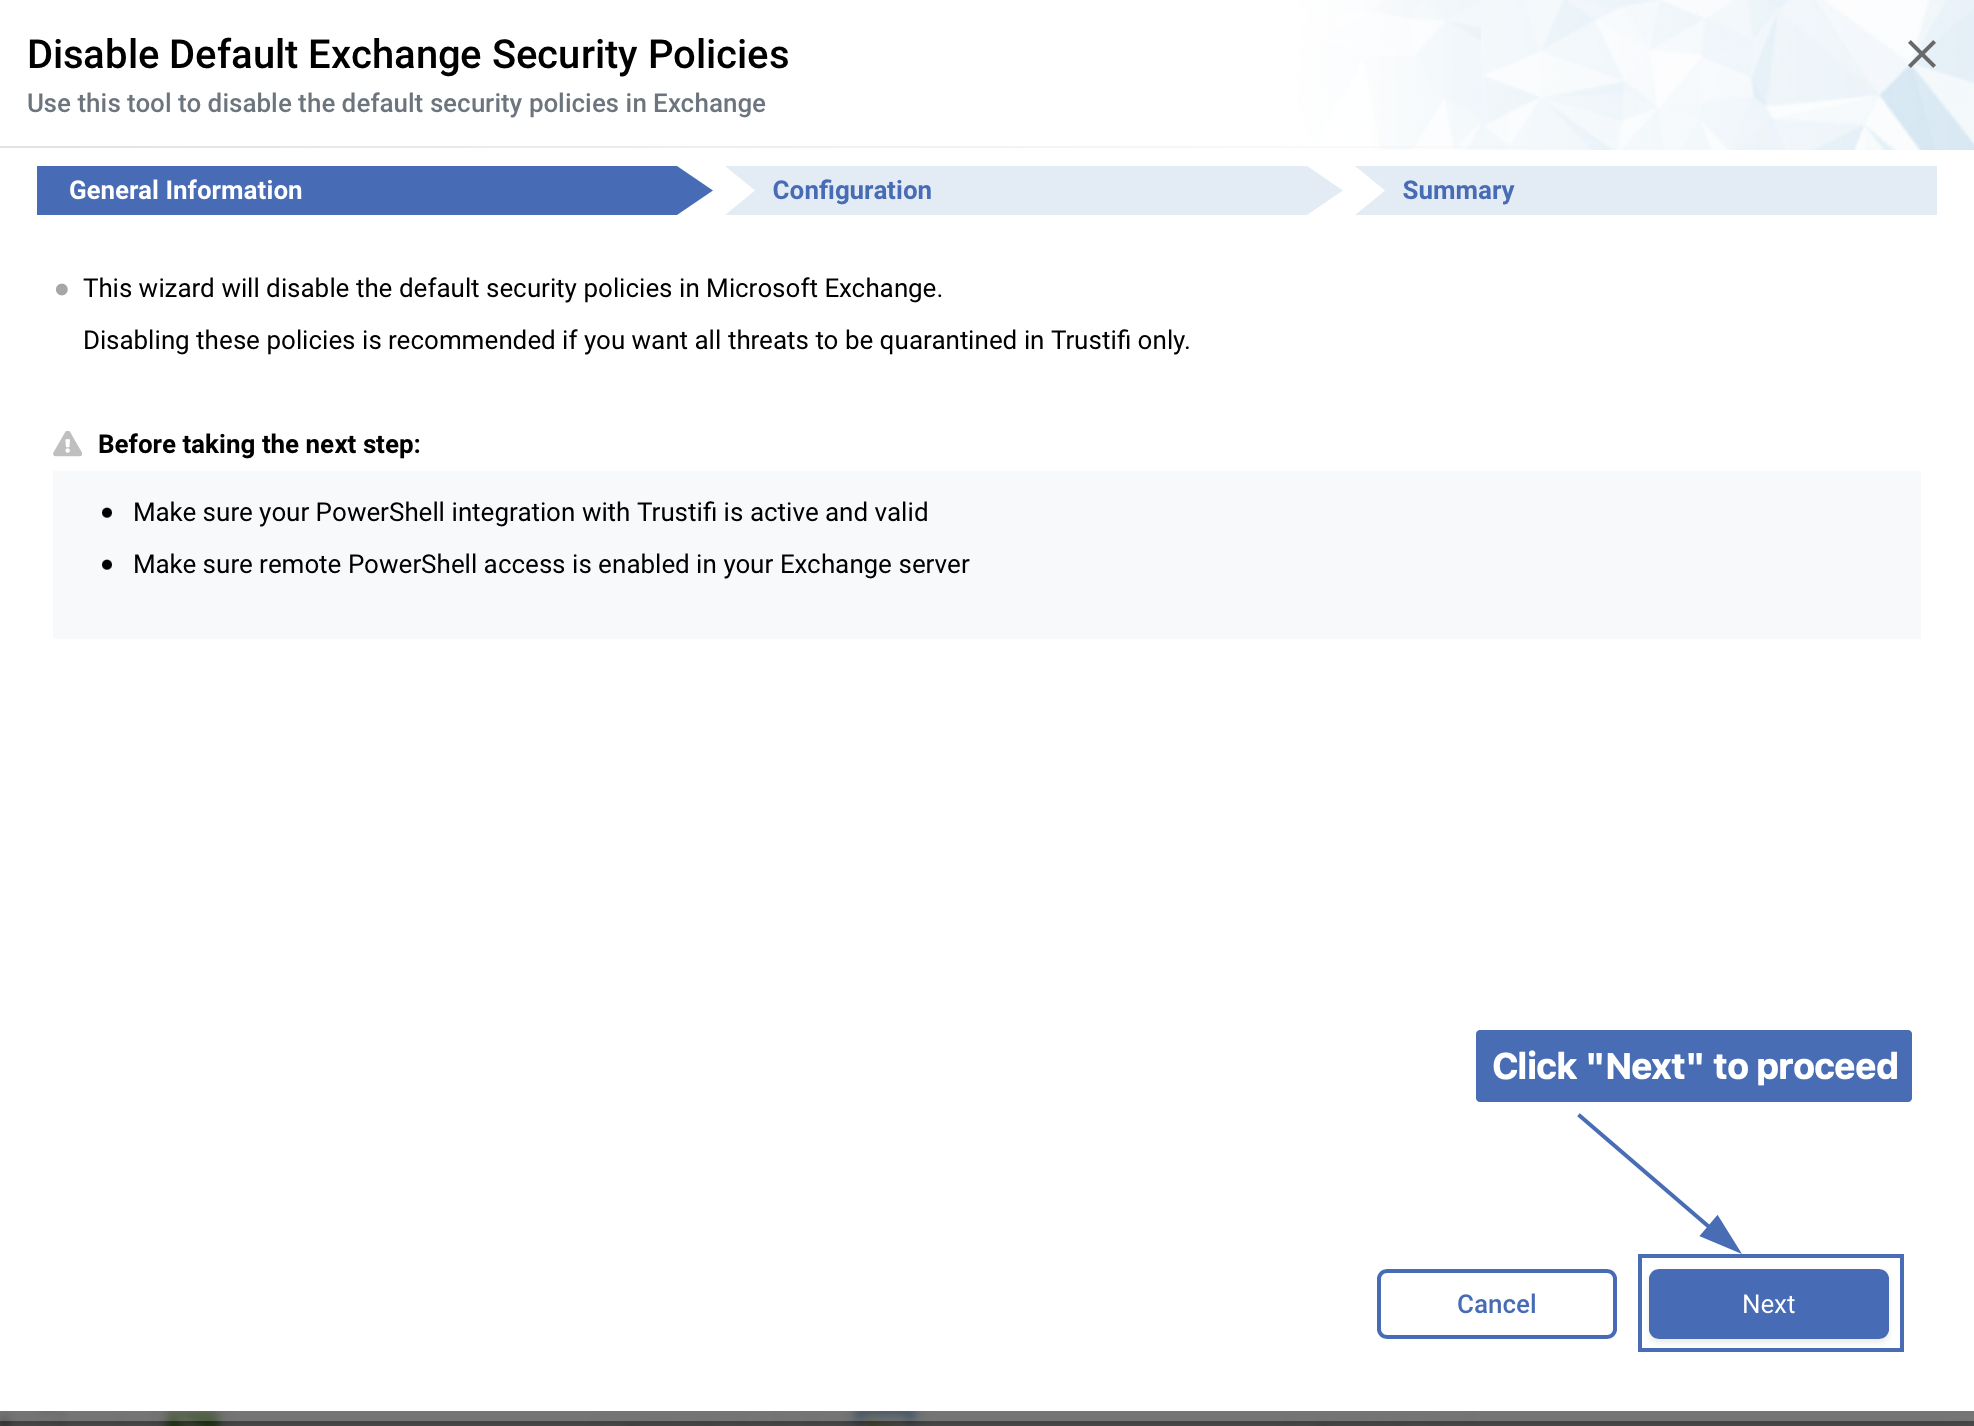
The “General Information” screen will display an explanation about the process you are about to perform.
Click "Next" to proceed.
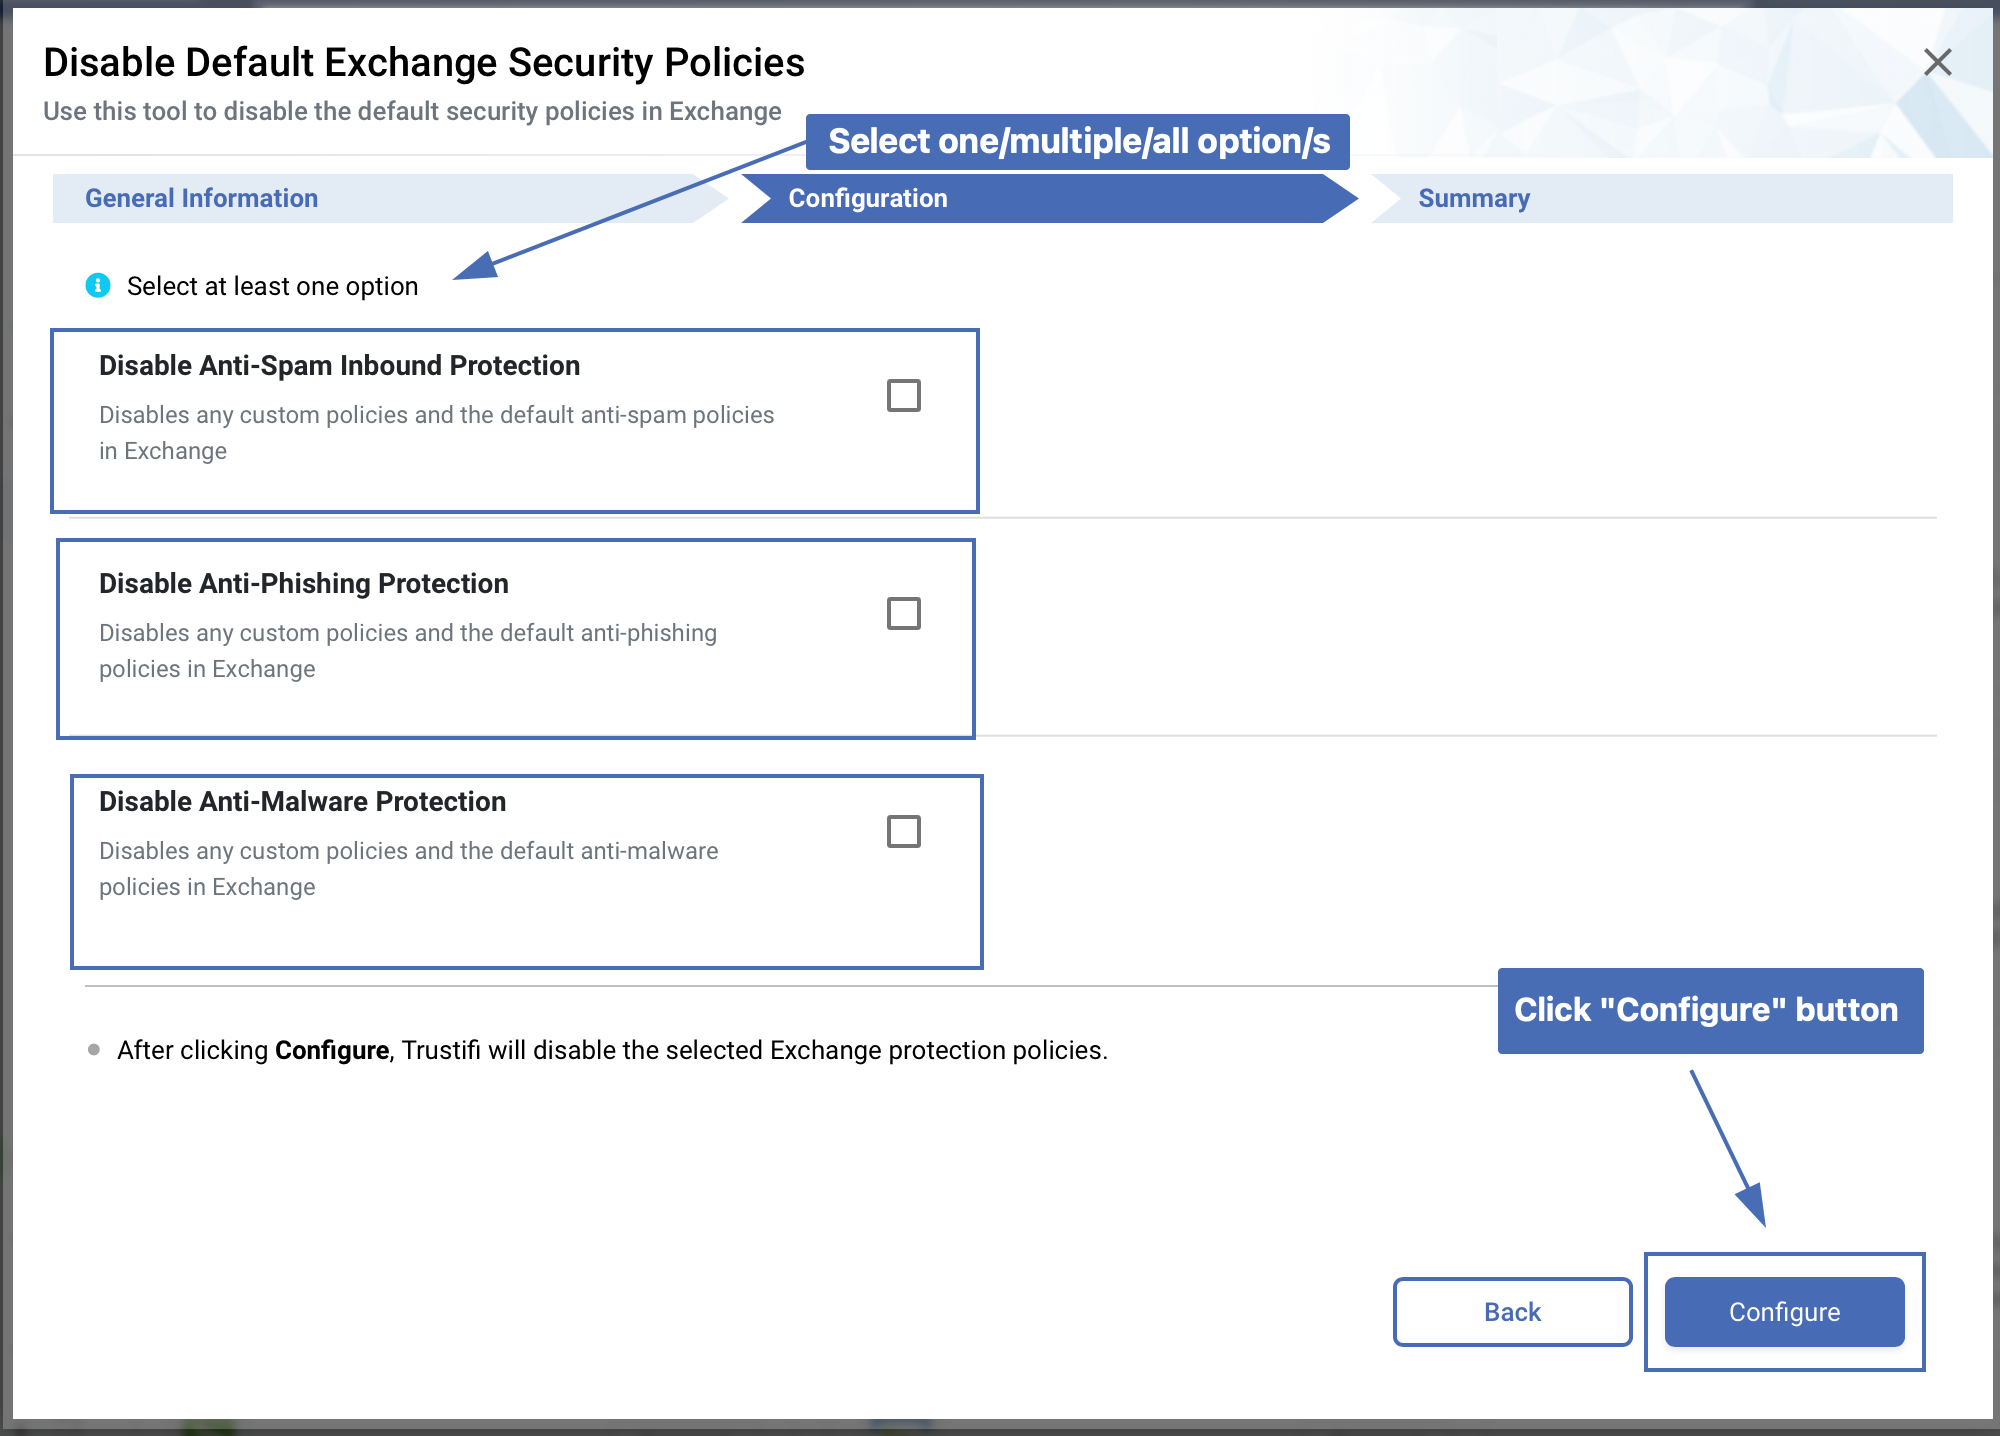
In the “Configuration” screen you will need to choose which policy you want to disable in Exchange.
Note: You need to select at least one option.
After you select the policies you want to disable, click the “Configure” button
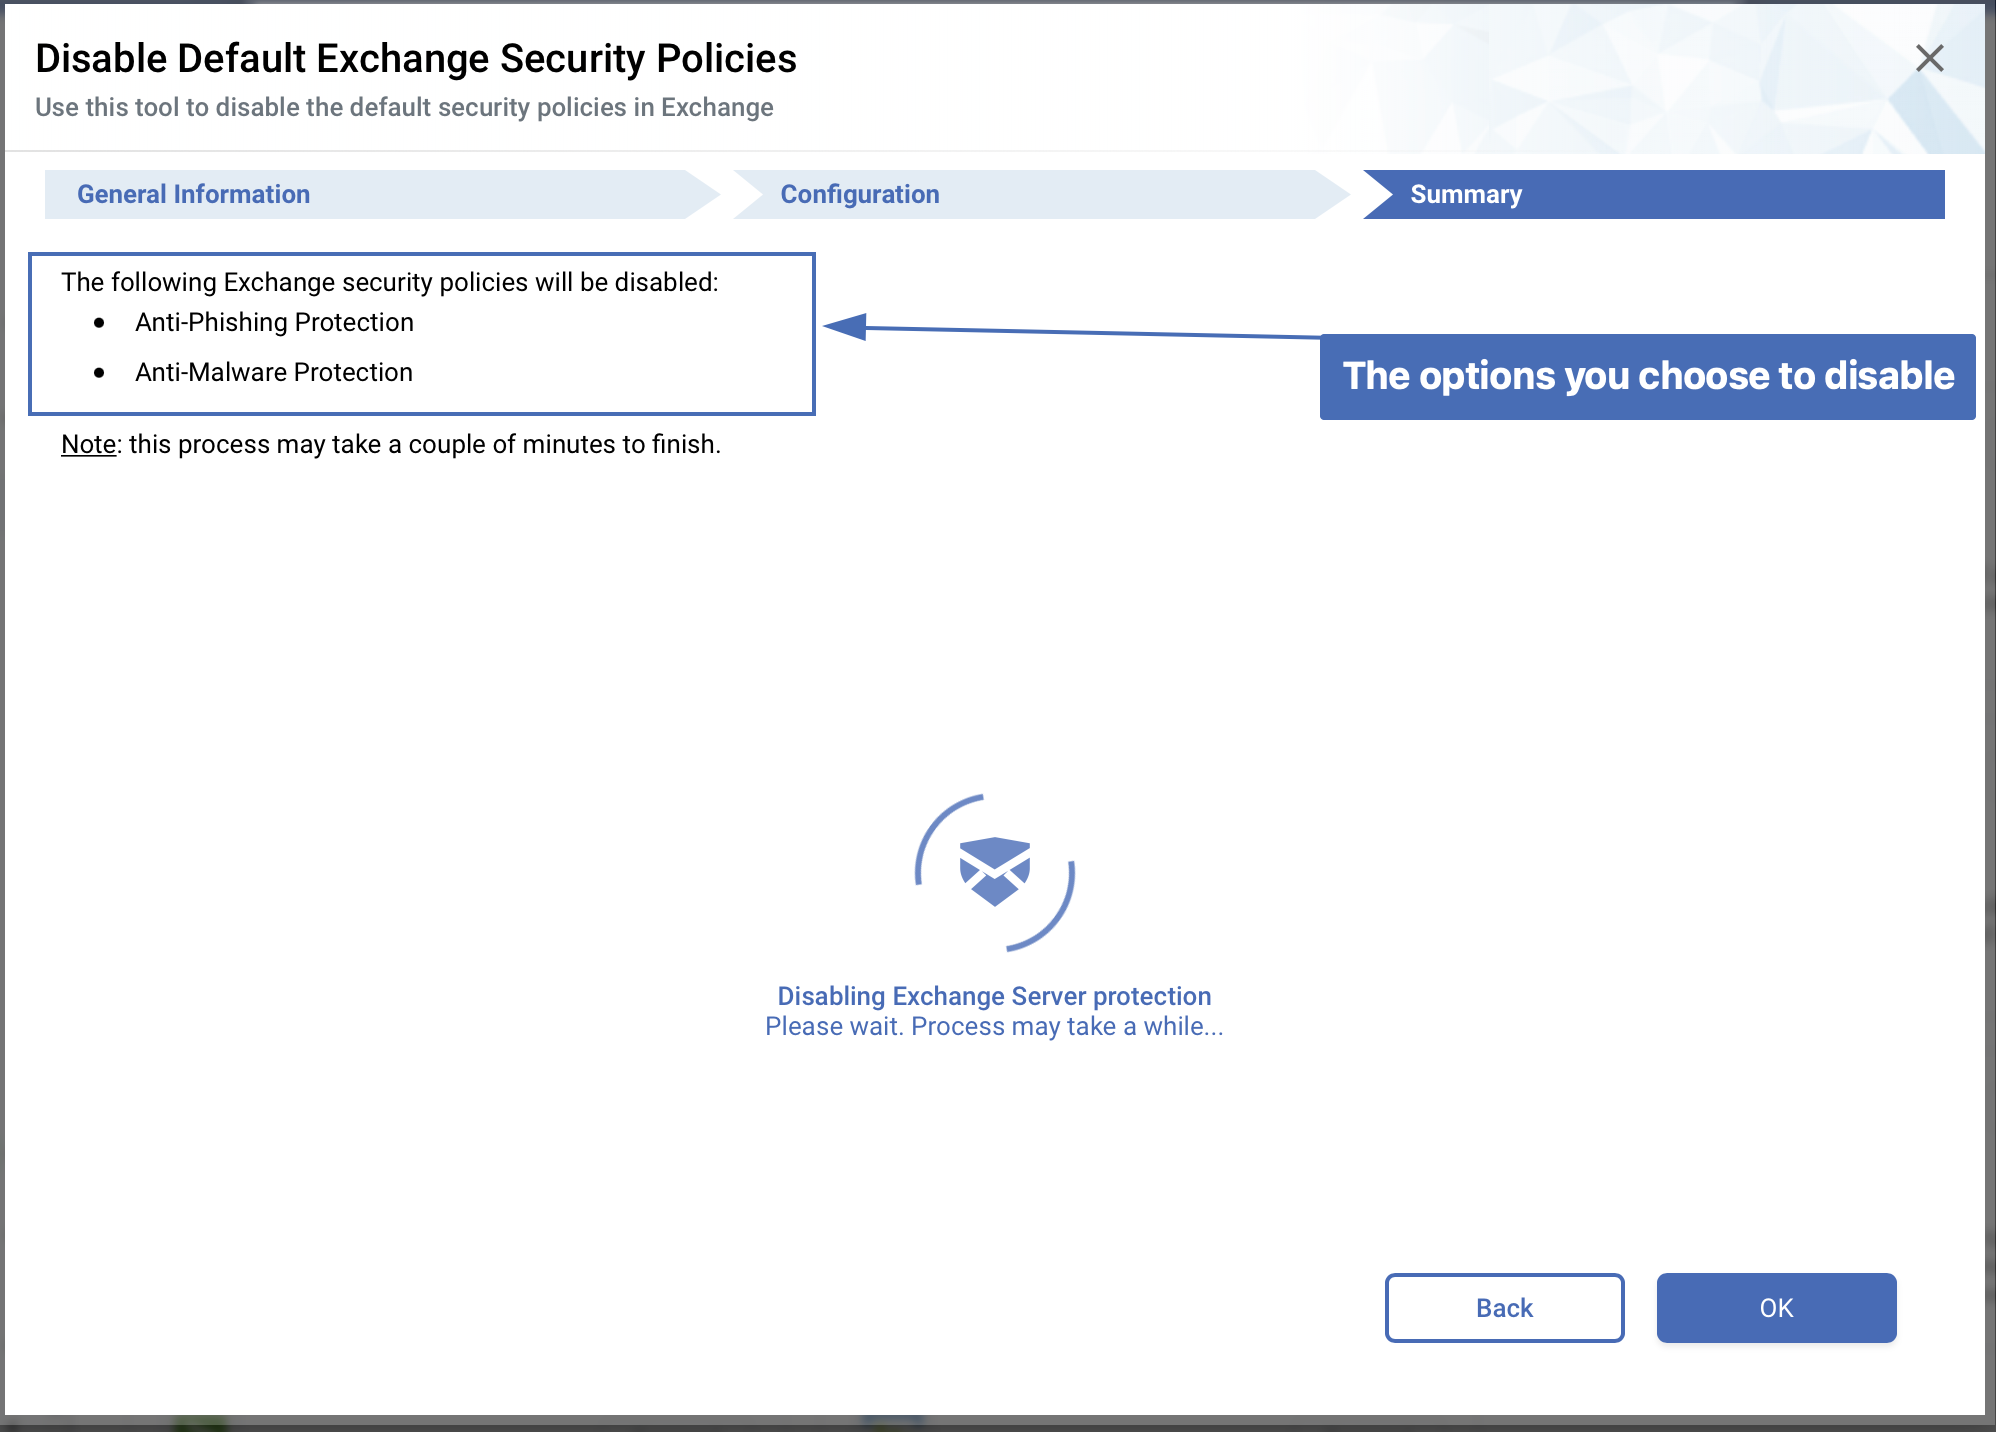
The “Summary” screen will display the policies you selected, while the process is applied in Exchange.
Note: This process may take a while, don't close the pop-up.
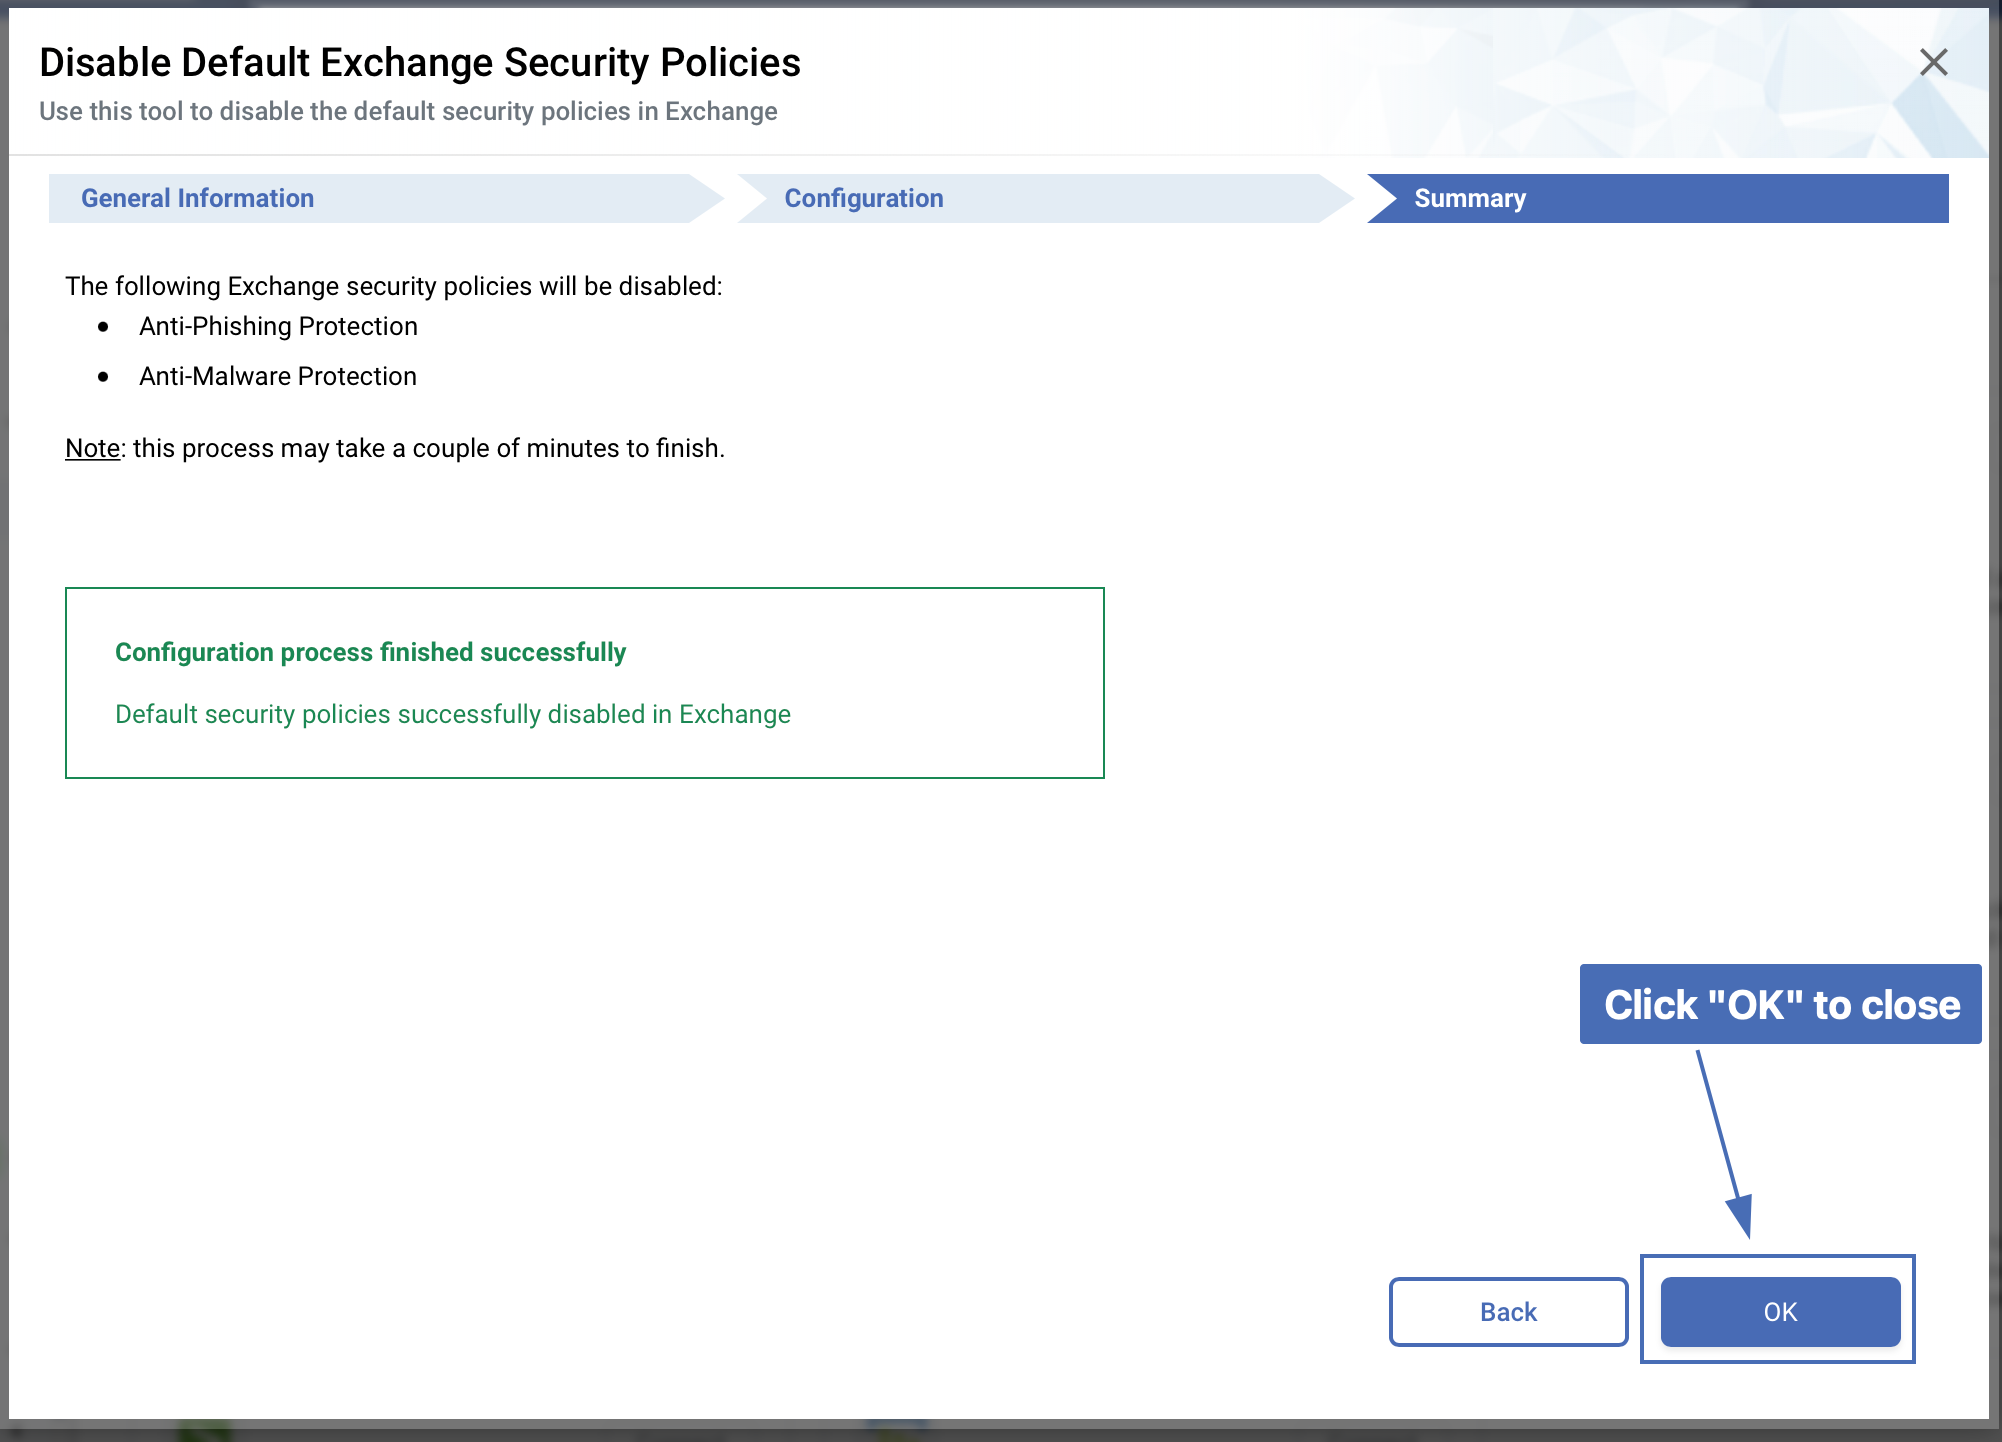
When the process has finished successfully, you will see a green confirmation text on the screen.
After you see the confirmation message on the screen, click “OK” to close this screen
Bypassing Microsoft clutter
After emails have finished being scanned by Trustifi and released back to Exchange, Microsoft may run additional scanning and processing on the email via the “clutter” mechanism.
This process can delay emails being received or even cause emails to not arrive in the inbox. To avoid this, we recommend setting up a basic mail flow rule to avoid this. Follow these instructions to set up the rule:
Open the Mail Flow Rules page in the Exchange Admin Center.
Then, click to create a new rule.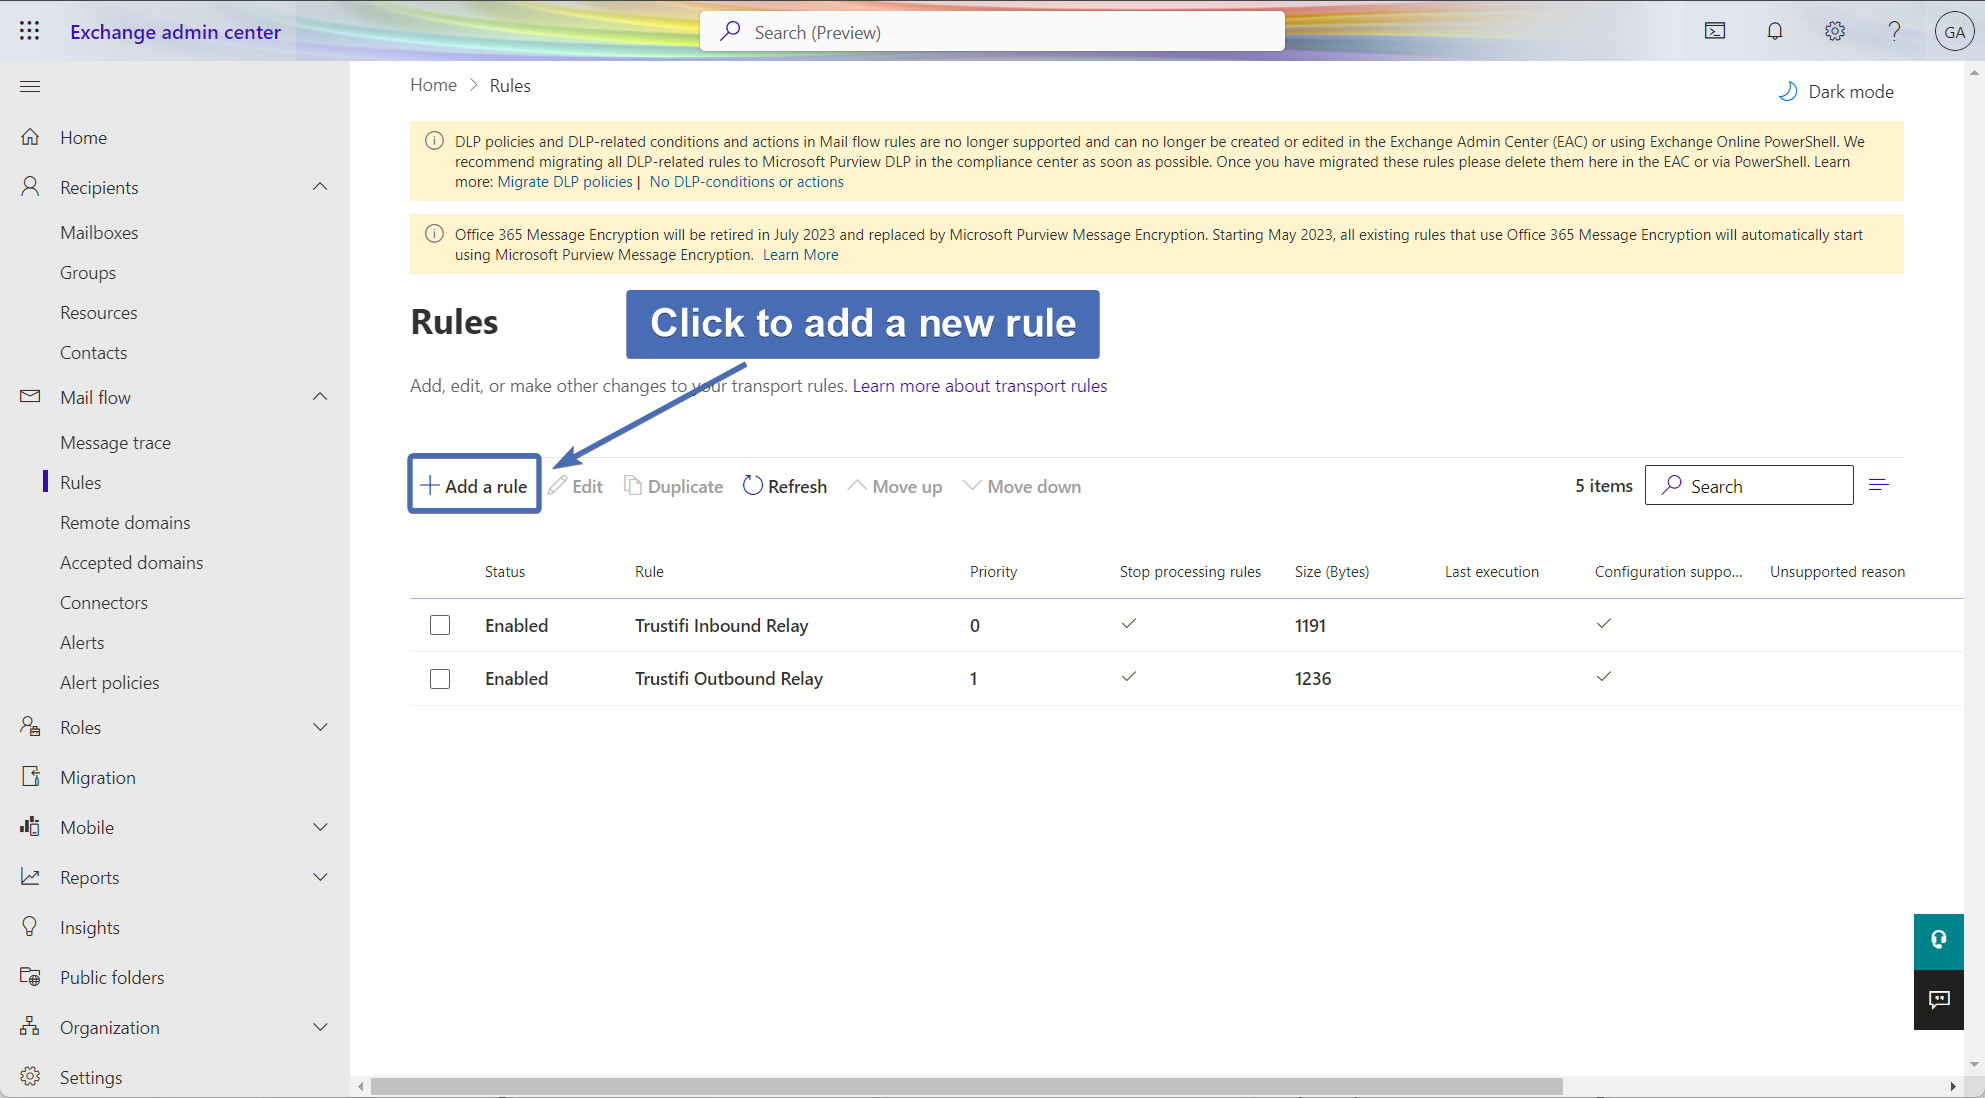
Give the rule a descriptive name, for example, “Trustifi Inbound Bypass Clutter”.
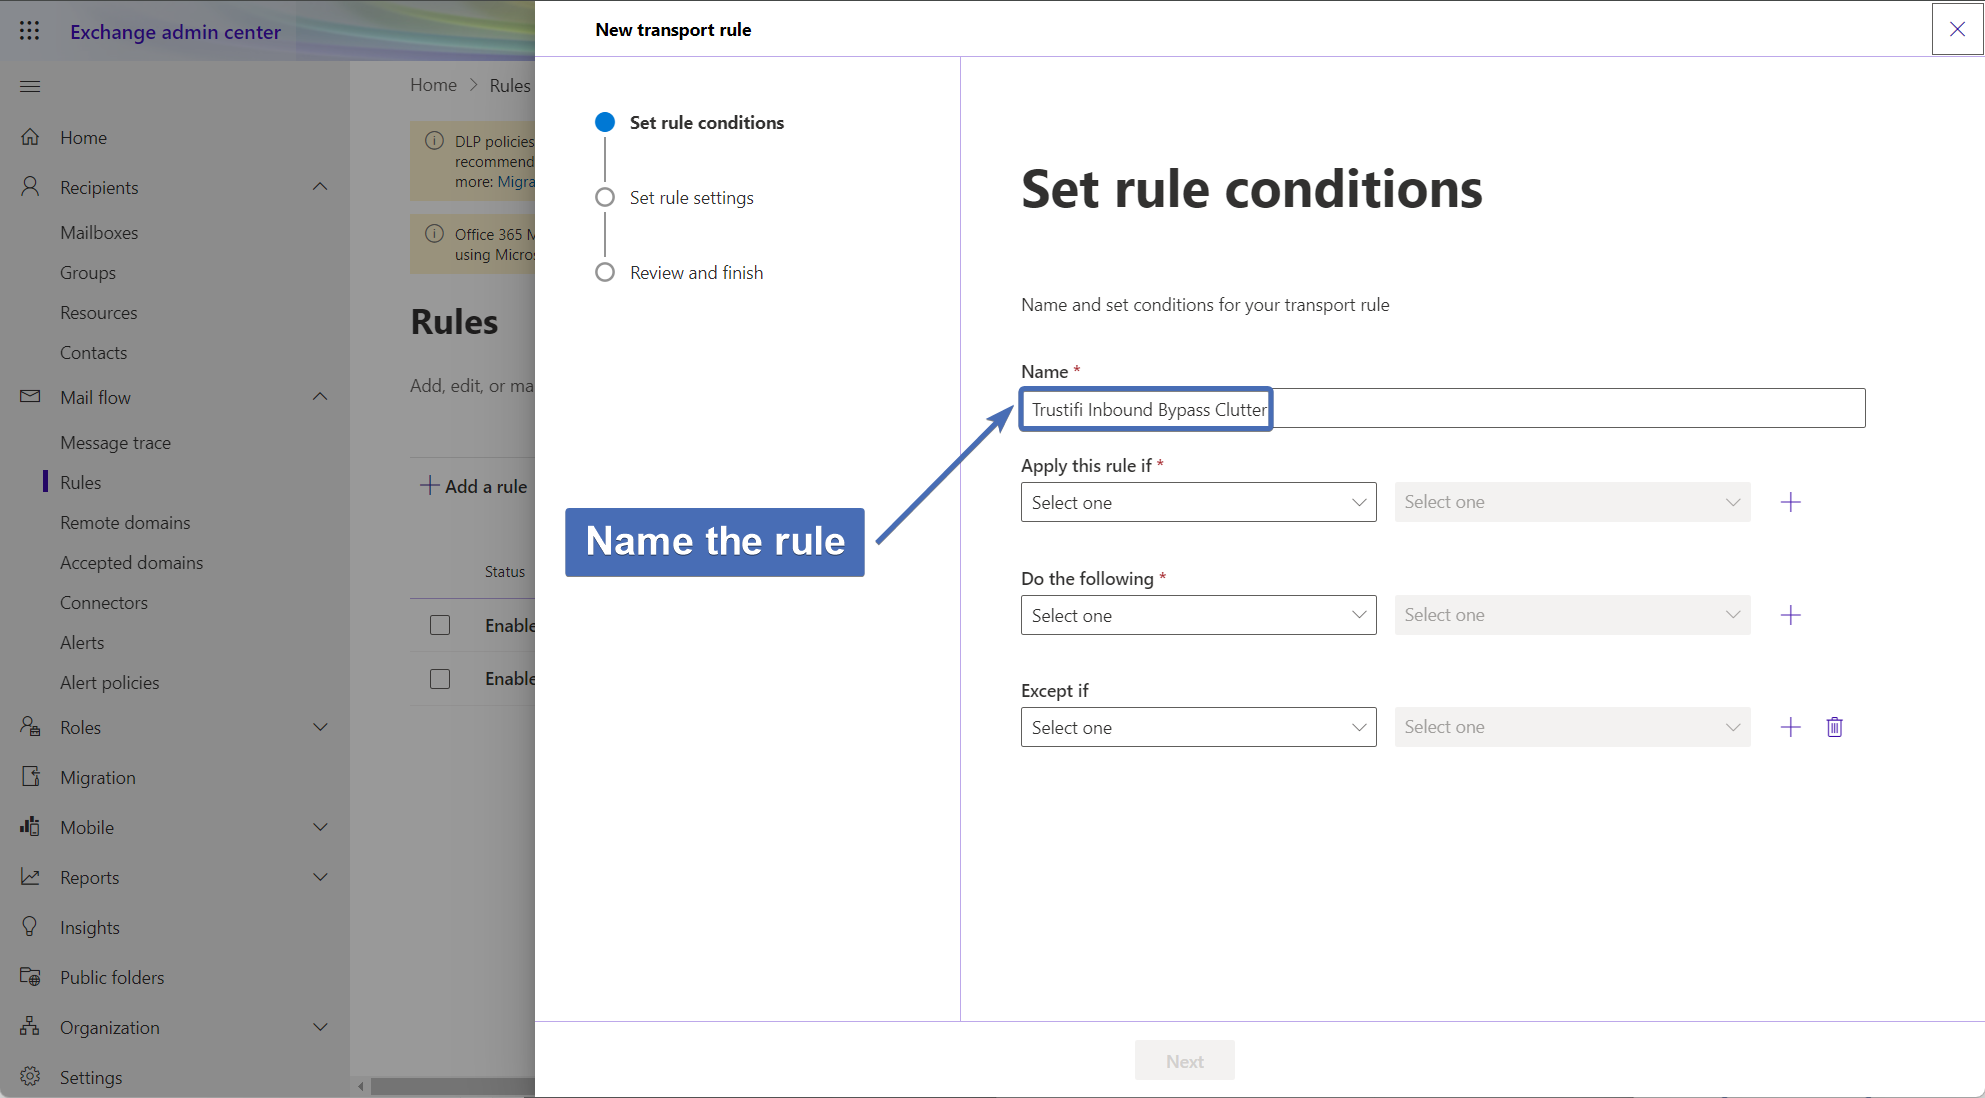
Set the condition for the rule:
If “The Sender” > “IP addresses belong to one of these ranges”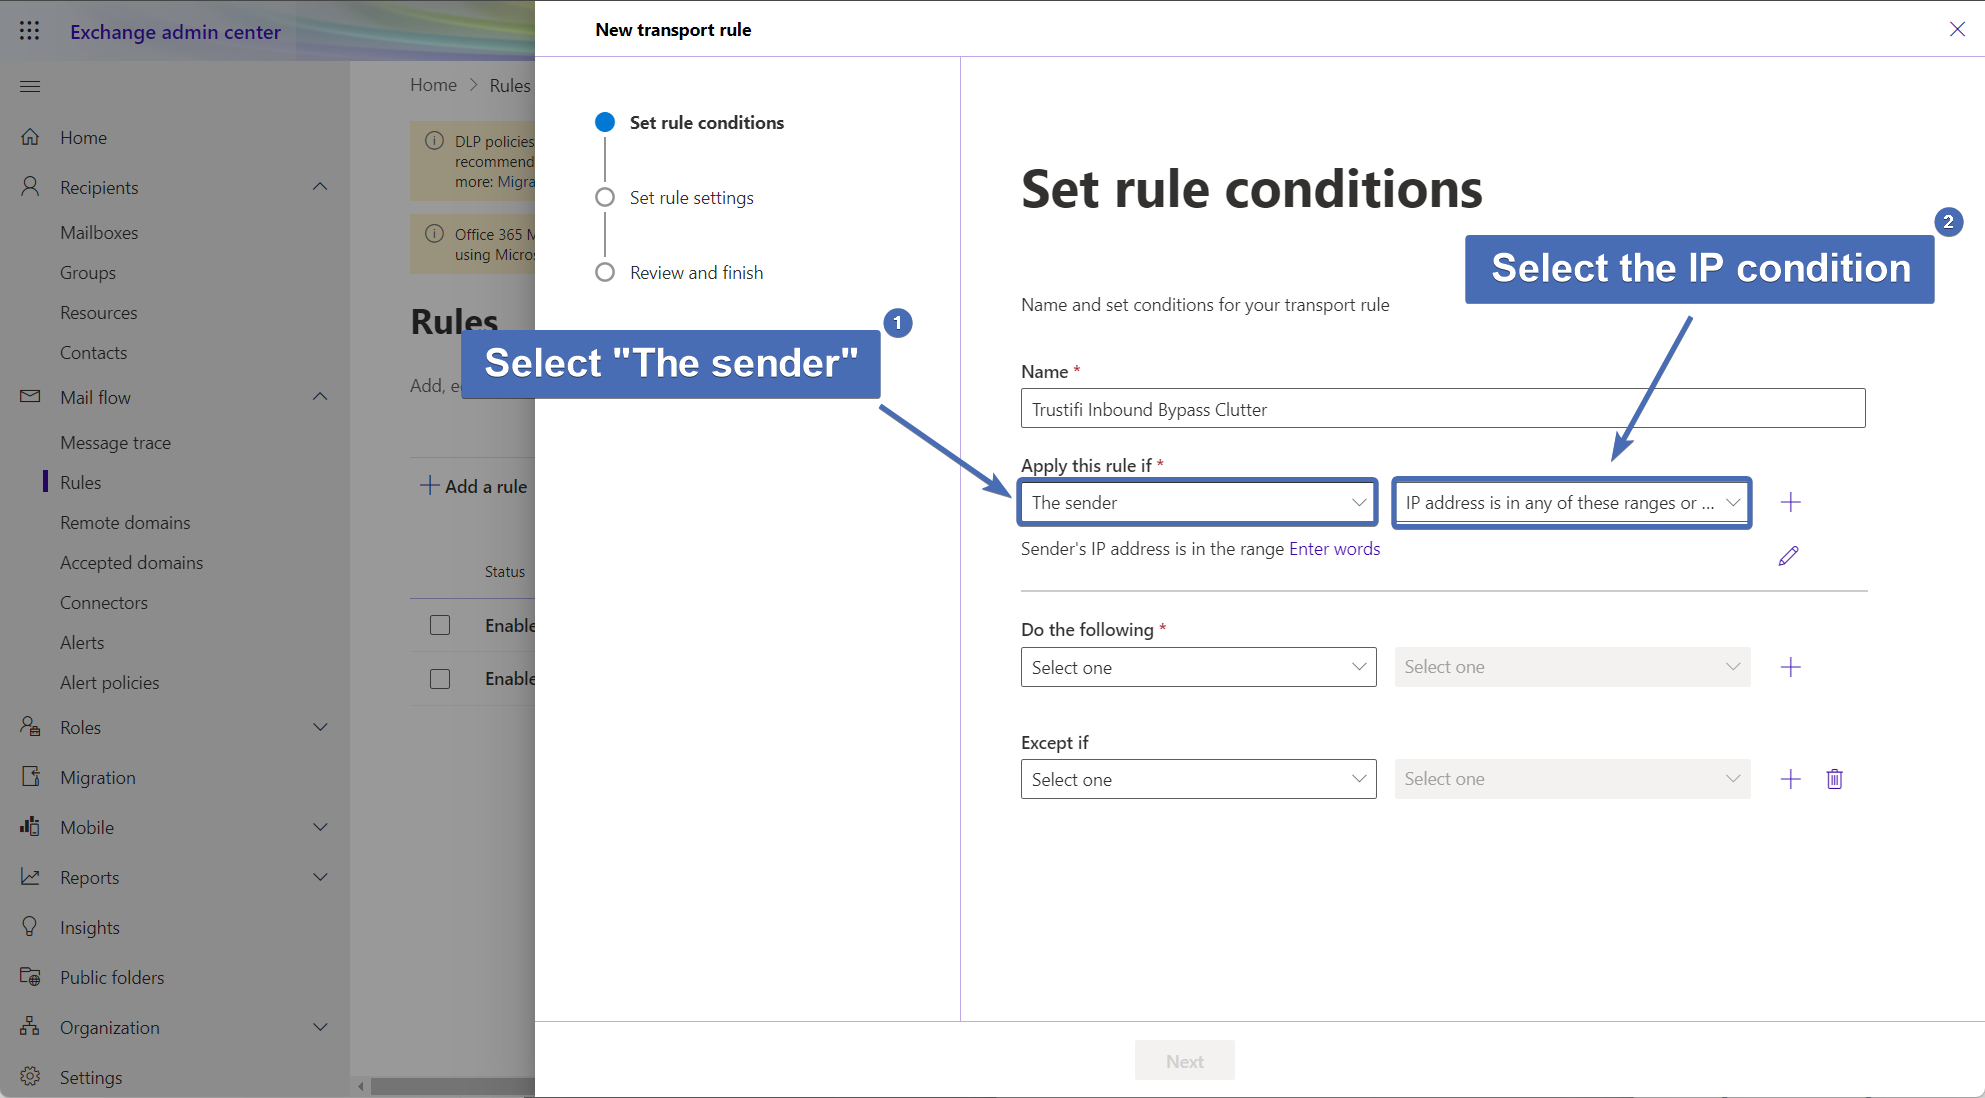
Enter the following Trustifi IPs (one by one) to the condition input:
3.93.243.176, 3.93.139.220, 54.195.145.1, 3.251.32.127
After all of the IPs have been added, click on “Save“.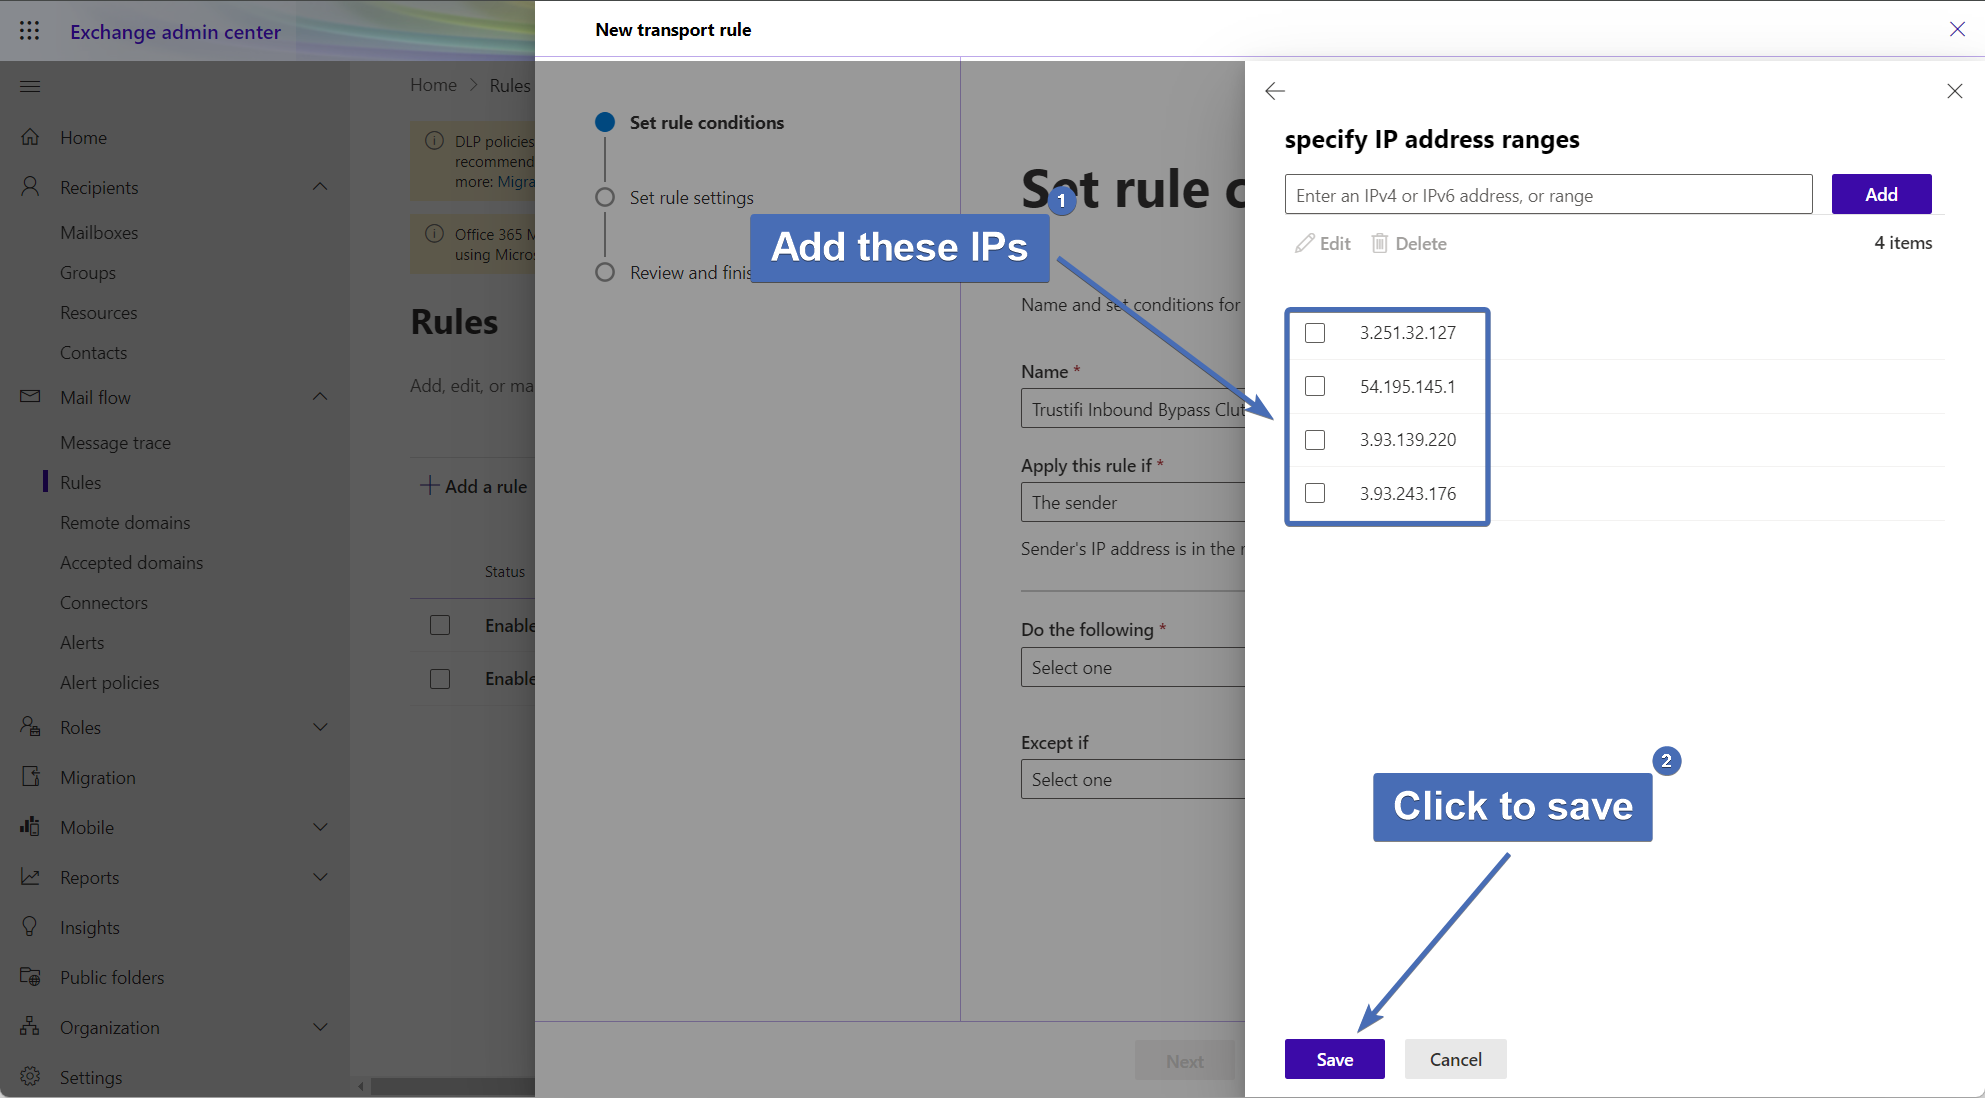
Create the first action of this rule:
Select “Modify the message properties” > “Set the spam confidence level (SCL)”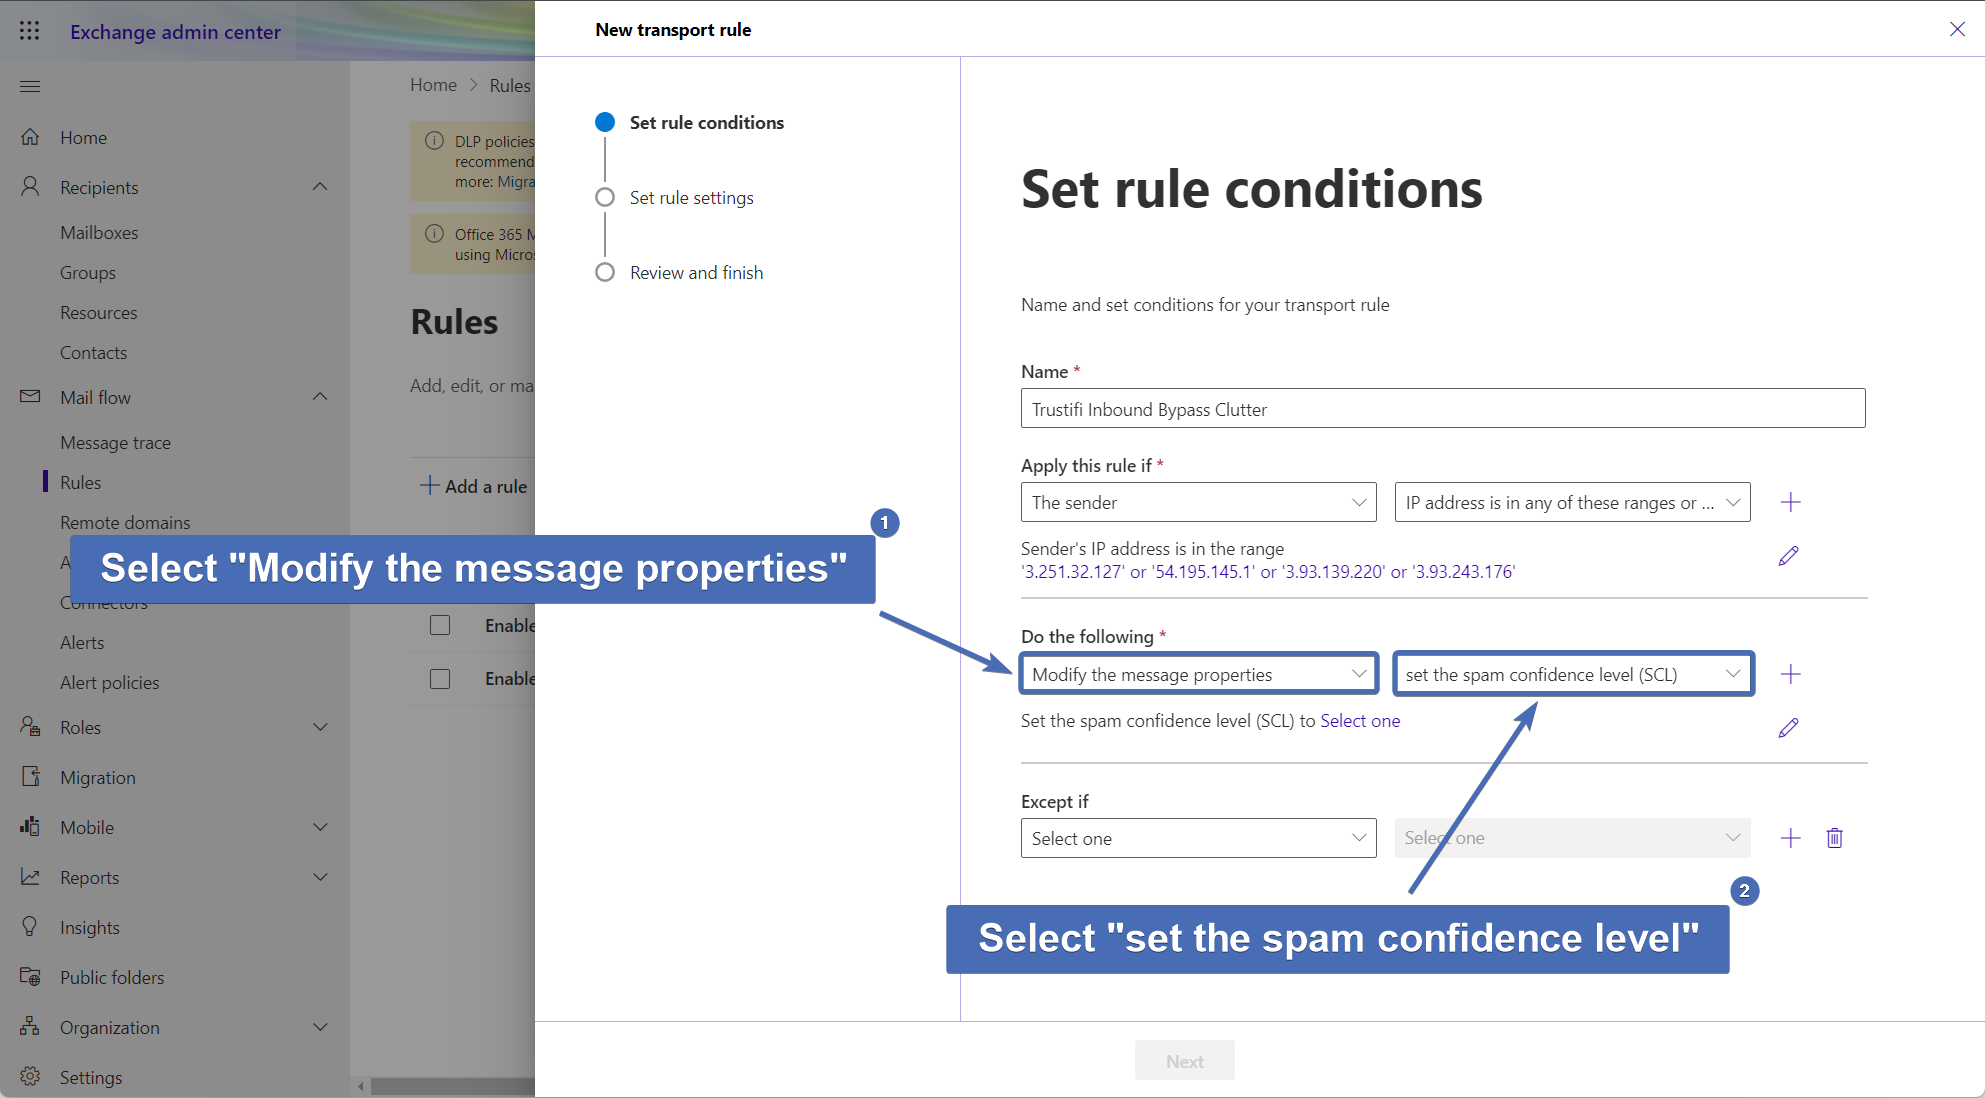
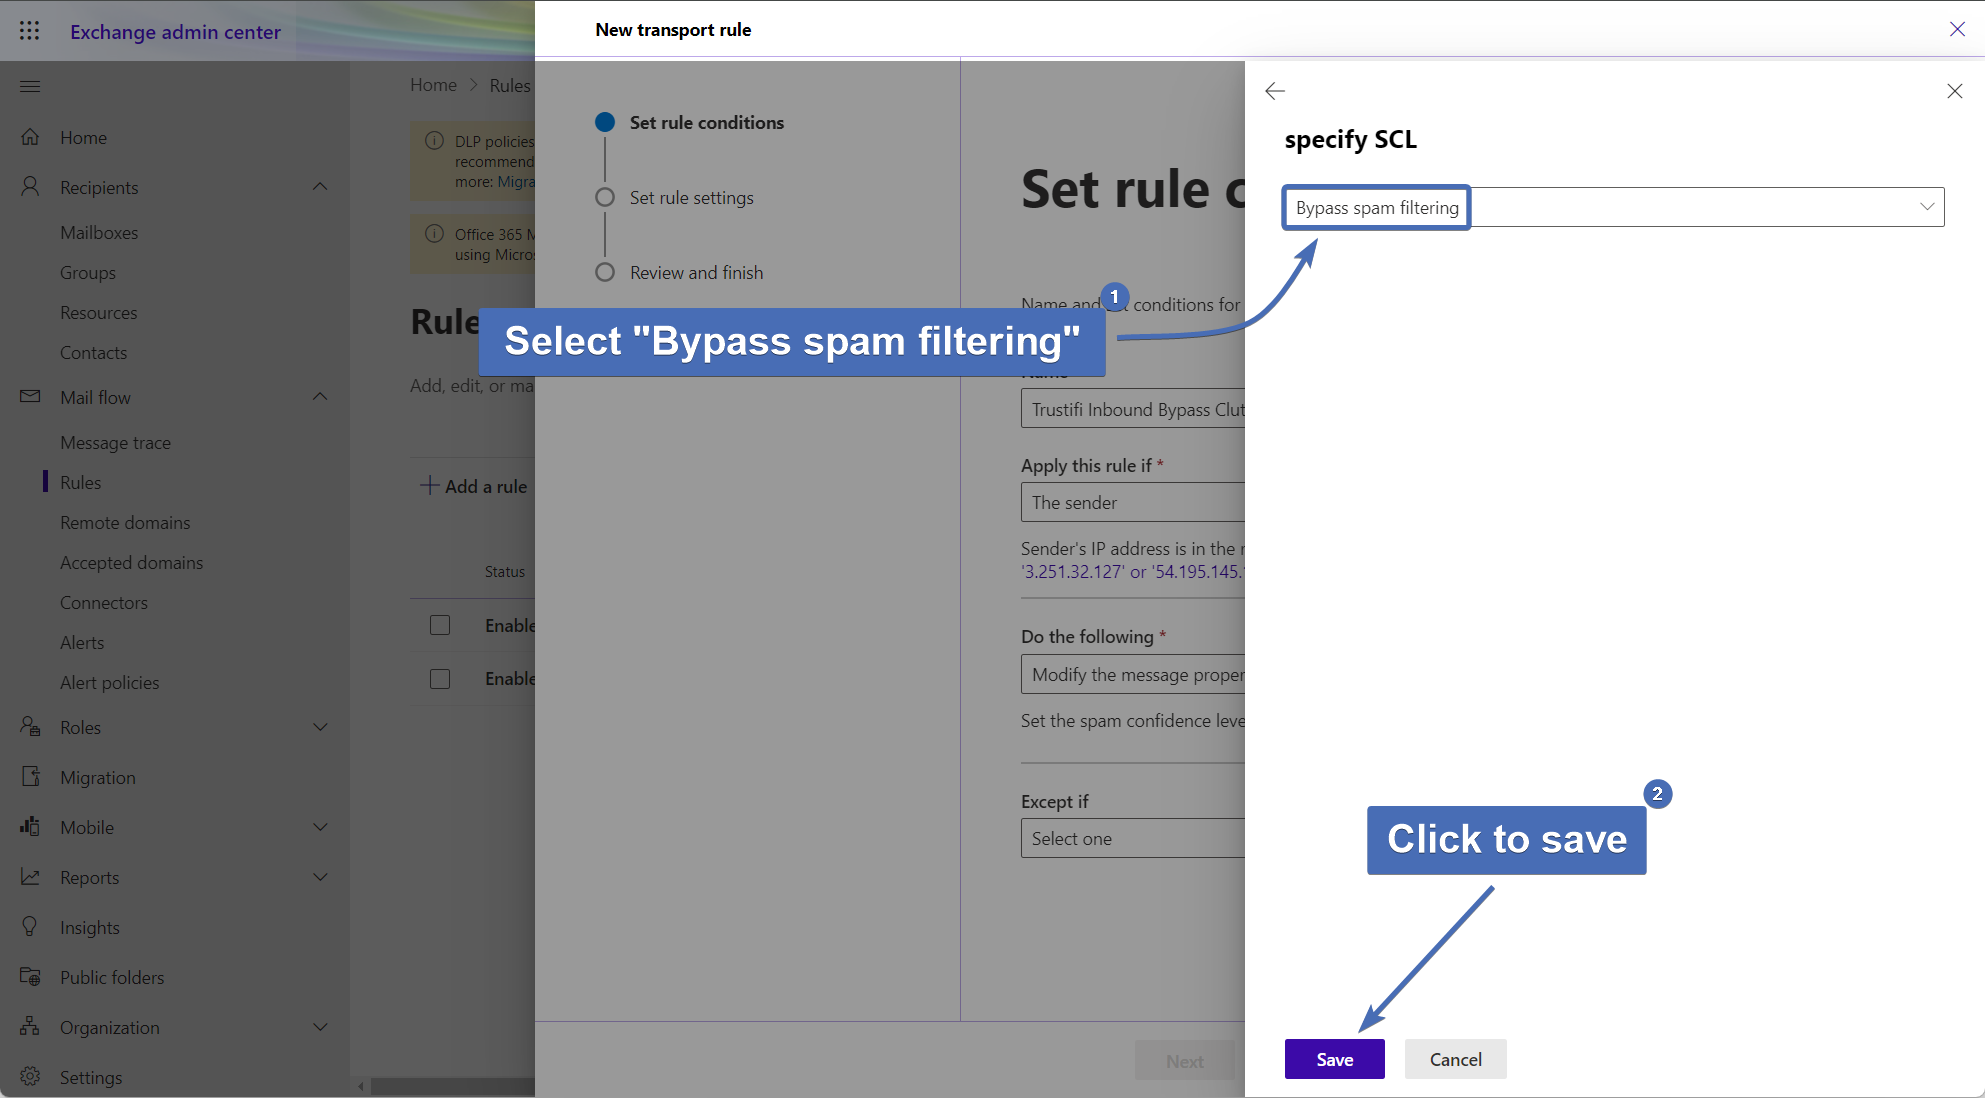
Select “Bypass spam filtering” for the SCL level, then click on “Save“.
Click on the “+” icon next to the first action to create another rule action.
Then, select “Modify the message properties” > “Set a message header”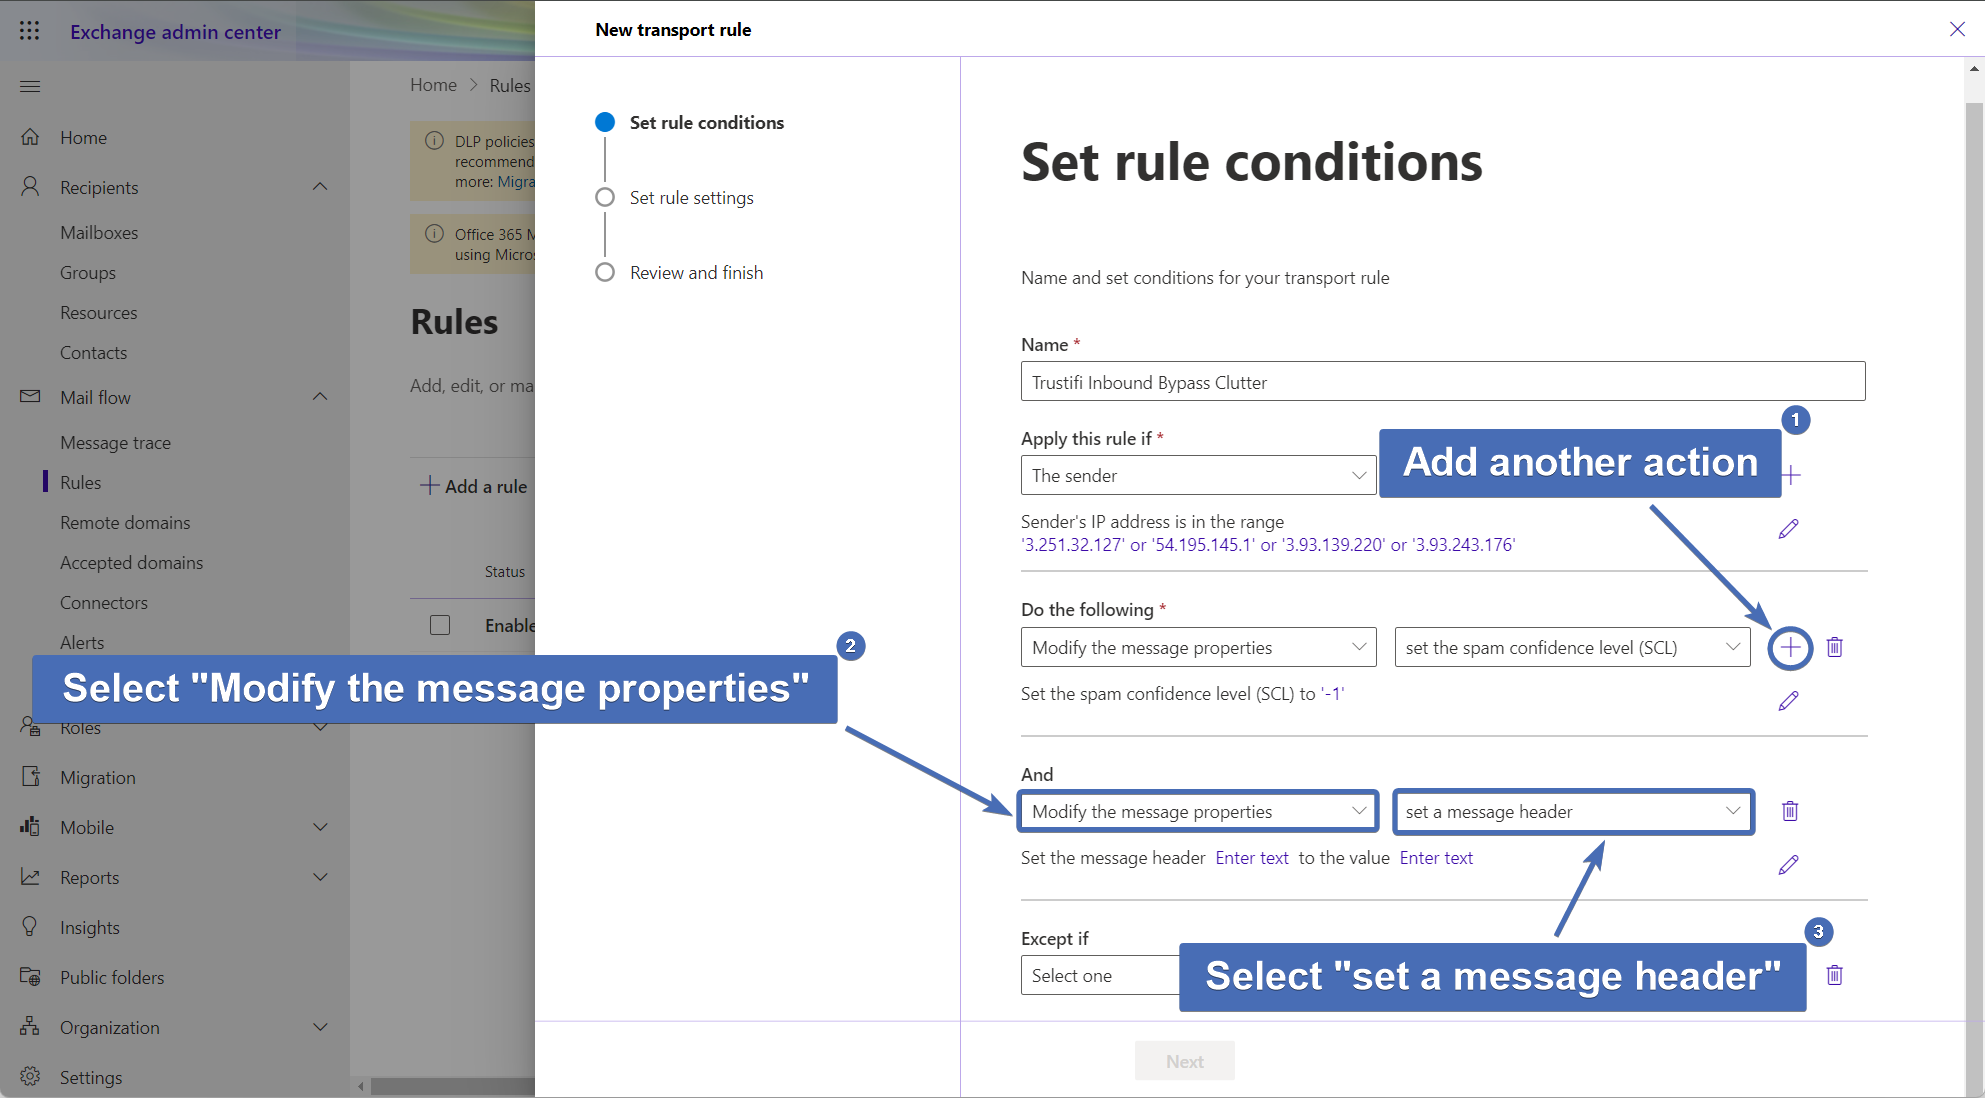
In the first header input, add the following:
X-MS-Exchange-Organization-BypassClutter
Then, click on “Save“.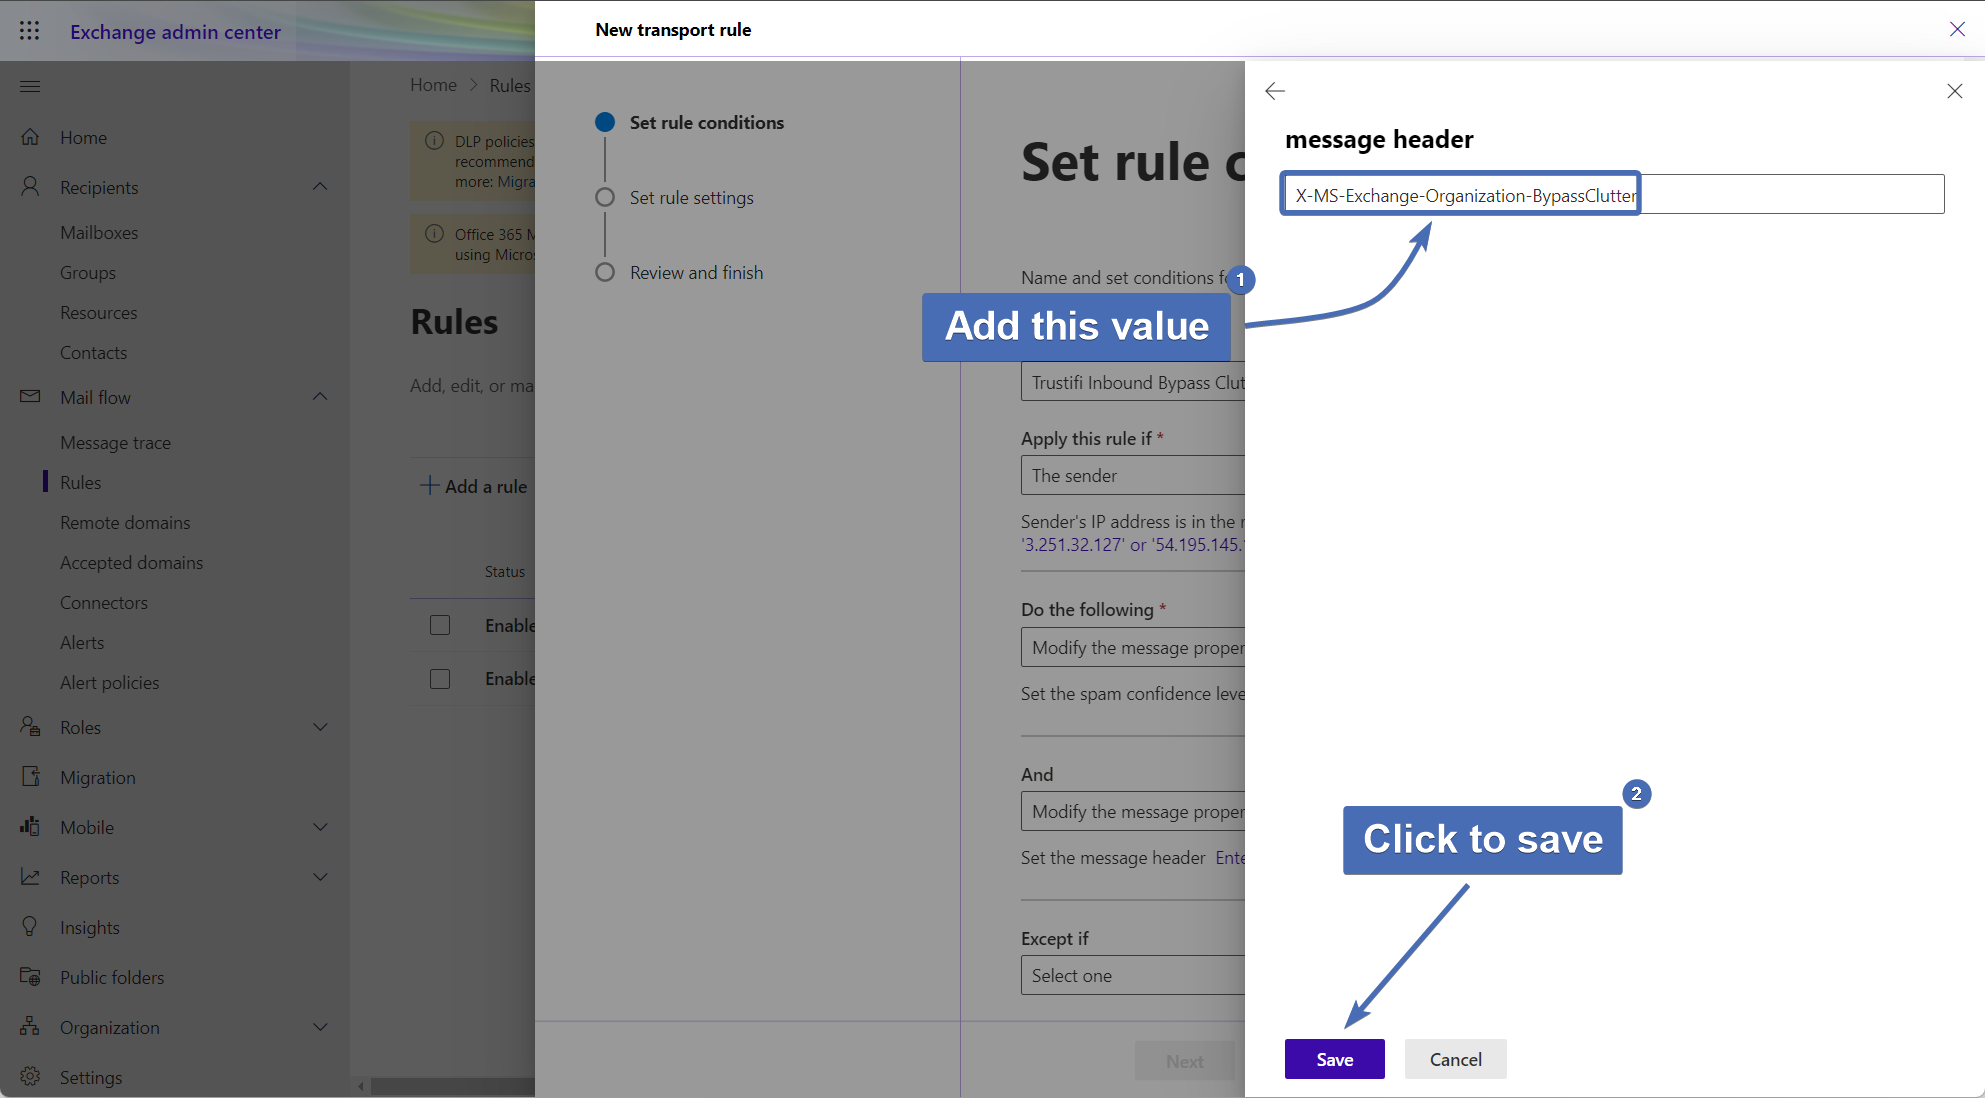
In the 2nd header input, add the following:
true
Then, click on “Save“.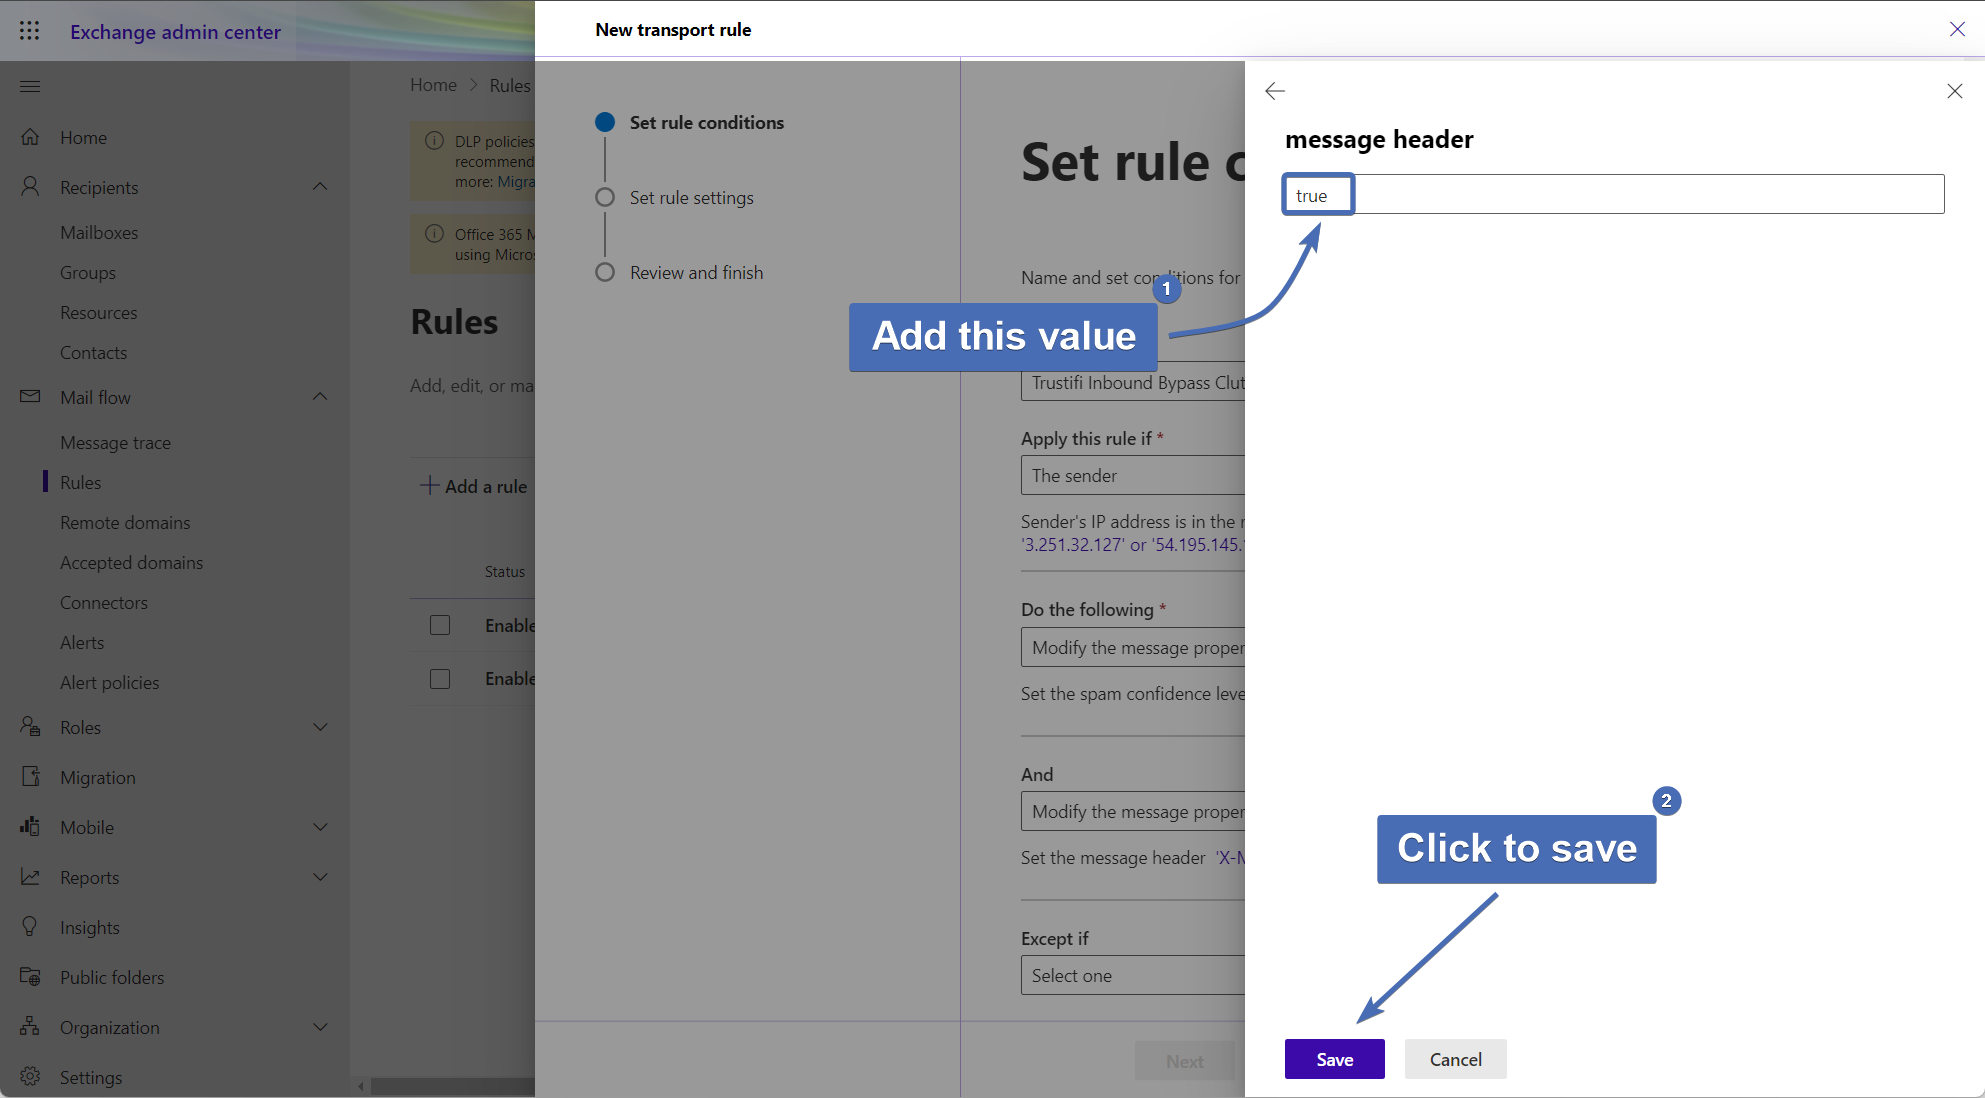
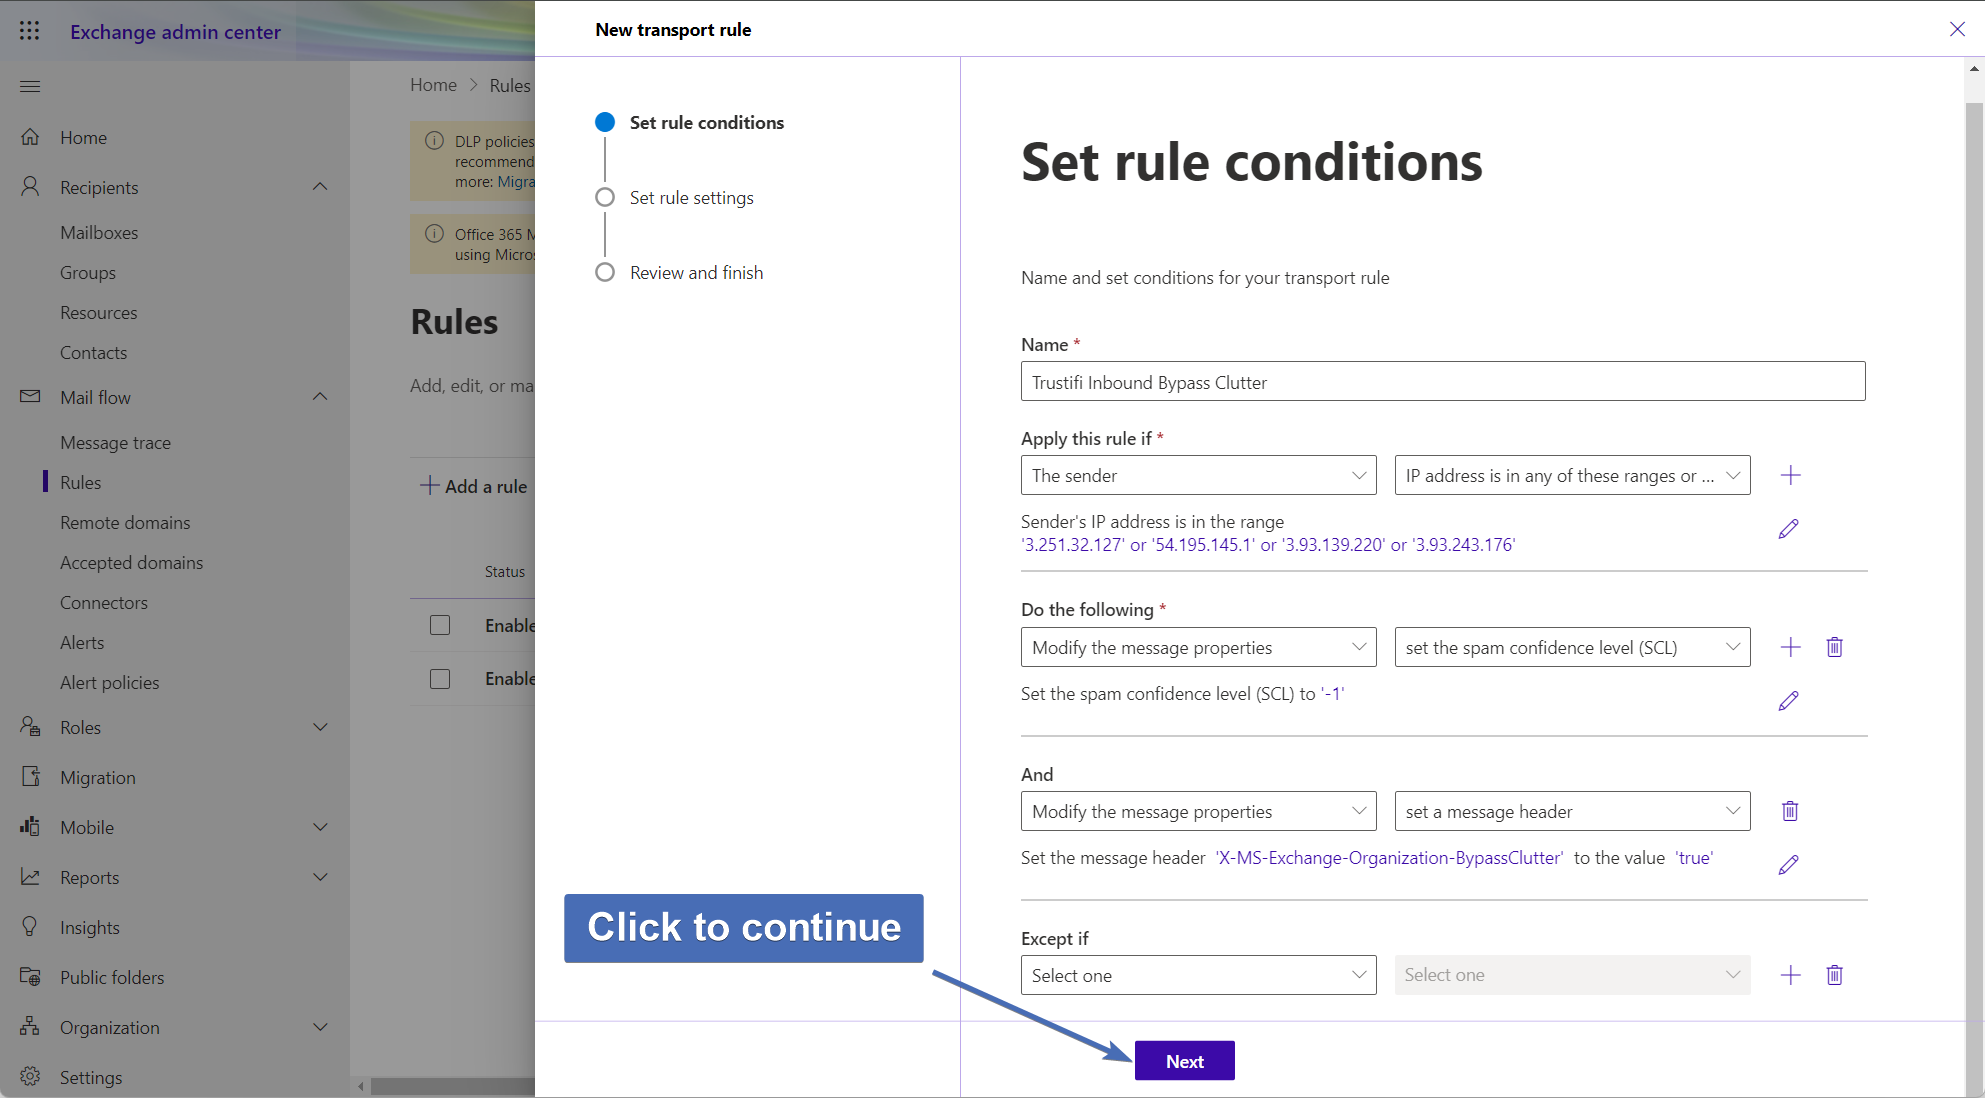
Click on “Next” to continue to the rule settings screen.
Check the box for “Stop processing more rules“.
Then, click on “Next“.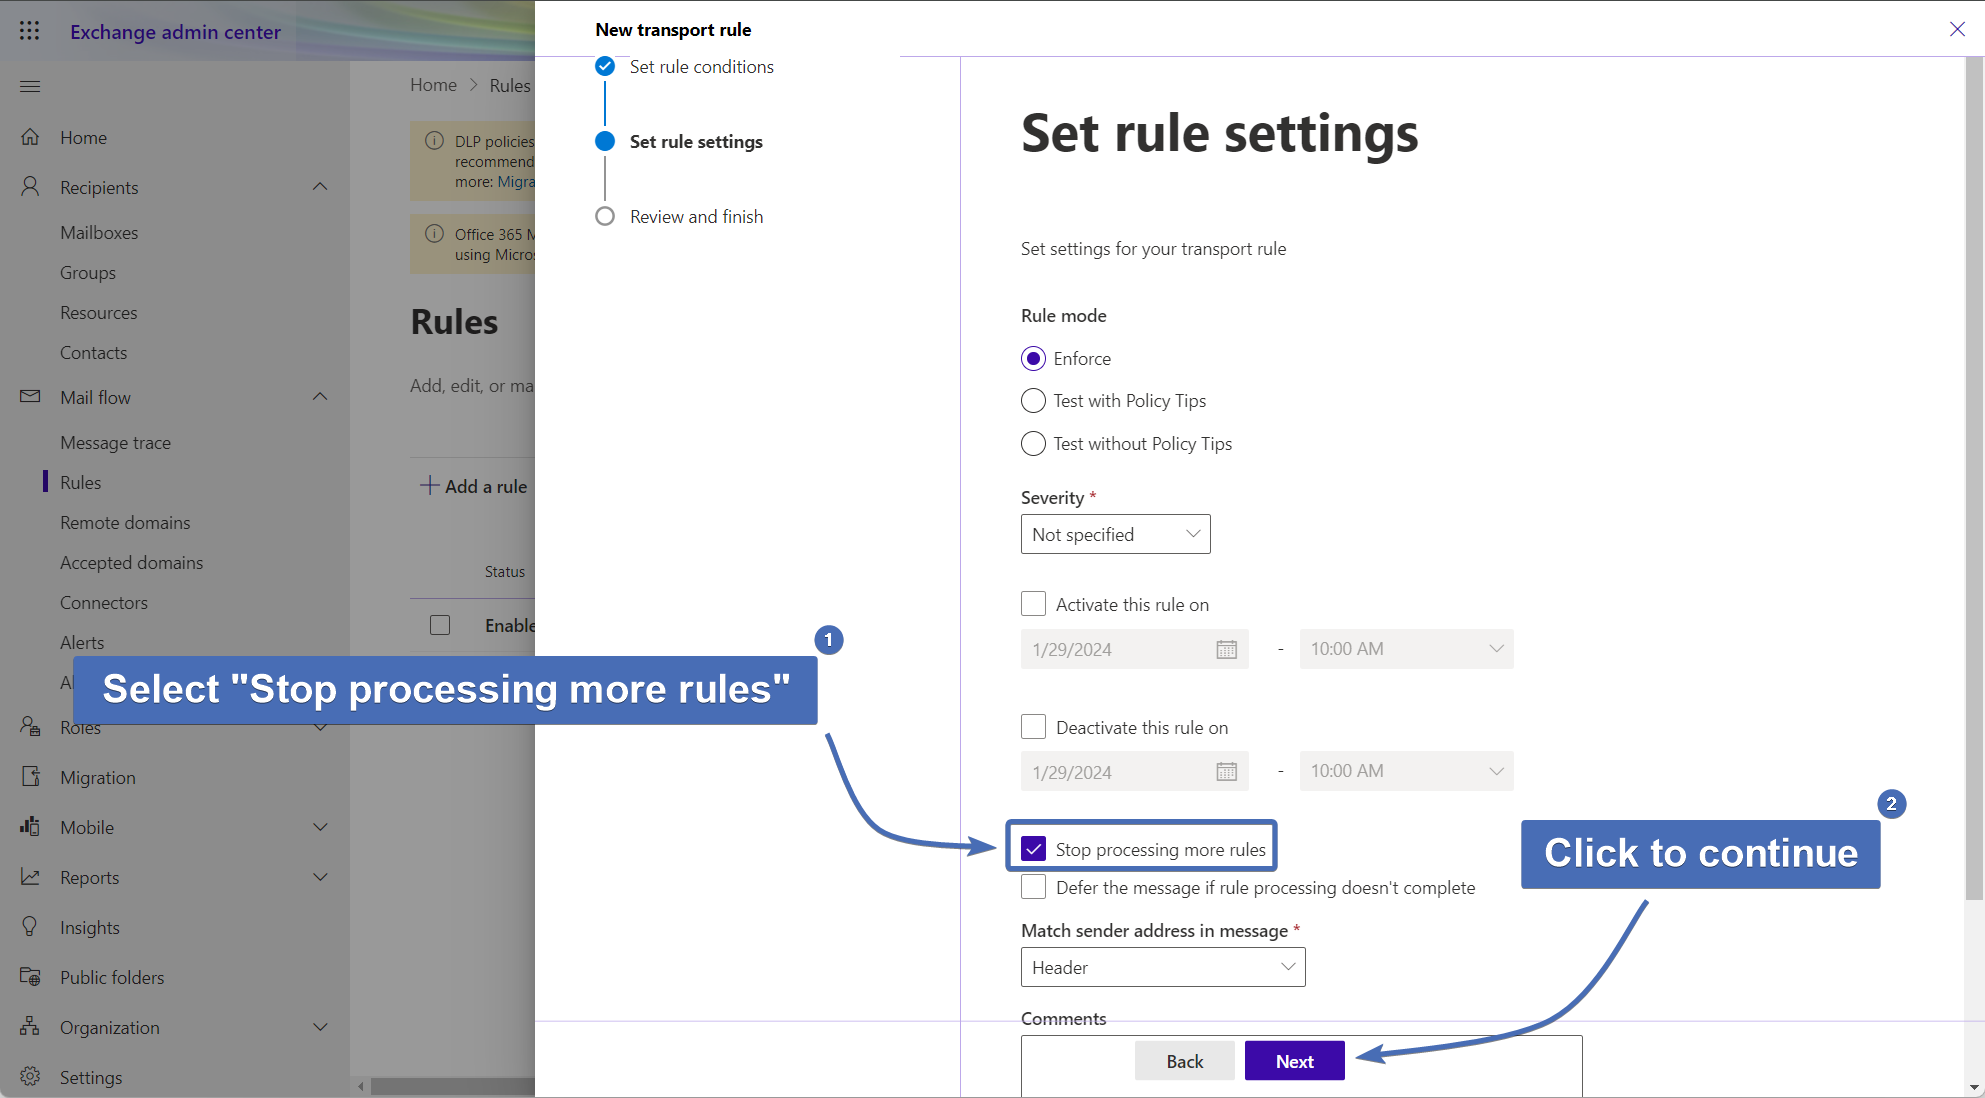
Now you can review the rule settings to make sure everything was set up correctly.
If everything looks OK, click on the “Finish” button to create the rule.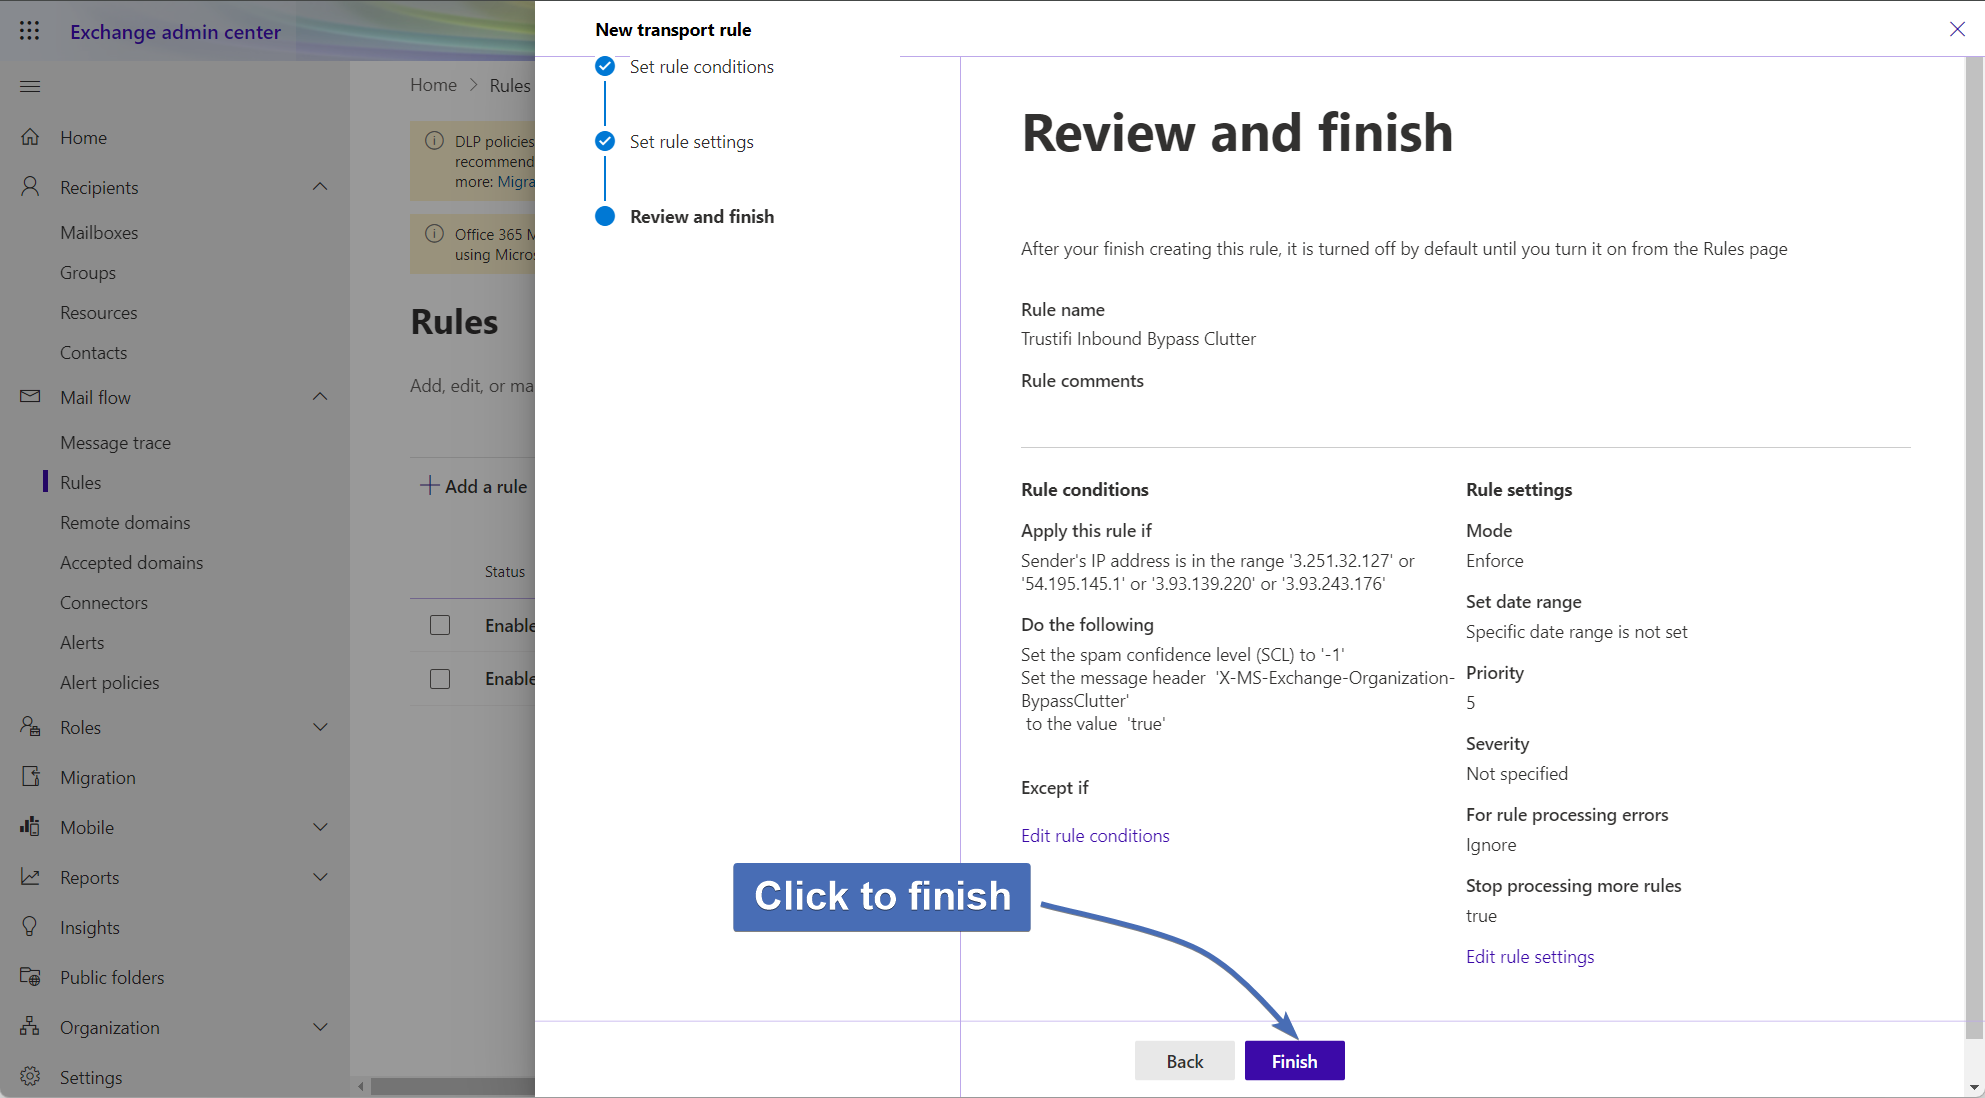
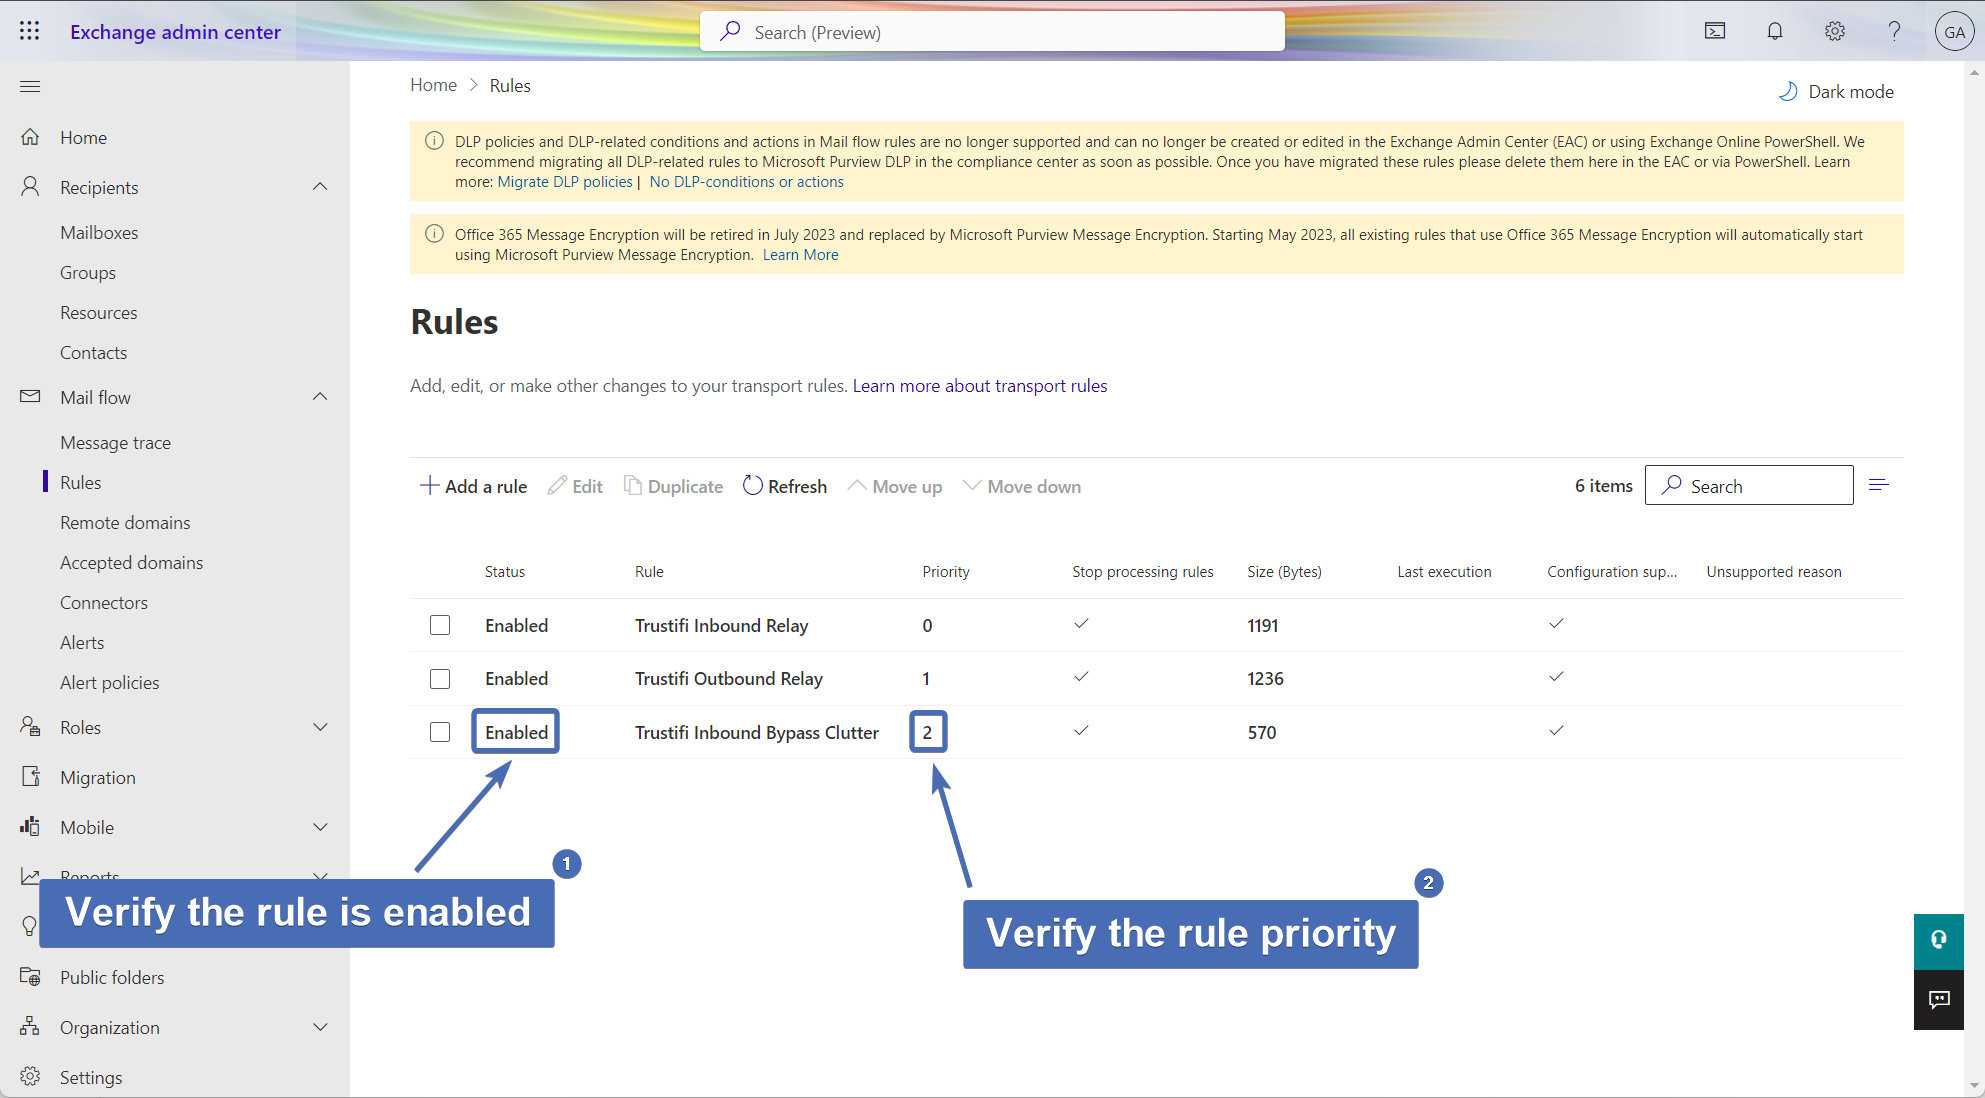
The rule has now been created. Depending on your settings, you may need to enable it manually for the rule to take effect.
Make sure the rule is enabled and that this new rule comes after the Trustifi inbound relay mail flow rule.